Overview
Please note, you must be an admin member to access the IP whitelisting settings in your Apollo account. Access to this feature also depends on your Apollo plan. Please refer to the Apollo pricing page for more details.
Enable IP whitelisting to restrict unauthorized access to your Apollo account and only give access to the specific IP addresses or ranges you consider trustworthy.
Apollo accepts the following formats:
- Single IP Address
- IP Range
- Classless Inter-Domain Routing (CIDR)
Feeling a little lost? Here's a quick summary of what these terms mean:
- An Internet Protocol (IP) address: This is a unique number assigned to your device or network to help identify it on the internet. There are 2 types of IP addresses—dynamic, which change automatically as you connect or disconnect from a network—and static, which always remain fixed. Note that if you enable whitelisting and users with dynamic IP addresses try to connect to Apollo after their IP address changes, they cannot access Apollo unless you add the new IP address or range to your whitelist.
- An IP Range: This is a set of consecutive IP addresses within a local network or assigned to a subnet. If you or your team uses a VPN, contact your IT administrator for guidance on adding your IP range.
- Classless Inter-Domain Routing (CIDR): Otherwise known as supernetting, this is an IP assigning system used by many organizations to increase the efficiency of IP address allocation.
Refer to the following sections to enable or deactivate IP whitelisting, and add or delete IPs from your Apollo whitelist.
Enable IP Whitelisting
To enable IP Whitelisting in Apollo:
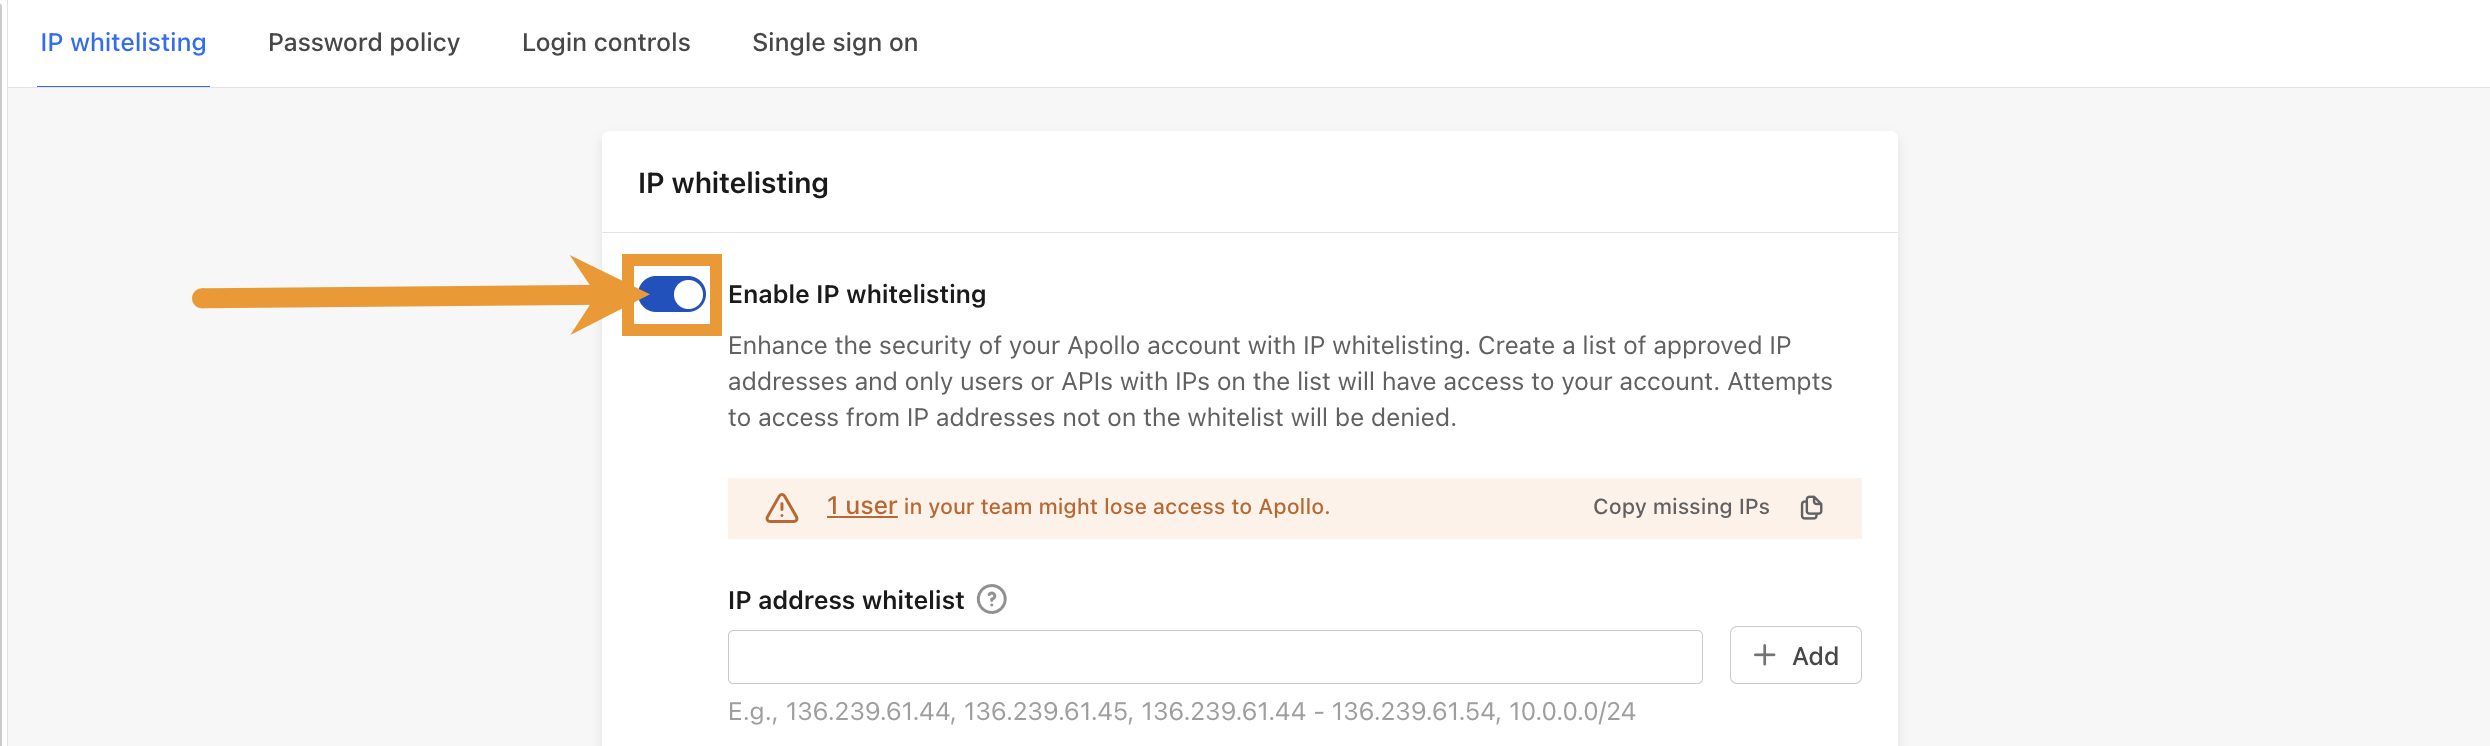
- Launch Apollo and click Settings > Security.
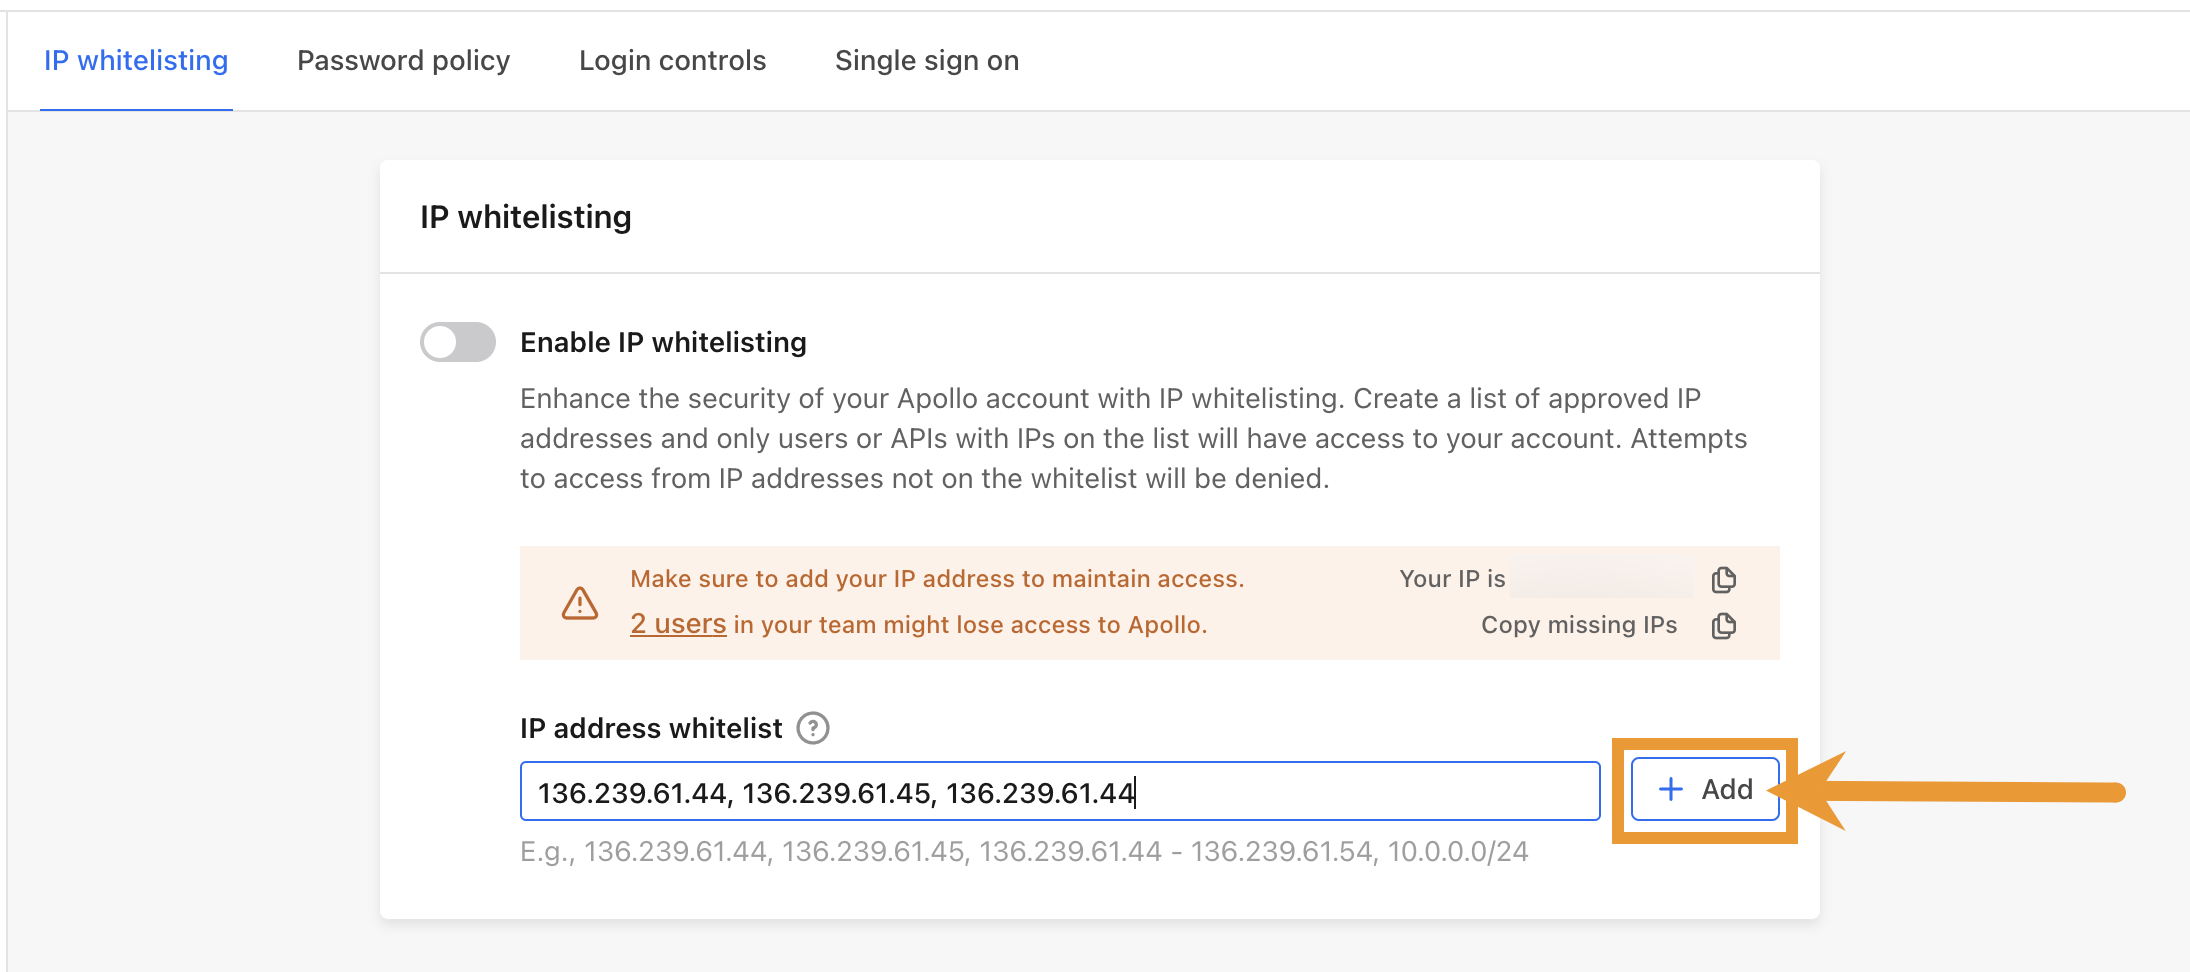
- Enter the IP addresses, ranges, and CIDRs that you want to whitelist in the IP address whitelist field.
- Make sure you add a comma after each IP address or range that you want to whitelist and then click + Add.
- Apollo adds the IP addresses to your whitelist and informs you if any other users in your team may lose access. To view any potentially affected users, click the word user.
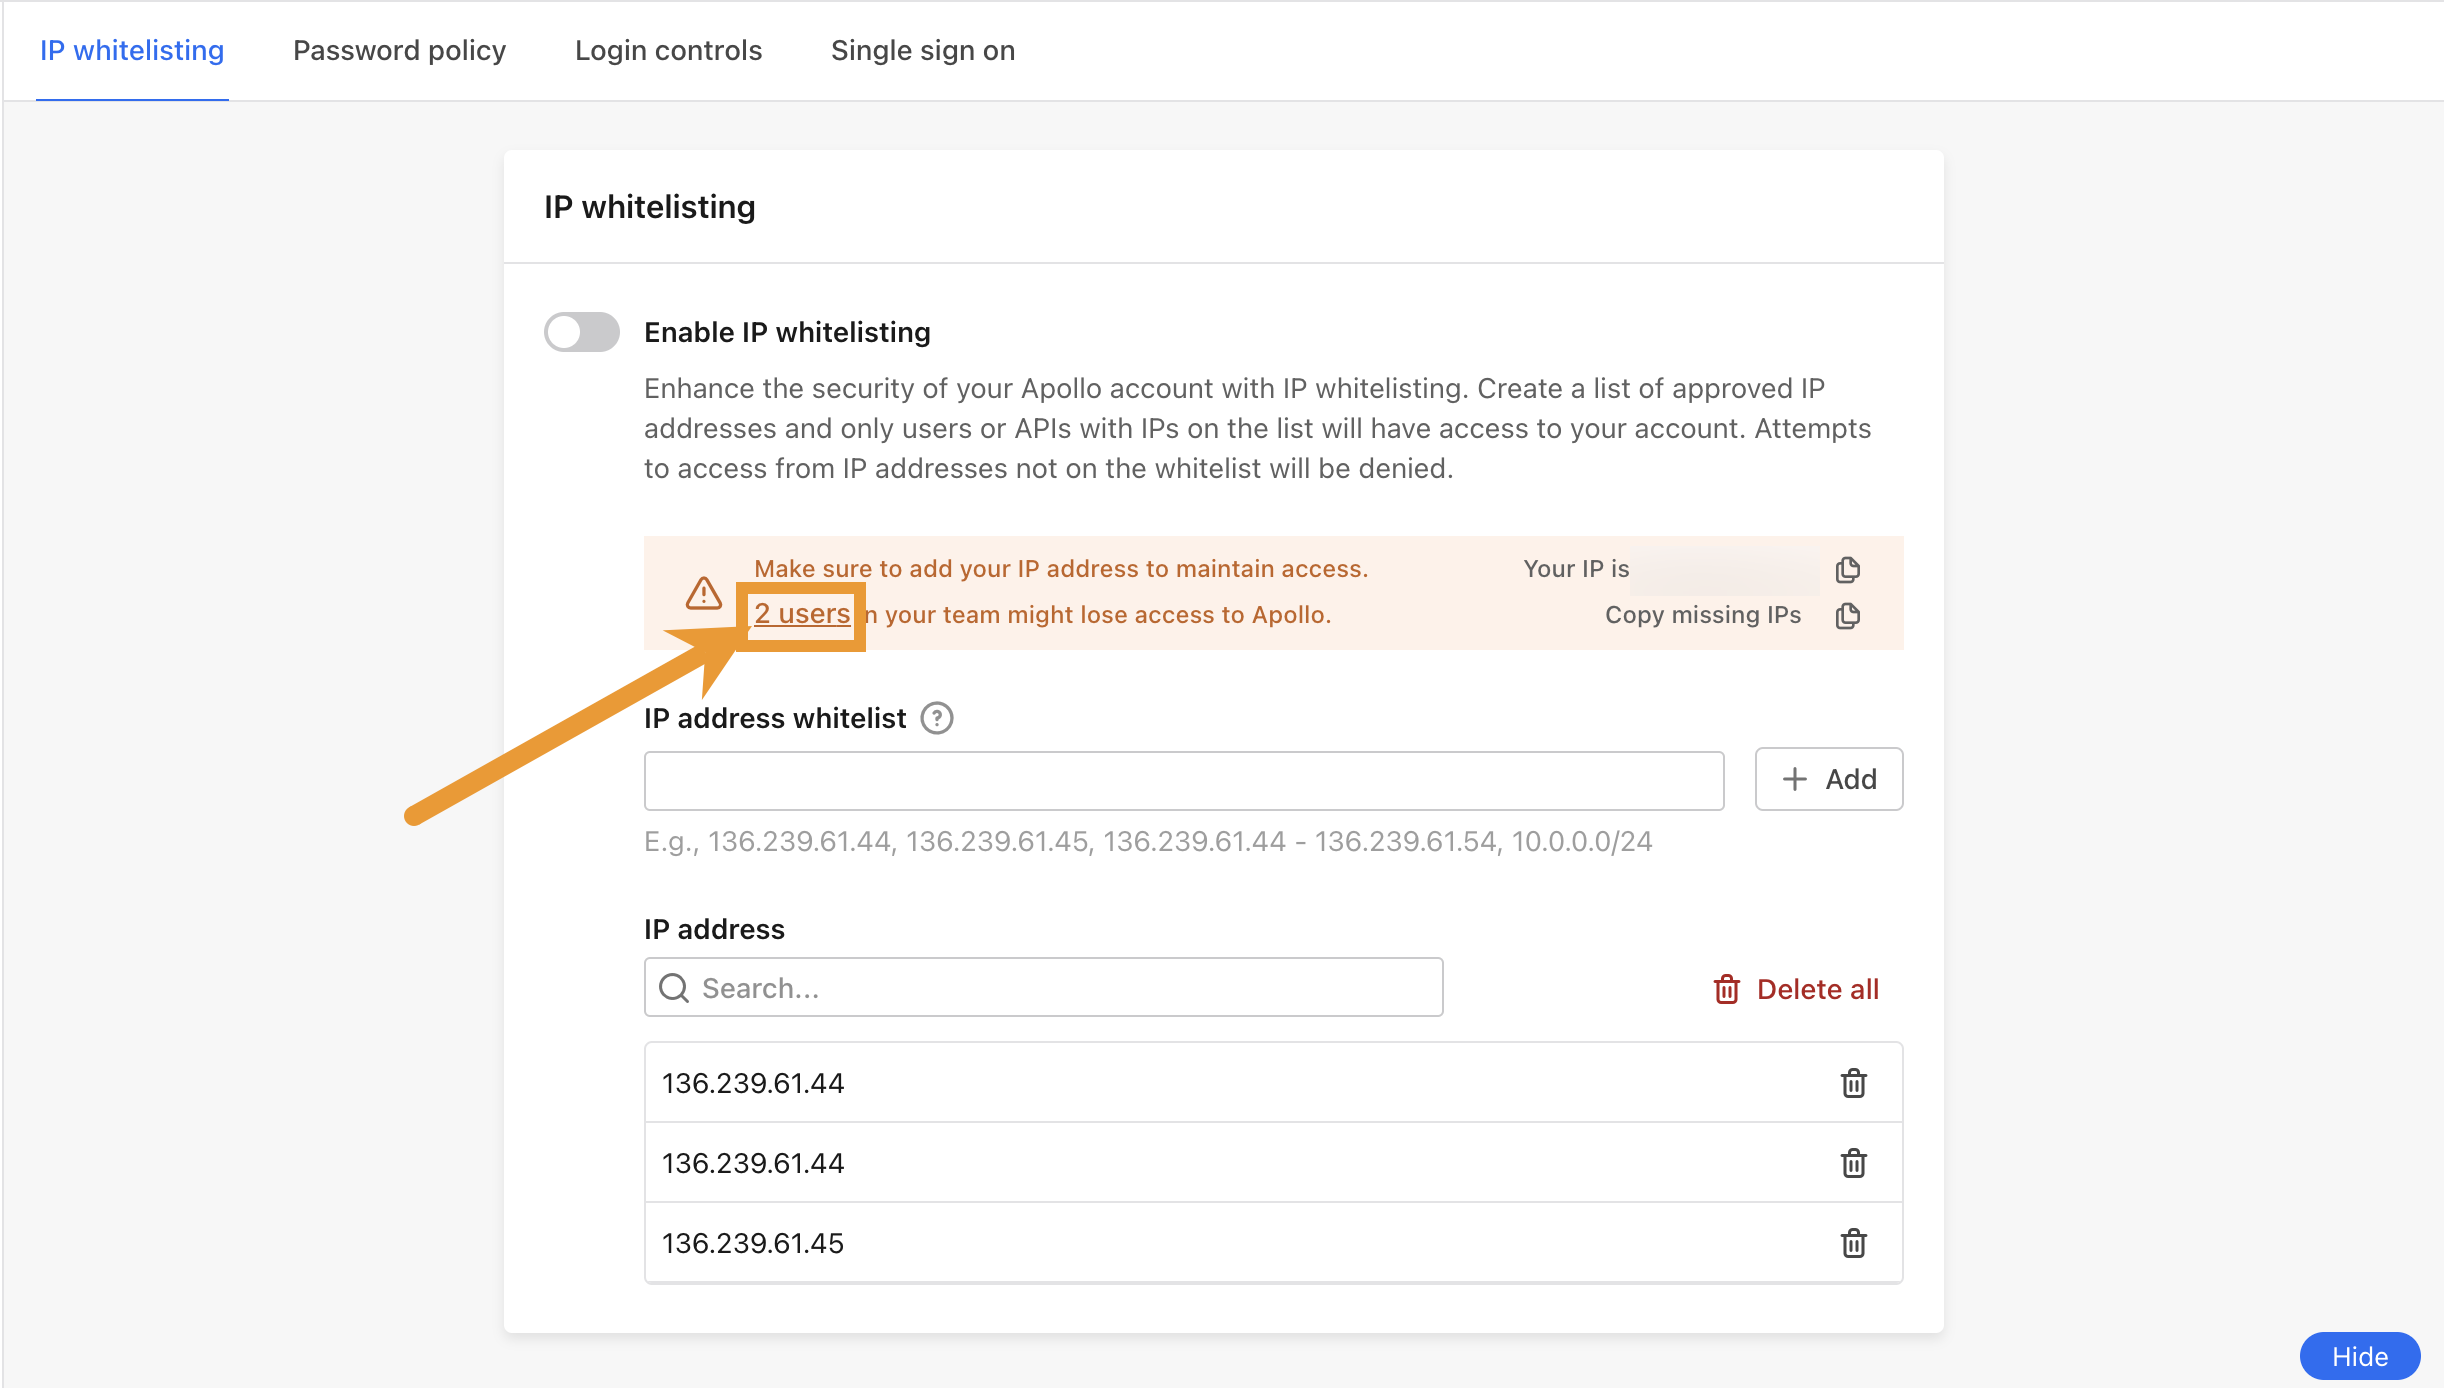
- Apollo then displays the details of any users that may be blocked if you don't add them to your whitelist.

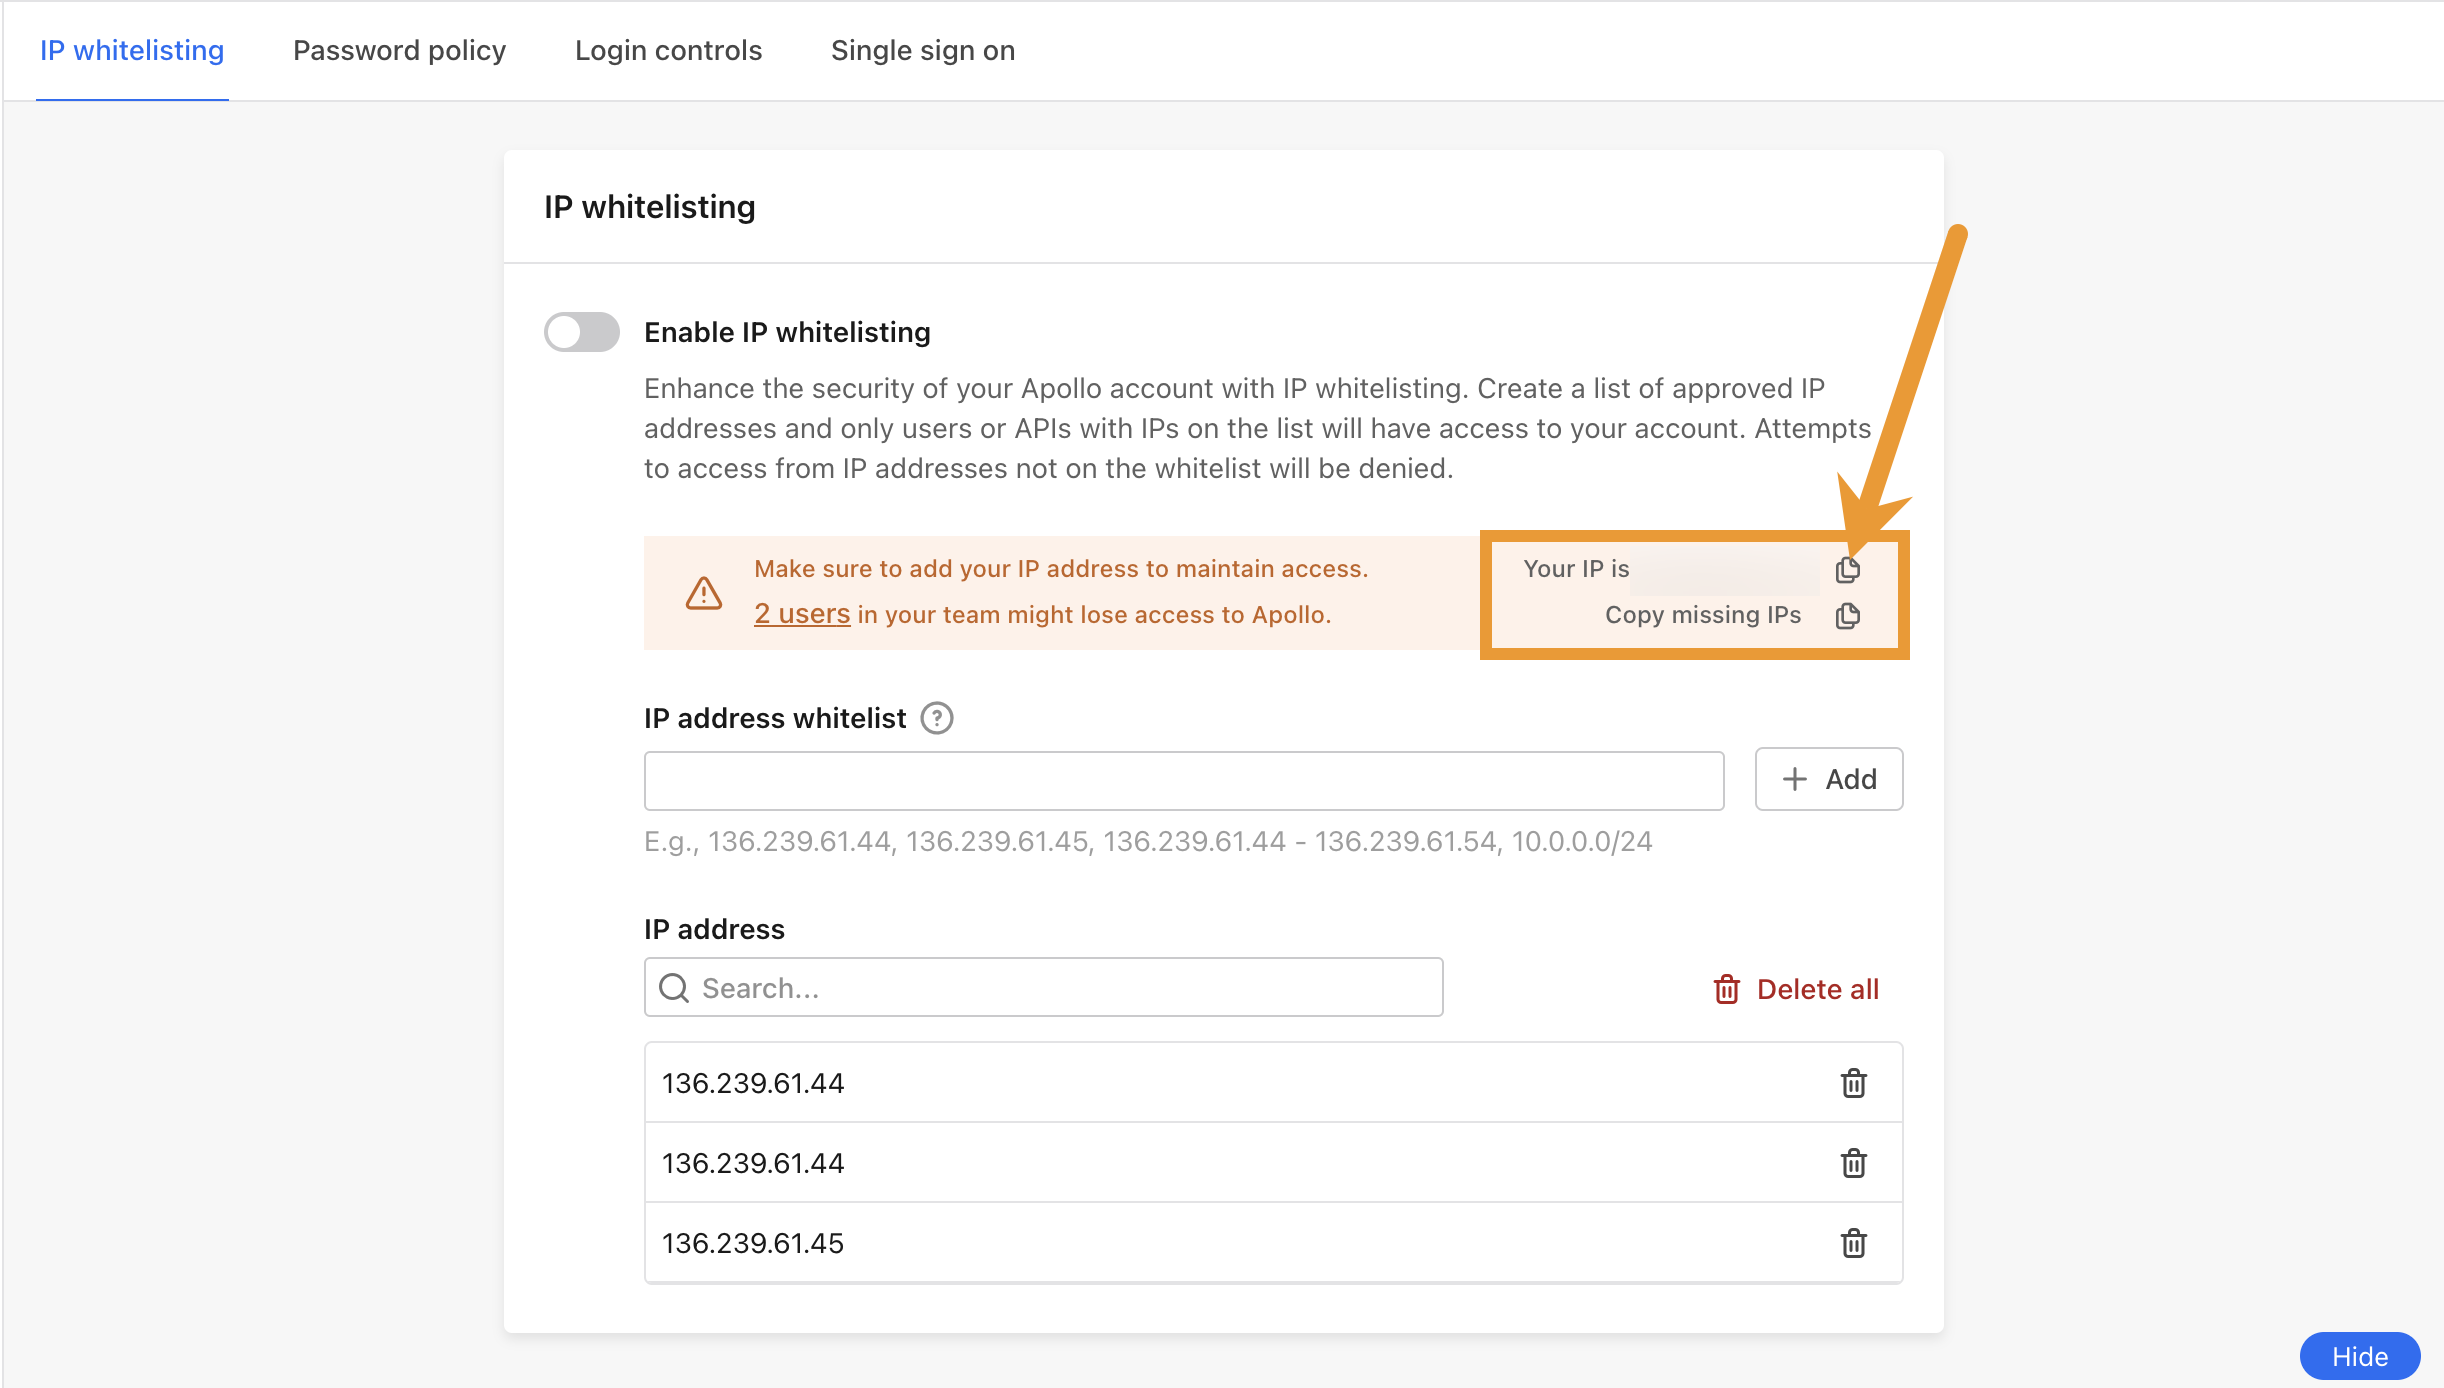
- To add missing IPs, click the Copy icon, then paste them into the IP address whitelist field and click + Add.
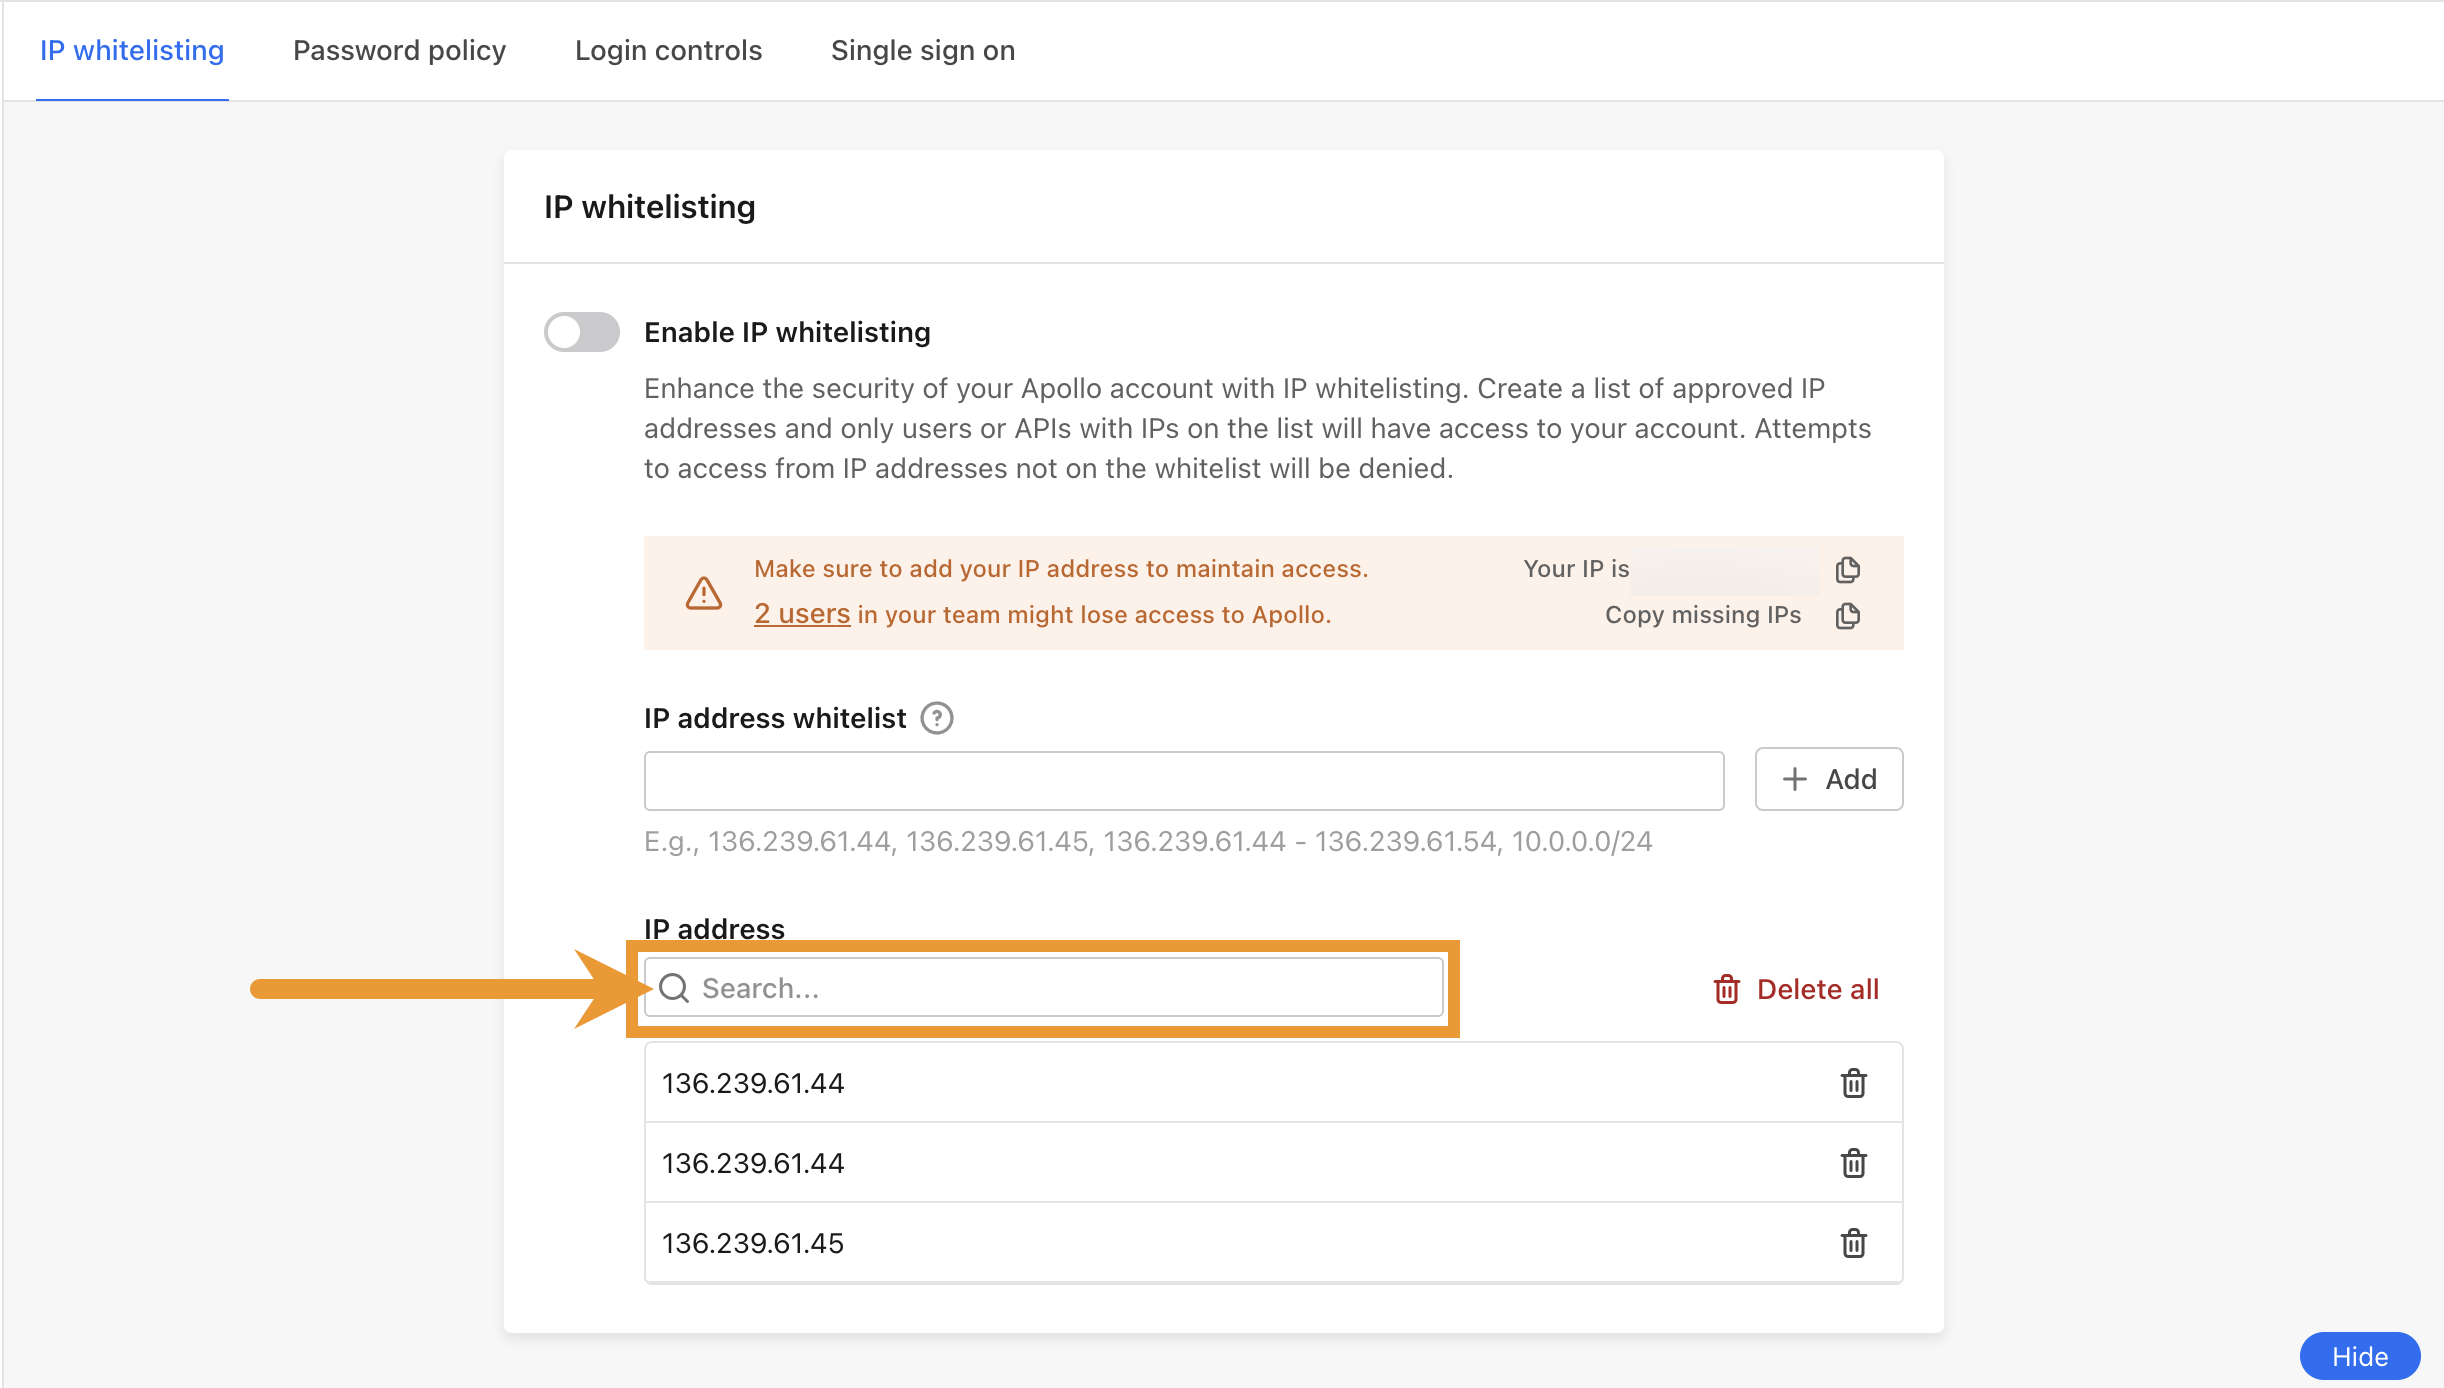
- To search for an IP address on your whitelist, type the IP into the IP address search bar.
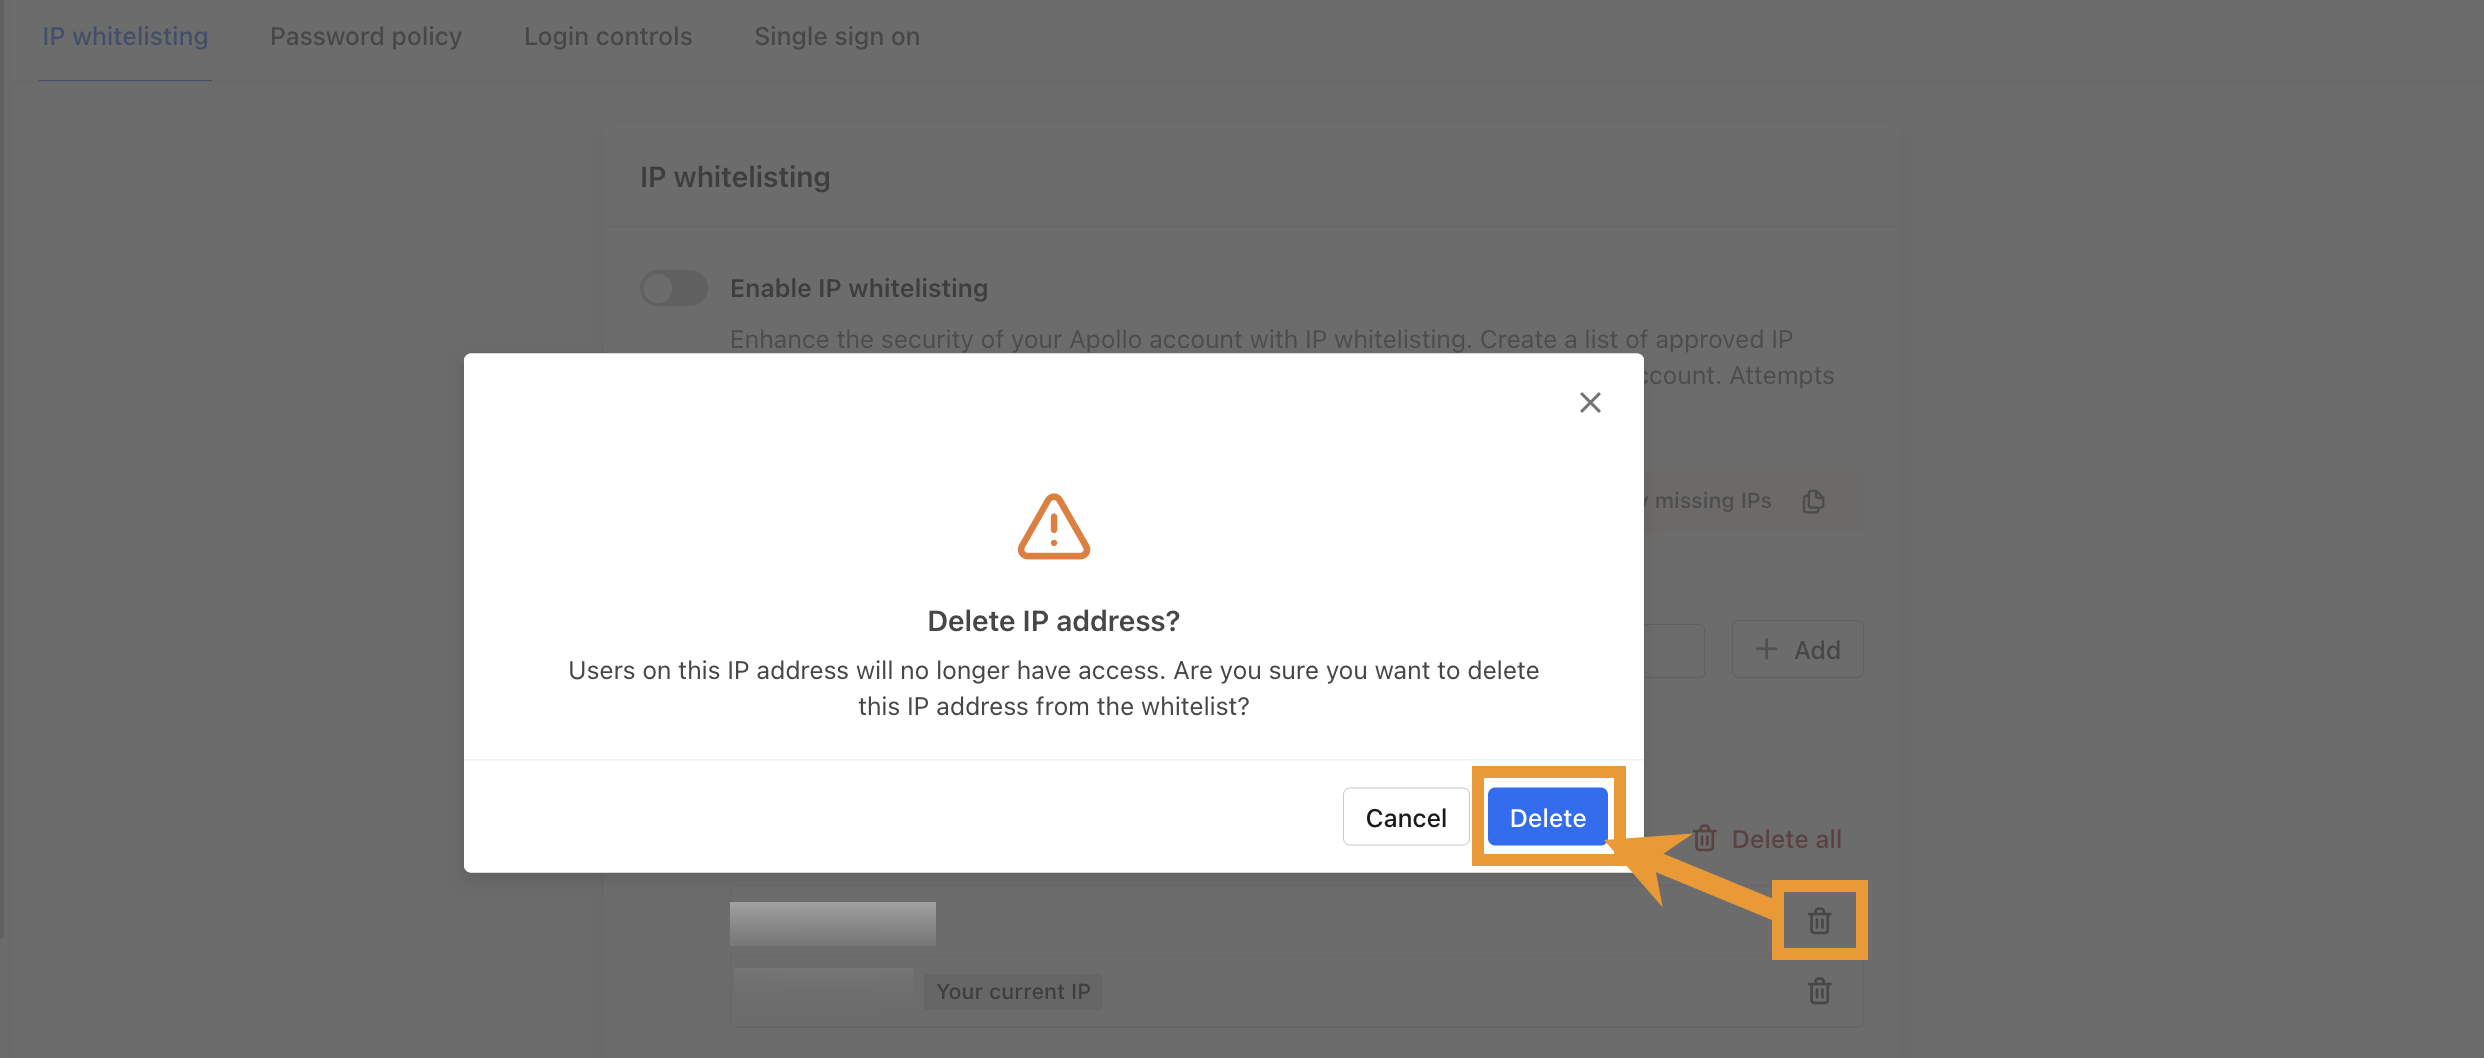
- Click the trash can icon next to an IP address or range that you want to delete. Then, click Delete in the warning pop-up to continue.
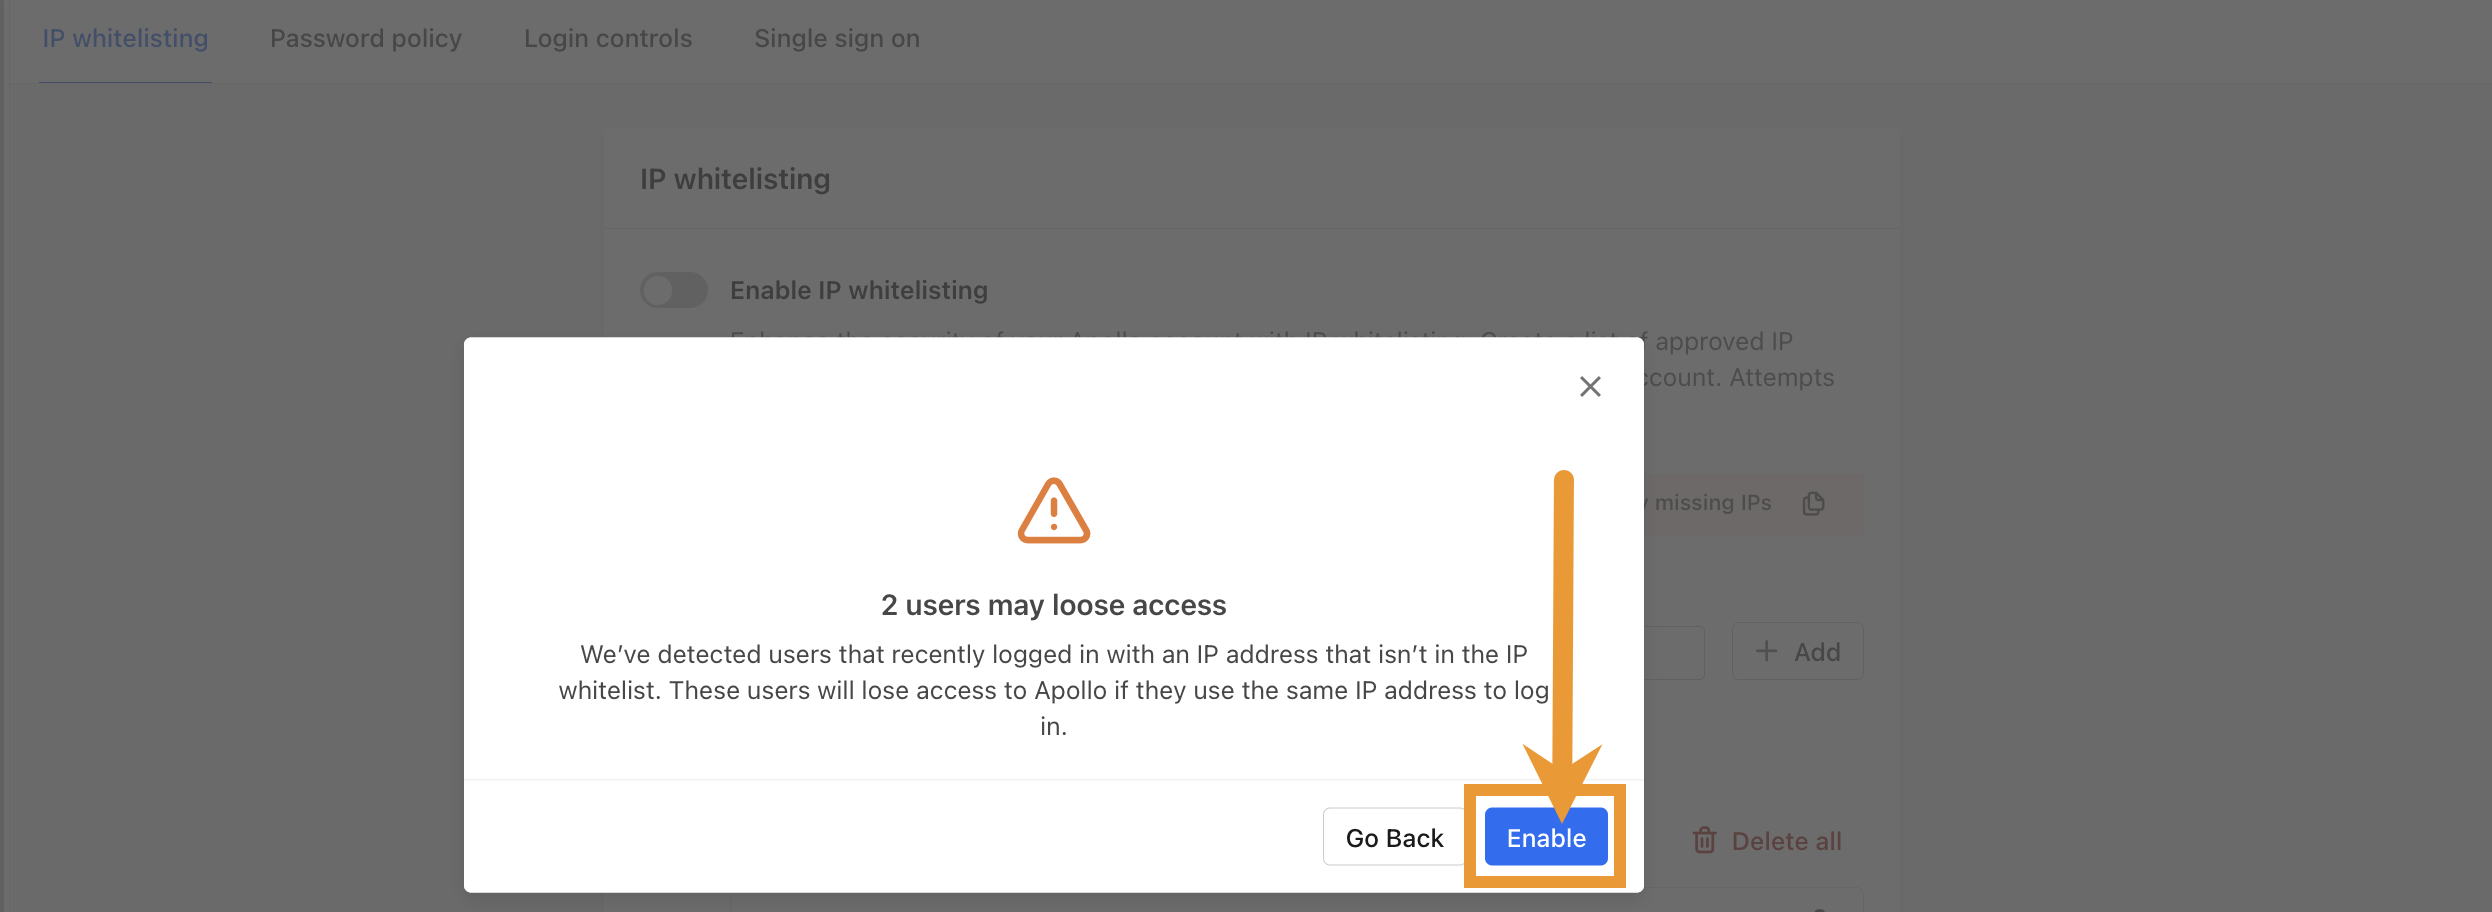
- When you're ready to activate IP whitelisting in Apollo, click the Enable IP whitelisting toggle.
- Apollo warns you if it detects any users that may lose access when you enable IP whitelisting. To continue, click Enable.
You have enabled IP whitelisting in Apollo. Only users who try to access your account from one of the whitelisted IP addresses, ranges, or CIDRs can now successfully enter Apollo.
If you are an admin, repeat the steps above any time you want to add or delete IPs from your whitelist.
Deactivate IP whitelisting
To deactivate IP whitelisting for your Apollo account:
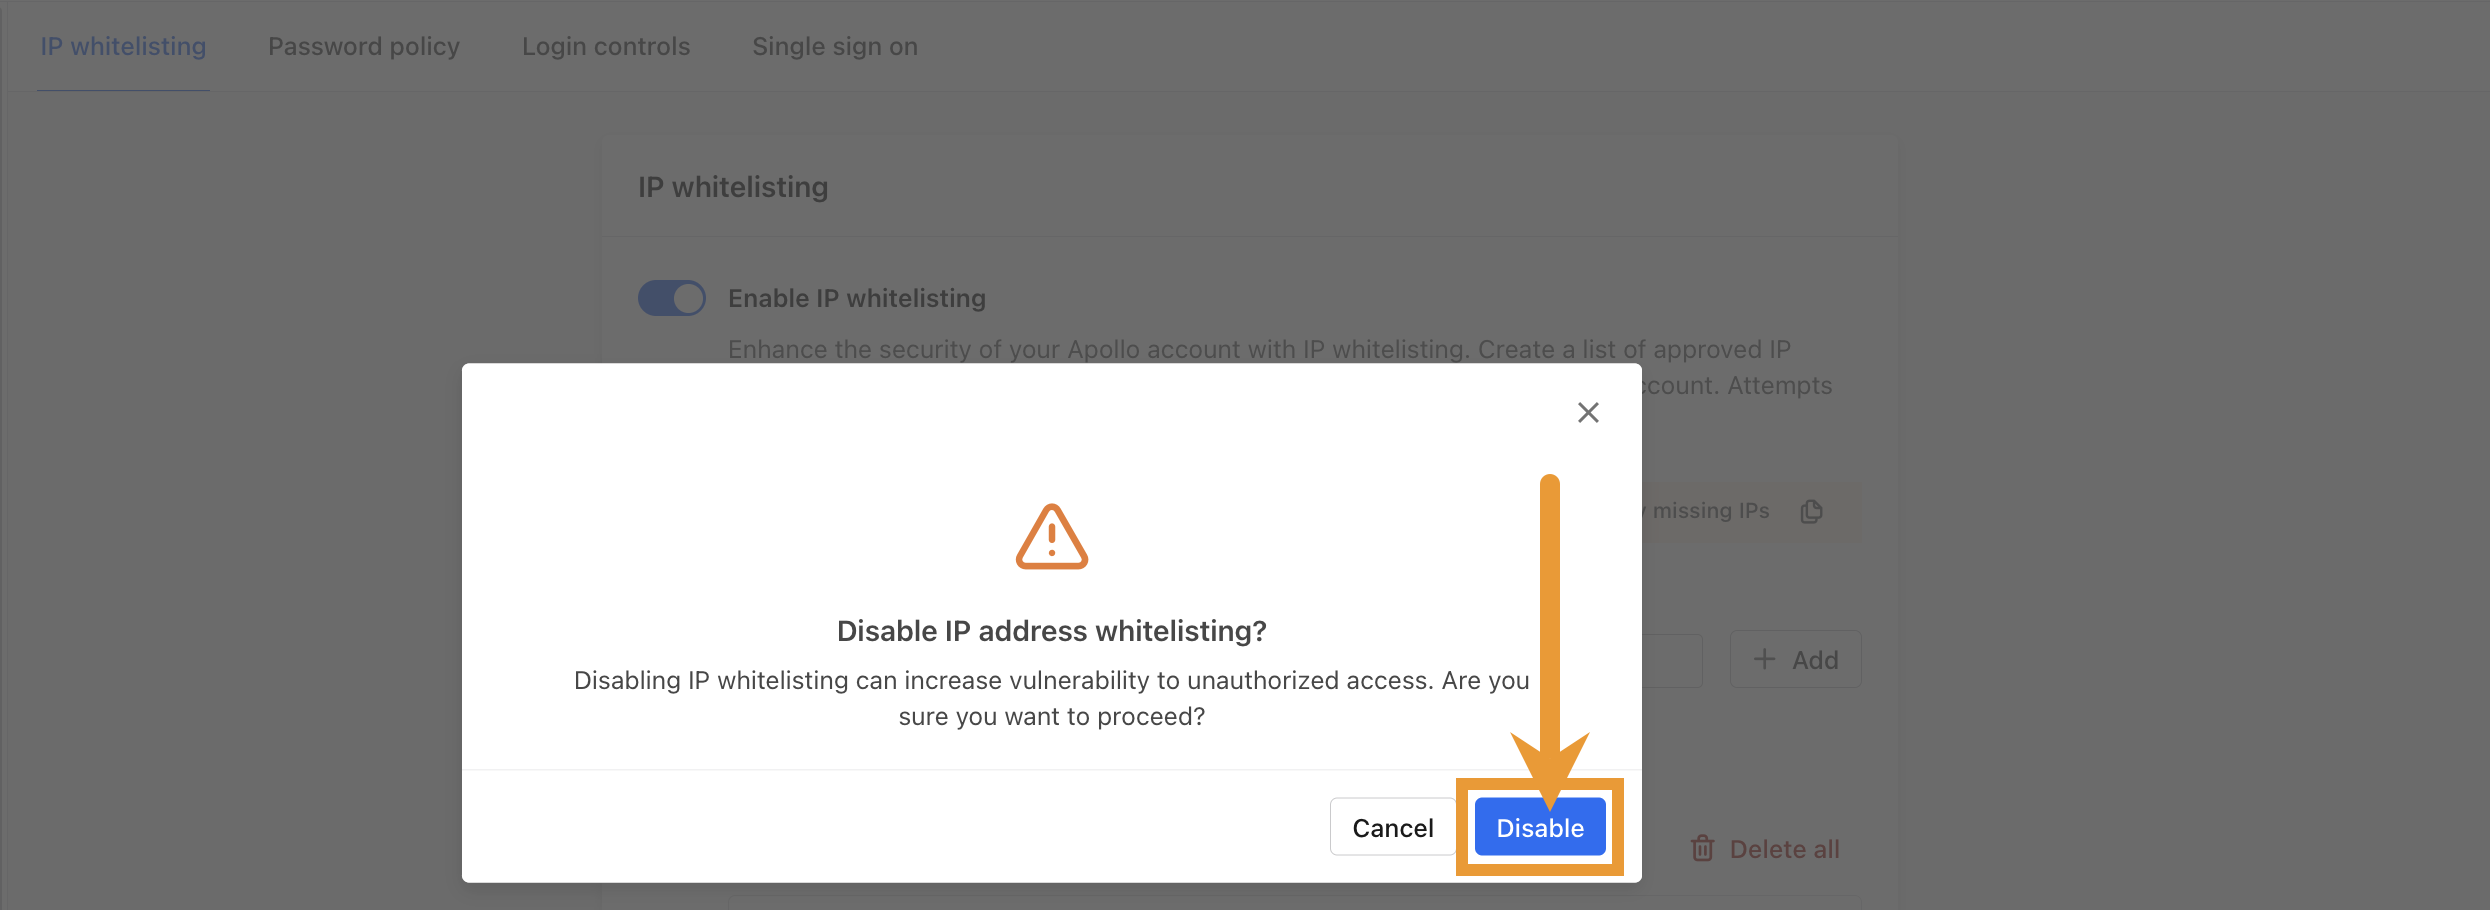
- Launch Apollo and click Settings > Security.
- Click the Enable IP whitelisting toggle in the IP whitelisting tab.
- Click Disable to confirm your choice.
You have now deactivated IP whitelisting in Apollo.