
Overview
SCIM user provisioning lets admins create, update, deactivate, and reactivate Apollo users from an identity provider. Apollo supports SCIM provisioning with Okta and Microsoft Entra ID when SAML single sign-on is active.
SCIM syncs users' first names, last names, and active statuses. It doesn't update primary email addresses or assign Apollo teams or custom permission profiles.
Check out the following sections to configure and manage SCIM user provisioning for Apollo.
Review SCIM Requirements
You need admin access in Apollo with permission to manage Security settings. You also need admin access in Okta or Microsoft Entra ID with permission to configure application provisioning.
Your Apollo workspace must have an active SAML single sign-on configuration with Okta or Microsoft Entra ID. SCIM provisioning isn't available with Google or Microsoft OAuth single sign-on. If you haven't configured SAML single sign-on yet, follow Use Single Sign-On on Apollo first.
Apollo applies your workspace's standard seat limits when SCIM creates or reactivates a user. If Apollo can't assign a seat, it doesn't provision or reactivate the user.
Apollo supports the following SCIM attributes:
| SCIM attribute | Apollo field | Behavior |
|---|---|---|
id |
Apollo user ID | Identifies the provisioned Apollo user. |
userName |
Primary email | Identifies and creates the user. SCIM doesn't update an existing user's primary email. |
name.givenName |
First name | Syncs when the user is created or updated. |
name.familyName |
Last name | Syncs when the user is created or updated. |
active |
User status | Deactivates or reactivates the user. |
Apollo doesn't support the SCIM /Groups resource. SCIM also doesn't assign users to Apollo teams or custom permission profiles. New SCIM users receive the workspace's non-admin permissions.
Configure SCIM in Apollo
To copy your Apollo SCIM credentials:
- Launch Apollo, then go to Settings > Security > Single sign-on.
- Scroll to User Auto Provisioning, then copy the SCIM connector base URL.
- Copy the SCIM Token.
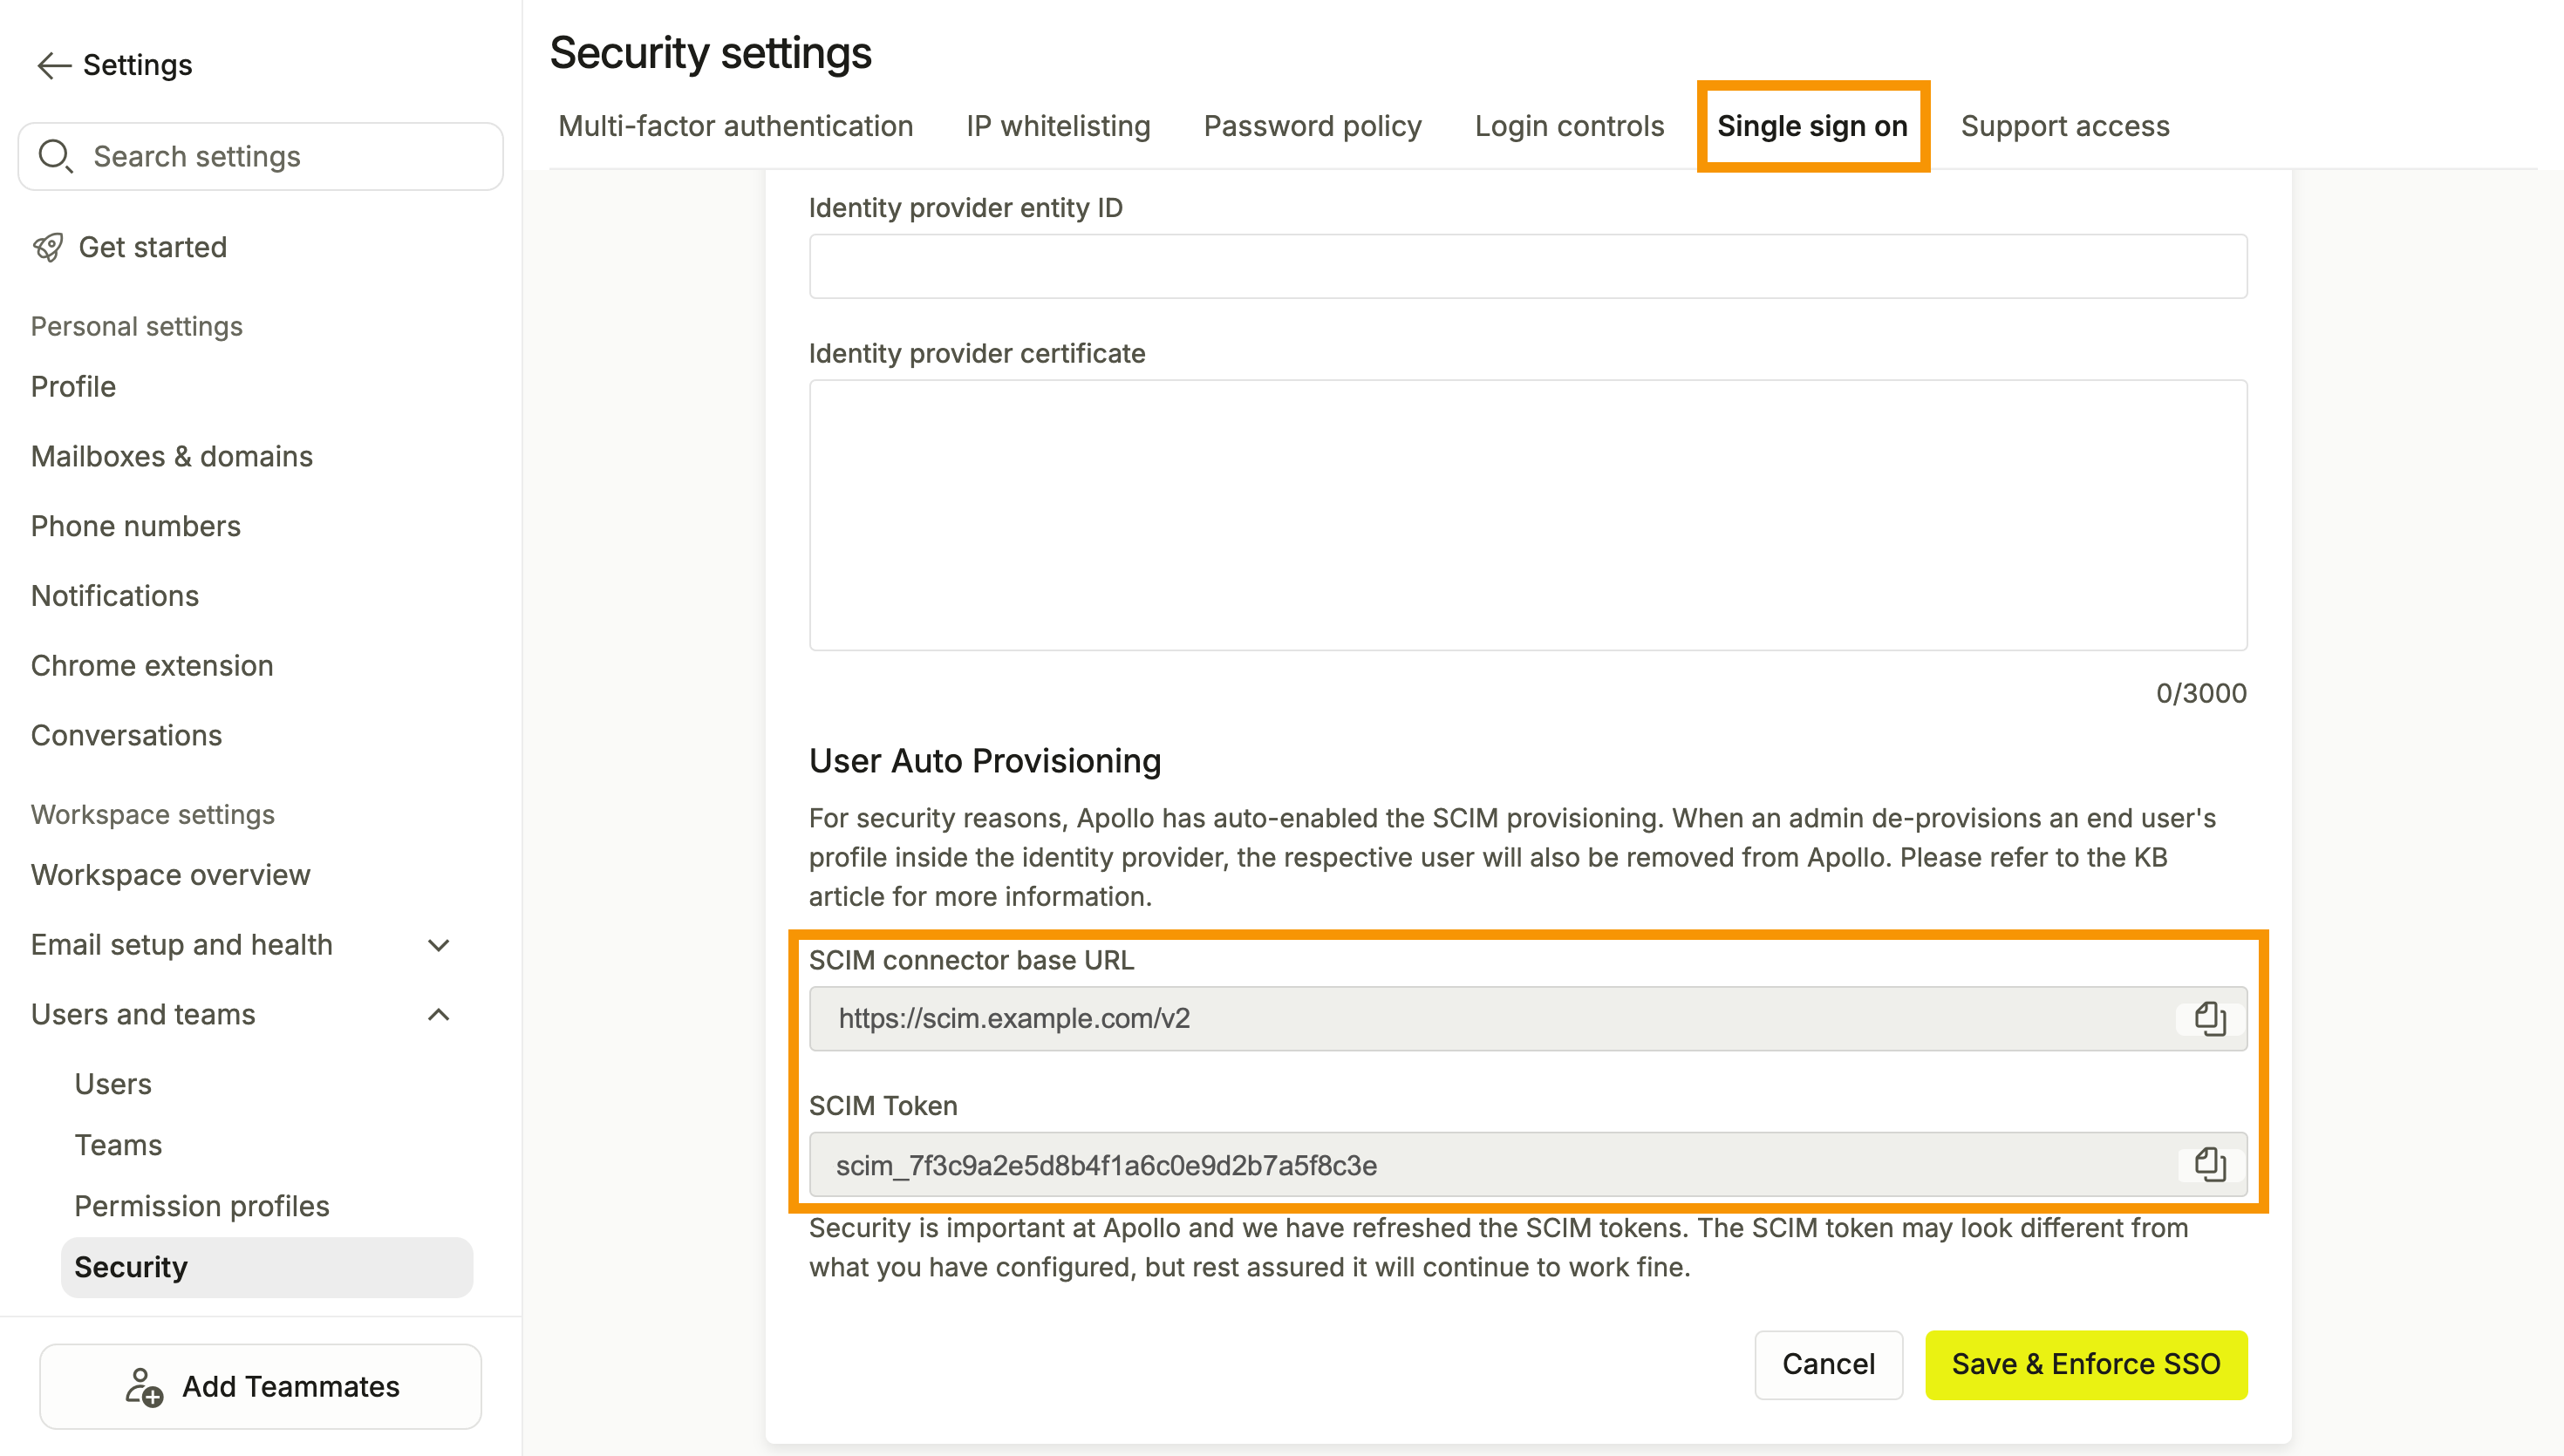
You have now copied the SCIM credentials you need to connect your identity provider to Apollo.
Configure Your Identity Provider
Choose your identity provider below to connect it to Apollo with SCIM provisioning.
Okta
To configure SCIM provisioning in Okta:
- In Okta, go to Applications > Applications, then select Apollo.io.
- Click Provisioning > Configure API Integration.
- Select Enable API integration.
- Enter the SCIM connector base URL and SCIM Token that you copied from Apollo in the corresponding fields.
- Click Test API Credentials, then click Save.
- Click To App > Edit.
- Enable Create Users and Update User Attributes.
- Enable Deactivate Users, then click Save.
You have now configured SCIM user provisioning for Apollo in Okta.
Microsoft Entra ID
To configure SCIM provisioning in Microsoft Entra ID:
- In Microsoft Entra ID, go to Entra ID > Enterprise apps, then select the Apollo enterprise application.
- Click Provisioning, then select Automatic.
- For Tenant URL, enter the SCIM connector base URL that you copied from Apollo.
- For Secret Token, enter the SCIM Token that you copied from Apollo.
- Click Test Connection, then click Save.
- Review the user provisioning mappings and confirm that Entra can create, update, and deactivate users in Apollo.
- Assign the individual users you want to provision to the Apollo enterprise application.
- Set Provisioning Status to On, then click Save.
You have now configured SCIM user provisioning for Apollo in Microsoft Entra ID.
Apollo doesn't support the SCIM /Groups resource and ignores SCIM remove operations. Configure Entra to deprovision individual users by sending an inactive status or deleting the user. Removing someone from a group alone doesn't deactivate them in Apollo.
Manage Provisioned Users
Apollo handles SCIM provisioning events as follows:
| Provisioning event | Apollo behavior |
|---|---|
| Create a new user | Apollo creates the user with their email, first name, and last name. Apollo assigns non-admin permissions and applies the workspace's standard seat limits. Check your Apollo plan to review your available seats. |
| Provision an existing user in the same workspace | Apollo returns a duplicate-user error and doesn't create another user. |
| Provision a user from another workspace | Apollo sends the user an invitation to join your workspace instead of automatically moving them. Before the user accepts the invitation, see Consolidate Multiple Apollo Workspaces into One to understand what happens to their existing workspace and data. |
| Provision a deactivated user | Apollo starts the reactivation process instead of creating a duplicate user. Standard seat limits apply. Check out Add, Manage, and Deactivate Users to learn more about reactivating users. |
| Deactivate a user | Apollo deactivates the existing user. Apollo blocks the change if it would deactivate the workspace's last active admin. See Add, Manage, and Deactivate Users to learn what happens when you deactivate a user. |
| Reactivate a user | Apollo reactivates the existing user when a seat is available. |
Change userName
|
Apollo leaves the user's primary email unchanged, even if the identity provider reports that the update succeeded. |
SCIM doesn't update an existing user's primary email. Manage primary email changes outside SCIM. Reach out to Apollo support if you need help updating a user's email.
Next Steps
Check out these resources to learn more about managing SSO and Apollo users:
| Use Single Sign-On on Apollo | Set up SAML single sign-on and learn how your team signs in through an identity provider. Check out Use Single Sign-On on Apollo to get started. |
|---|---|
| Why Are the Users I Assign in SSO Not Created in Apollo? | Troubleshoot users who don't appear in Apollo after you assign them through your identity provider. Check out Why Are the Users I Assign in SSO Not Created in Apollo? for common fixes. |
| Add, Manage, and Deactivate Users | Manage Apollo users directly and learn how deactivation affects their access and data. Check out Add, Manage, and Deactivate Users for details. |
| Create and Assign Permission Profiles | Configure user access after provisioning. Check out Create and Assign Permission Profiles to assign the appropriate permissions. |