Overview
You've identified the ideal customer profile (ICP) for your product, and you're ready to find leads that match it. How much time will you and your sales team spend finding and prioritizing leads?
You can use workflows in Apollo to automate tedious sales team tasks such as lead prioritization. By applying Apollo's filters to the branches in a workflow, you can automatically surface leads based on any number of factors and feed those leads directly into the appropriate outreach sequences.
The following sections demonstrate a specific use case scenario for how workflows can be used to automate lead prioritization.
Understand the Scenario
The following steps show the specific workflow that is being built in this scenario:
- The workflow runs on a weekly schedule.
- Only people that work at companies showing high or medium buying intent scores will be enrolled in the workflow.
- The workflow targets specific personas by adding multi-split branches.
- The re-enrollment criteria for the workflow is defined so that the same leads are not processed too often.
You can replicate these steps directly in Apollo if you want to prioritize leads using the same logic. Or you can use different Apollo filters and different branching logic to create workflows that match your own team's needs.
Want Apollo to do the heavy lifting of creating high-quality workflows for you? No problem! Learn how to use Apollo's templates to create workflows.
Step 1: Create a Workflow and Define Enrollment Criteria
To create the workflow:
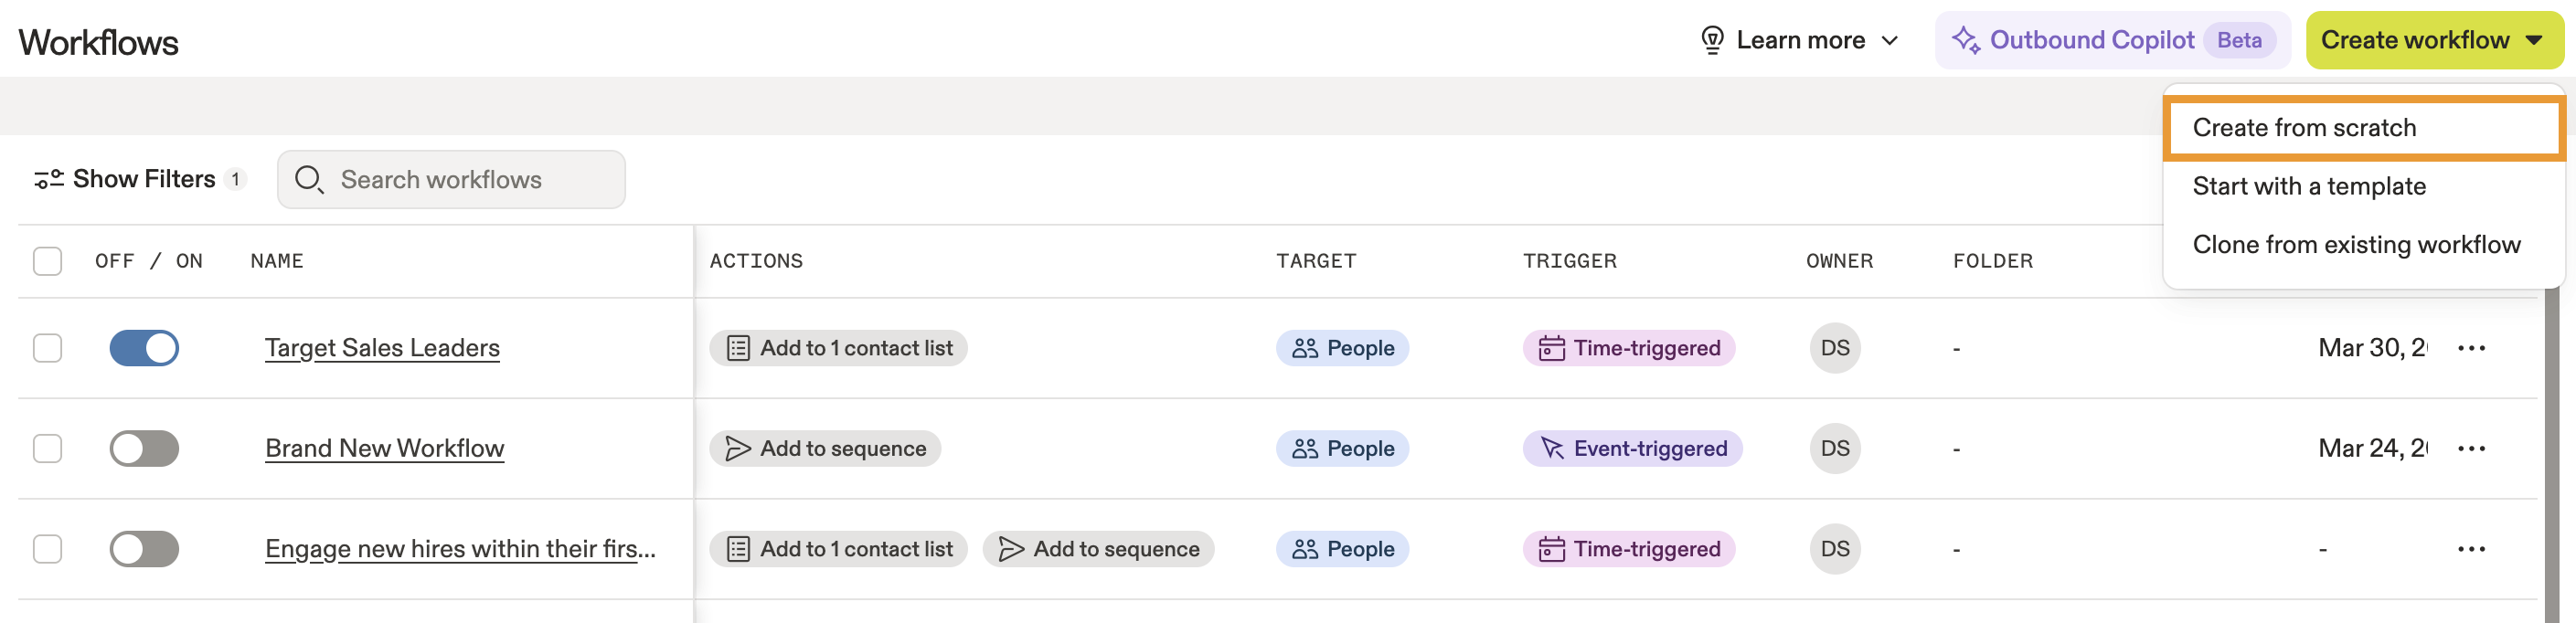
- Launch Apollo and click .
- Click Create workflow, then Create from scratch.
- Click Add trigger.
- Click Based on a date or schedule, then select People as the workflow's target. Choose the schedule for the workflow. In this scenario, Apollo is running the workflow once every week.
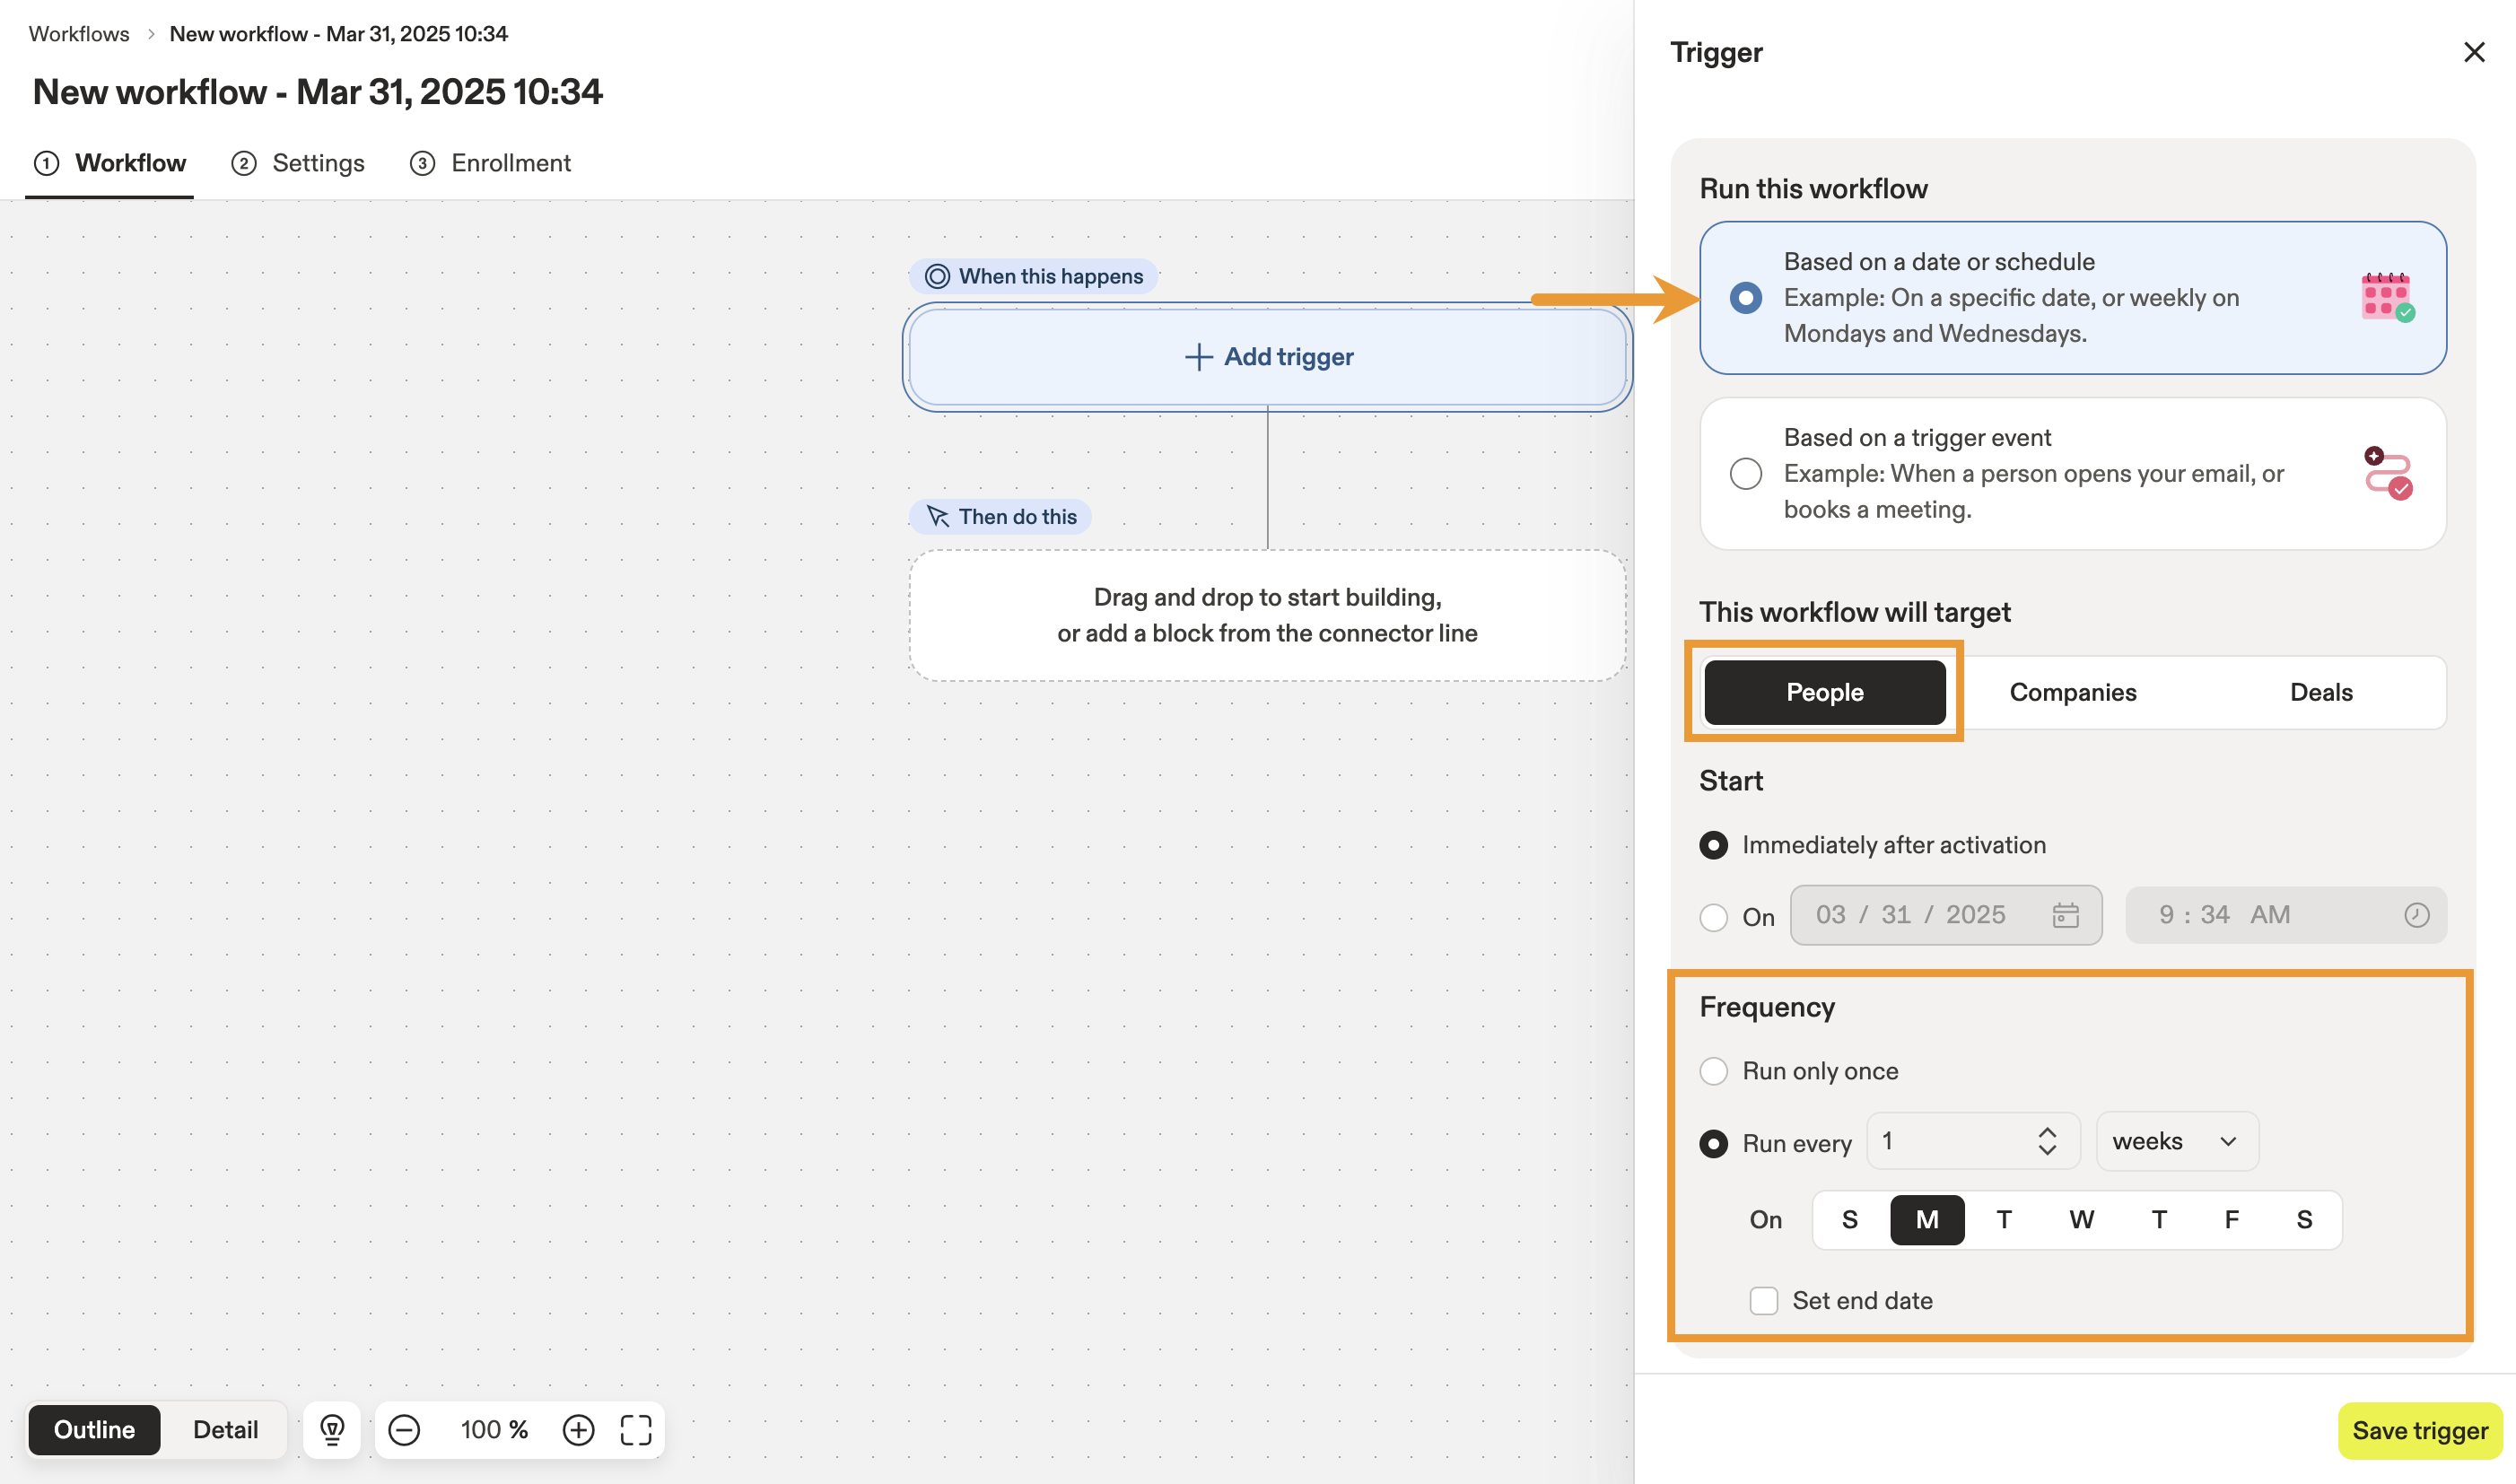
- Click Add filters to choose the enrollment criteria. This limits the people that will be eligible to be enrolled in the workflow.

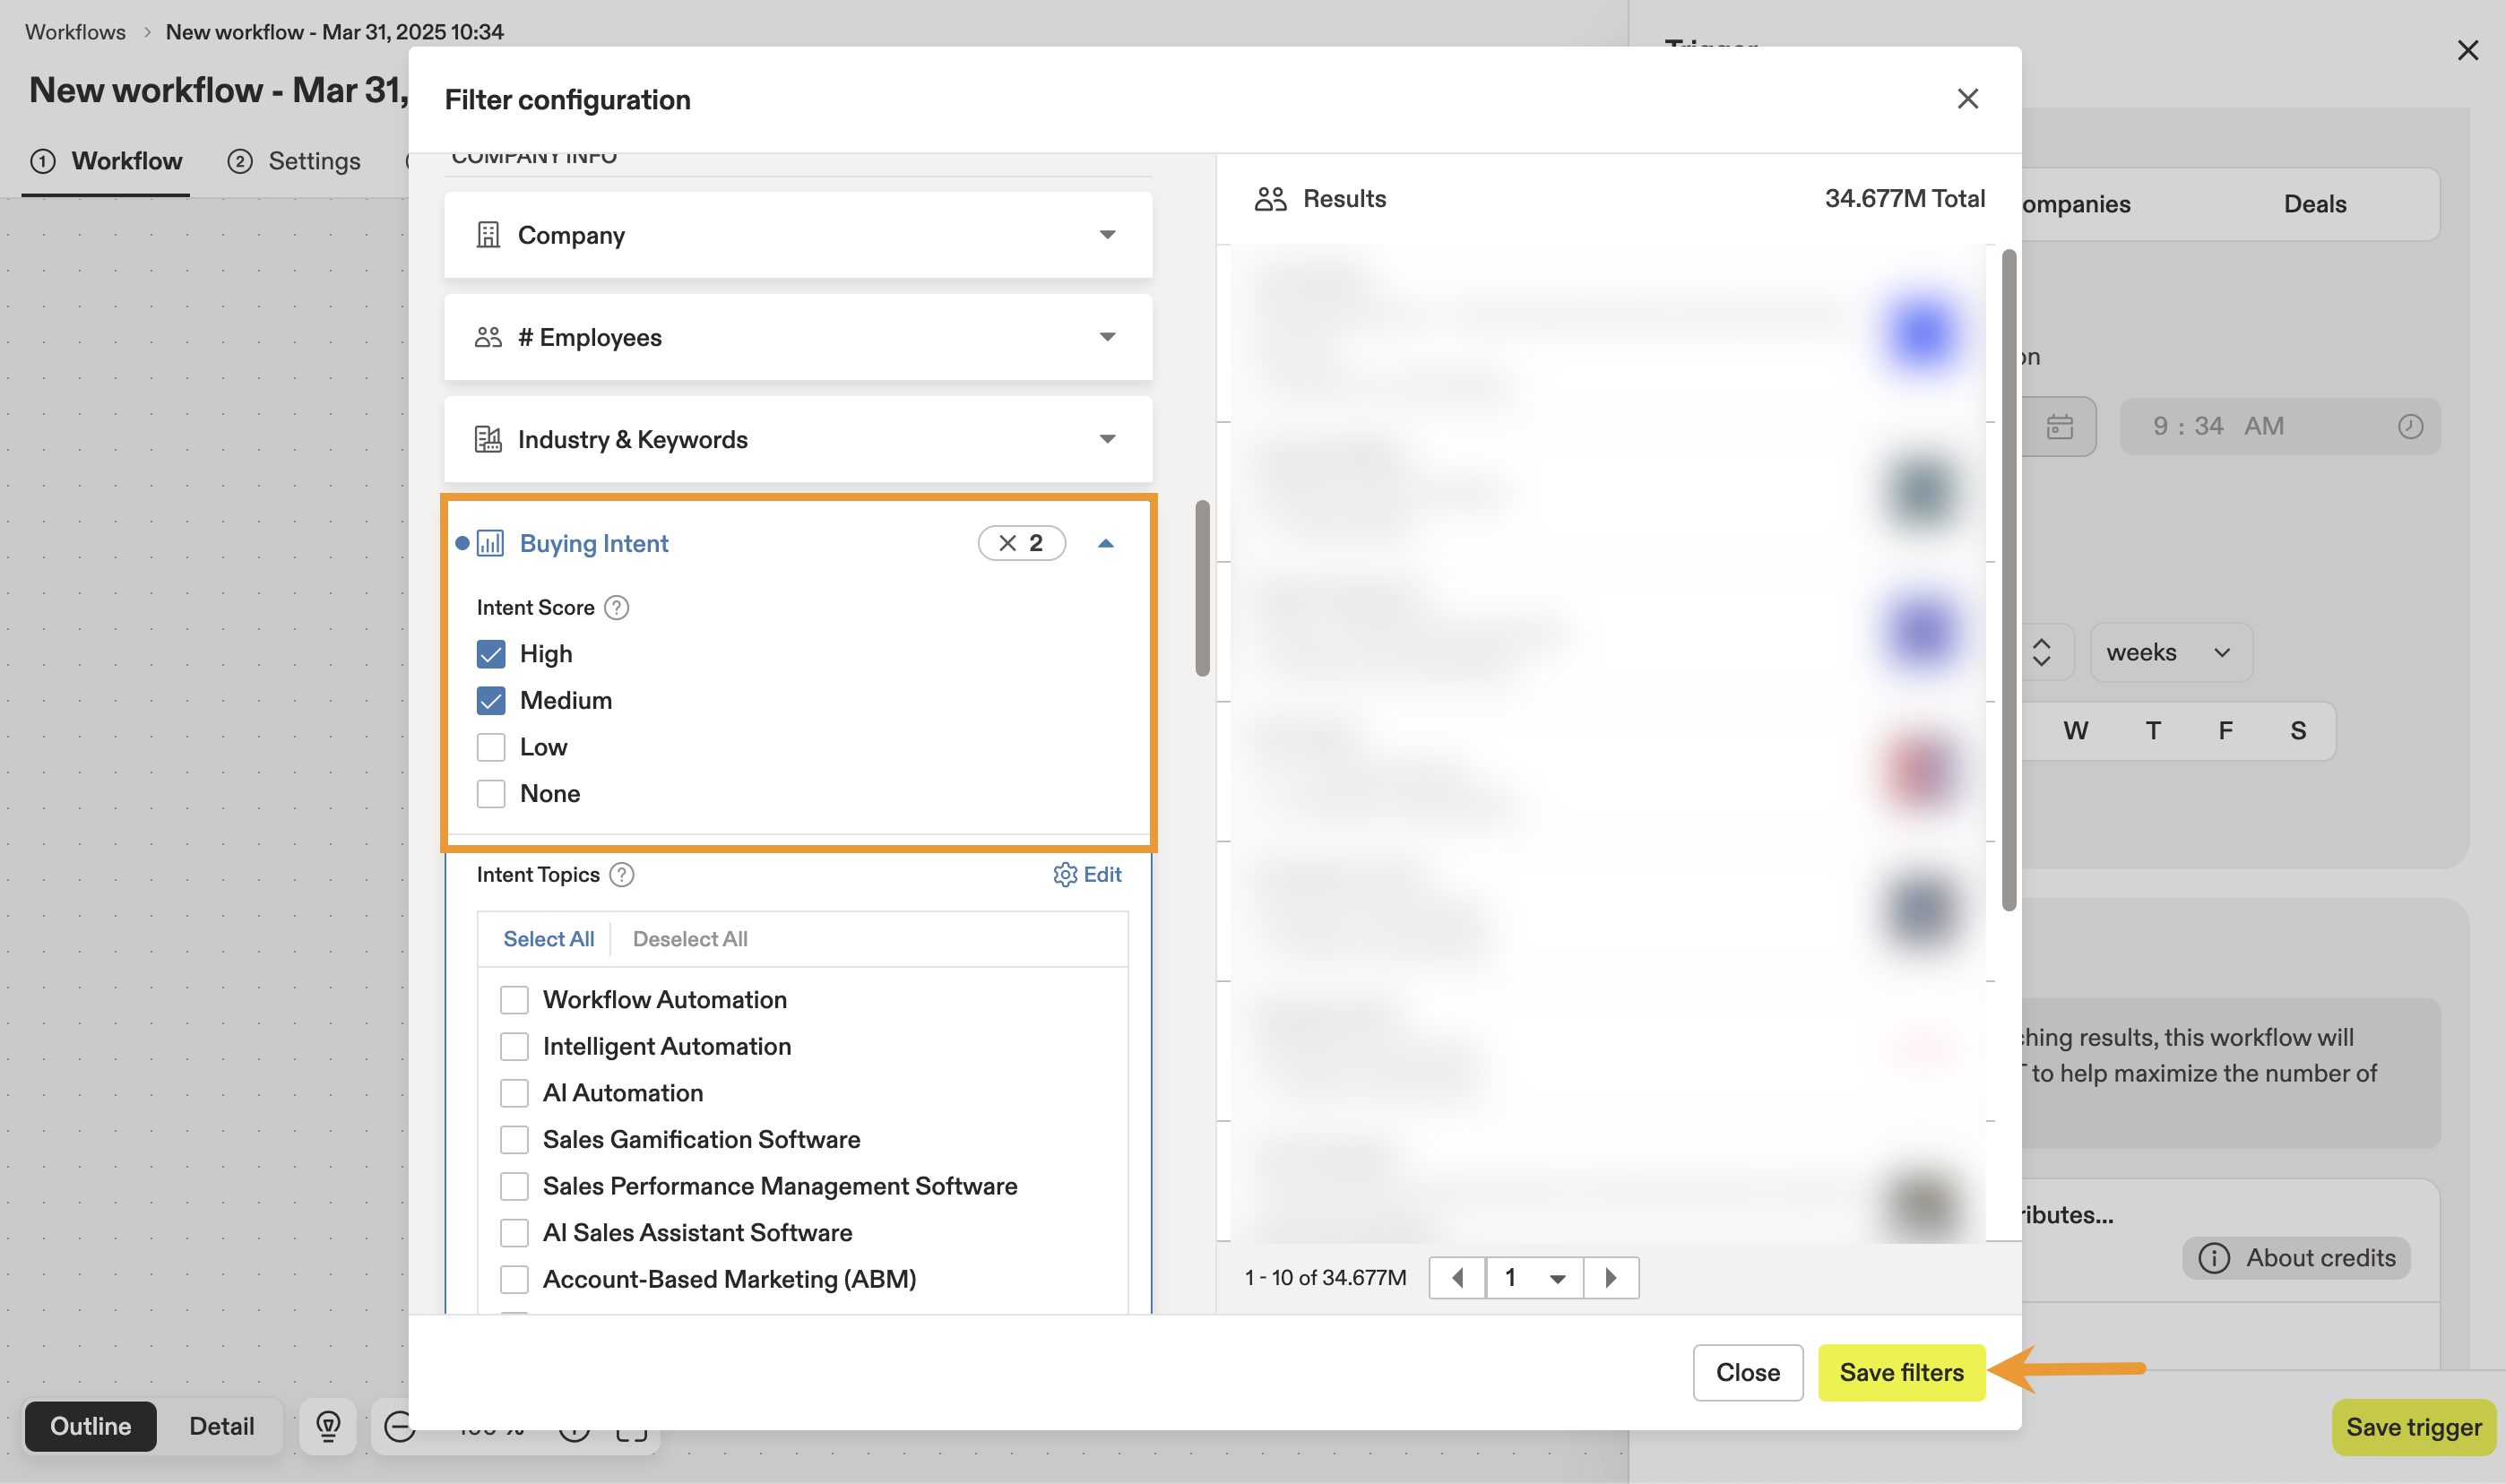
- Open the Buying Intent filter and click the checkboxes for High and Medium intent scores. Then, click Save filters.
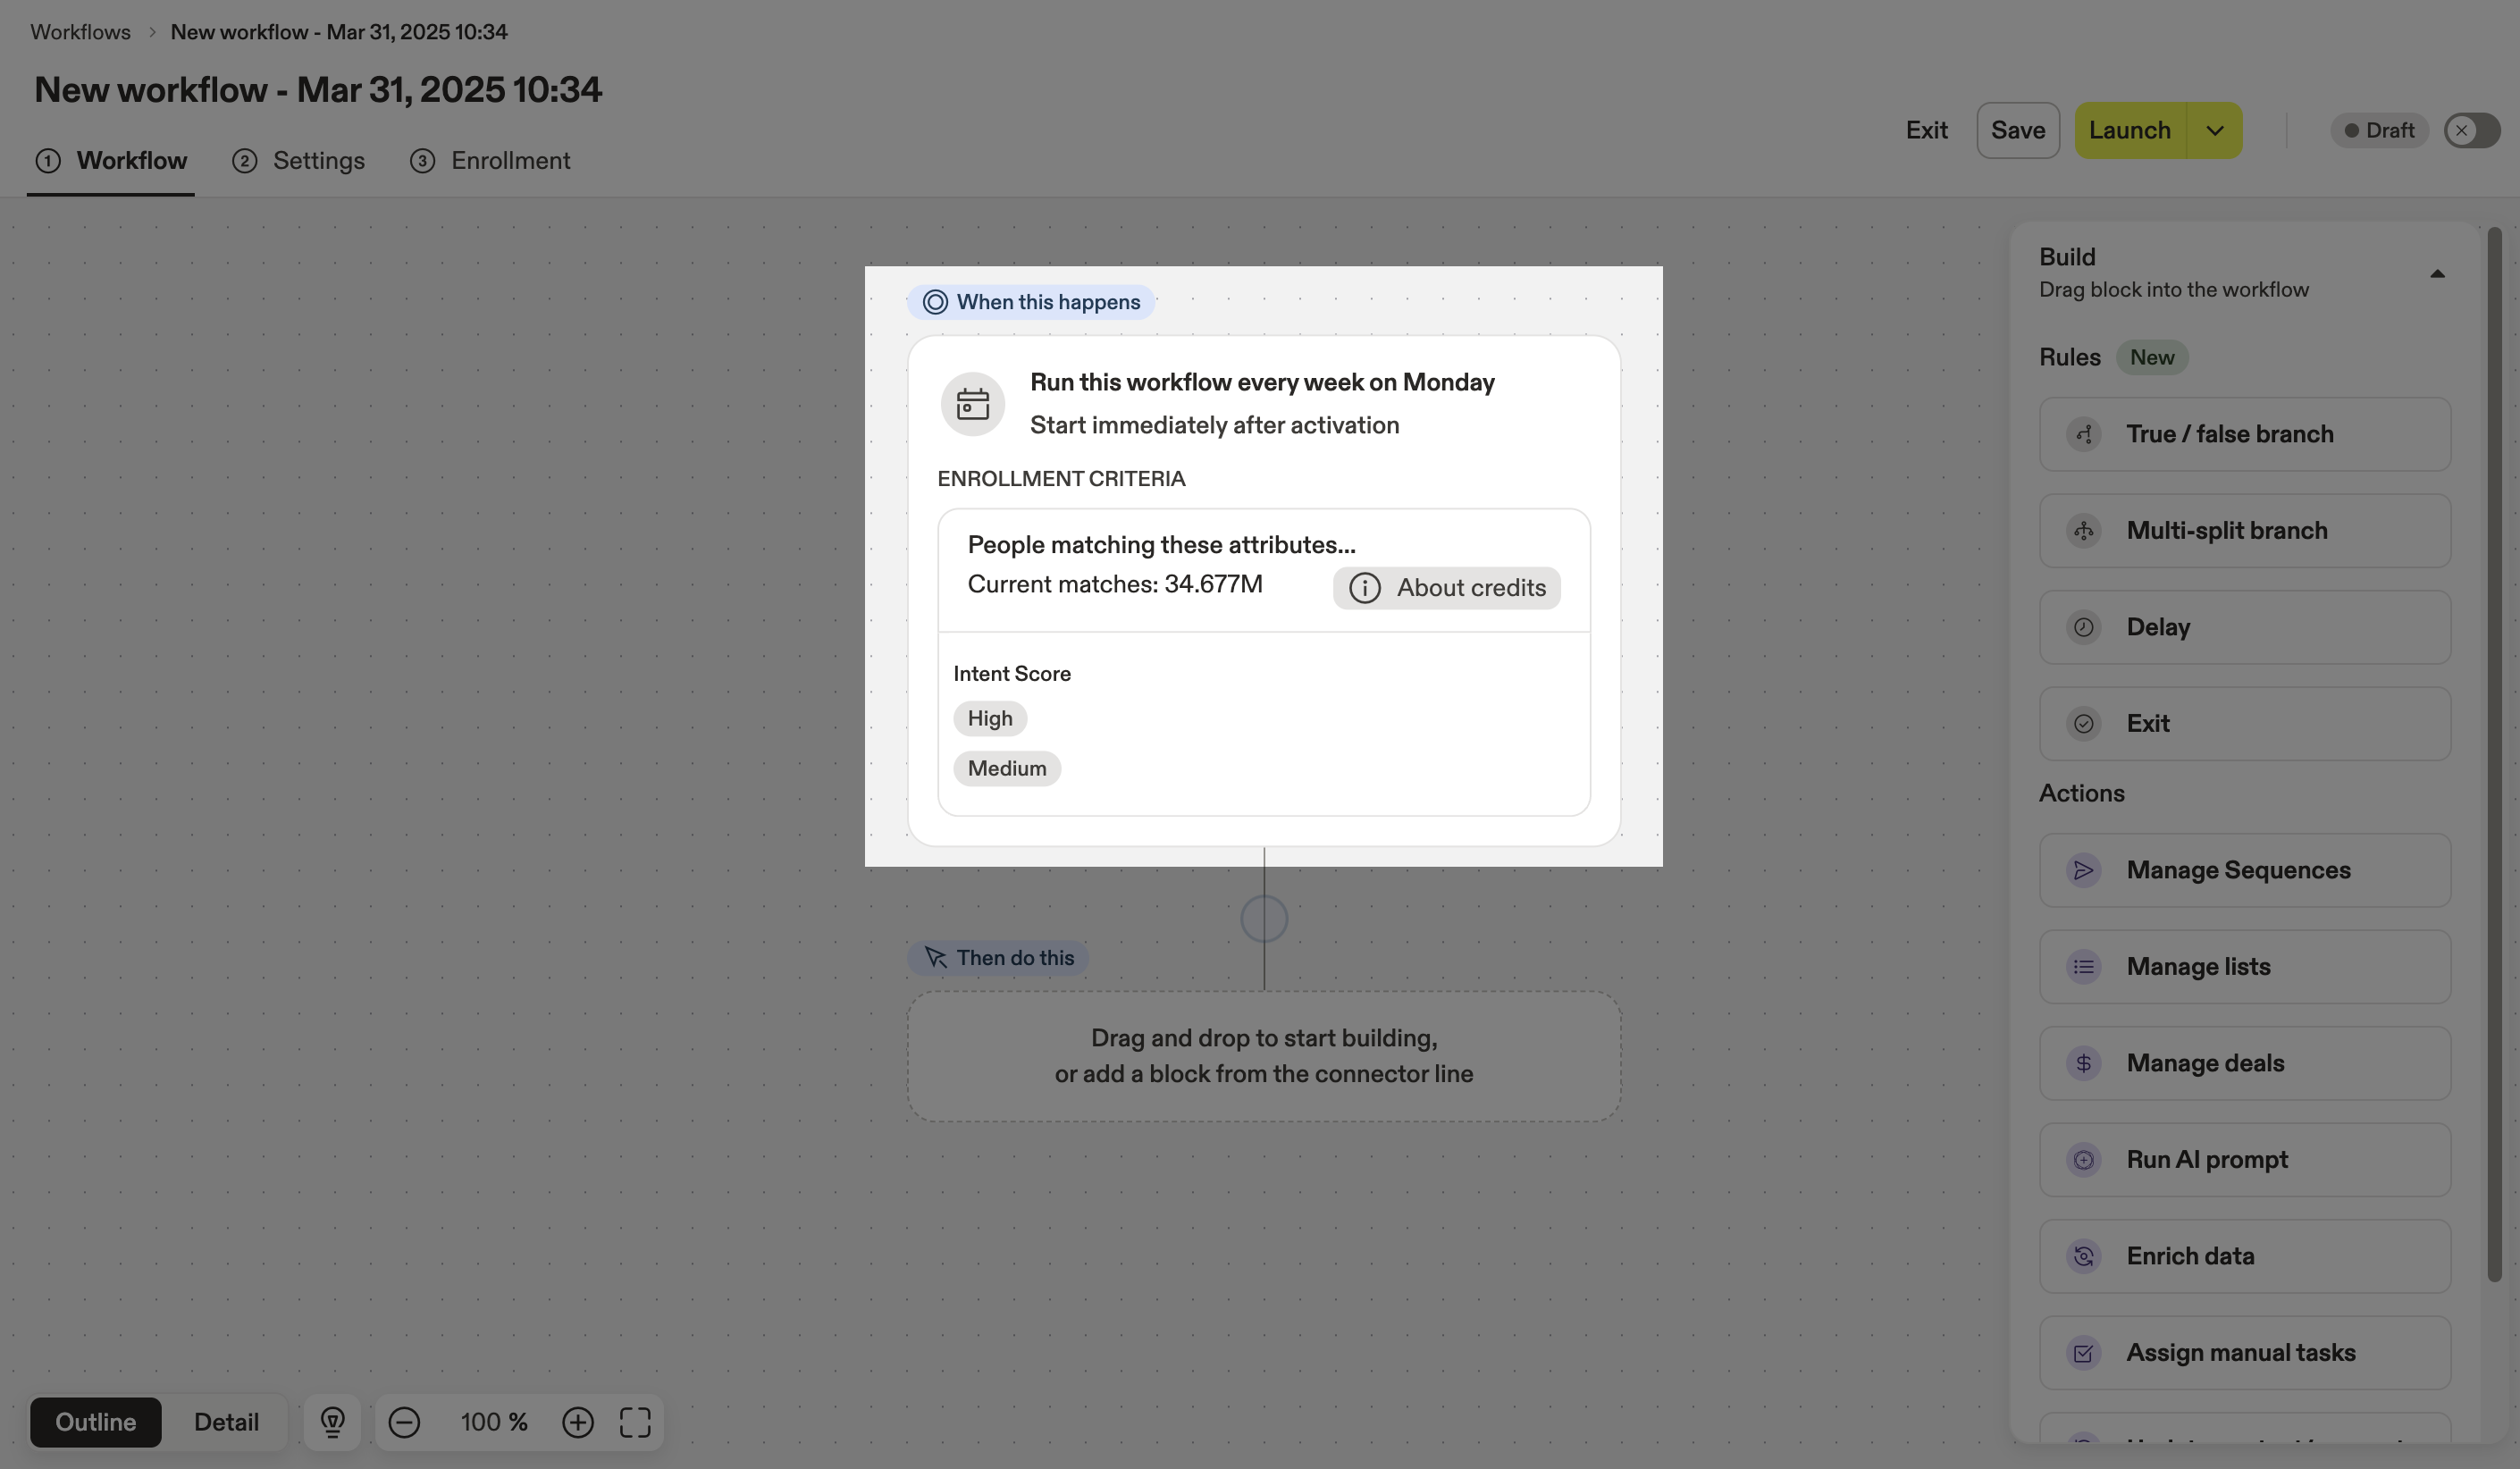
- Click Save trigger
You've now added the enrollment trigger and criteria to the workflow. Next, target specific personas from your original enrollment pool.
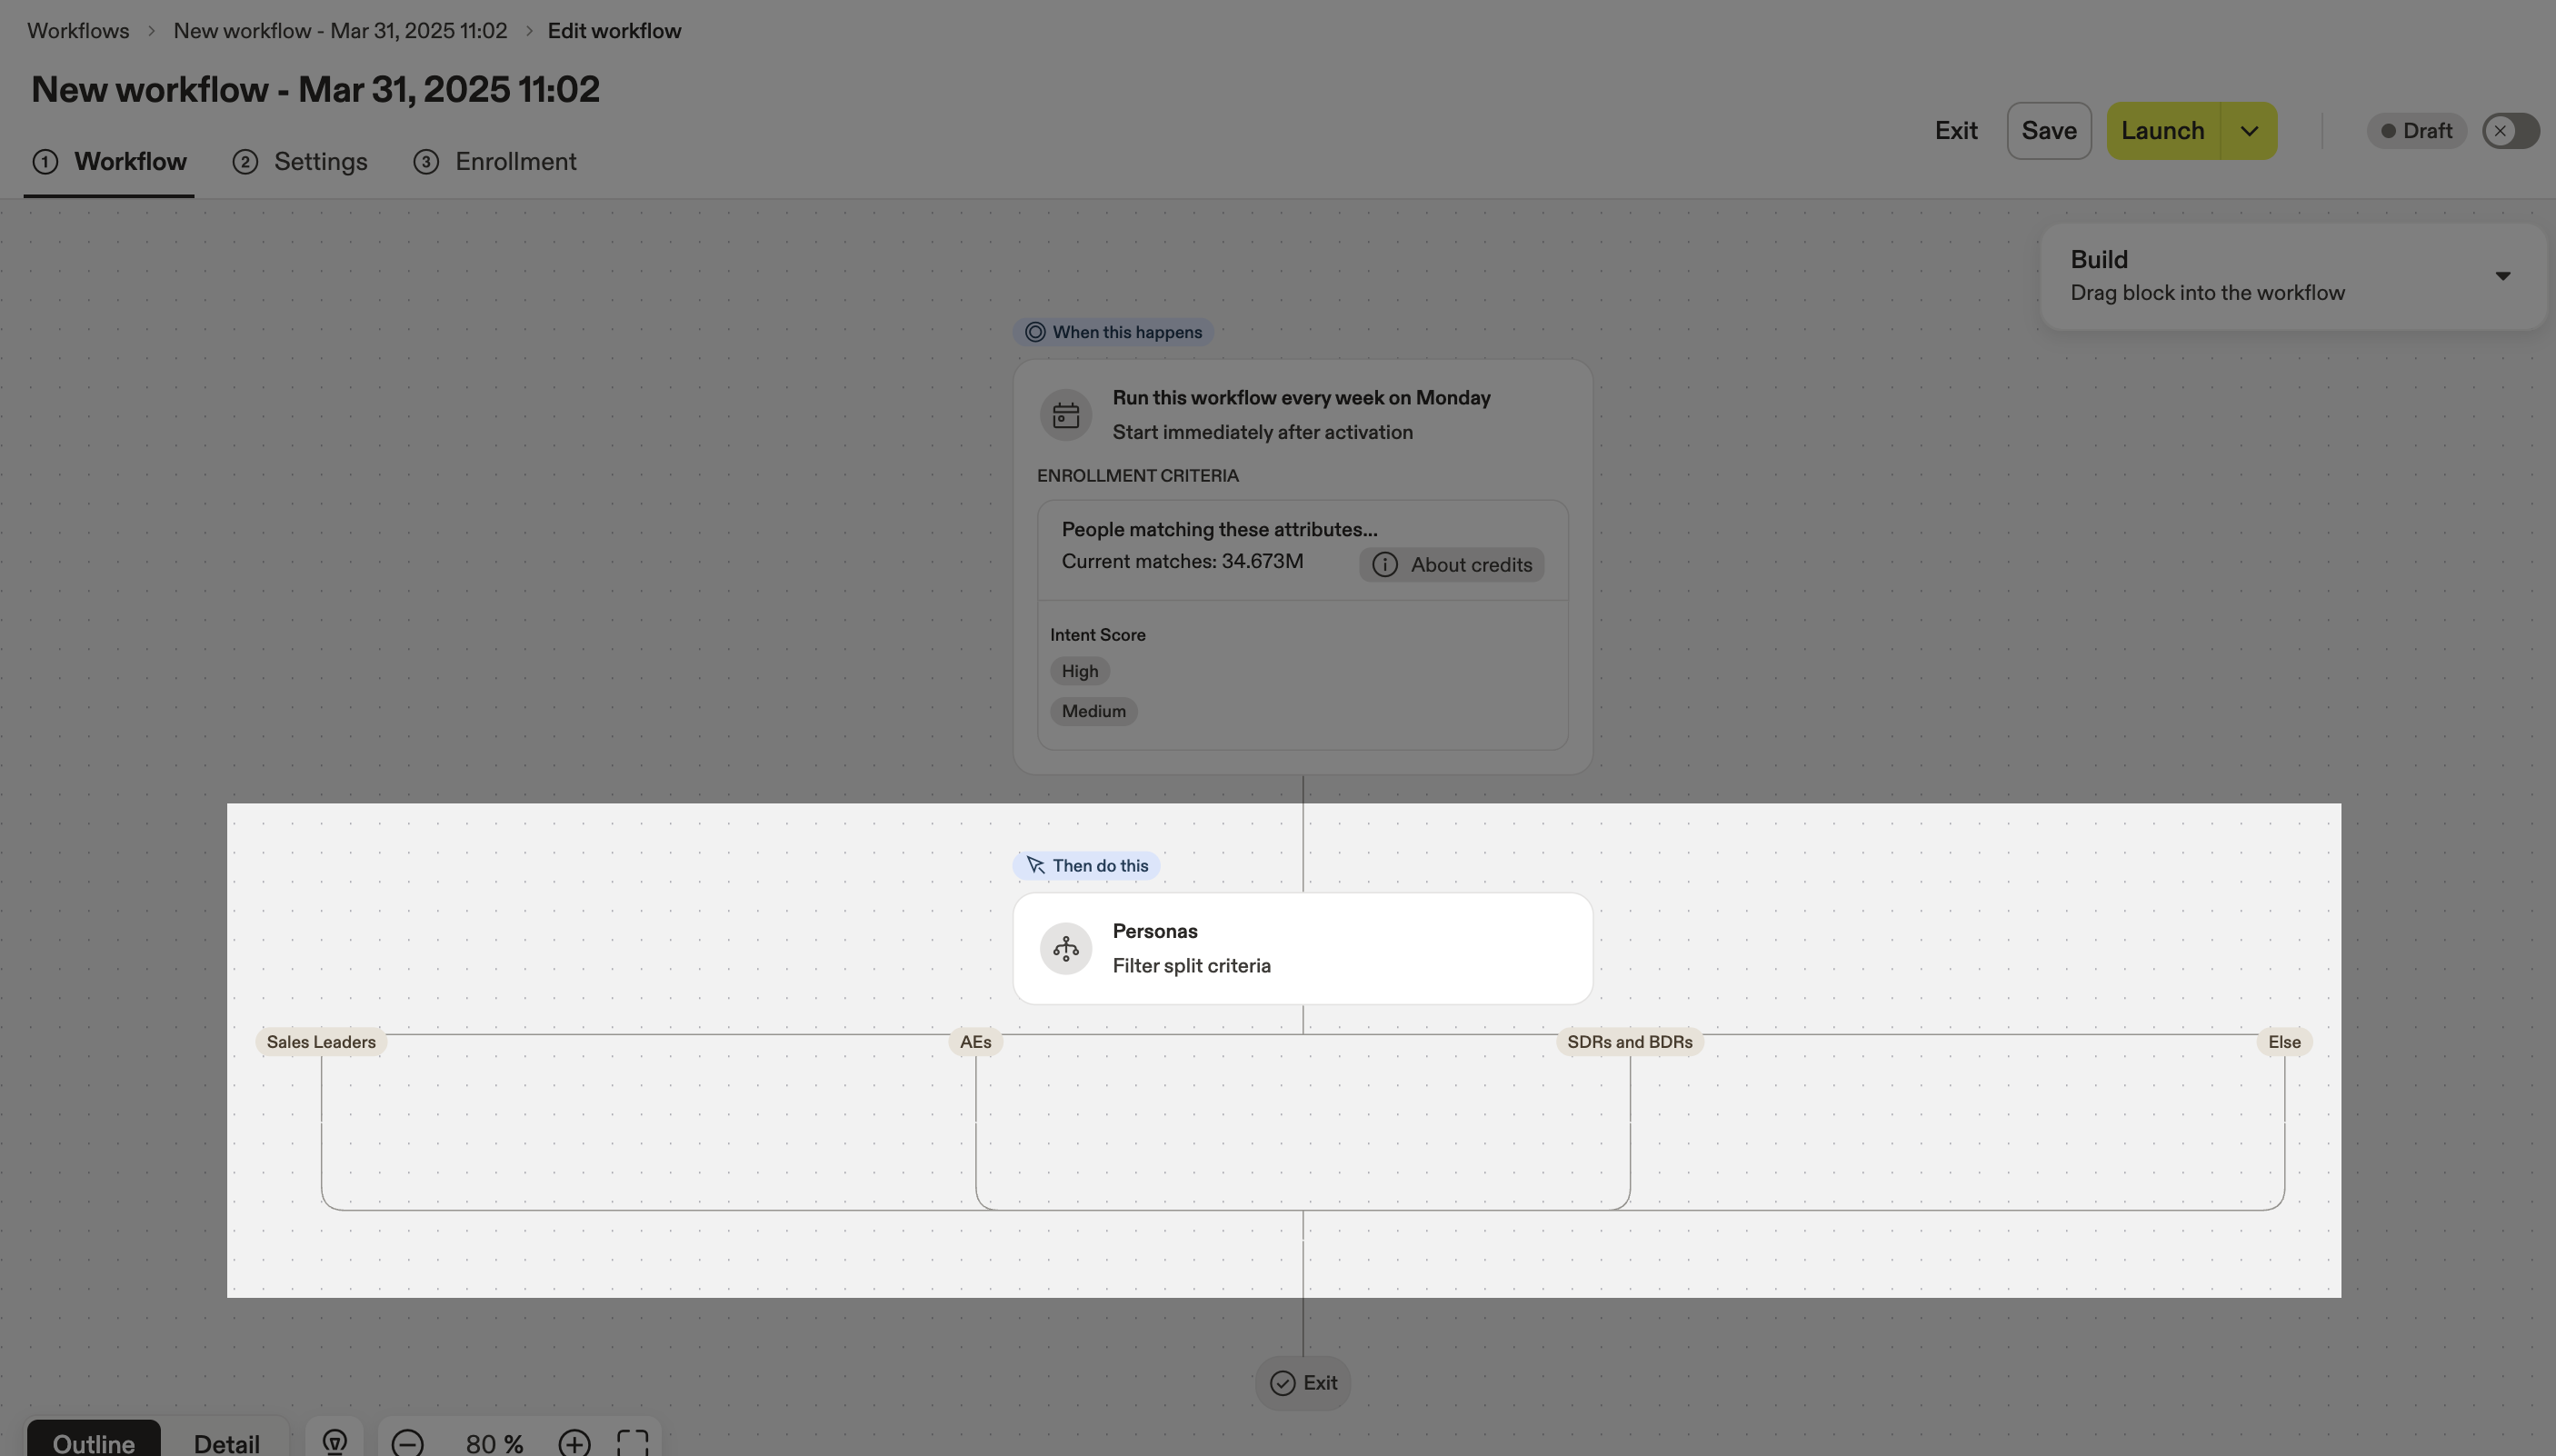
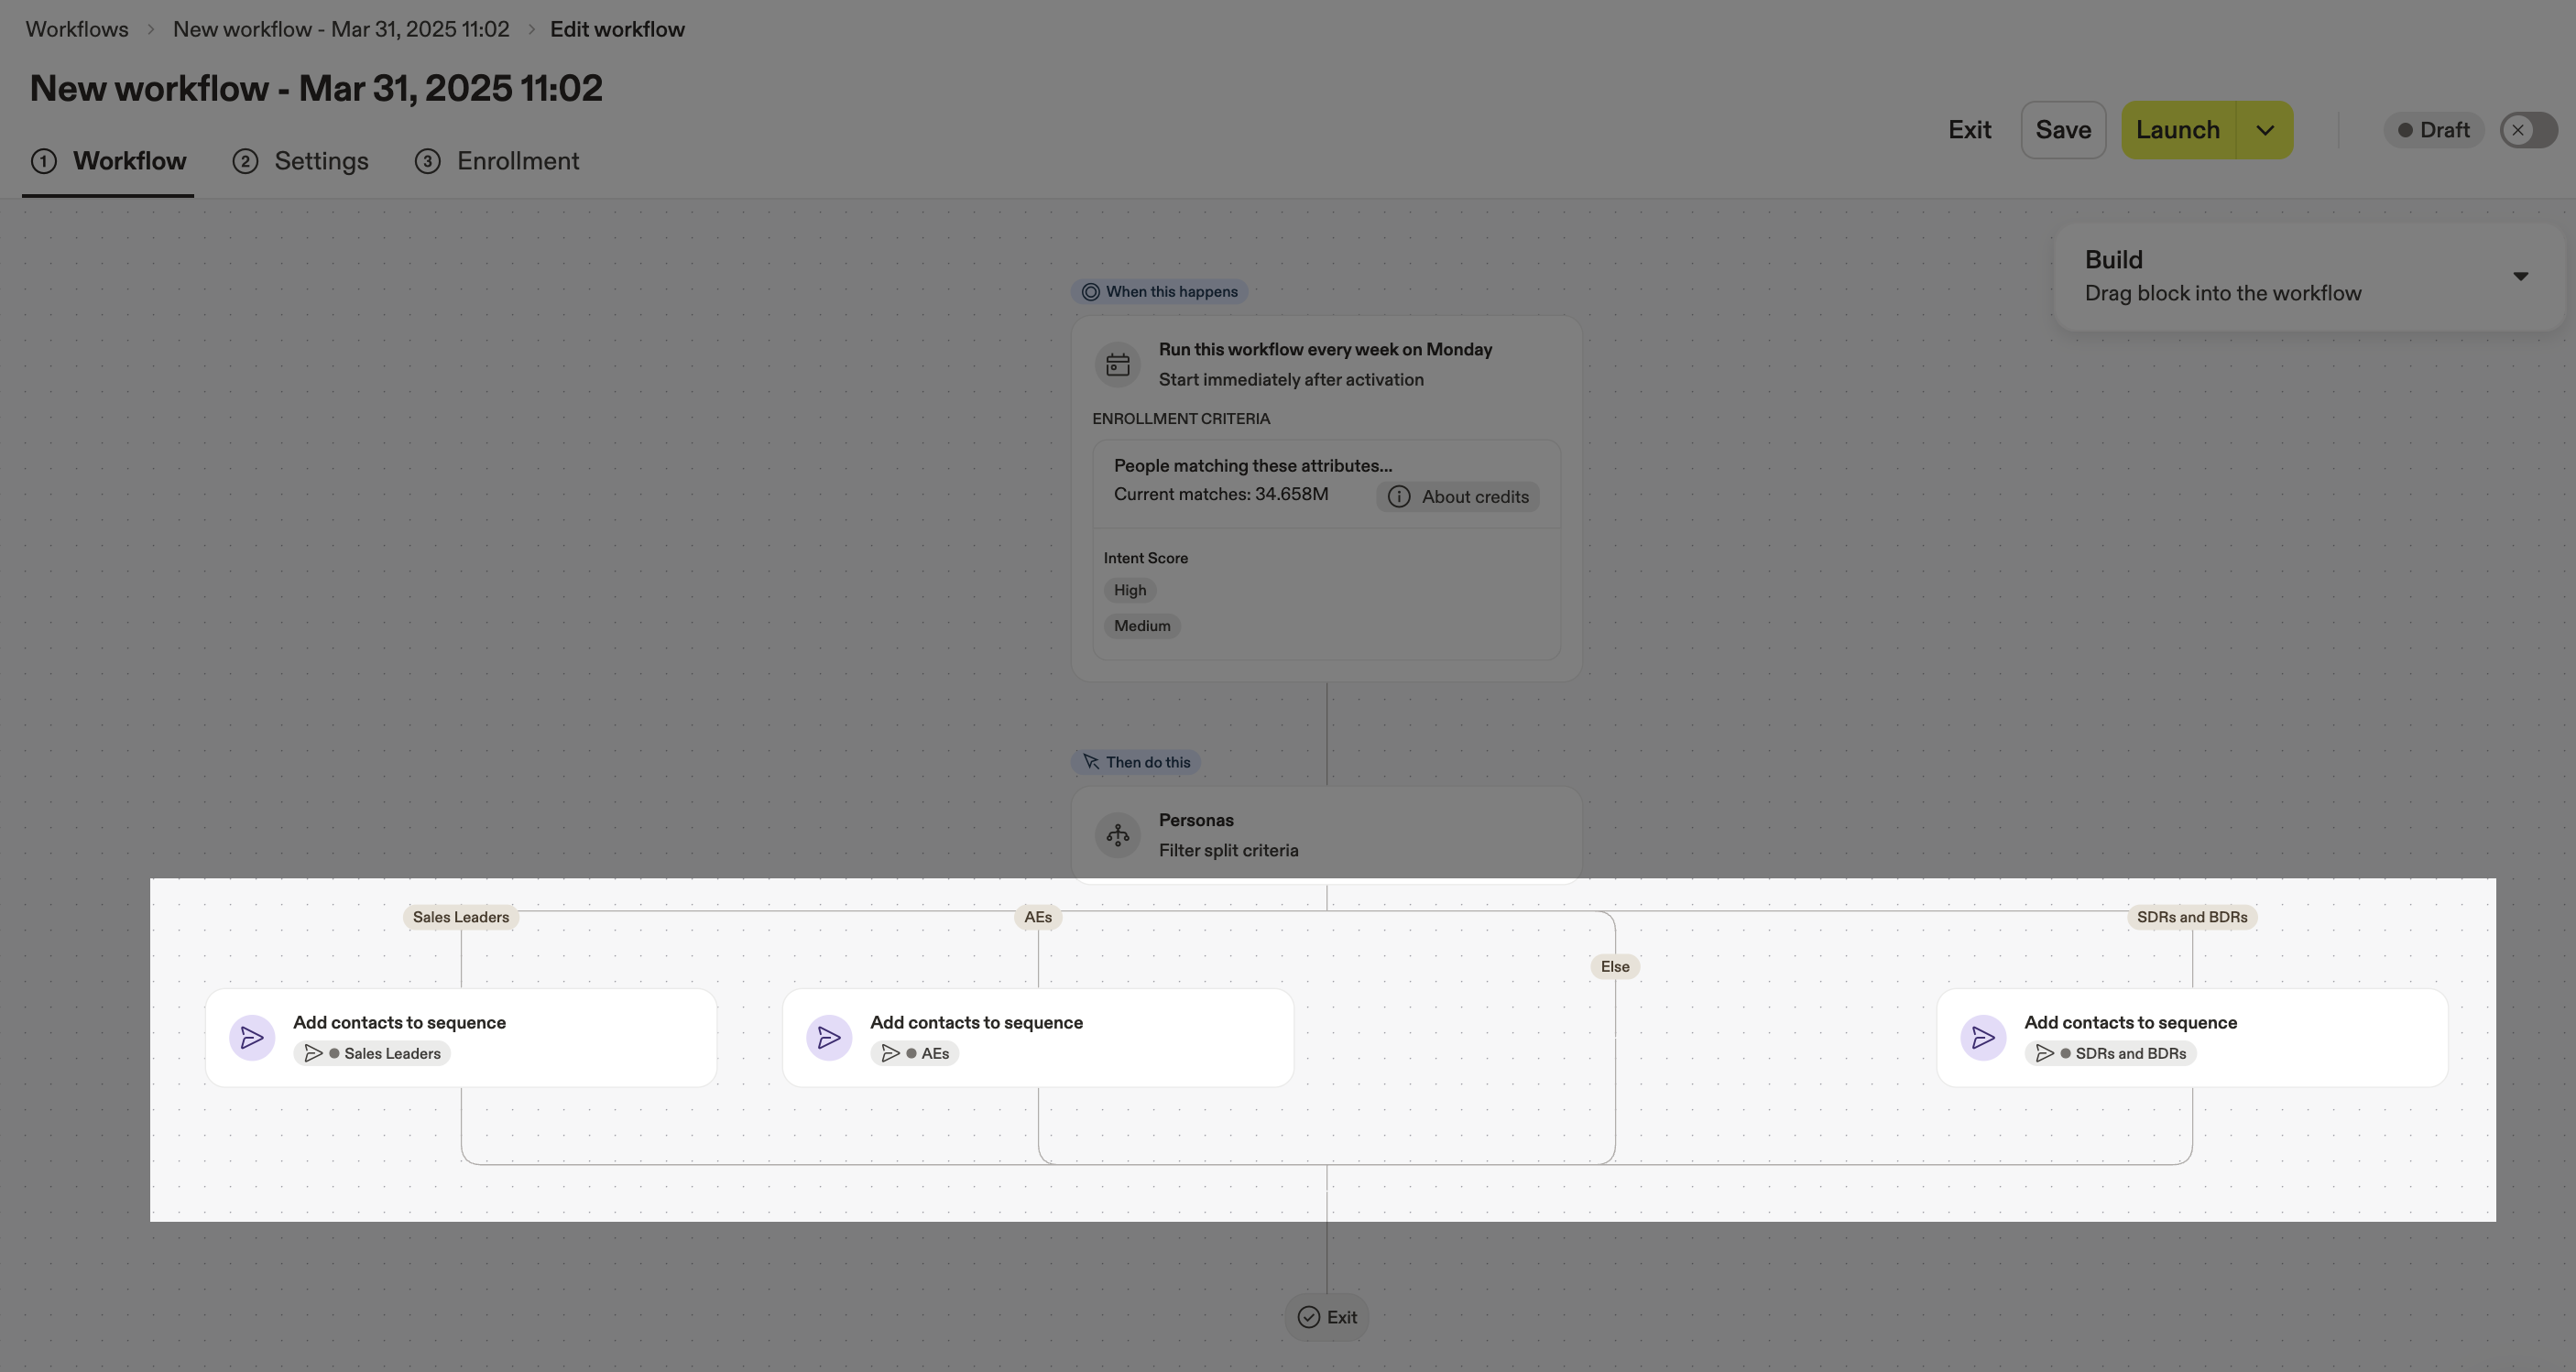
Step 2: Target Specific Personas
With the enrollment trigger and criteria set, you can add multi-split branches to target personas:
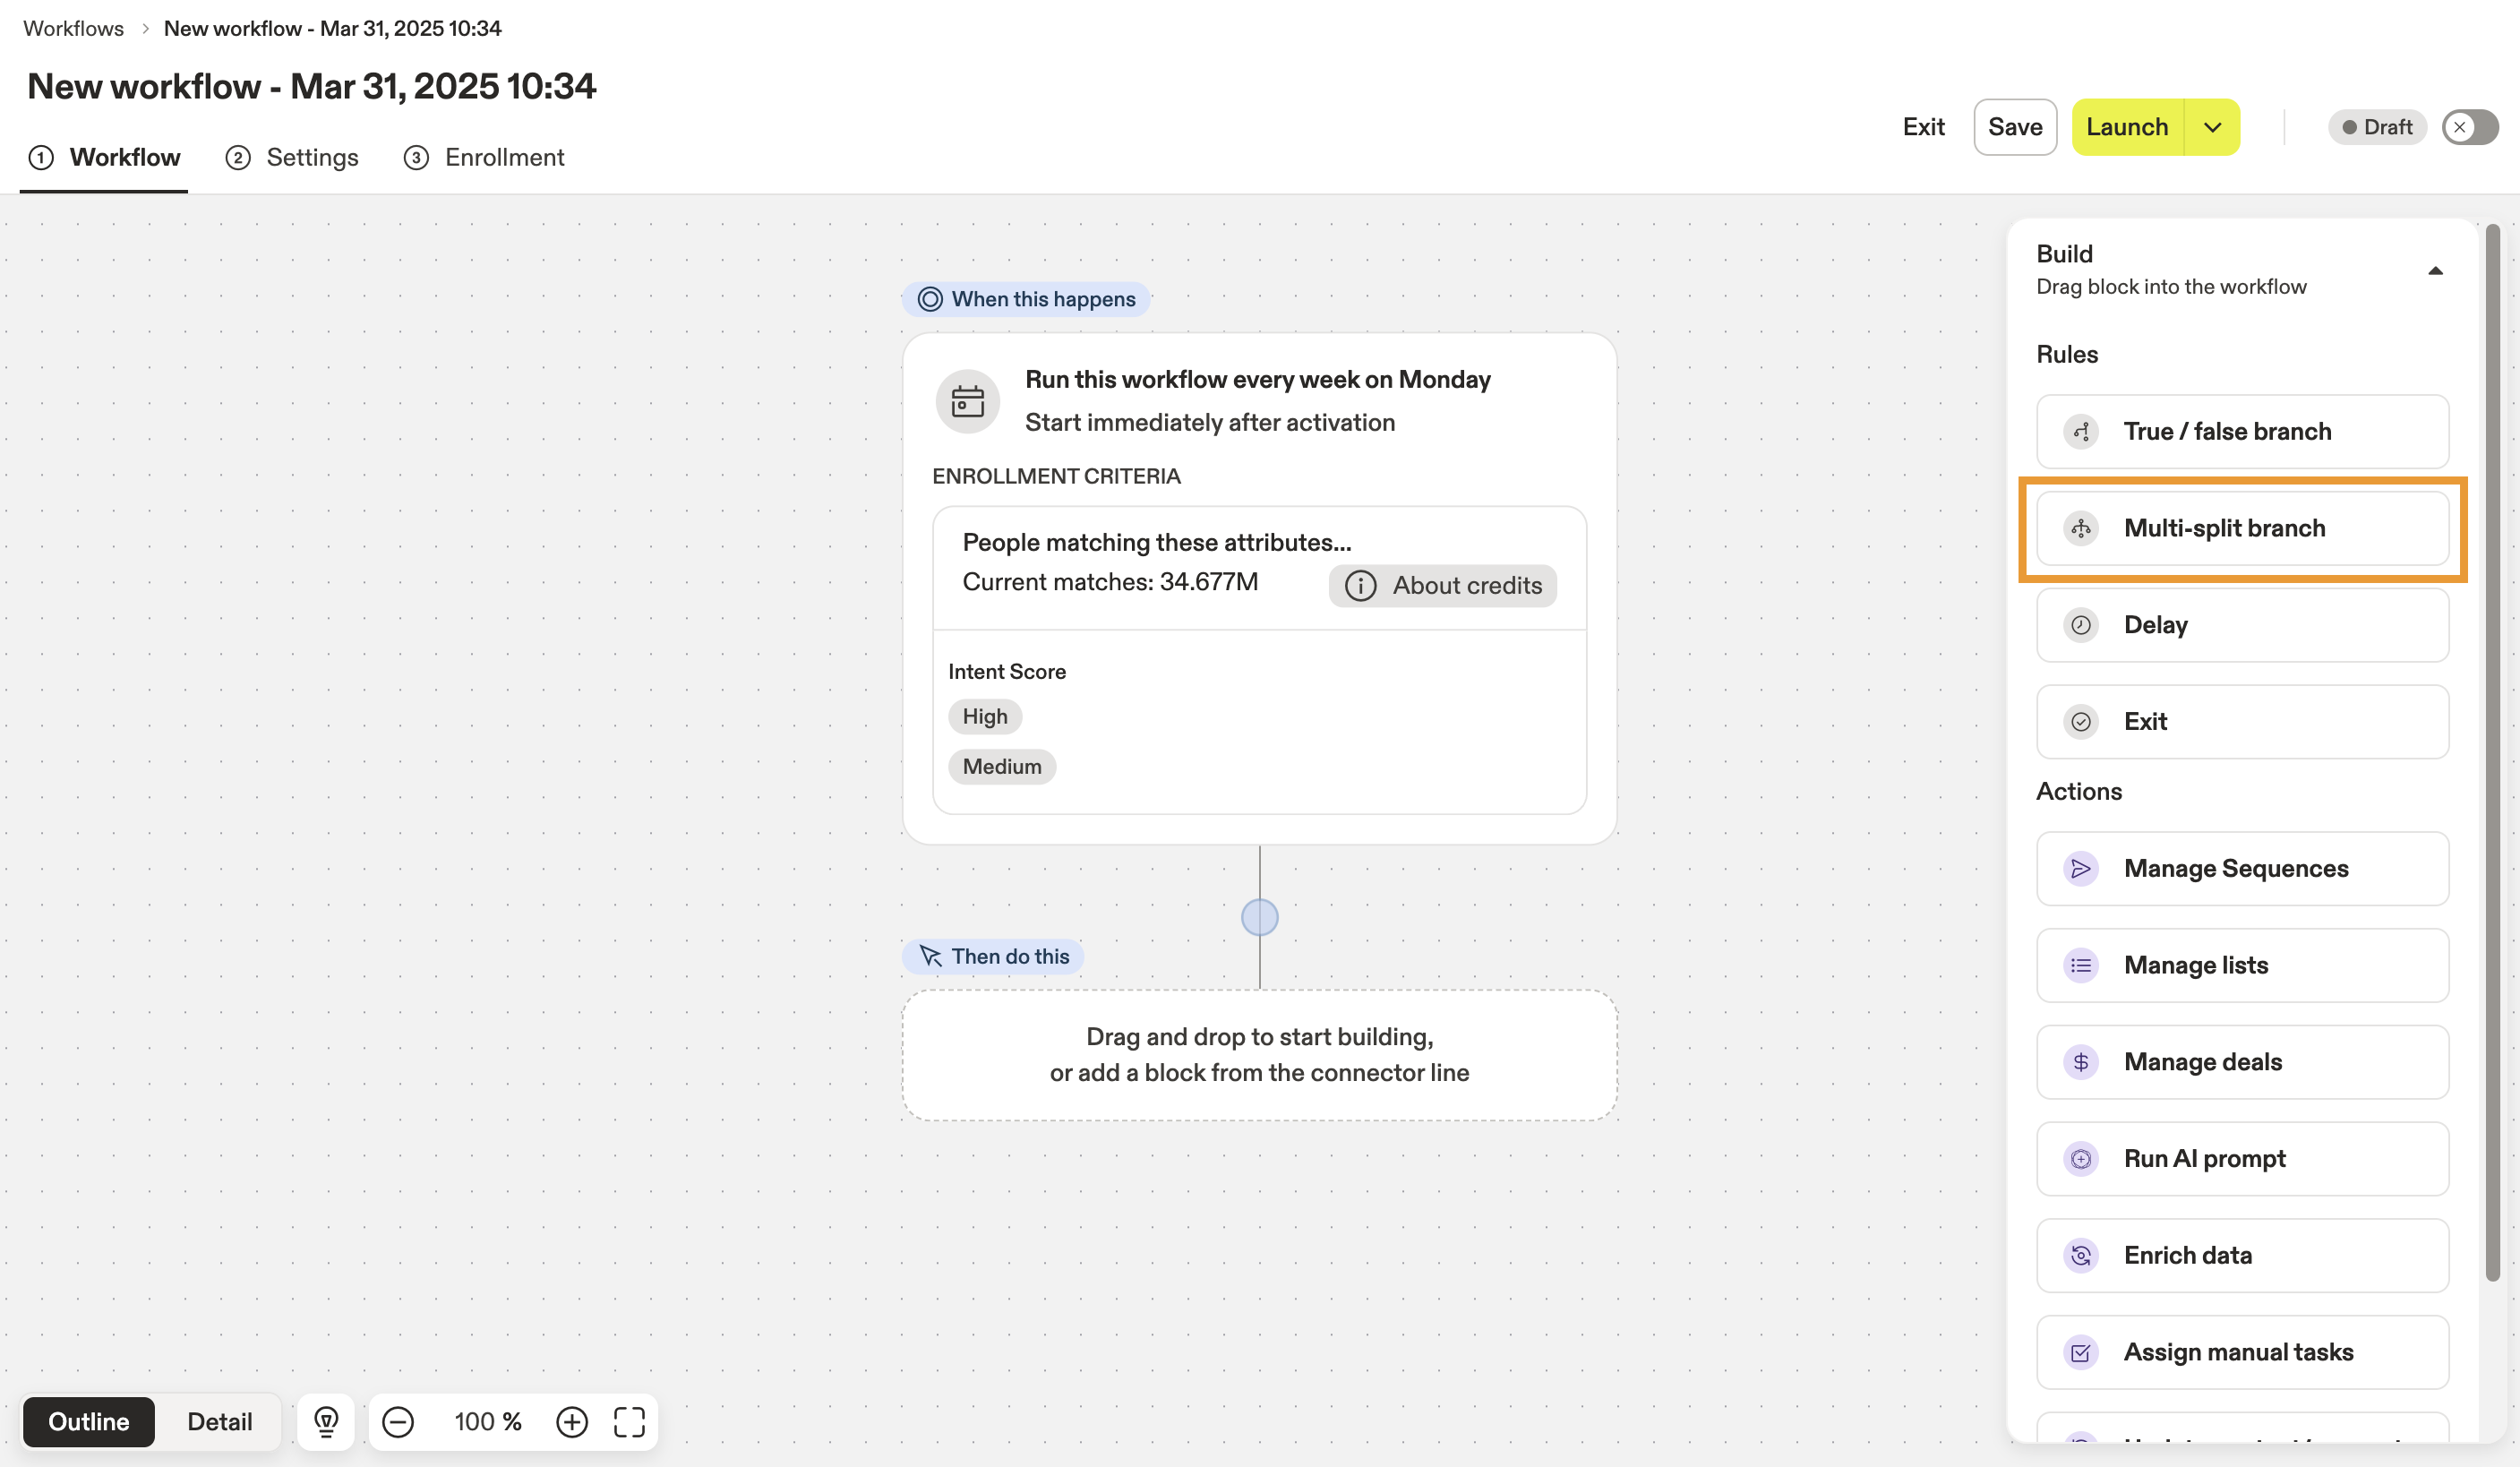
- Add a Multi-split branch block to the workflow.
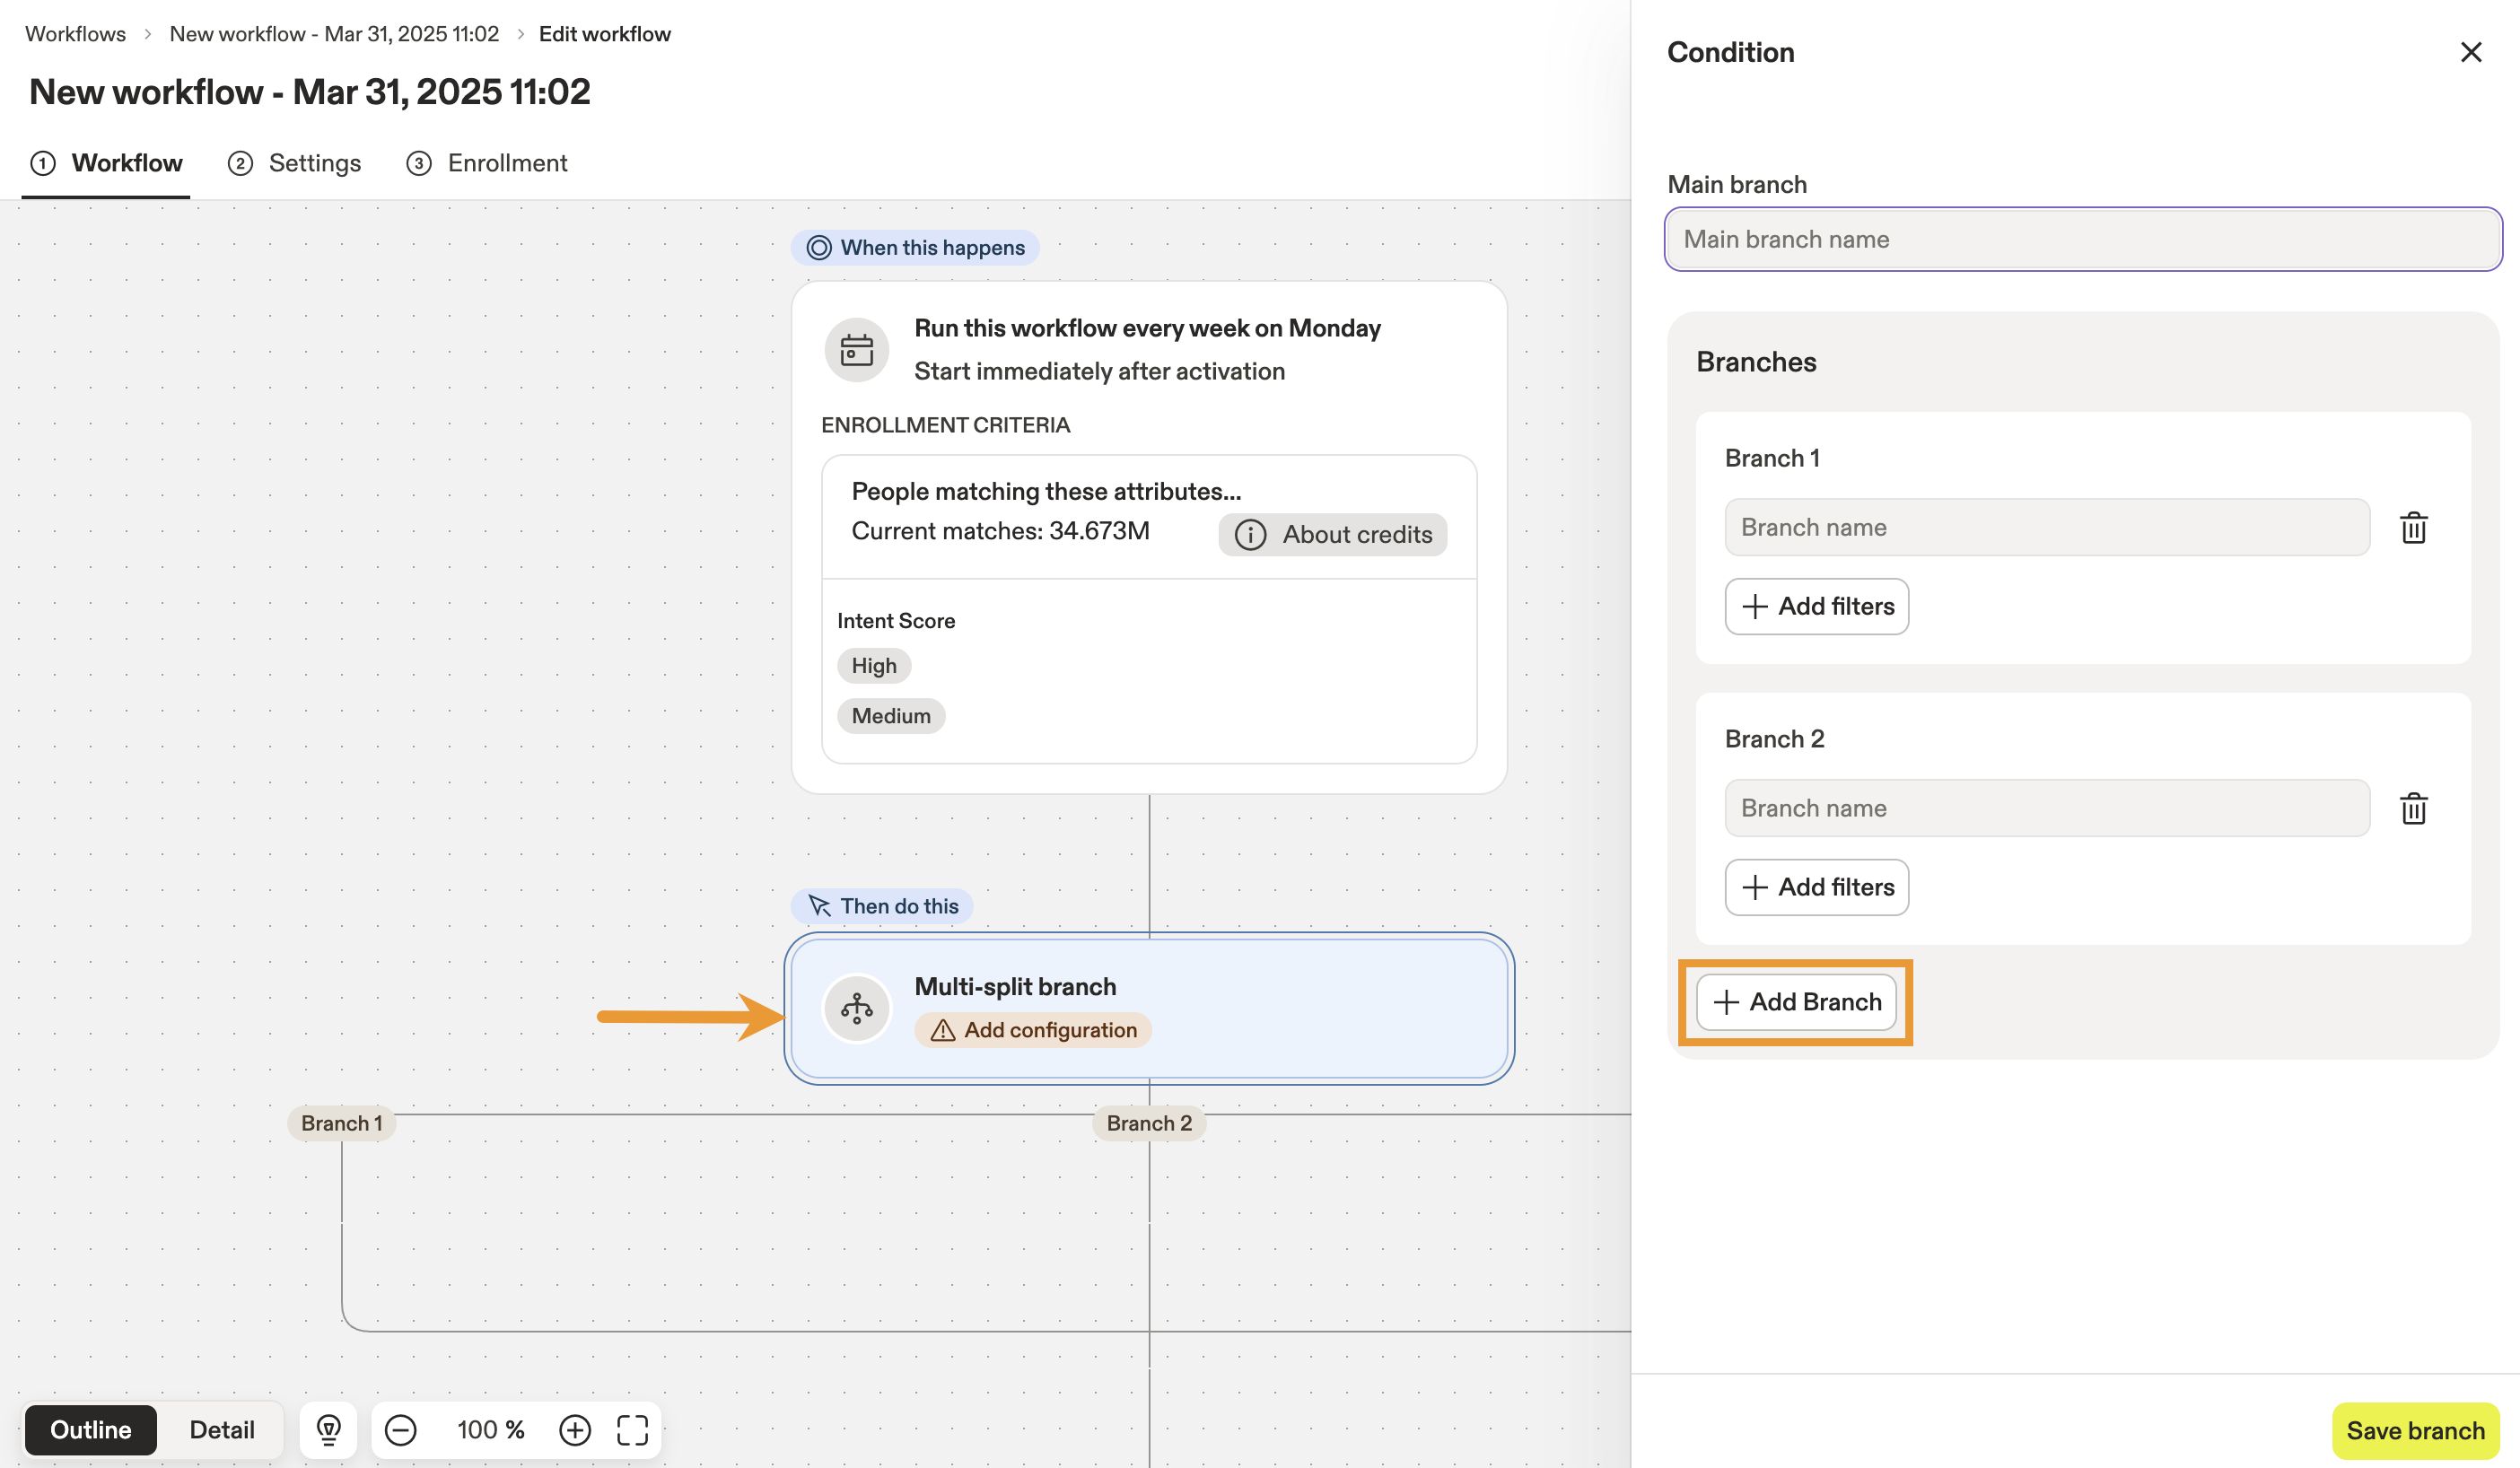
- Click the Multi-split branch block to configure it. Then, click Add Branch to add a third branch to the block.
- Click Add filters to define the enrollment criteria for each branch. Targets that match a branch's filters will be processed by the branch.
TheElsebranch is automatically created by Apollo, and will enroll all targets that do not meet the criteria defined in your other branches.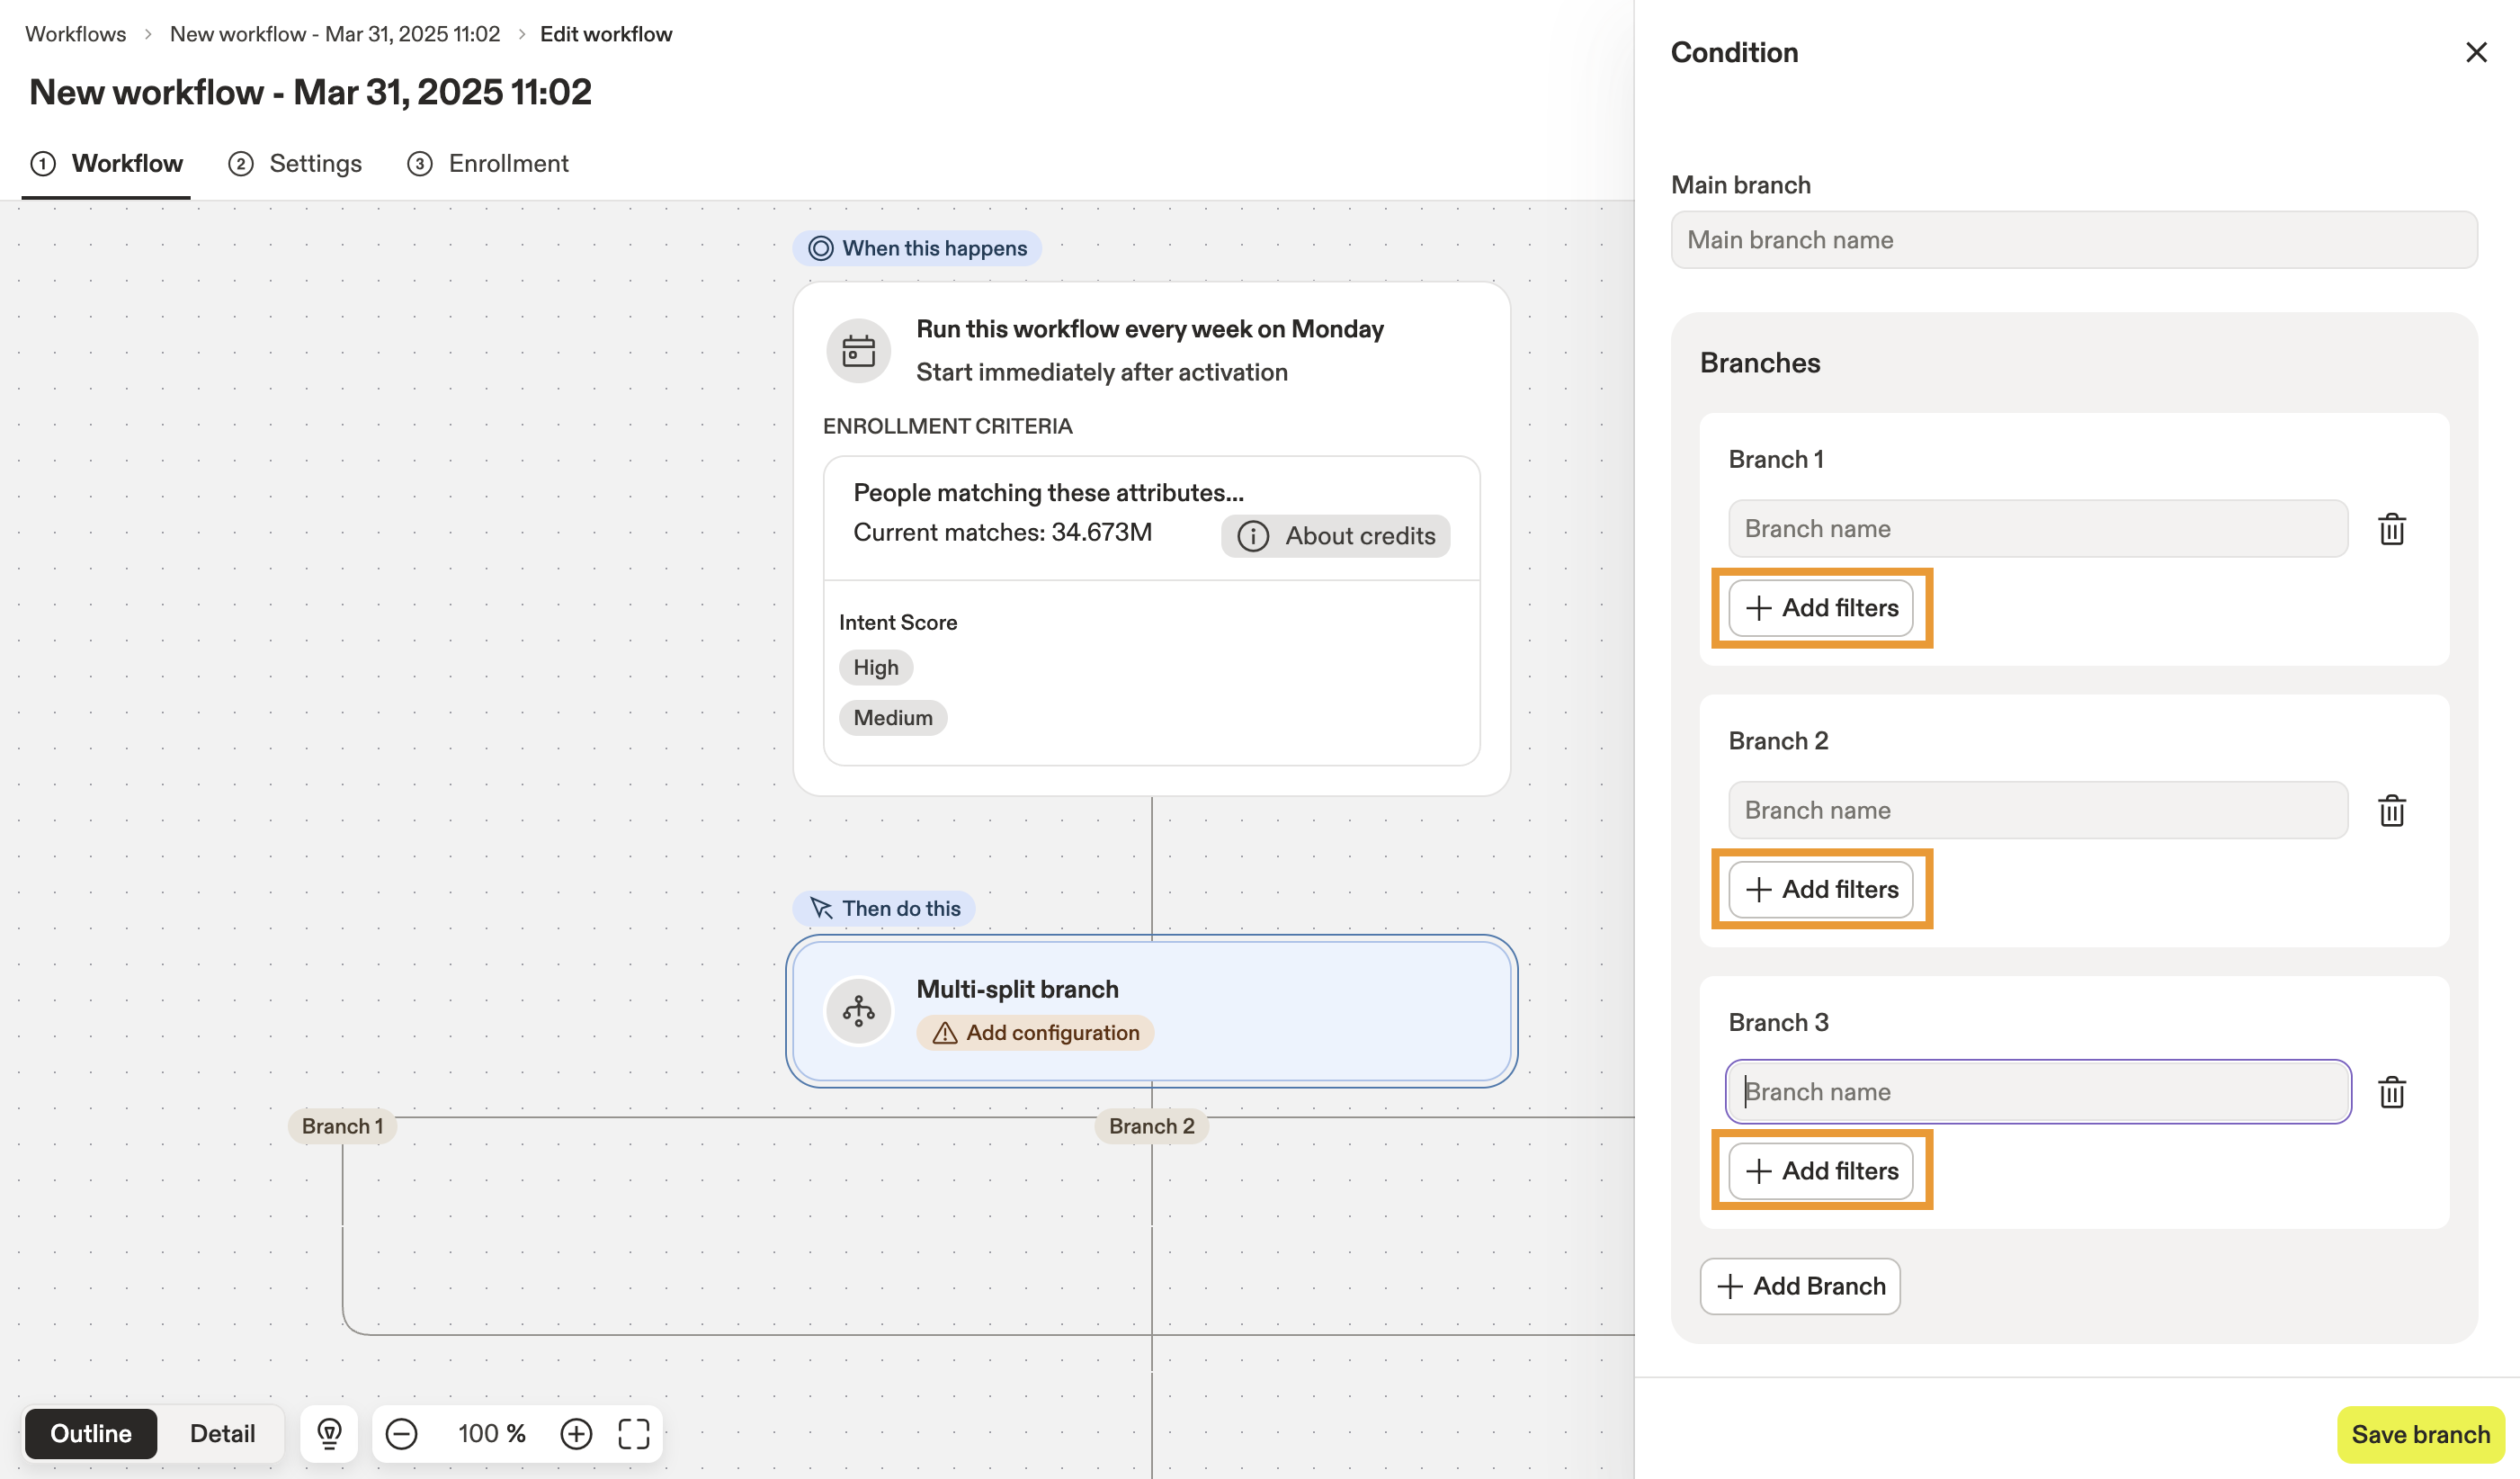
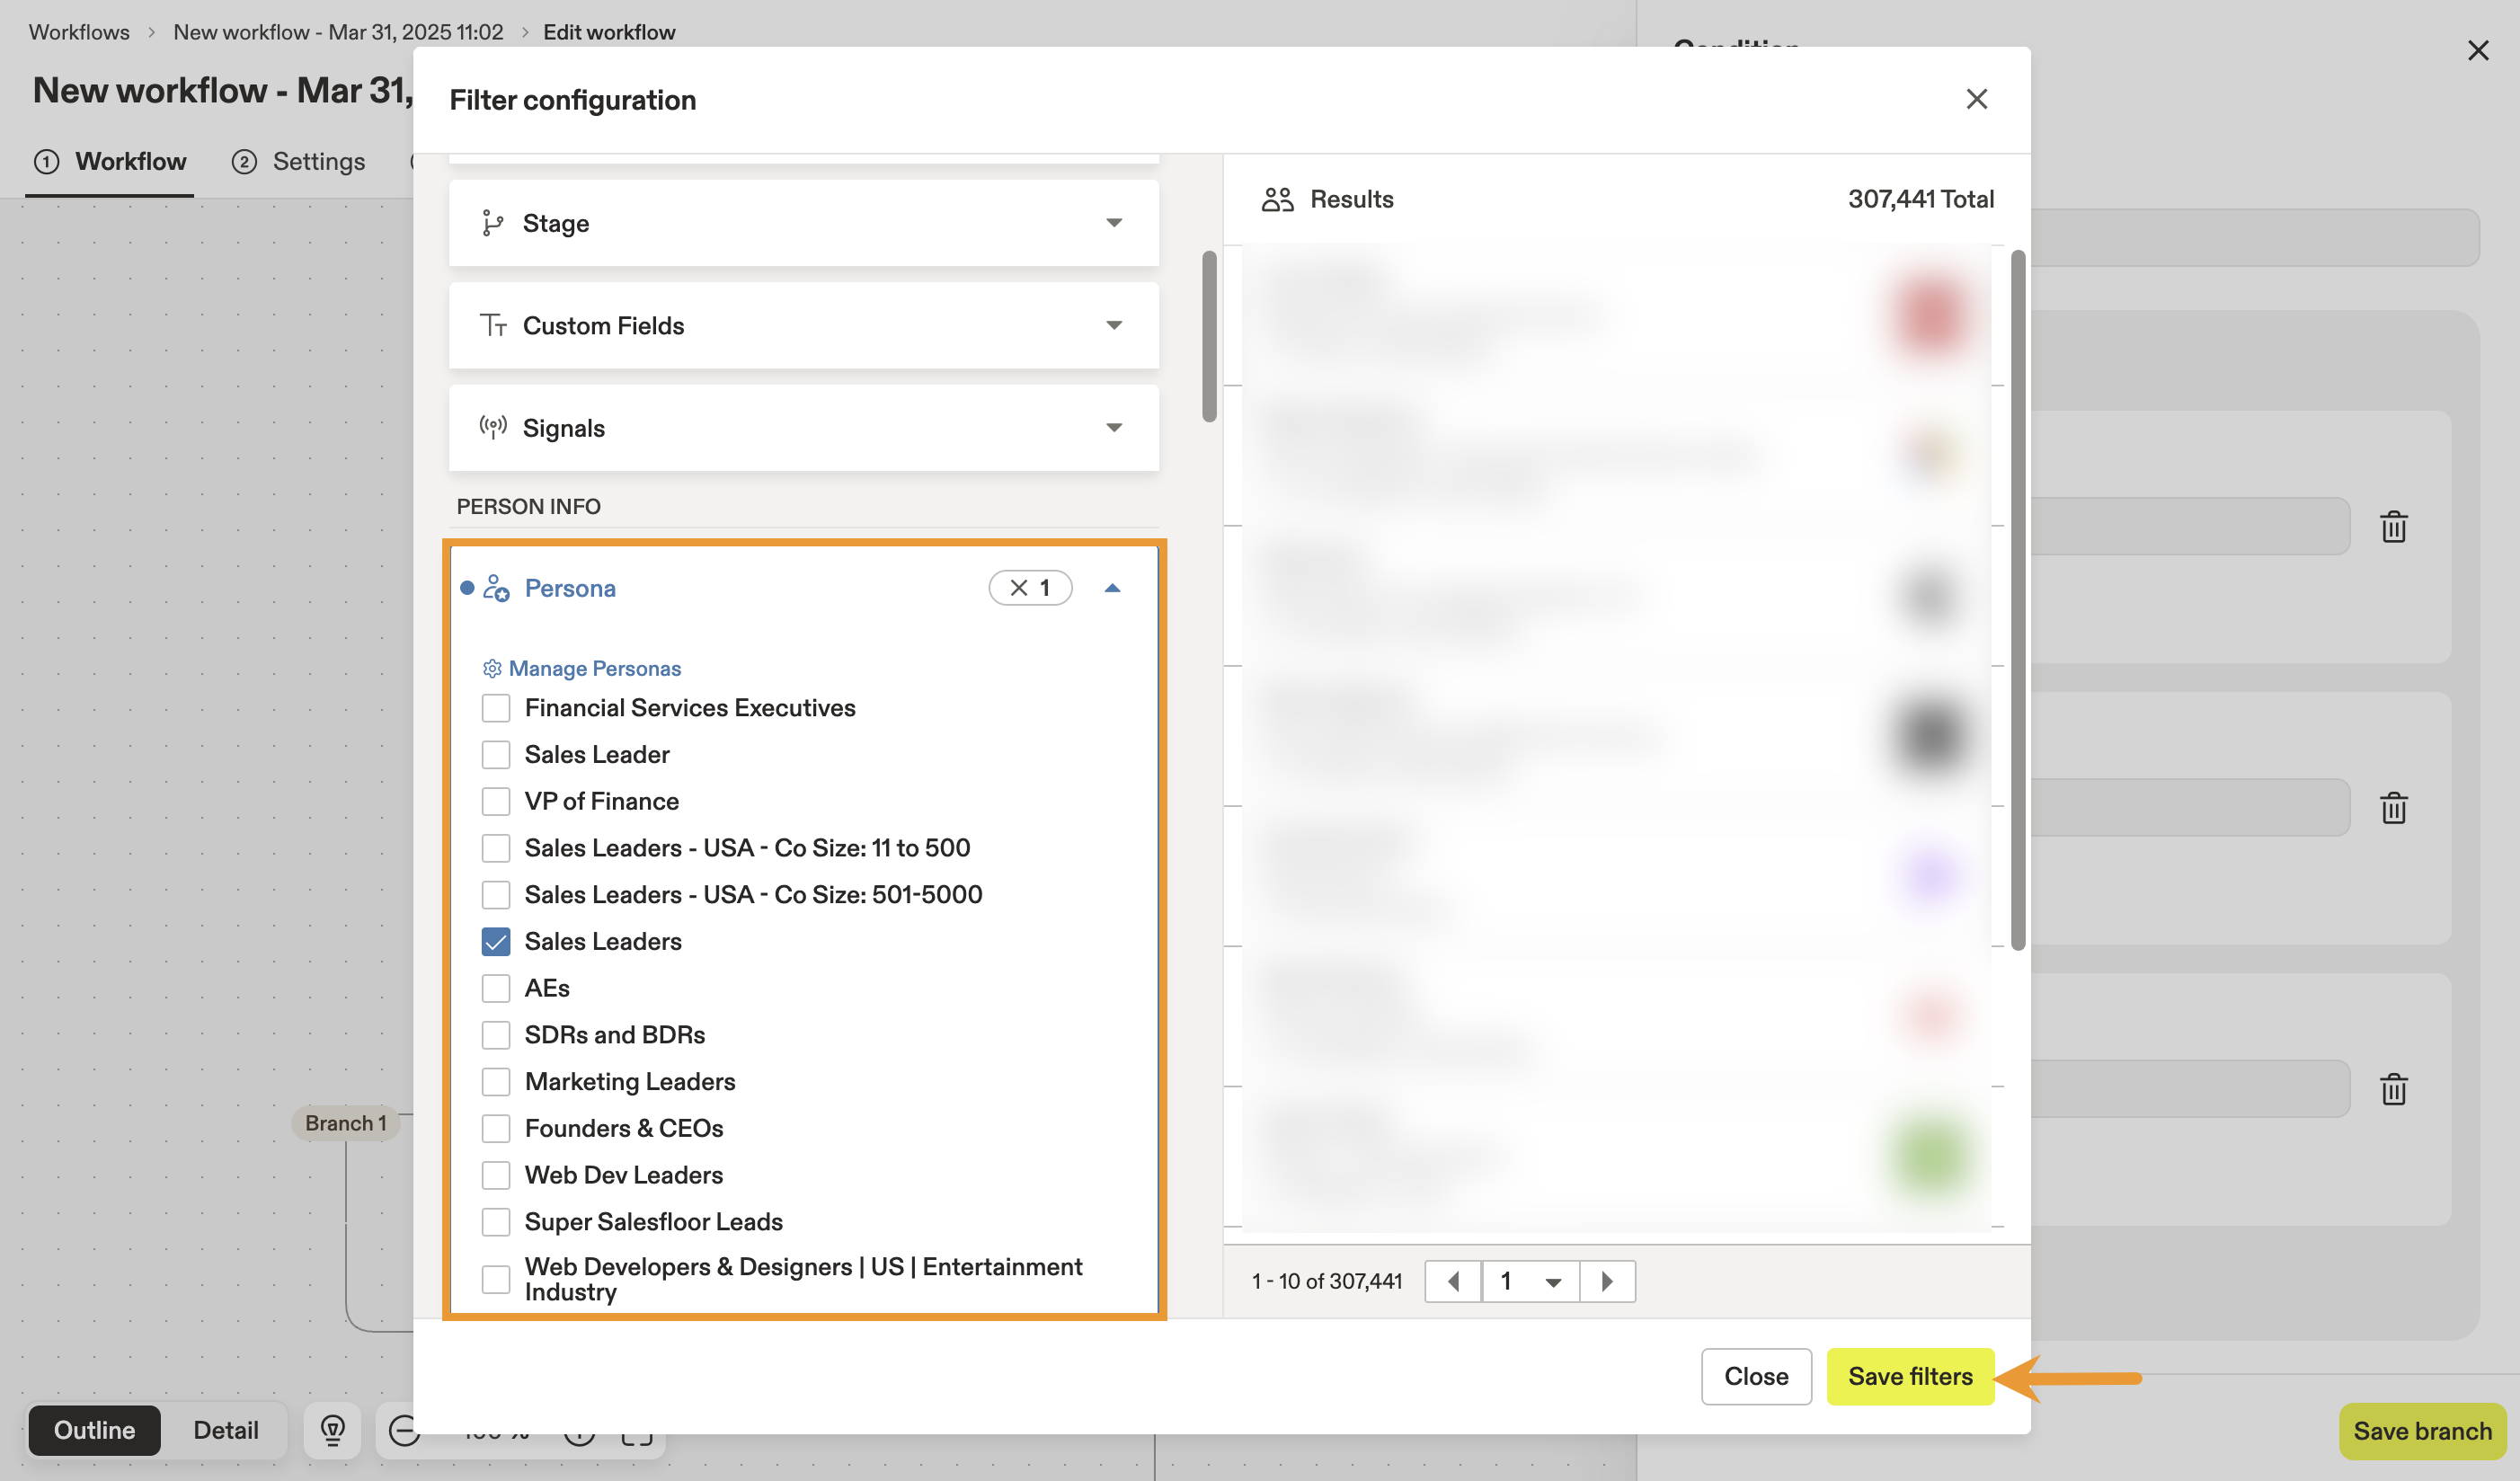
- Open the Persona filter and click the checkbox for the persona you want to use for the branch. Then, click Save filters.
- Repeat the previous step to apply the Persona filter to each of the other branches.
- (Recommended) Name both the main branch and each individual branch. Using a clear naming scheme makes it easier for you and your team to understand which filters have been applied to the workflow's branches.

- Click Save branch.
You've now added multi-split branches to target personas.
Step 3: Feed Leads into Multi-touch Sequences
Never created a sequence in Apollo? Check out Create a Sequence to get started.
Apollo already created some sequences to specifically target the leads in this scenario. You can create sequences while building the workflow.
You've automated your lead prioritization using this workflow. Now, you can automatically start your outreach by adding your leads to the appropriate sequences:
- Add a Manage Sequences block to each branch.
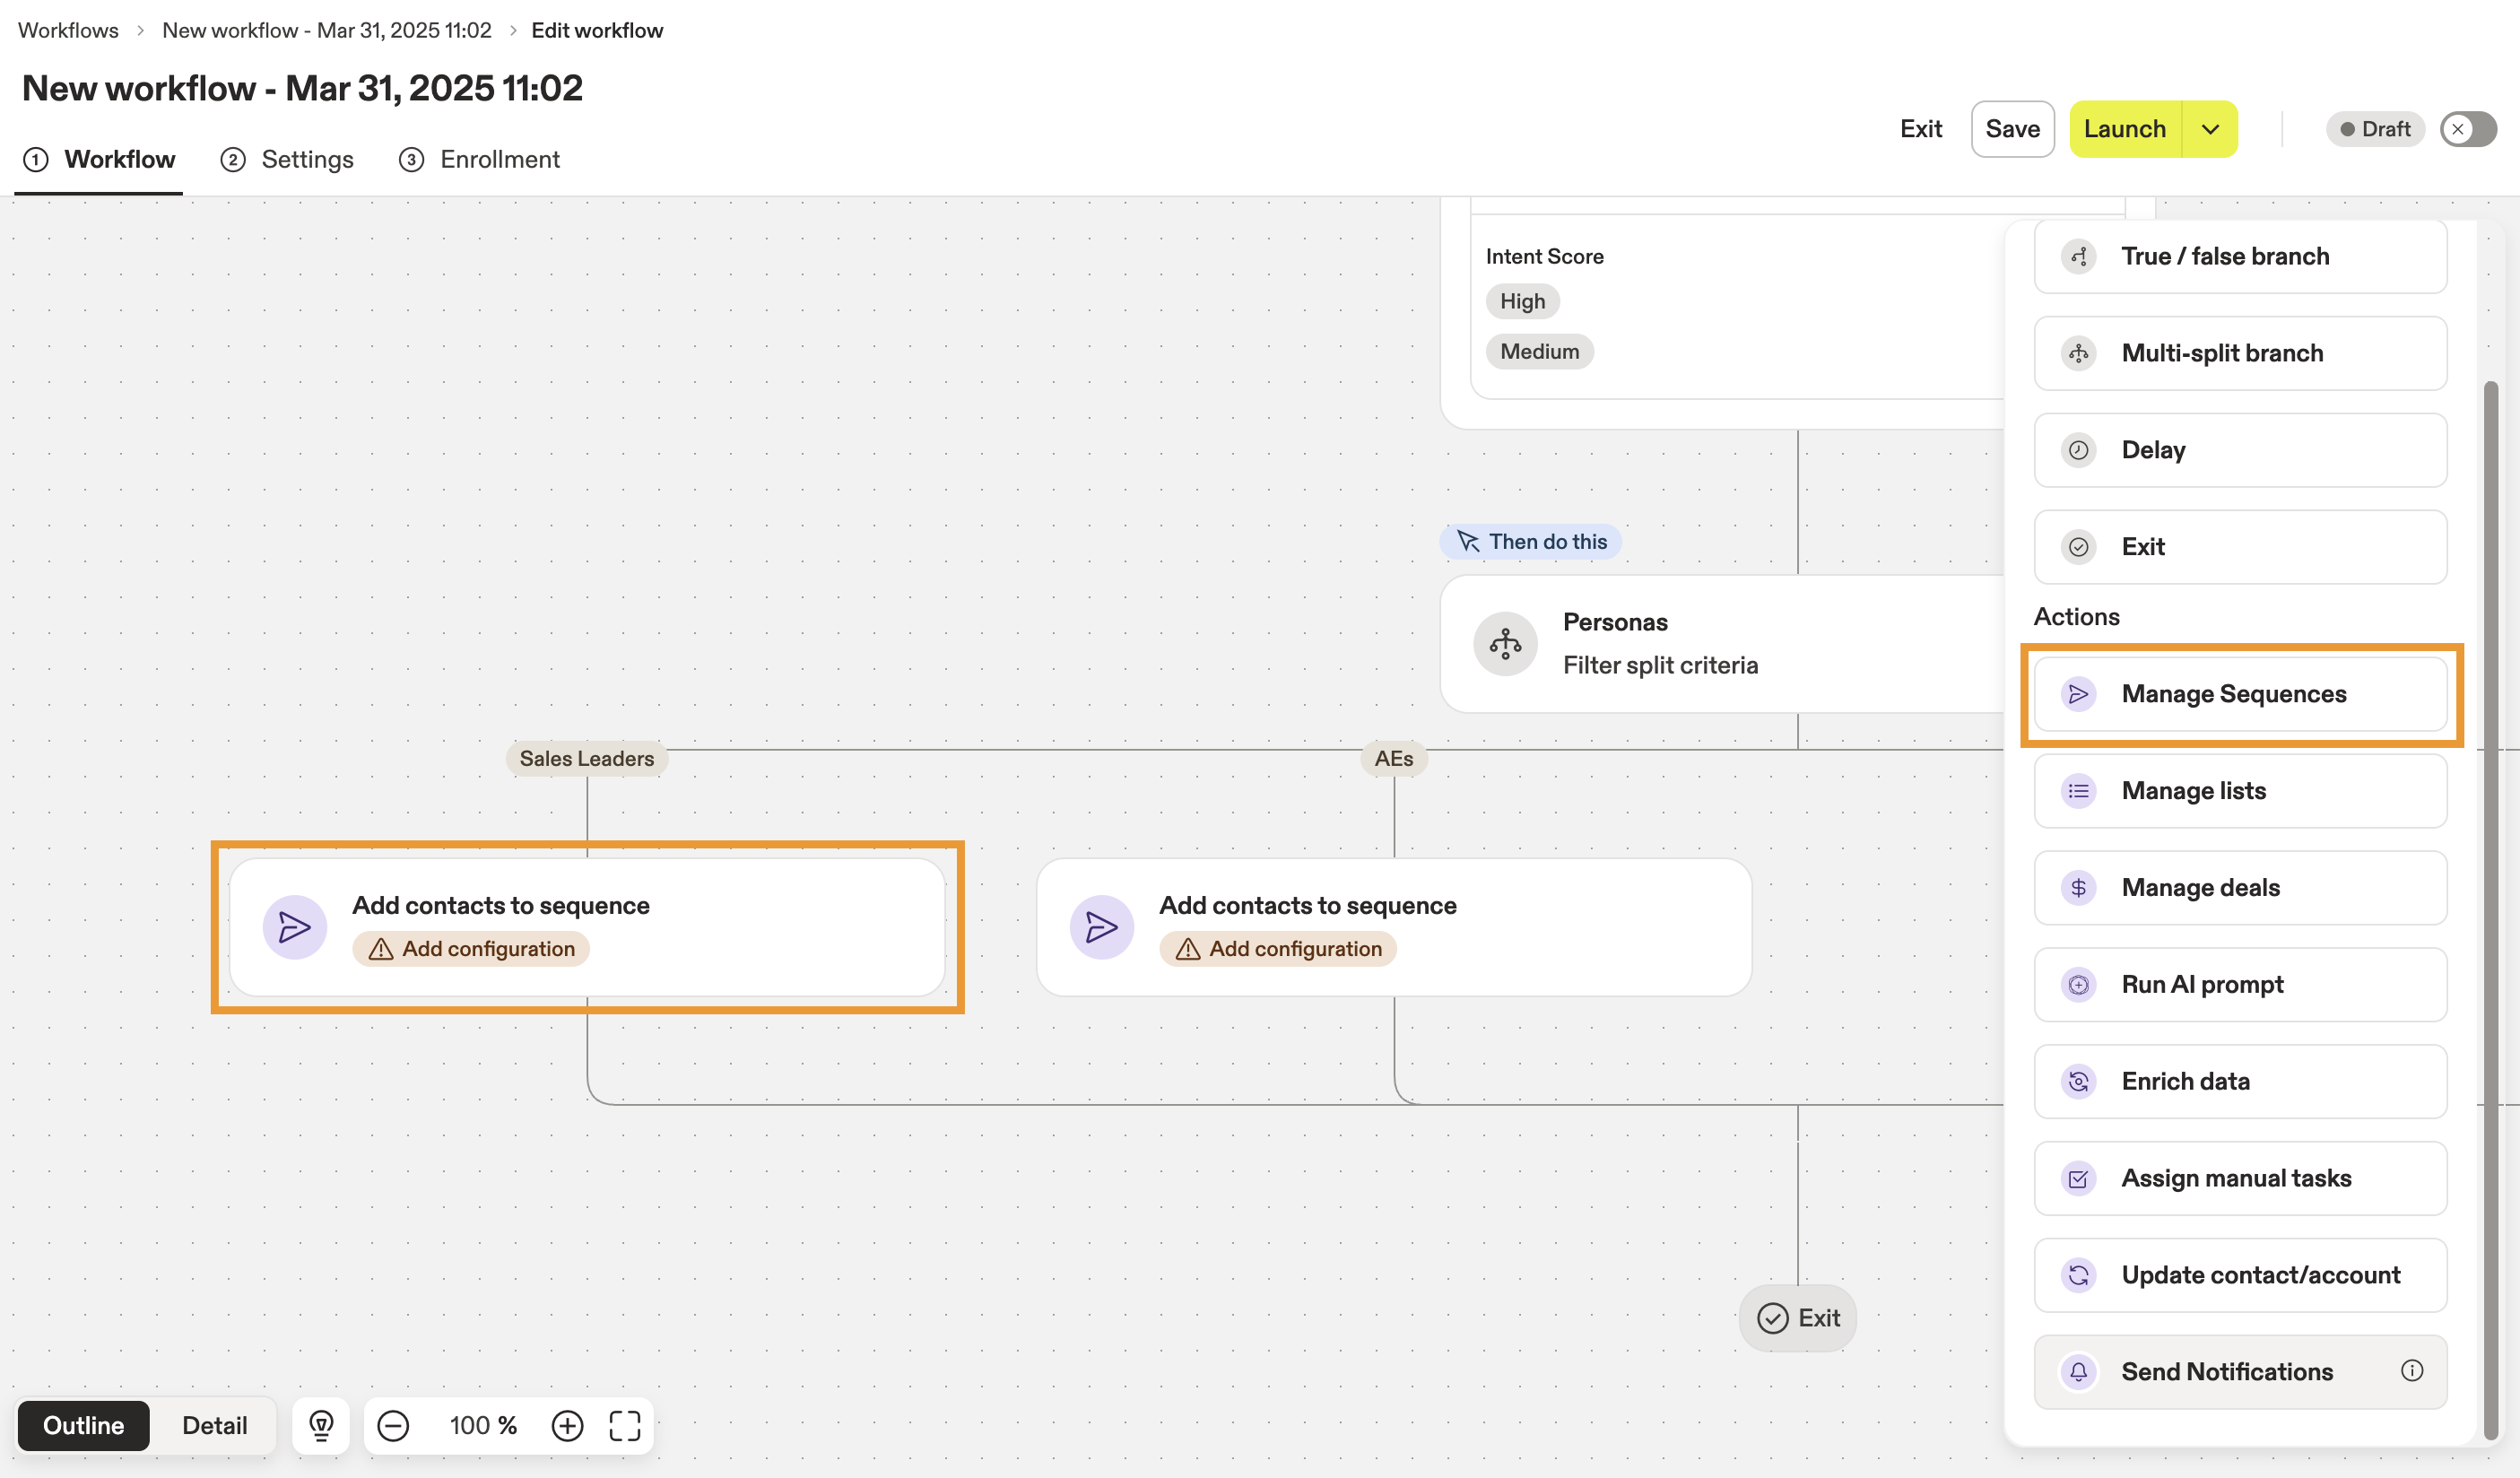
- Click a Manage Sequences block to configure it. Then, click Add contacts to sequence.
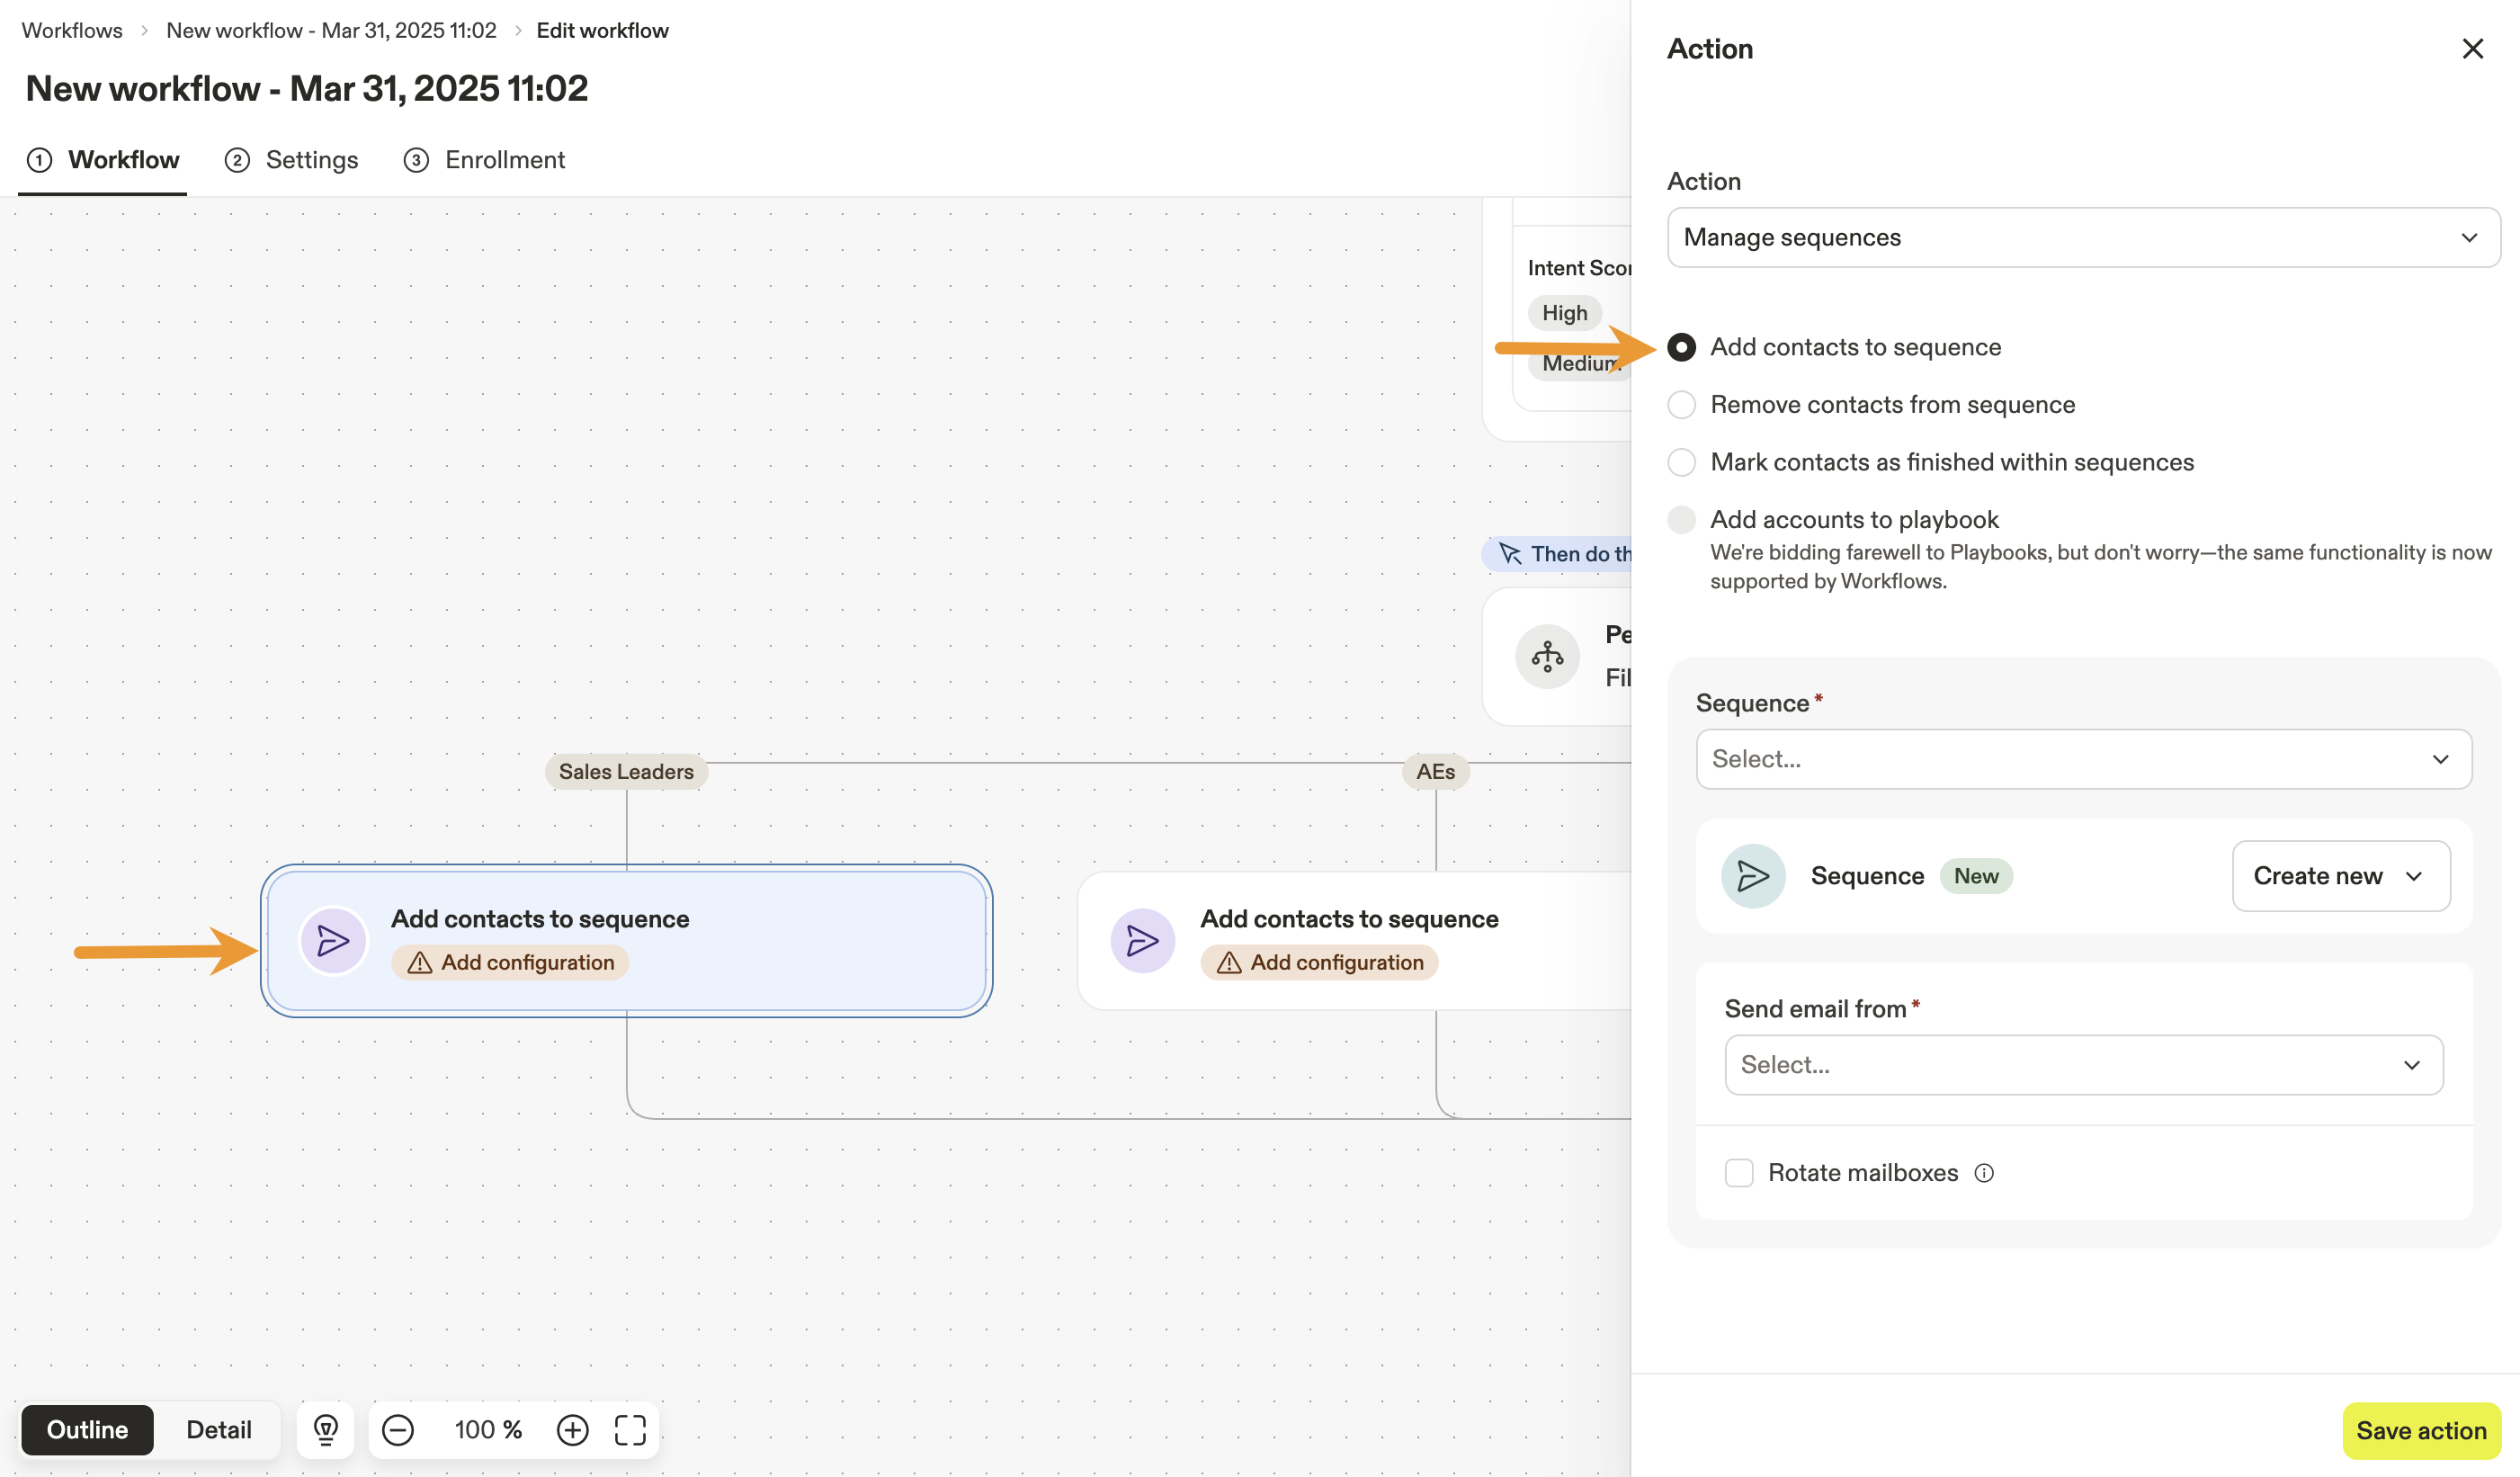
- Choose the sequence you want to use for the leads that match the branch's filters. For this scenario, Apollo has created sequences based on each of the 3 personas being targeted and the phone status of each persona.
Click the Send email from drop-down to choose the user inboxes that should be used to send emails for the sequence. Then, click Save action.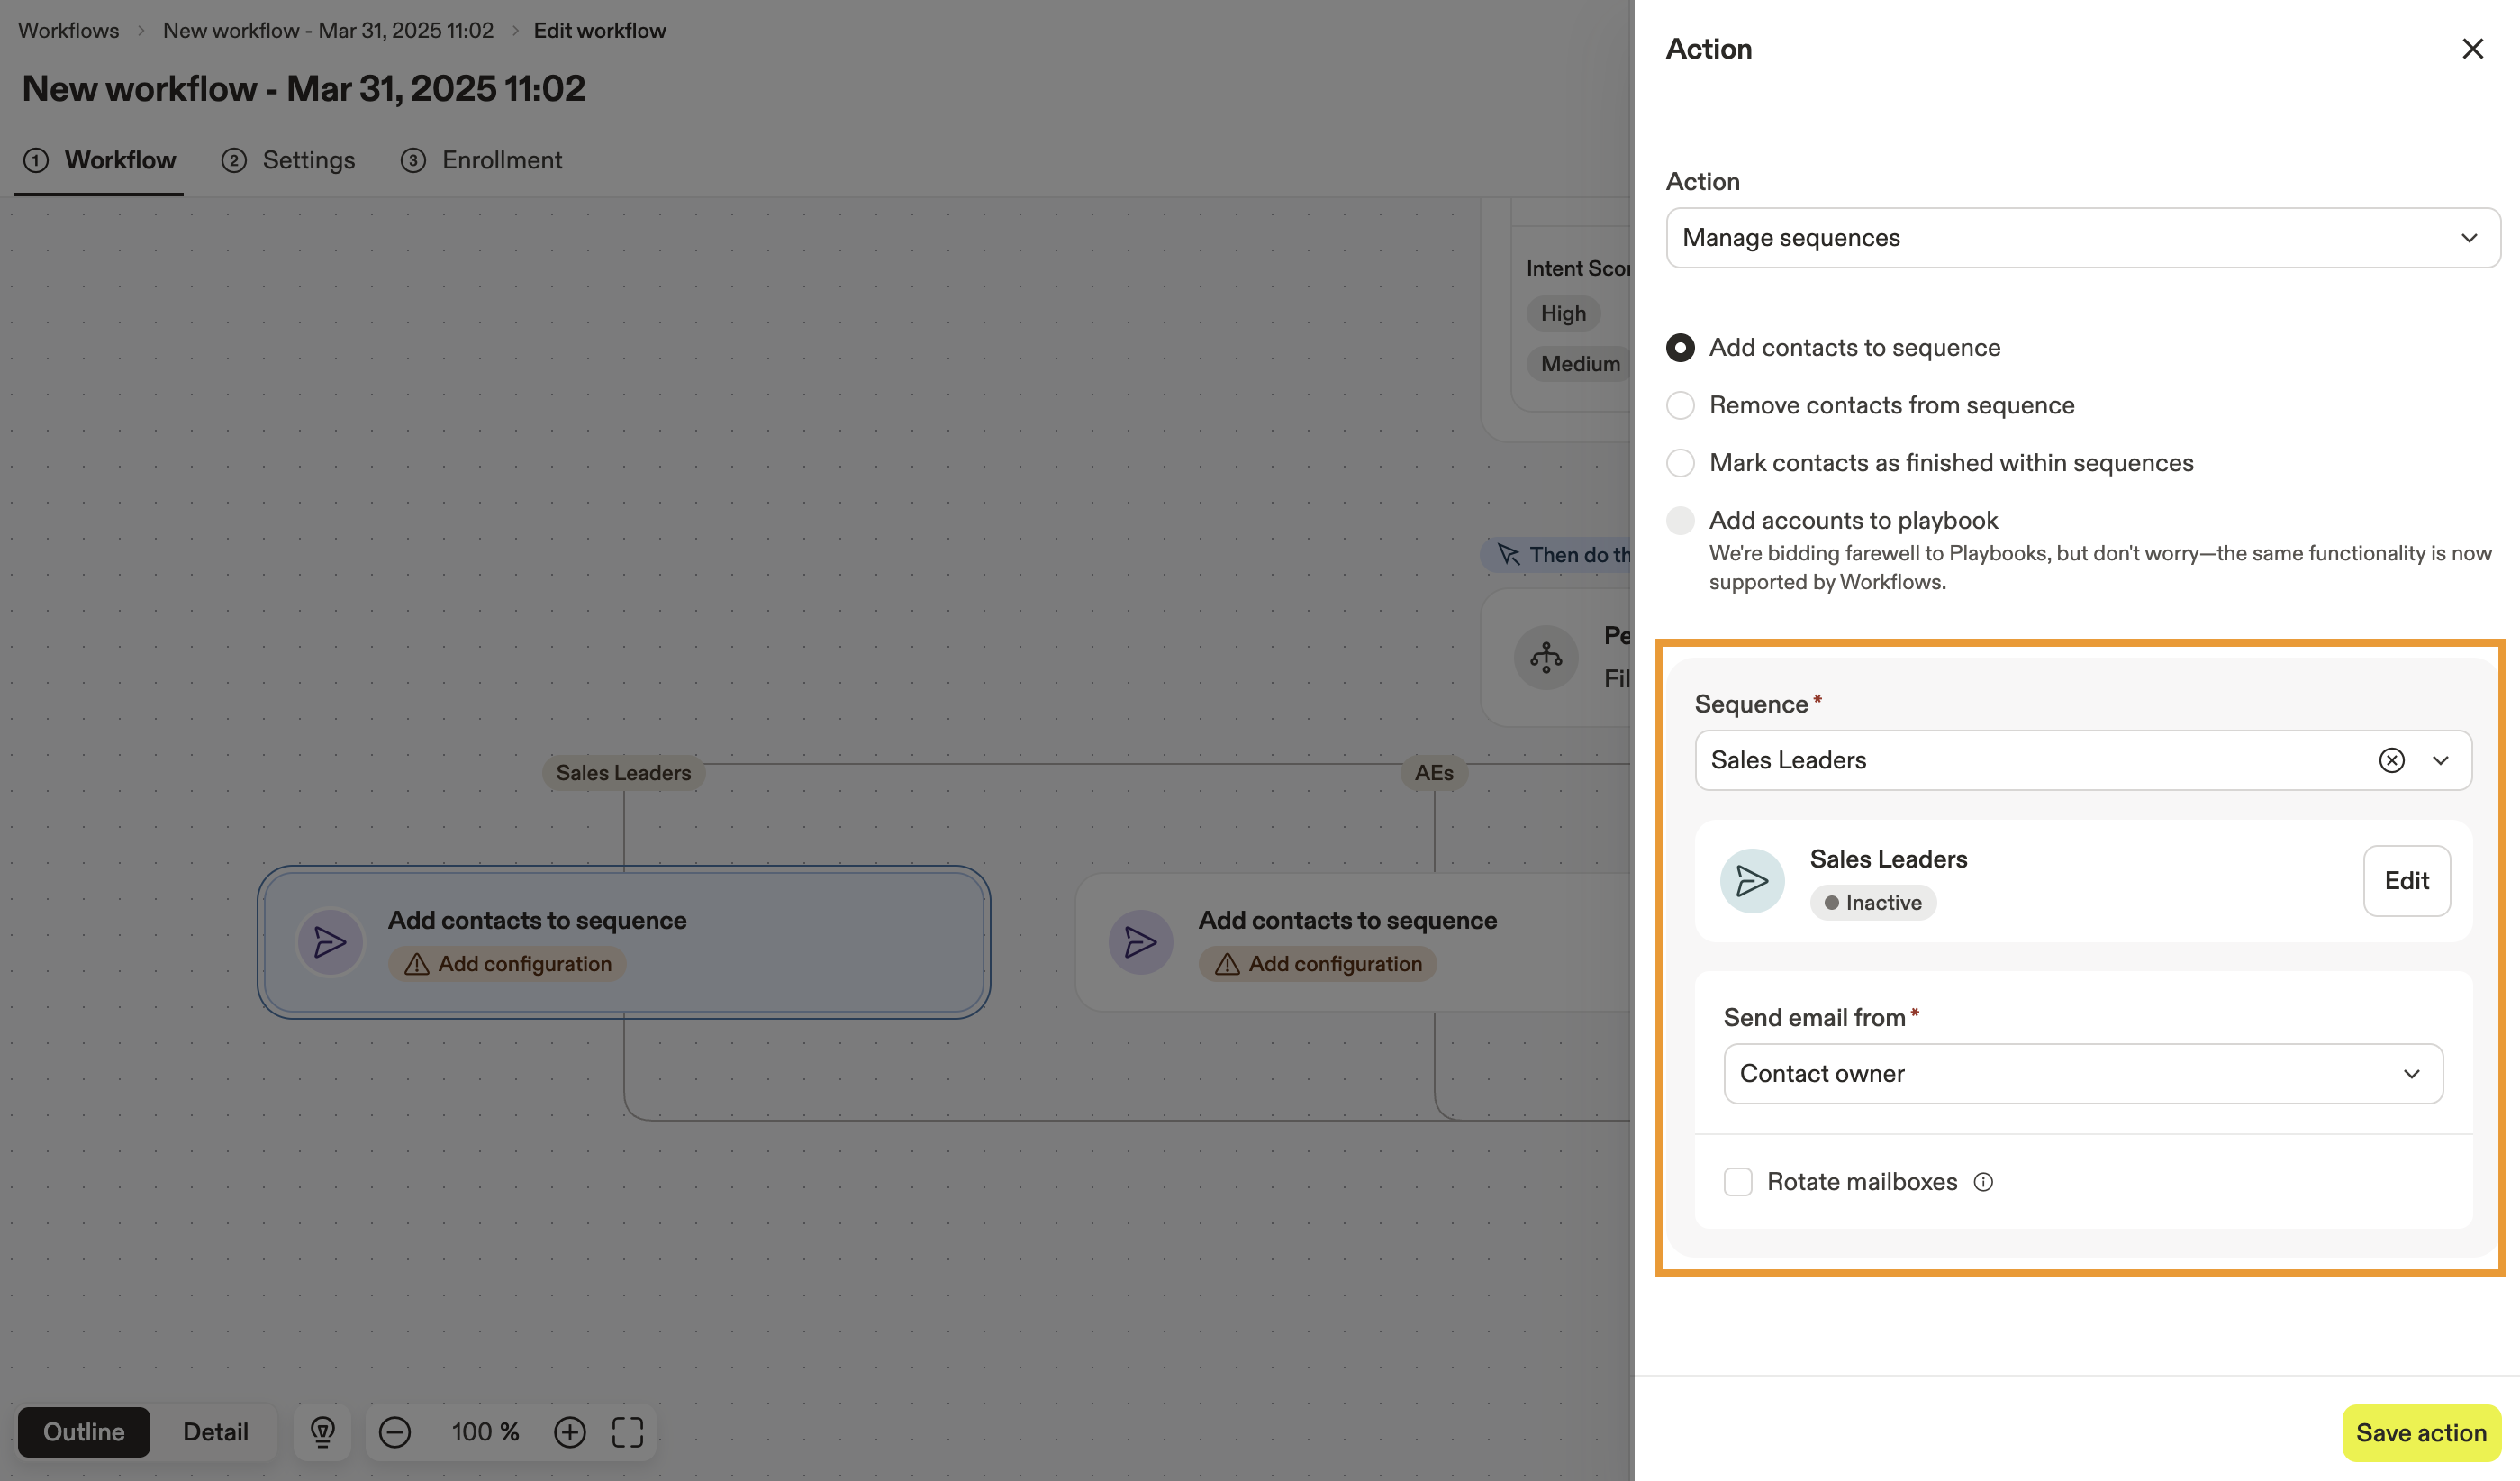
- Repeat the previous steps to add the Manage Sequences block to each of the true / false branches.
You've now added sequences to target the leads surfaced by the workflow. Next, finalize the workflow by defining the re-enrollment criteria.
Step 4: Finalize and Activate the Workflow
The re-enrollment criteria for a workflow defines how often targets should be eligible to be processed again by the same workflow. You should set re-enrollment criteria to avoid contacting the same leads too often.
To set the re-enrollment criteria for the workflow:
- Click the Settings tab.
- In the Re-enrollment section, choose how often targets are eligible for re-enrollment. In this scenario, Apollo is making targets eligible for re-enrollment once every 6 months.
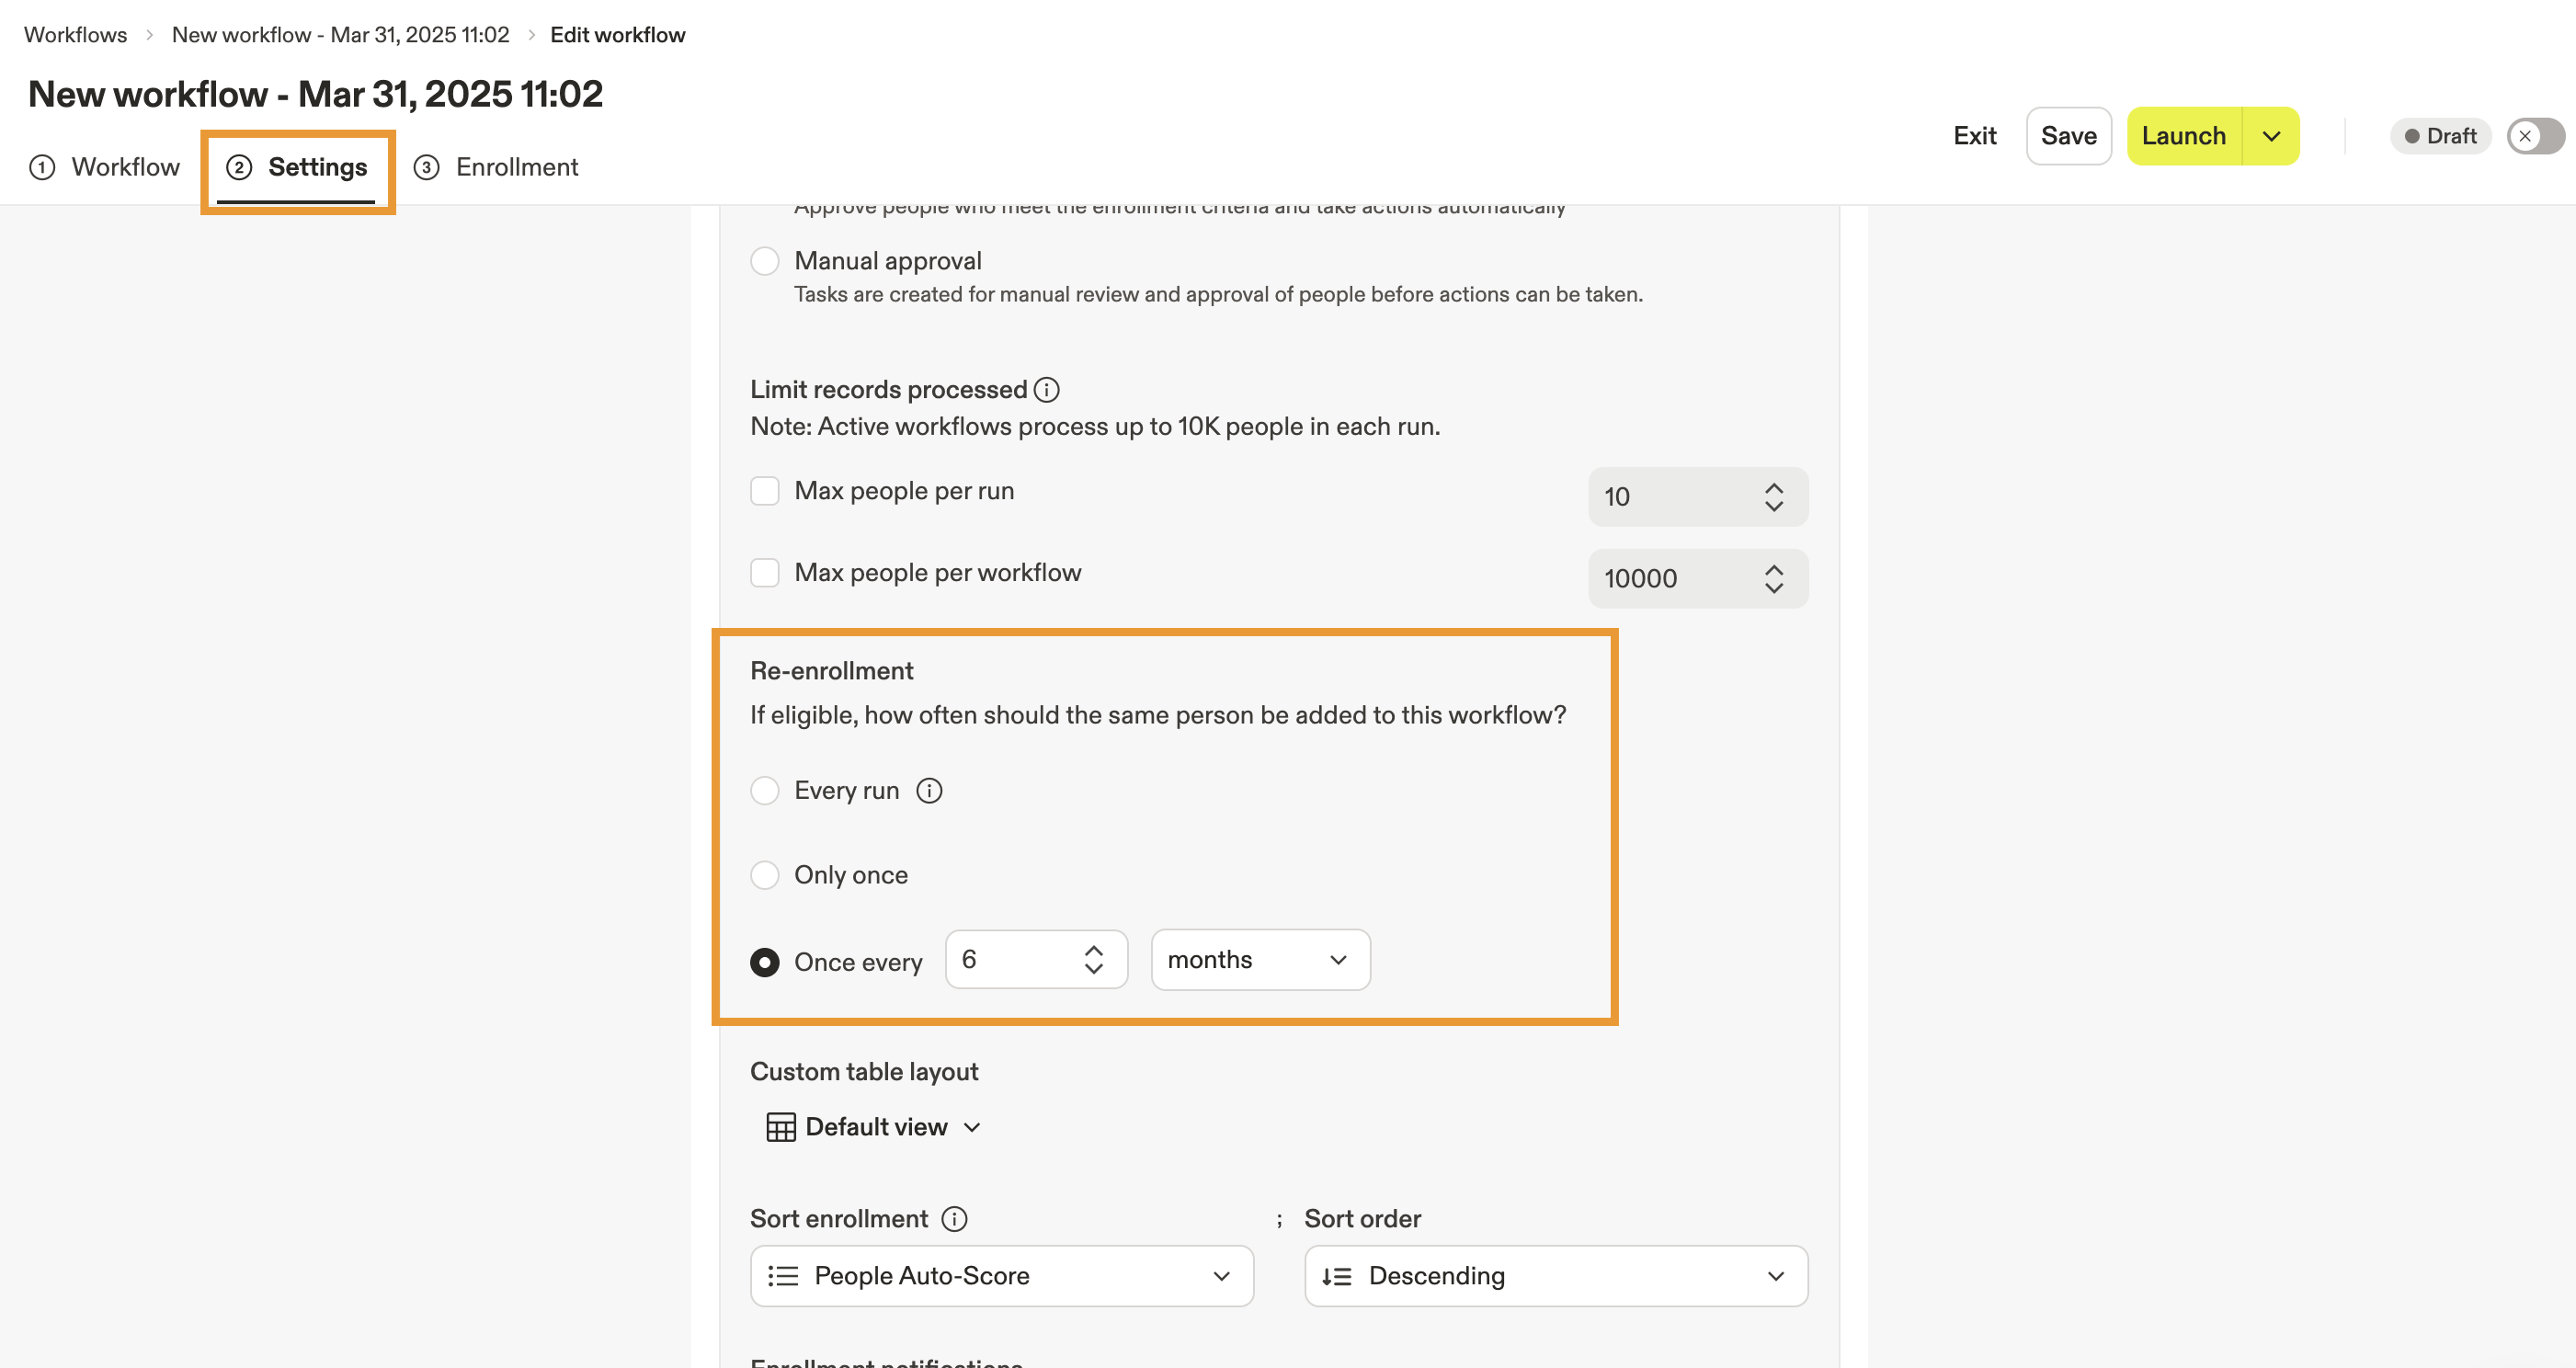
- Click Save.
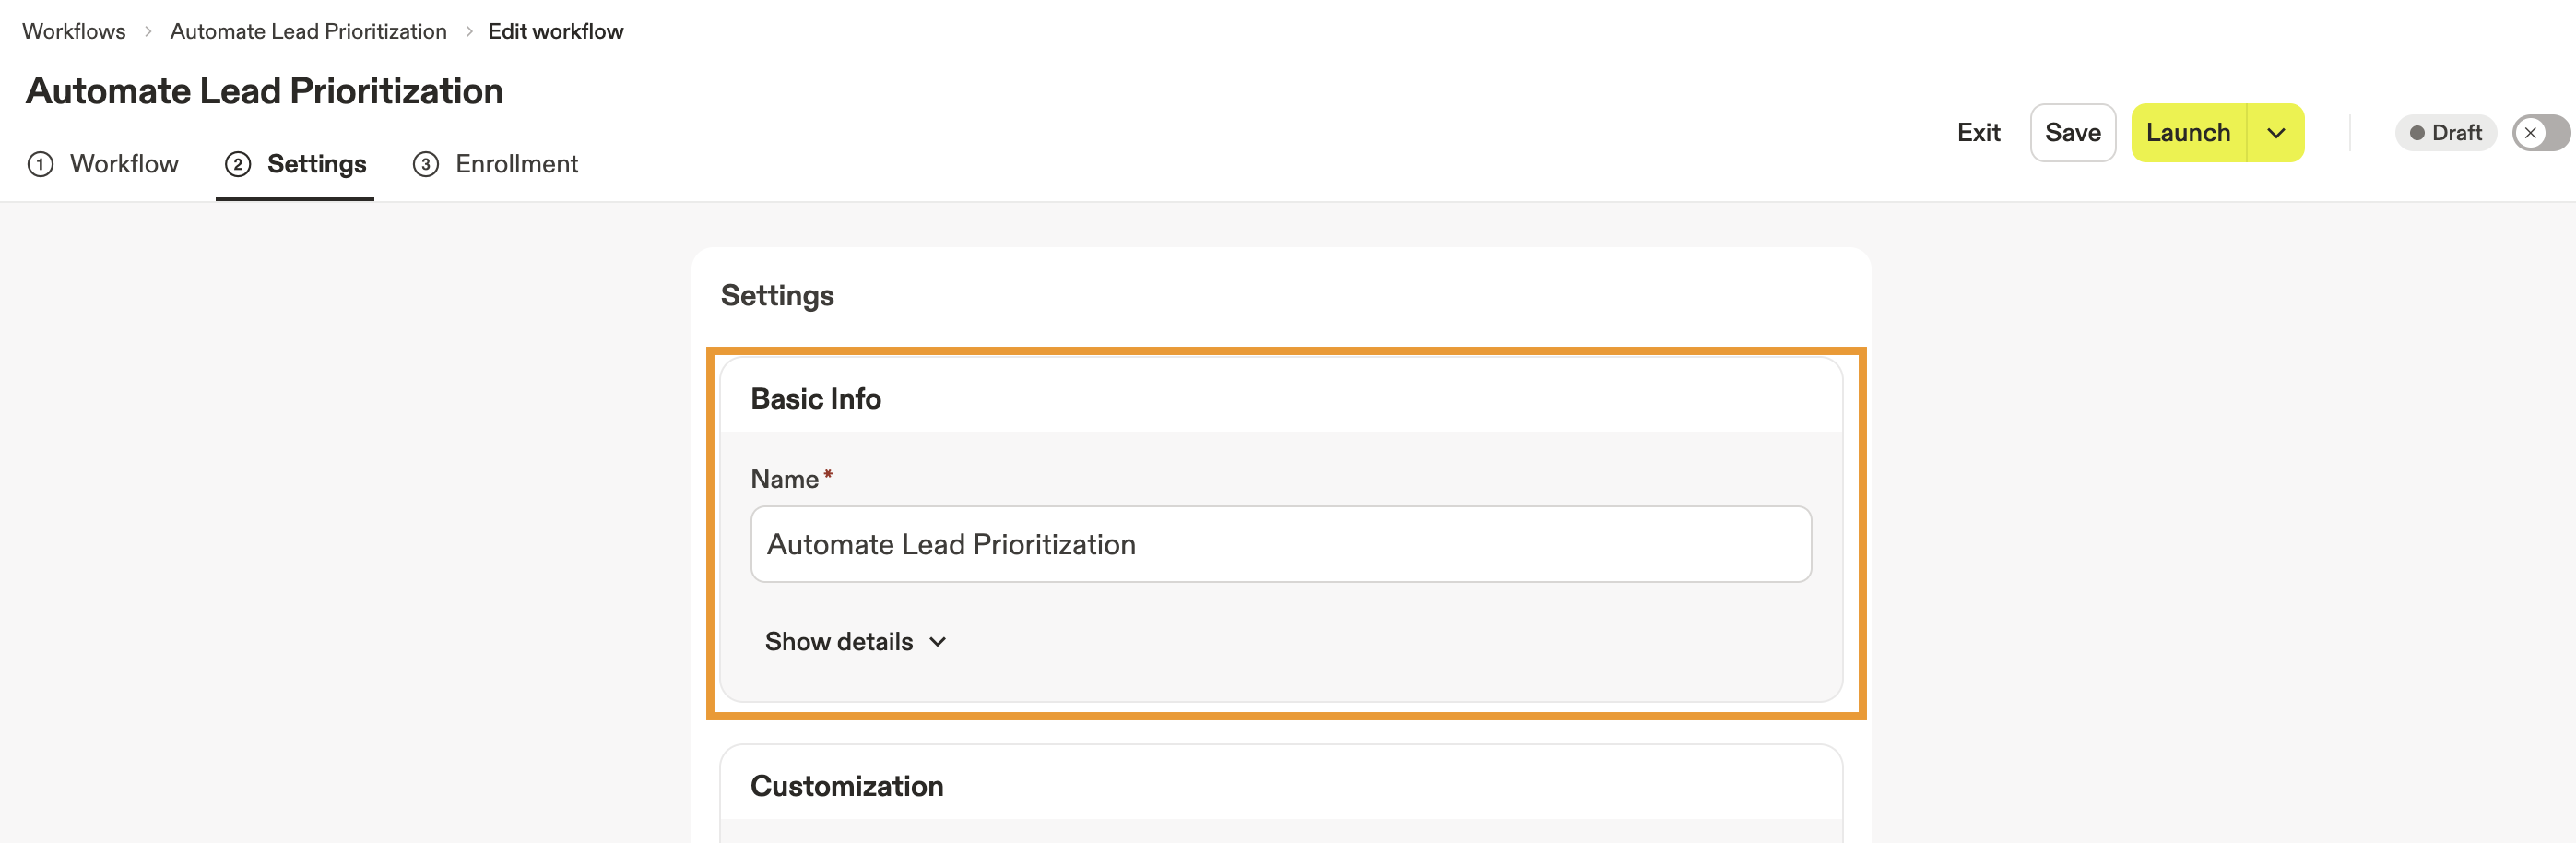
With the re-enrollment criteria added, you're ready to publish the workflow.
To publish the workflow:
- Name the workflow.
- Click Launch to activate the workflow. To preview your workflow before fully activating it, click the Launch drop-down and choose how many targets to process during the initial run.
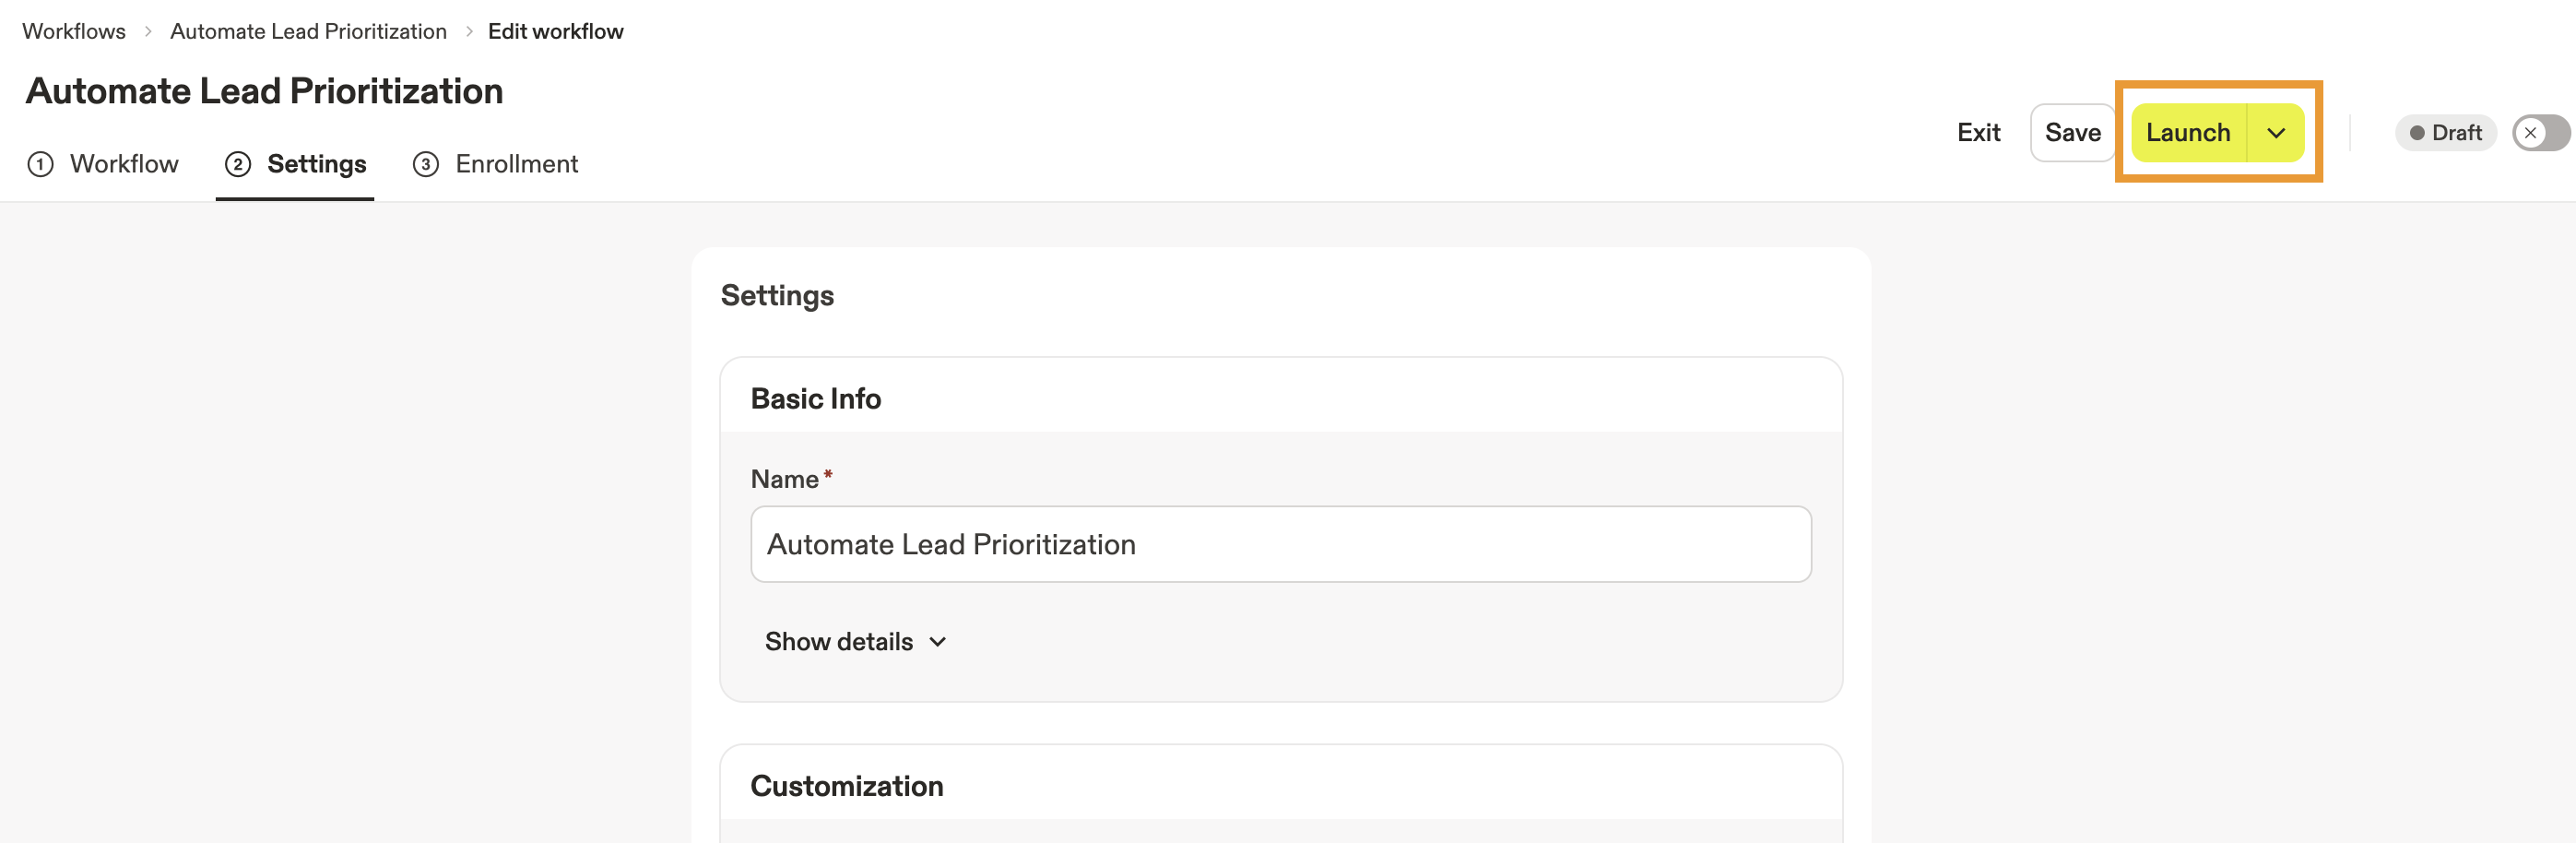
You've now launched the workflow. It will run based on the schedule you established in the enrollment trigger.
Learn More Apollo Automations
Ready to automate more of your sales workflows in Apollo? Check out these free Apollo Academy courses related to workflows and automations.