Overview
If you want to access your Zoom call recordings and leverage important meeting insights from within Apollo, you first need to set up Conversations.
There are 2 ways that you can execute the setup to ensure full functionality between Zoom and Apollo Conversations:
- Enable the required Zoom admin settings from within Zoom
- Connect your Zoom account to Apollo and enable the settings directly from within your Apollo instance
For more information about the benefits of integrating your account with Zoom, please refer to the "Set Up Conversations in Apollo" article. For more information about the specific features available in Apollo Conversations, refer to the "Access Your Conversations in Apollo" article.
Follow the steps below if you want to execute the setup and connect or disconnect Apollo from your Zoom account. Alternatively, refer to the steps in the "Set Up Conversations in Apollo" article if you want to enable the settings and connect or disconnect the platforms directly within Apollo.
Please note, if you have a Zoom Pro or above plan, only members with Zoom and Apollo admin access can integrate Zoom with Apollo. If you are not an admin for either account, please share this article with a team member that has the necessary permissions to follow the steps below.
Enable Zoom Admin Settings Within Zoom
Before you begin with the setup, click here to preauthorize the installation of the Apollo Zoom app from within the Zoom Marketplace. This gives Apollo the necessary access to record through Zoom so that you can view and analyze your call recordings within Apollo Conversations.
When ready, launch Zoom and click the Account Management drop-down under the Admin section.
Click Account Settings.
Then, click Recording.
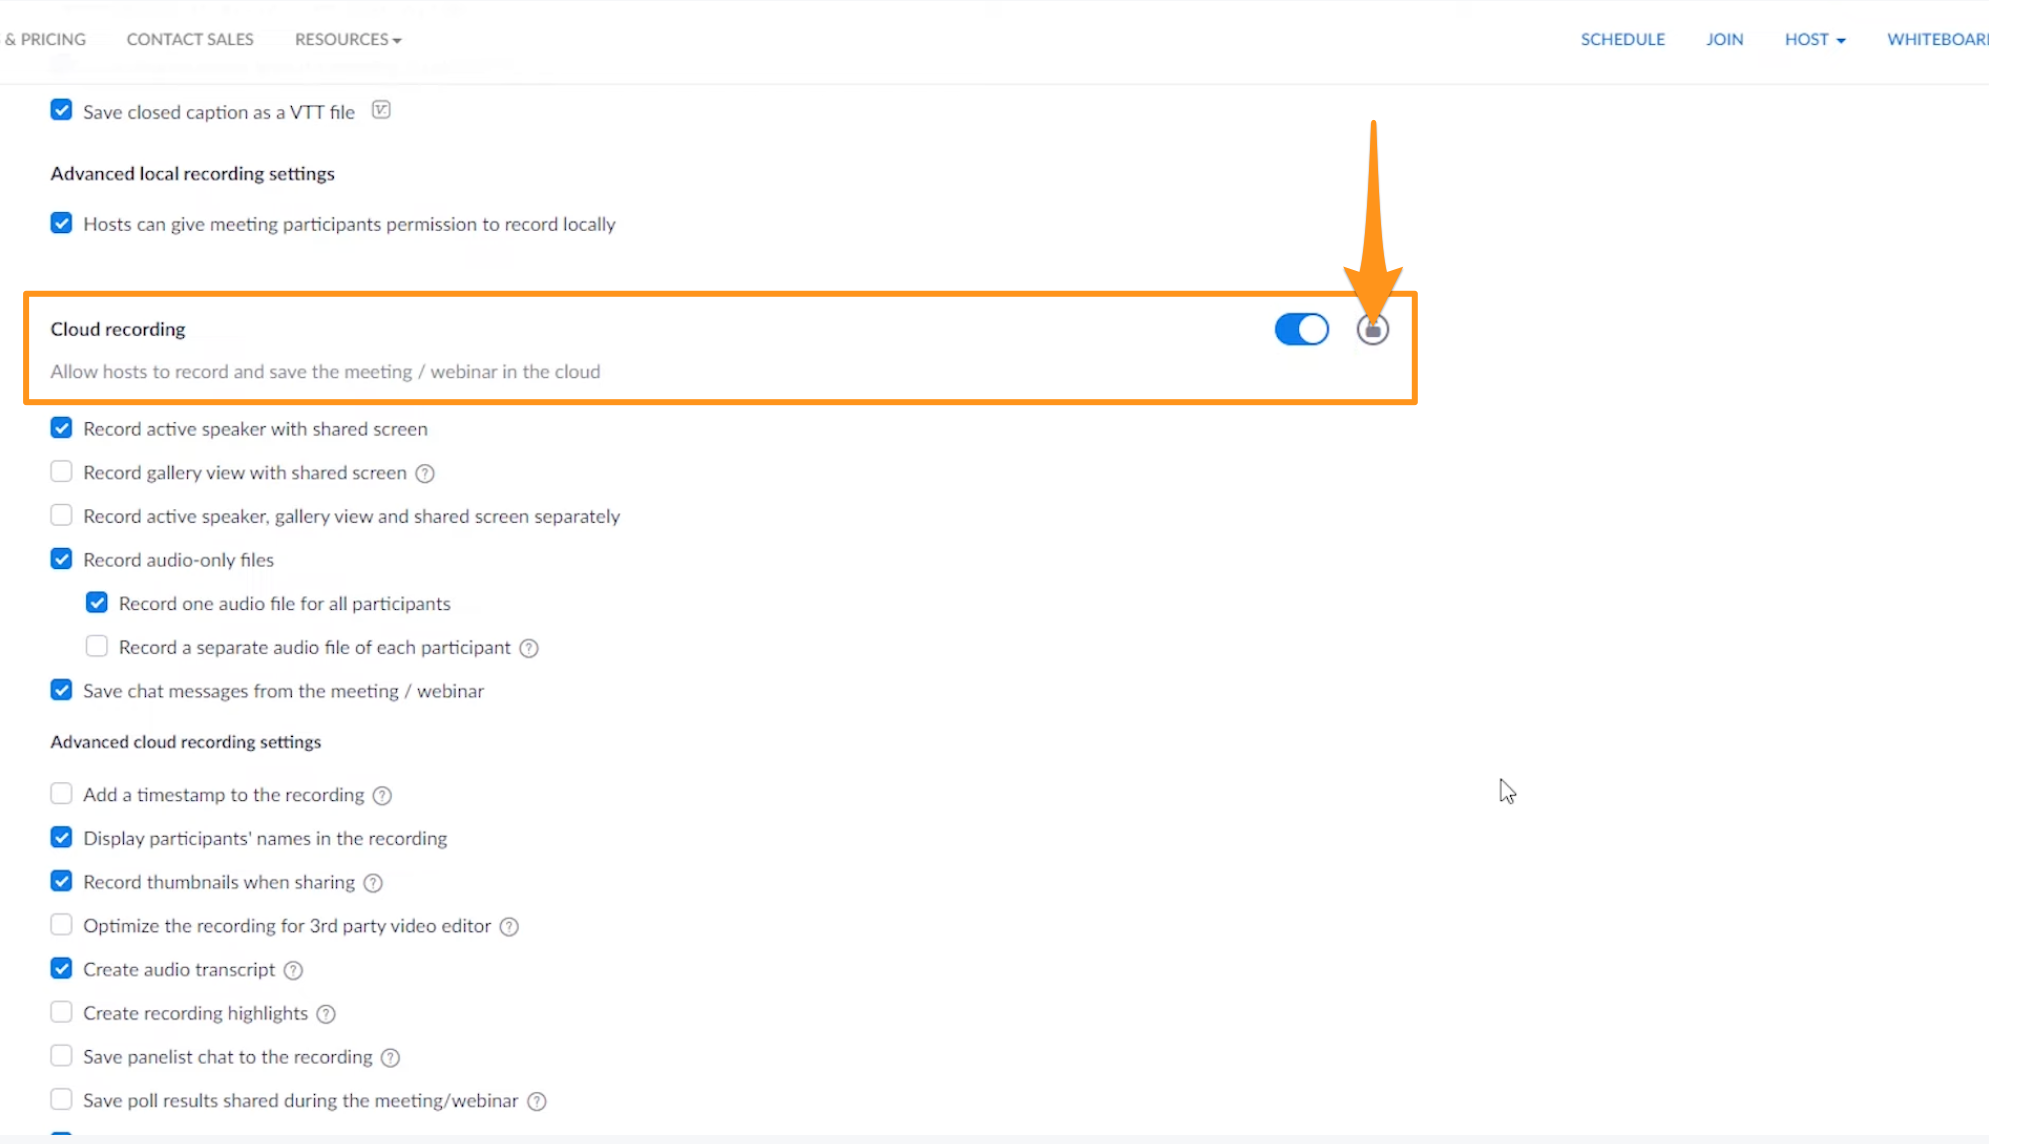
Scroll to Cloud Recording and enable the toggle on the right to ensure that every member of your organization can record their calls.
Click the lock icon to save this setting for all users within your company.
Please note, if you want to enable group-specific settings, follow the instructions in the "Managing User Groups and Settings" article in the Zoom Knowledge Base.
As you will be able to access all your recordings from Apollo, you may also want to auto-delete cloud recordings in Zoom.
To do so, enable the Auto delete cloud recordings after days toggle and then click the lock icon to save this setting for all users.
For more information about how Cloud Recording works in Zoom, please refer to the "Starting a Cloud Recording" article in the Zoom Knowledge Base.
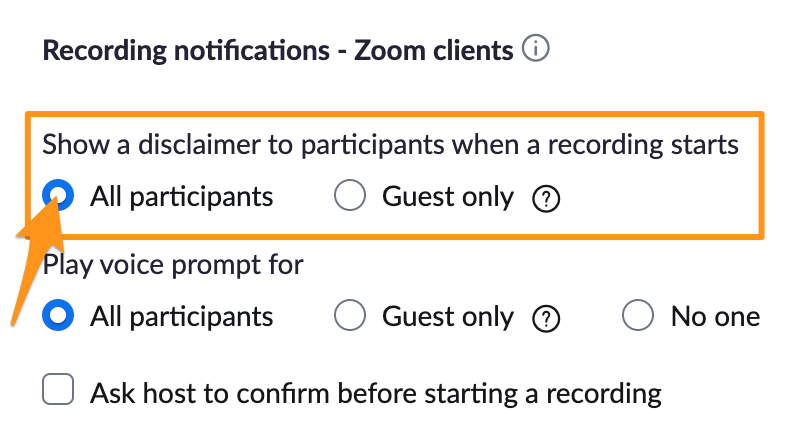
Then, to ensure you and your team stays compliant when recording calls, scroll to Recording notifications and click the radio button for Show a disclaimer to participants when a recording starts. You can choose to enable this setting for all participants or just for guests.
For more information on Zoom Recording Notifications, please refer to the "Modifying Recording Notifications" article in the Zoom Knowledge Base. For additional information on how to customize your recording disclaimer with pop-up language and a hyperlink to your privacy policy, please refer to the "Customizing the Recording Consent Disclaimer" article in the Zoom Knowledge Base.
Click the Automatic recording toggle if you want your team to automatically record meetings at the start of each call.
Please note, each user in your team can switch the setting on and off at any time. However, be careful with your admin superpowers! If you click the lock icon for this setting, you will disable all recording functionality.
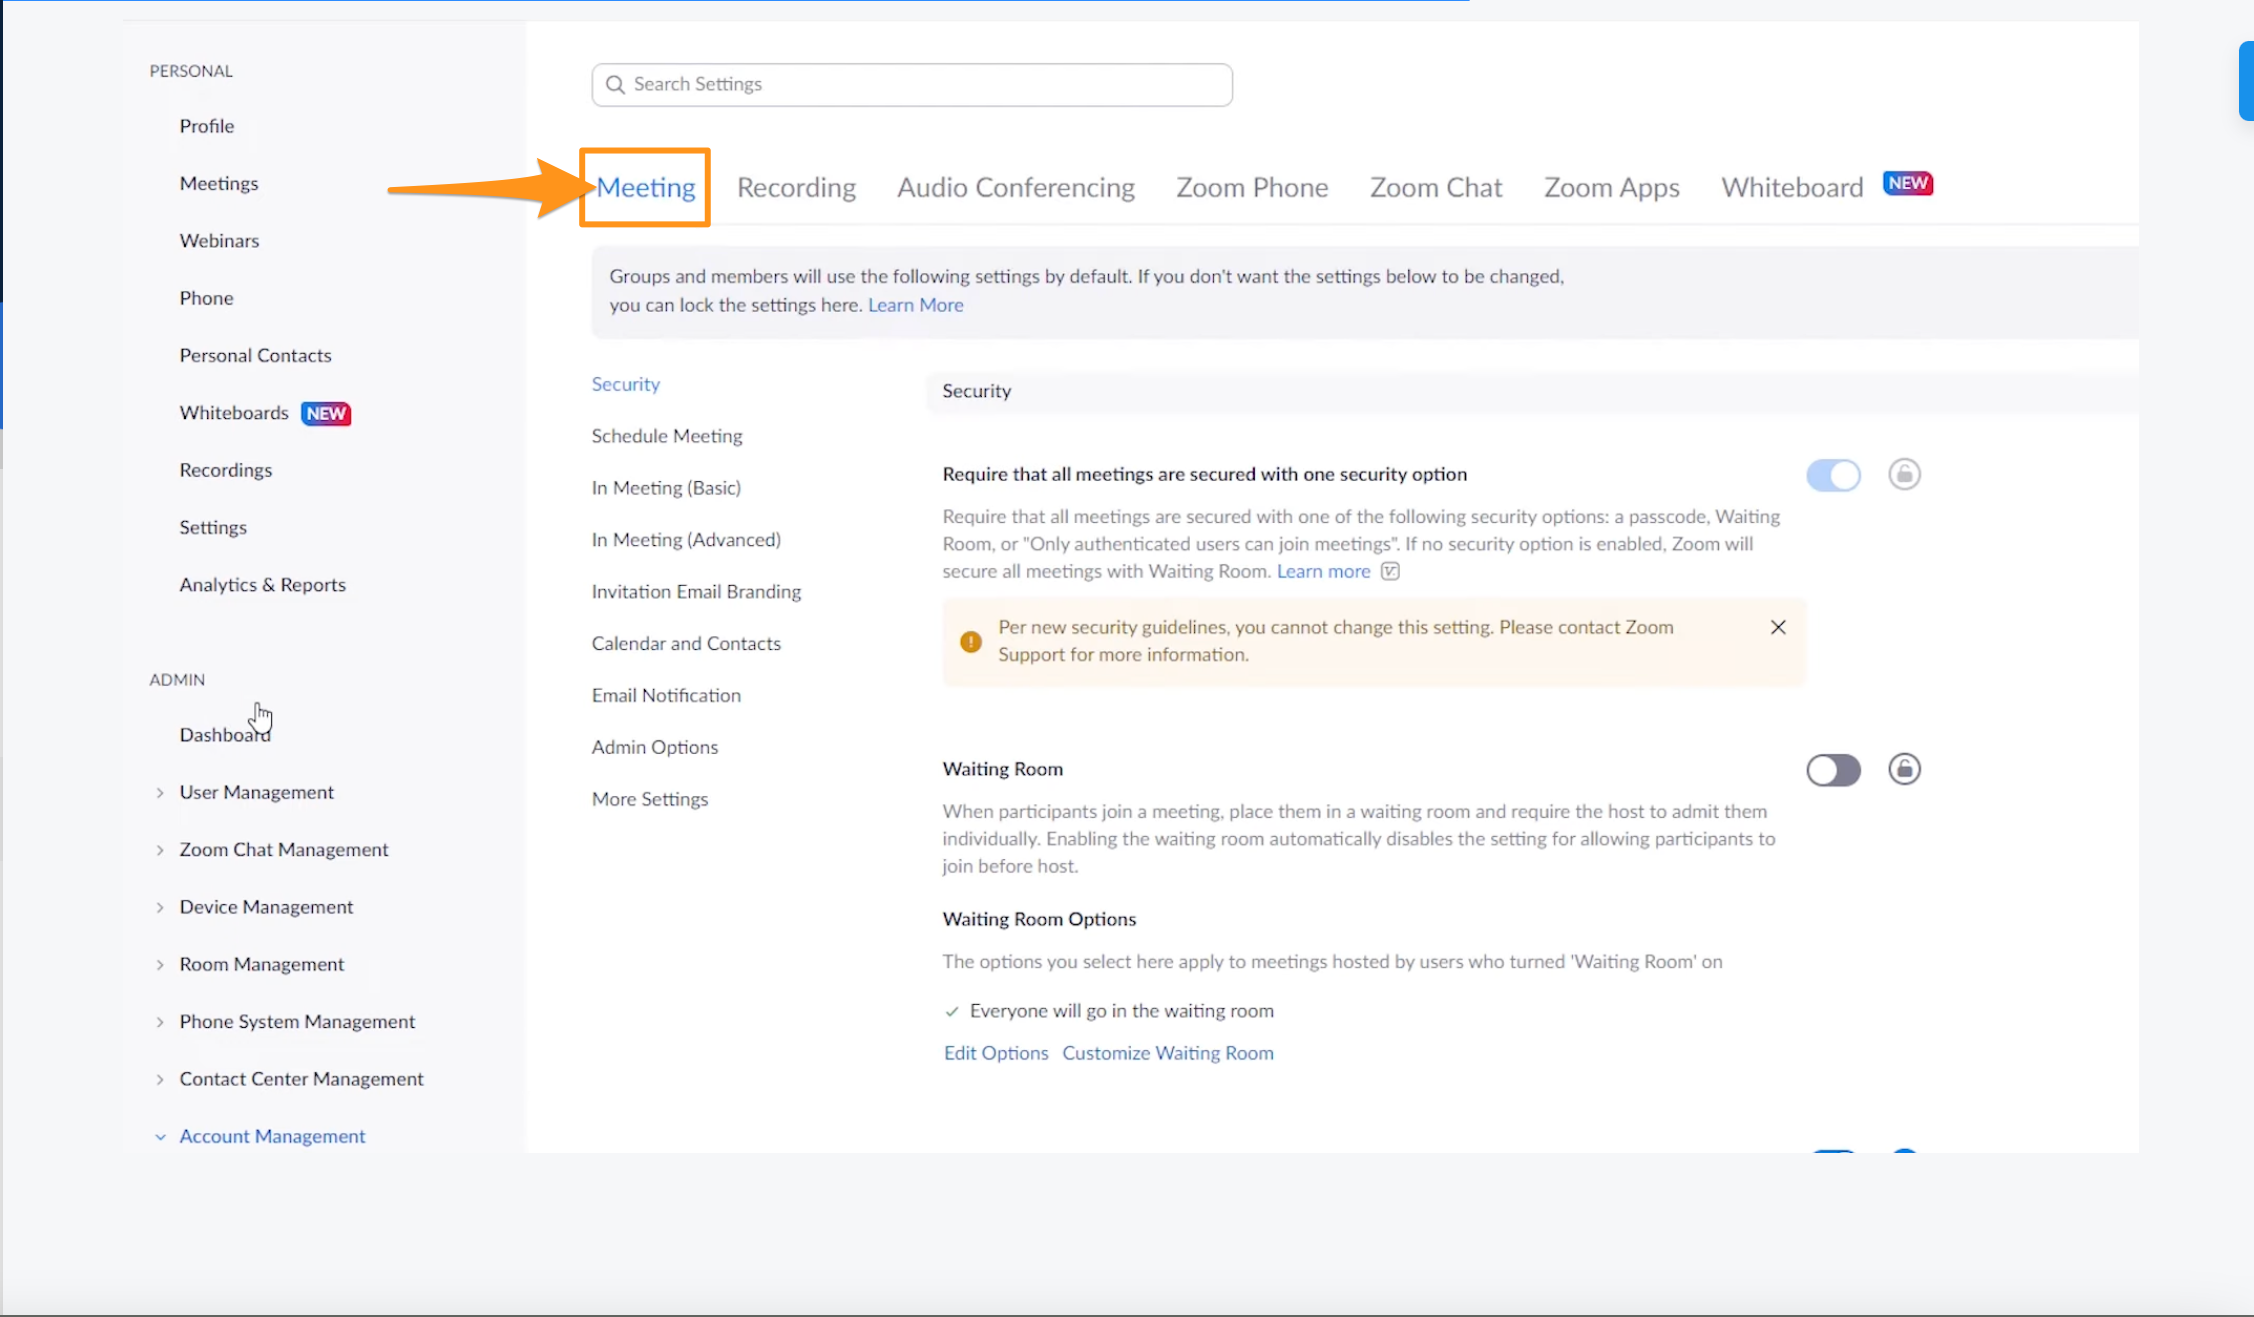
You have now enabled the necessary permissions from the Recordings tab. Next, click the Meetings tab.
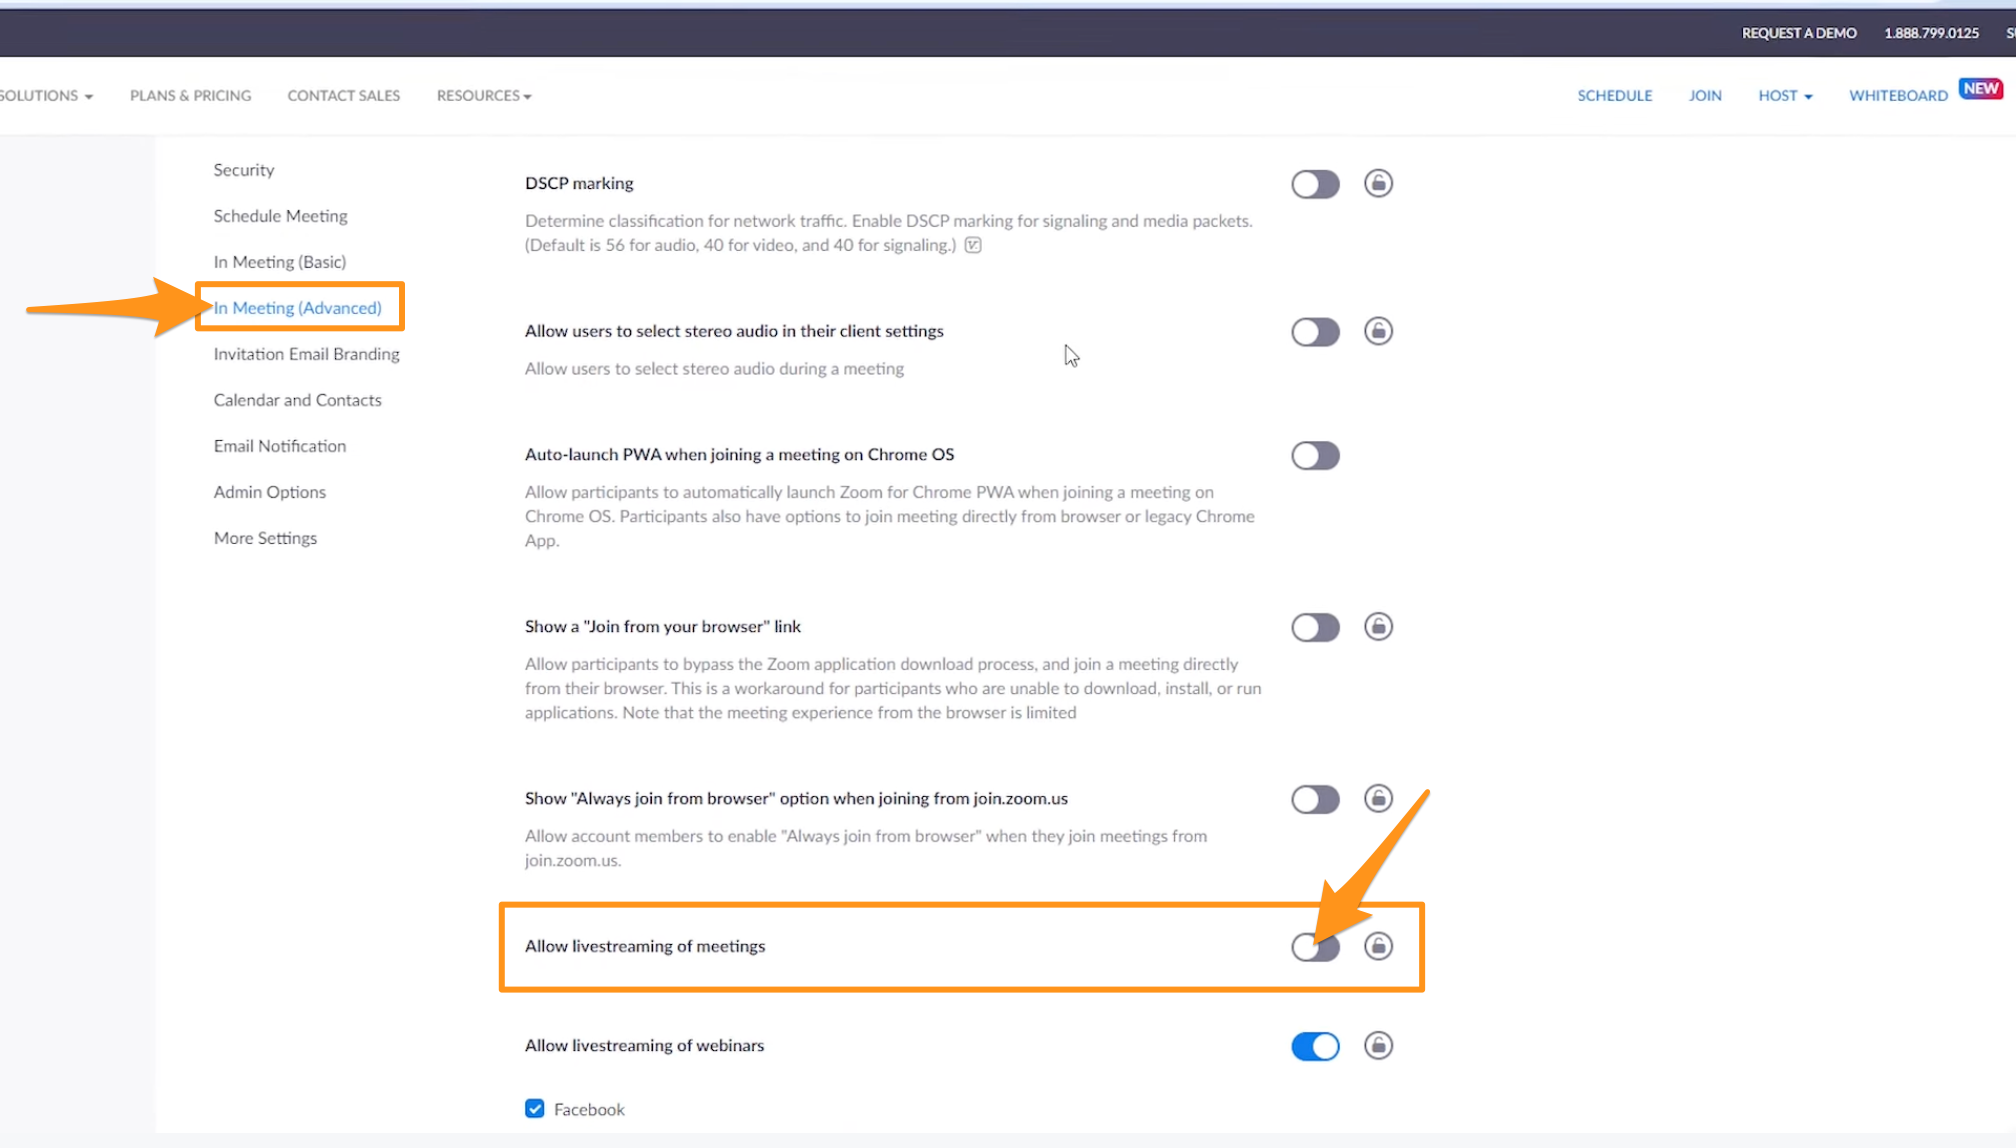
Click In Meeting Advanced and then click the Allow live streaming of meetings toggle.
Finally, click the checkbox for Custom Live Streaming Service and then click the lock icon to save the setting for all users.
Please note, when you enable the Custom Live Streaming Service checkbox, you do not need to enter any additional information in the text box that appears.
You have now enabled the necessary settings in Zoom.
Just one more step to go to access important insights from your conversations! Launch Apollo and refer to the information in this article to start leveraging your Zoom conversations within Apollo.
Disconnect Apollo in Zoom
You can disconnect Apollo from your Zoom account at any time.
You don't have to enter Zoom to disconnect Apollo. You can also disconnect the integration from within Apollo directly. For more information on the steps to take, refer to the "Disconnect Zoom in Apollo" section of this article.
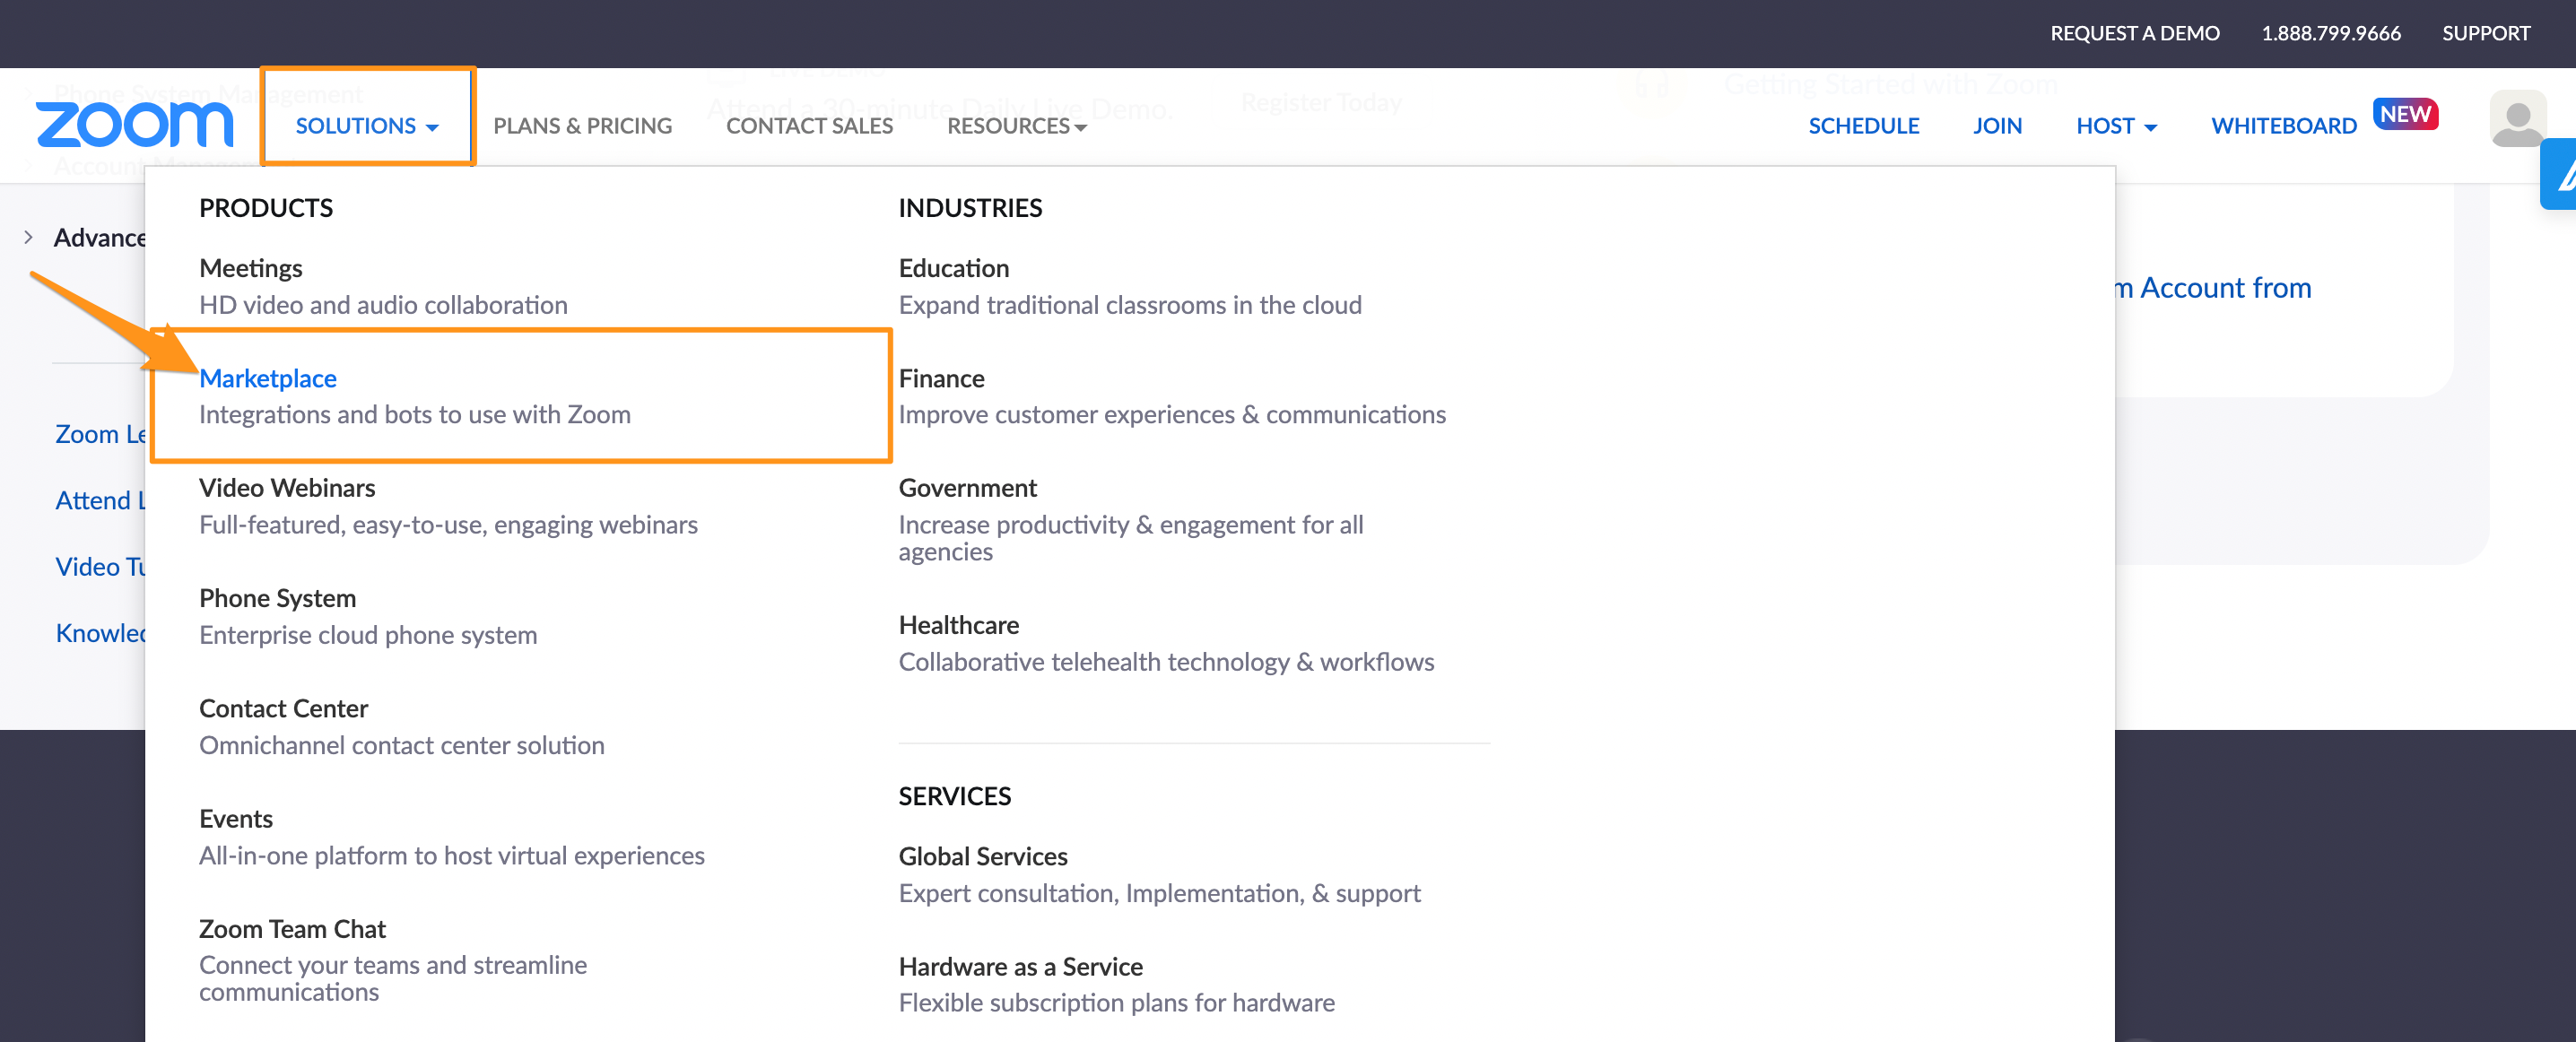
Launch Zoom, click Solutions, and then click Marketplace.
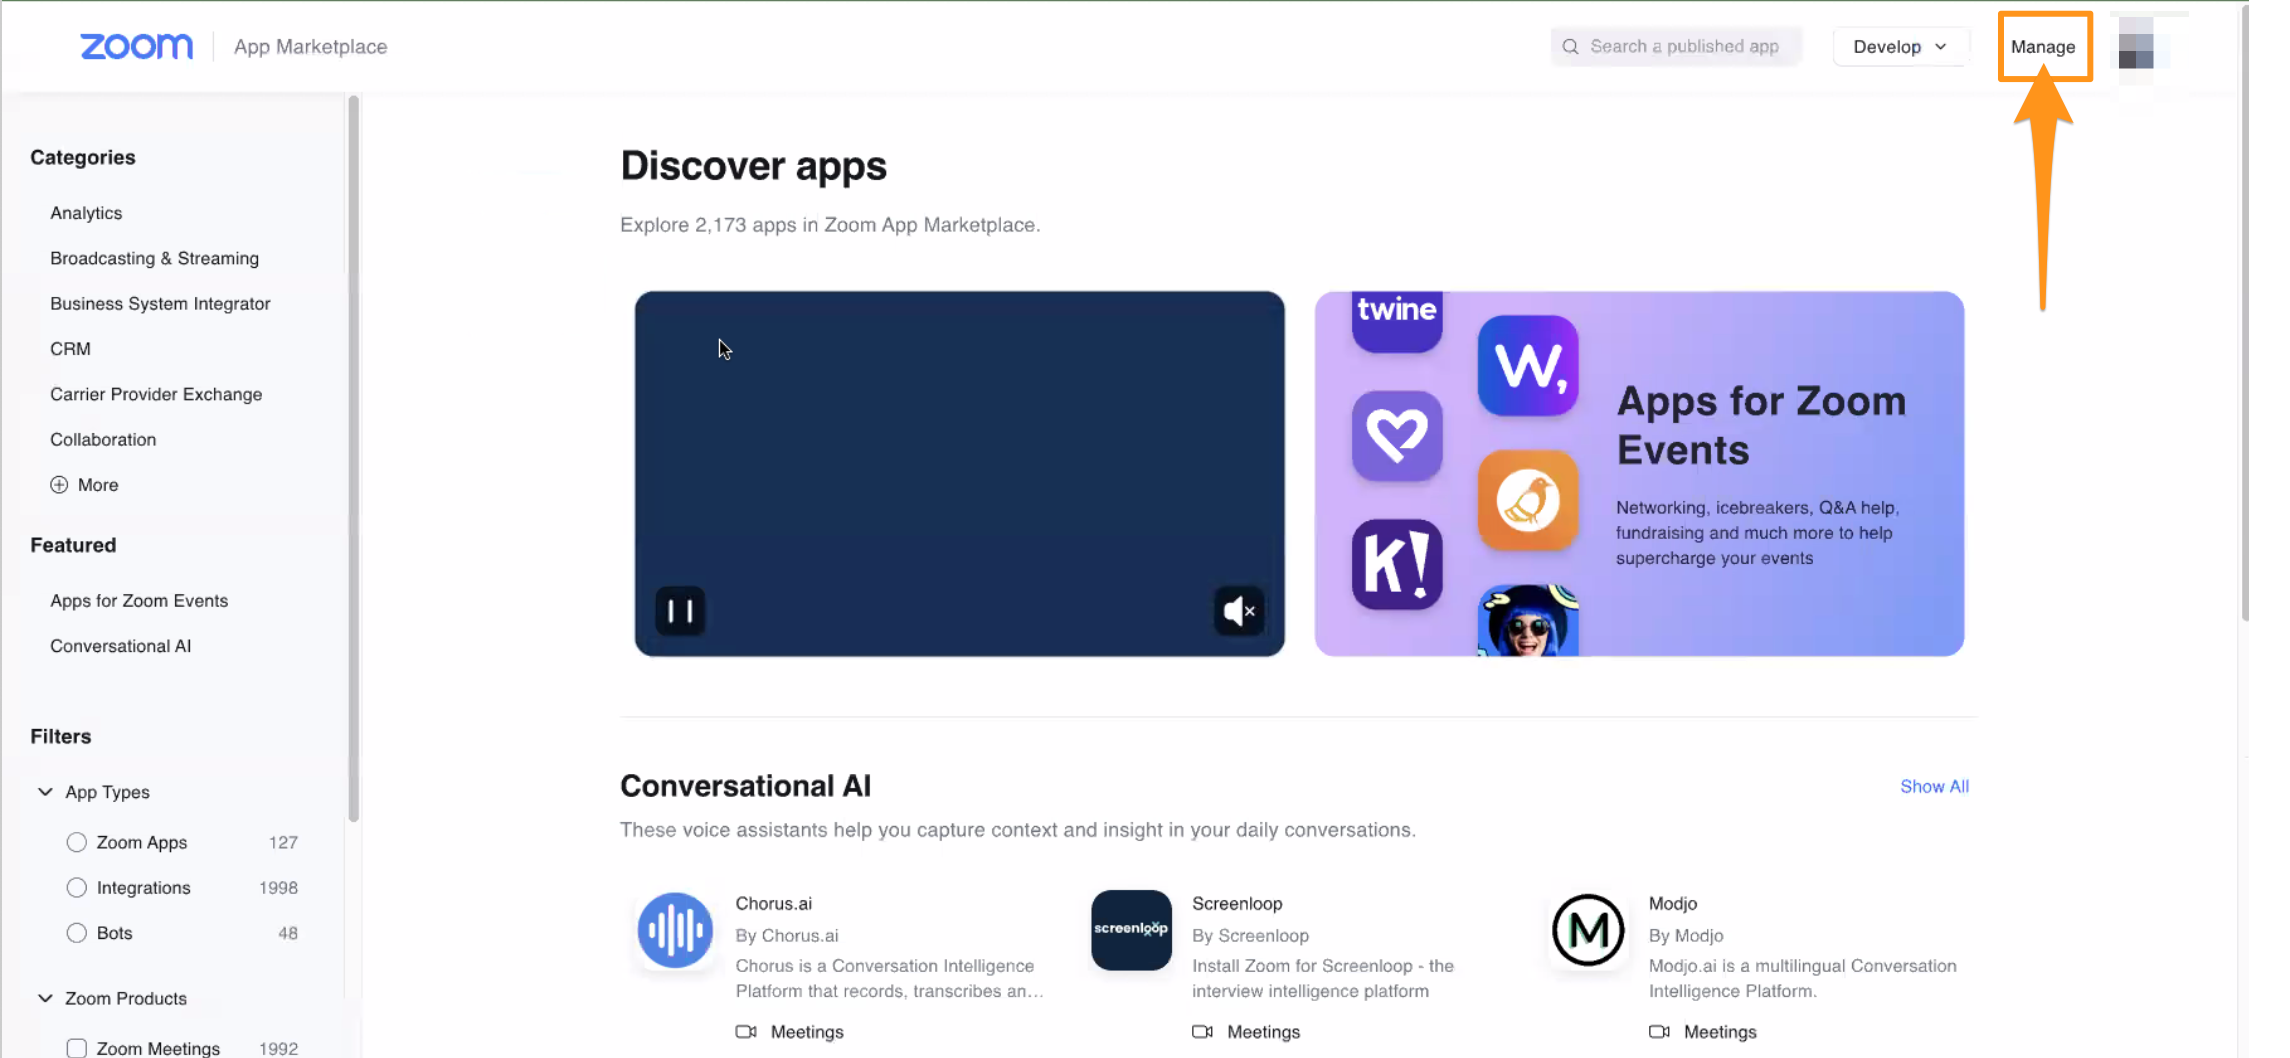
Click Manage at the top right of your screen.
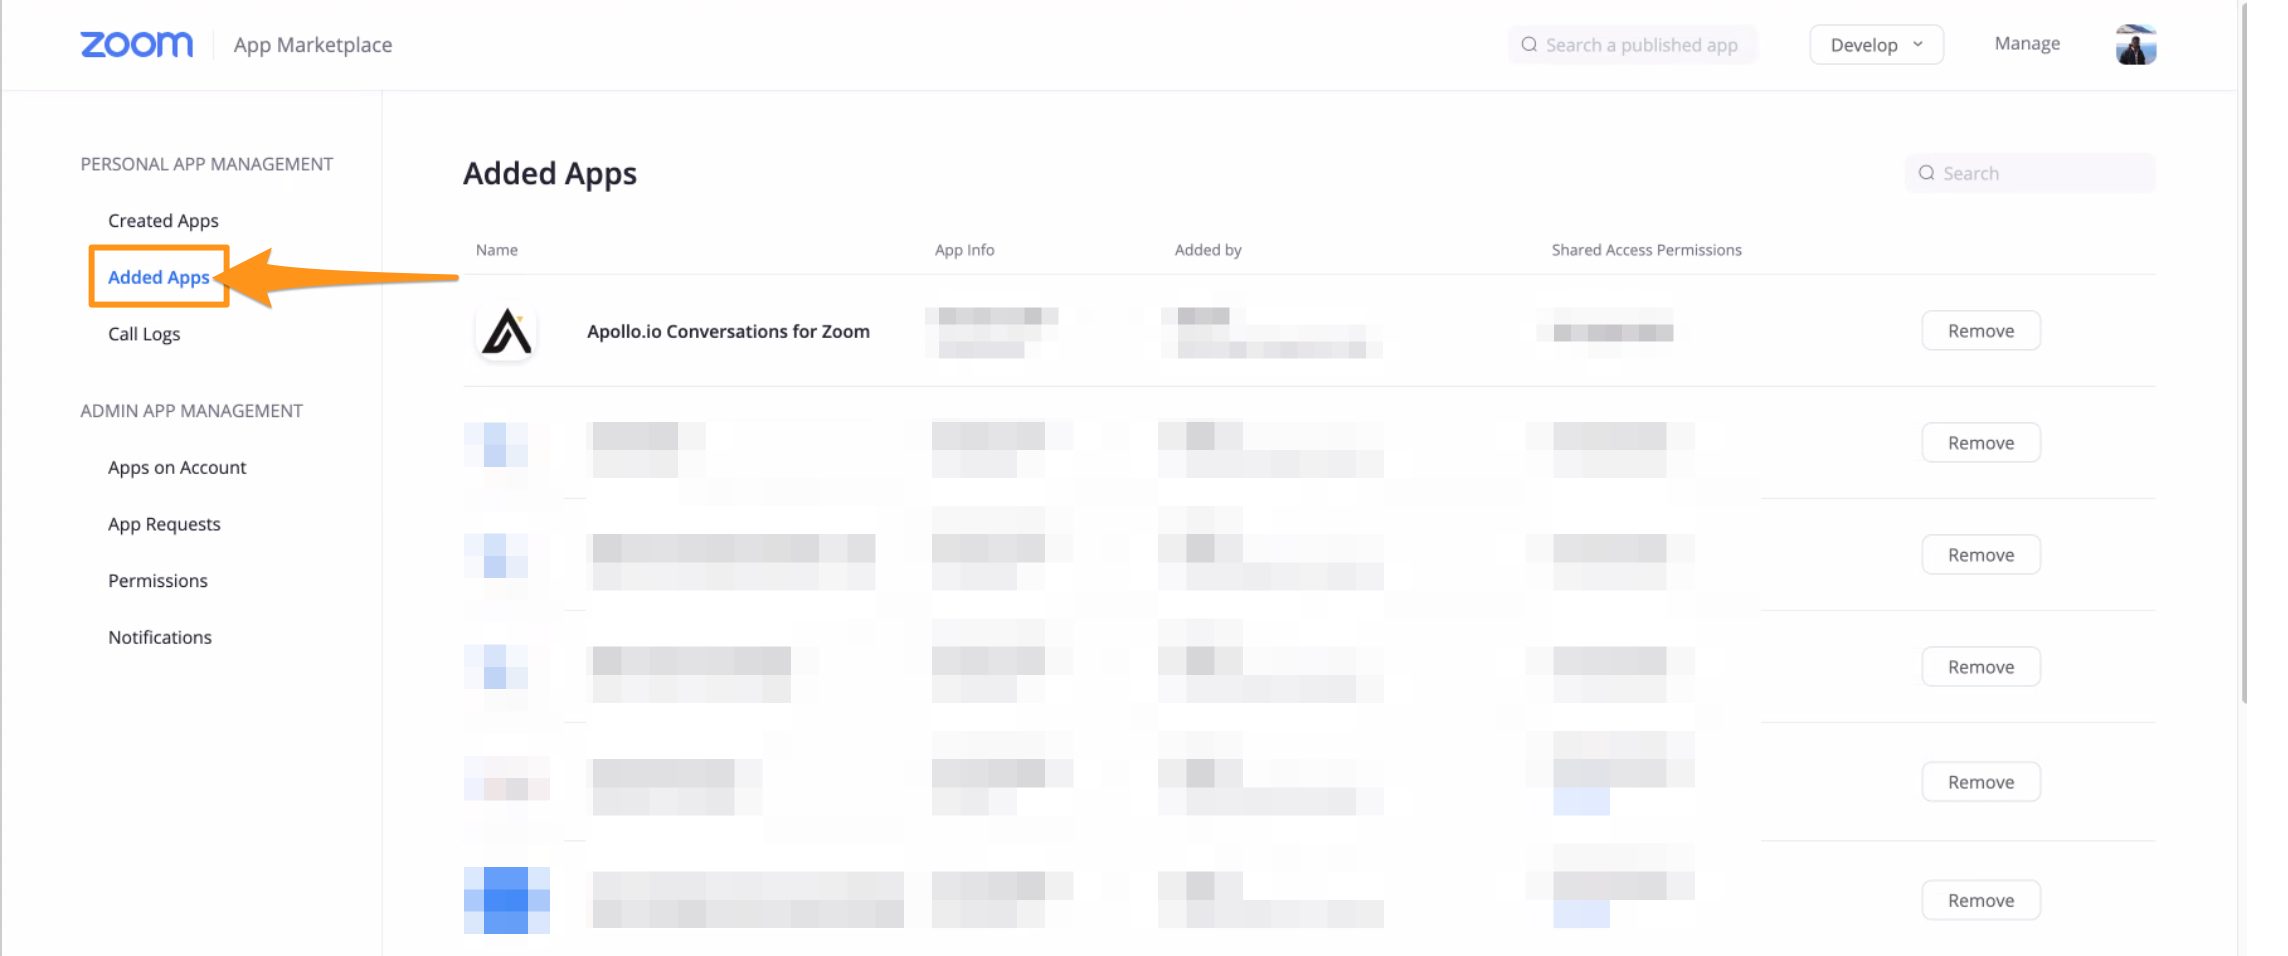
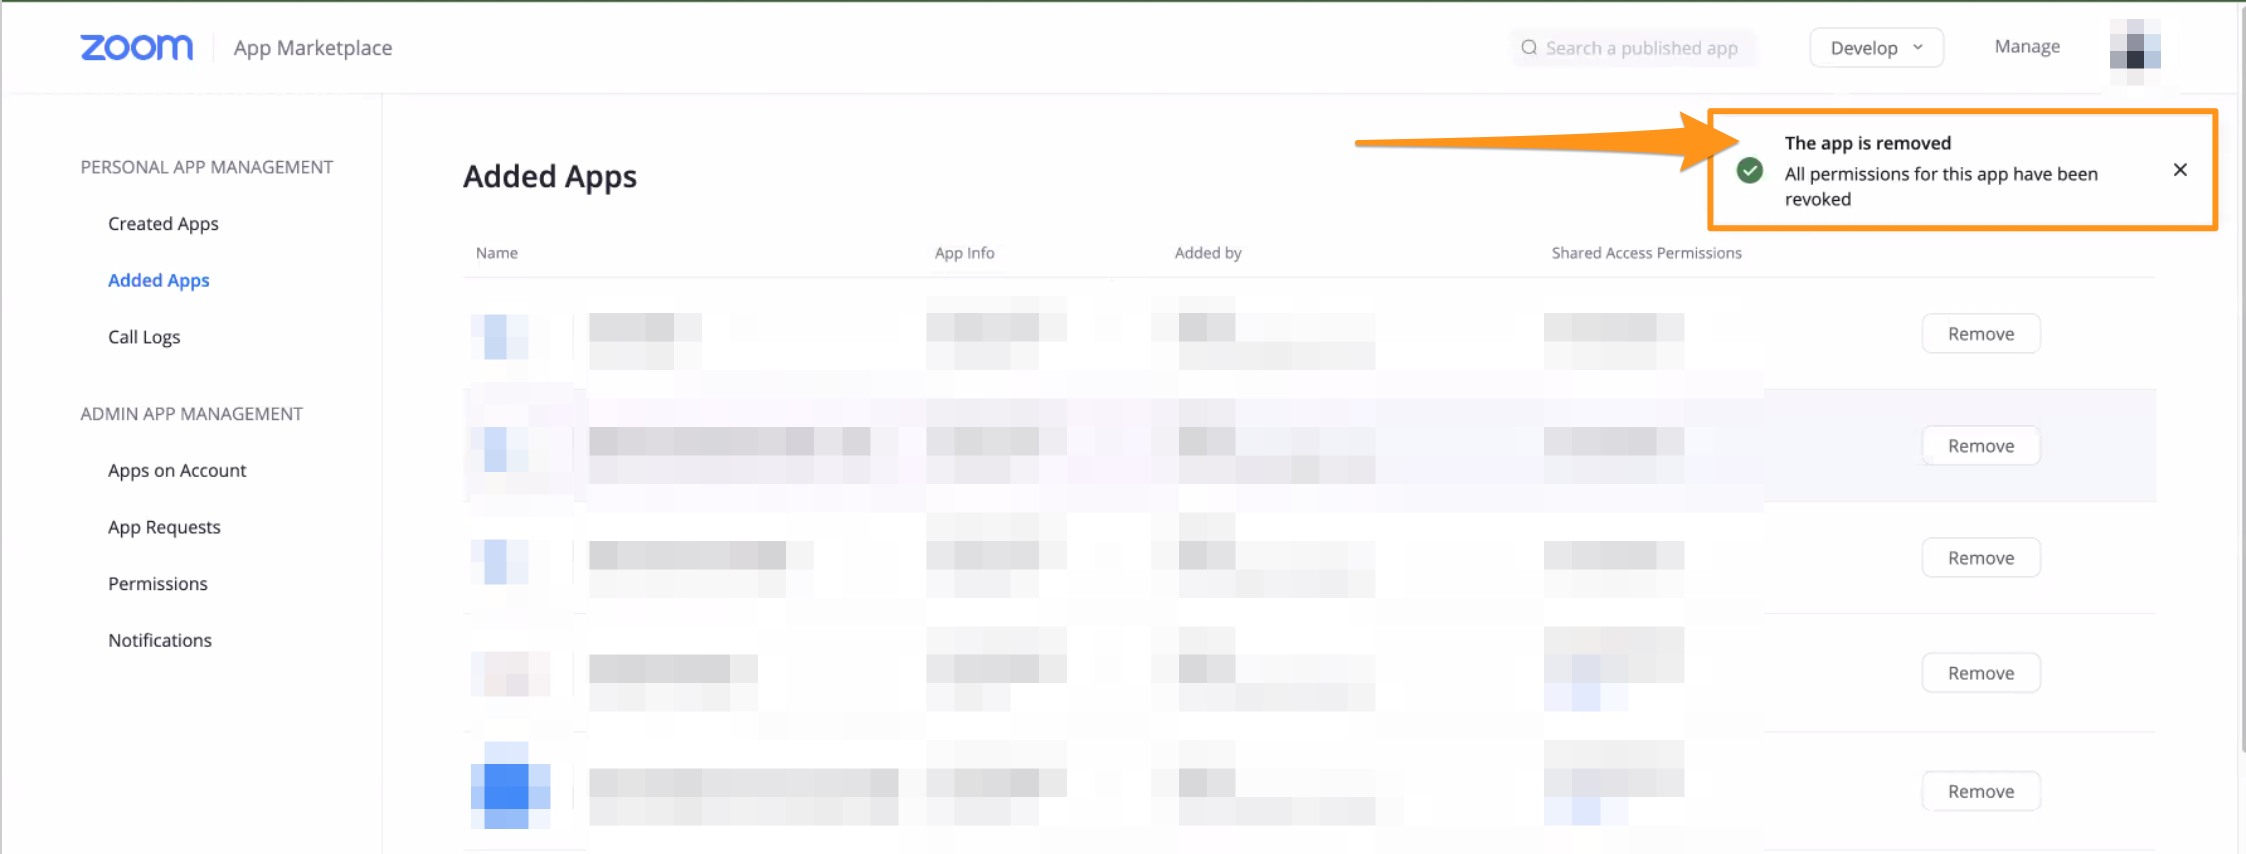
Click Added Apps.
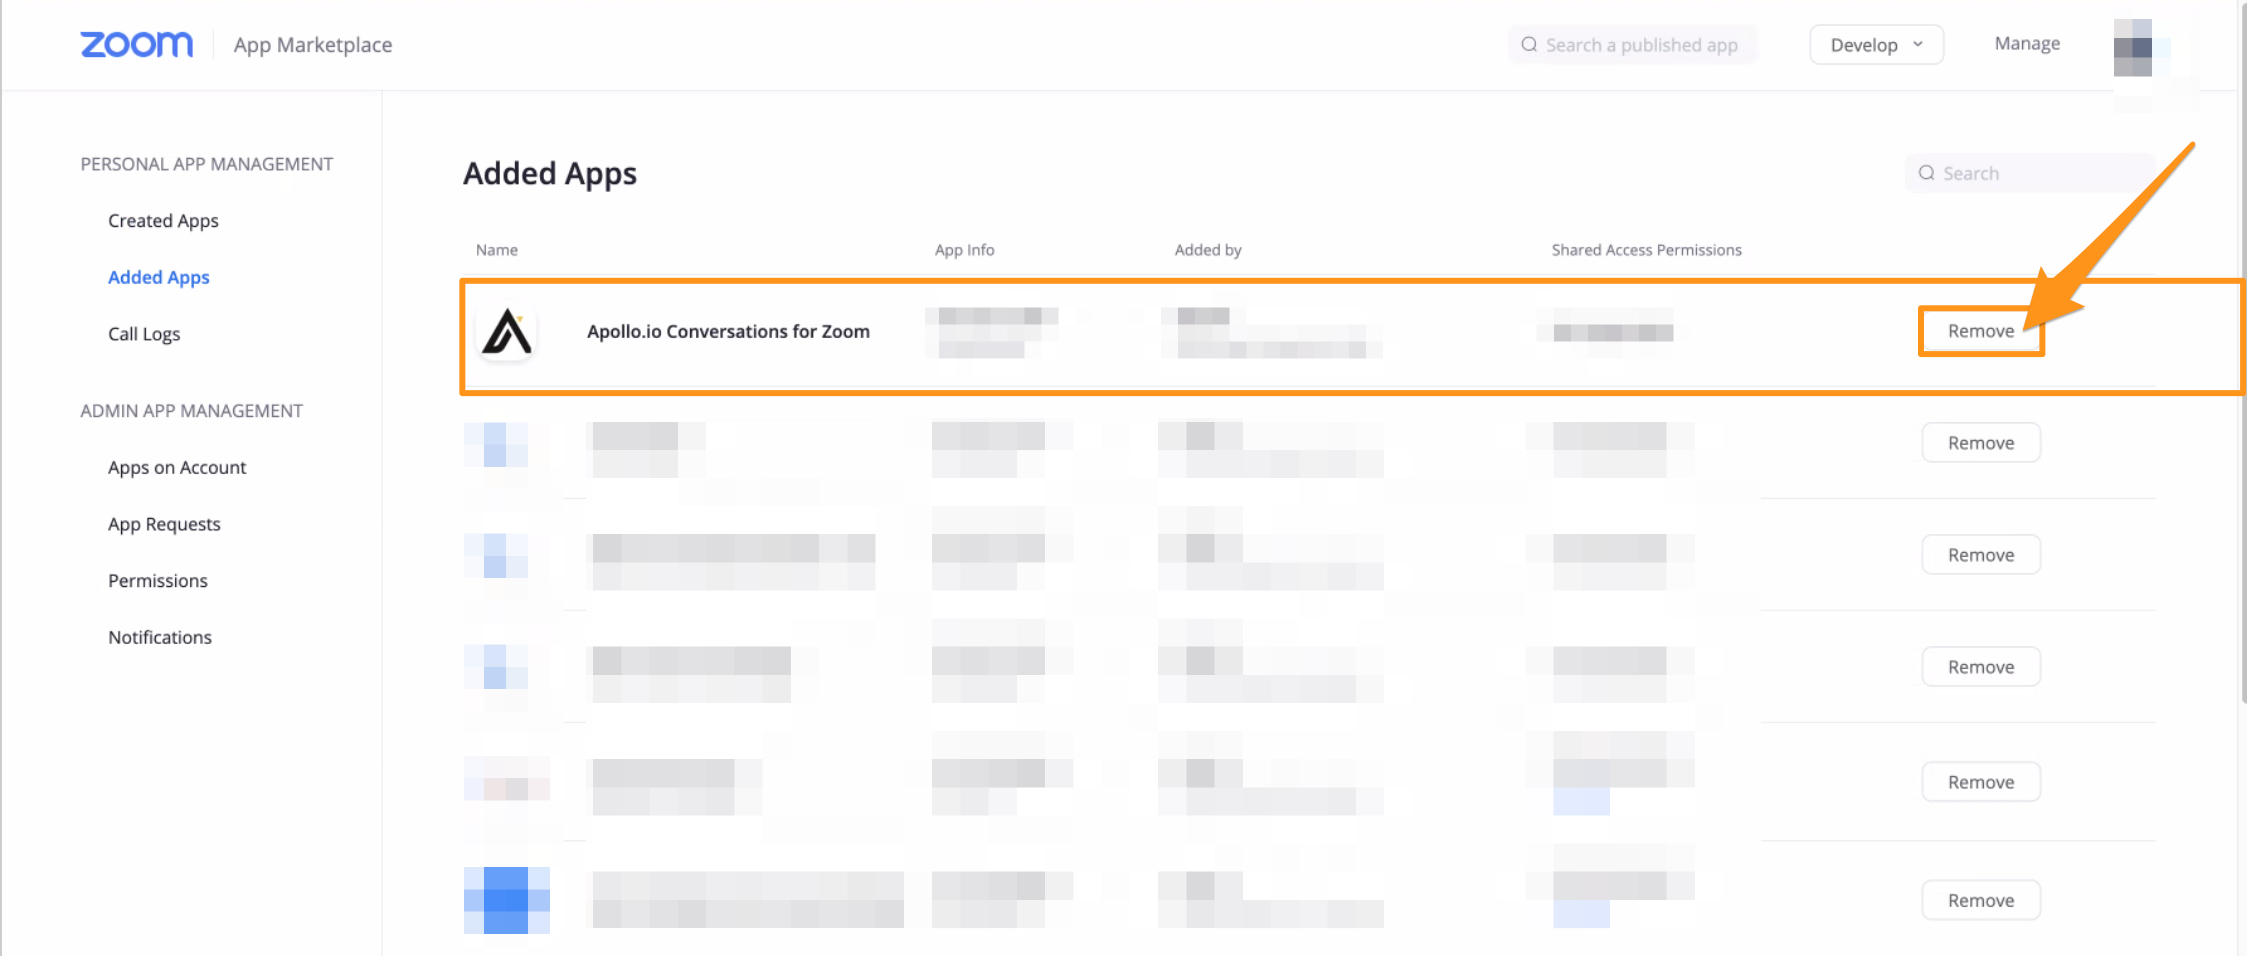
Then, scroll to the Apollo app and click Remove.
You have now disconnected Apollo from your Zoom account.


