Overview
Many Apollo users leverage workflows to:
- Automate administrative and prospecting activities to book more meetings.
- Improve efficiency and create repeatable, scalable sales processes.
- Generate more pipeline and drive more revenue.
This use case explores the steps you can take to automate sending an email to customers with an upcoming renewal date. The following sections walk through the recommended steps to set up this example workflow.
Scenario: Plan Your Workflow
Let's say you're the Head of Customer Success at a growing software company. You want to create a workflow to reach out to your customers 3 months before their contract is due for renewal, with the goal to increase retention and strengthen customer relationships.
So, you create a workflow in Apollo to automatically email contacts based on a renewal date that is set in your CRM. Let's run through the steps you can take to set up a workflow that helps your team get ahead of renewals:
- Step 1: Create a sequence that automatically sends the renewal notice via email when the workflow is triggered.
- Step 2: Create a list to track who has been processed by the workflow.
- Step 3: Add a custom field to your CRM.
- Step 4: Add a custom field in Apollo and map it to your integrated CRM.
- Step 5: Build a workflow from scratch that surfaces contacts based on updates to the custom field you add your CRM.
If you don't already have an Apollo-CRM integration set up, start by connecting Salesforce, HubSpot, or Pipedrive to your Apollo account.
Does your team want to run account-based sales motions in Apollo, but doesn't know how? Check out Use Case: Run Account-based Sales Motion Using Workflows to get started.
Step 0: Set Up CRM Integration
Before you attempt to replicate this example workflow, you should integrate a CRM like Salesforce, HubSpot, or Pipedrive with Apollo. Using an Apollo-CRM integration helps keep your customer data accurate and in sync.
Now, you're ready to create a sequence for your renewal workflow.
Step 1: Create a Sequence
Build a sequence with a single email step that engages your contacts in the run-up to their contract end date. Follow the steps in Create a Sequence to get started.
Step 2: Create a List
Create a contact list for customer renewals. When a contact meets the workflow's enrollment criteria, you can automatically add them to this list. This helps you track the contacts that have been processed by the workflow.
Step 3: Add Custom Field in CRM
Next, in your Apollo-integrated CRM, create a custom field for the renewal date. This ensures that the workflow in Apollo only enrolls contacts that are due for renewal.
If you already have a field in your CRM that tracks contract or renewal dates, mirror that field in the custom field that you create. Apollo relies on updates to contacts to trigger the workflow, so the custom field needs to refresh to trigger the workflow.
Use the following learning resources to set up a custom field in your CRM.
To create a custom field in Salesforce, check out Salesforce's Create a Custom Field article. 
To create a custom property in HubSpot, hop in to HubSpot's Create and edit properties article and Property field types articles. 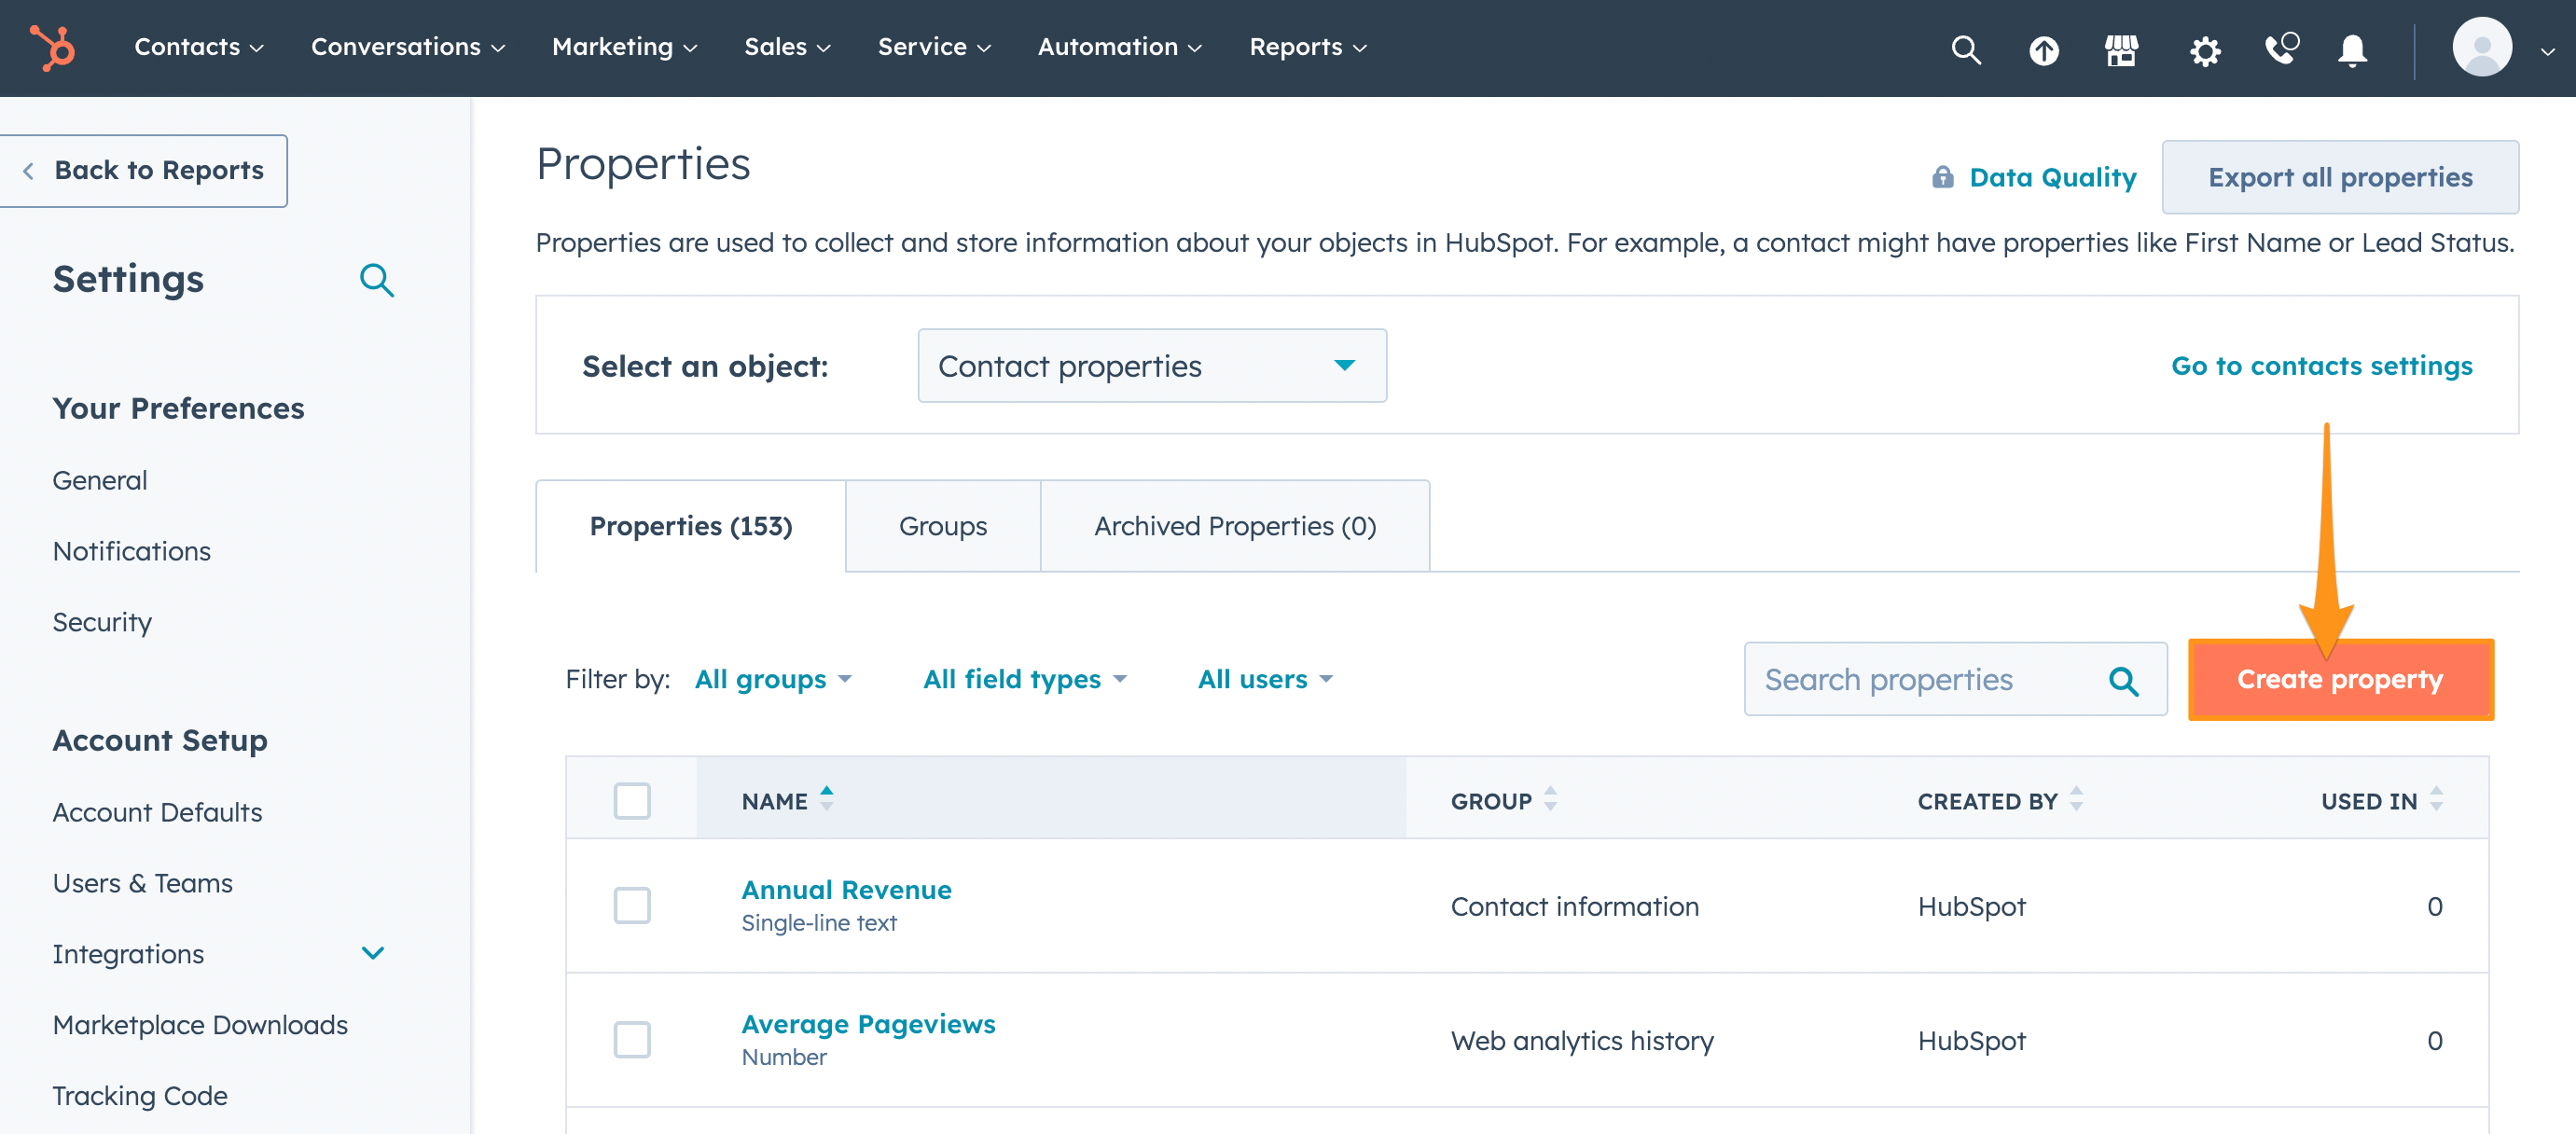
To create a custom field in Pipedrive, check out Pipedrive's Custom fields article. 
Step 4: Add Custom Field in Apollo and Map to CRM
Now, you're ready to create the custom field in Apollo and map it to the equivalent custom field you created in your CRM. This enables you to sync customer data between Apollo and your CRM to run your workflow with ease.
In Apollo, there are 3 types of custom fields: contact, account, and user. For this specific scenario, you should create a custom contact field for the renewal date.
To create a custom contact field, launch Apollo and click Settings > Objects > Contacts. Then, access the Fields tab and click Create Field.
With the custom field created in Apollo, you can map it to the field in your CRM using the following resources:
Step 5: Build Your Workflow
This example involves building a workflow from scratch. If you prefer to get a faster start with workflows, hop directly into a Apollo-created workflow template. Templates enable you to quickly build a workflow based on popular sales automation needs.
With your custom field created and mapped, it's time to set up your workflow:
- Launch Apollo and click Workflows.
- Click Create workflow > Create from scratch.

- To select enrollment triggers for your workflow, click Add trigger.

- For the workflows's enrollment criteria, click Based on a trigger event to run the workflow when the custom field you created in previous steps is updated. Set the workflow to target People.
Then, choose Contact updated as the event and use the custom field you created and mapped. Set the new value as a future time range; for this example, Apollo is using a range of 1 to 3 months in the future.
Click Save trigger.
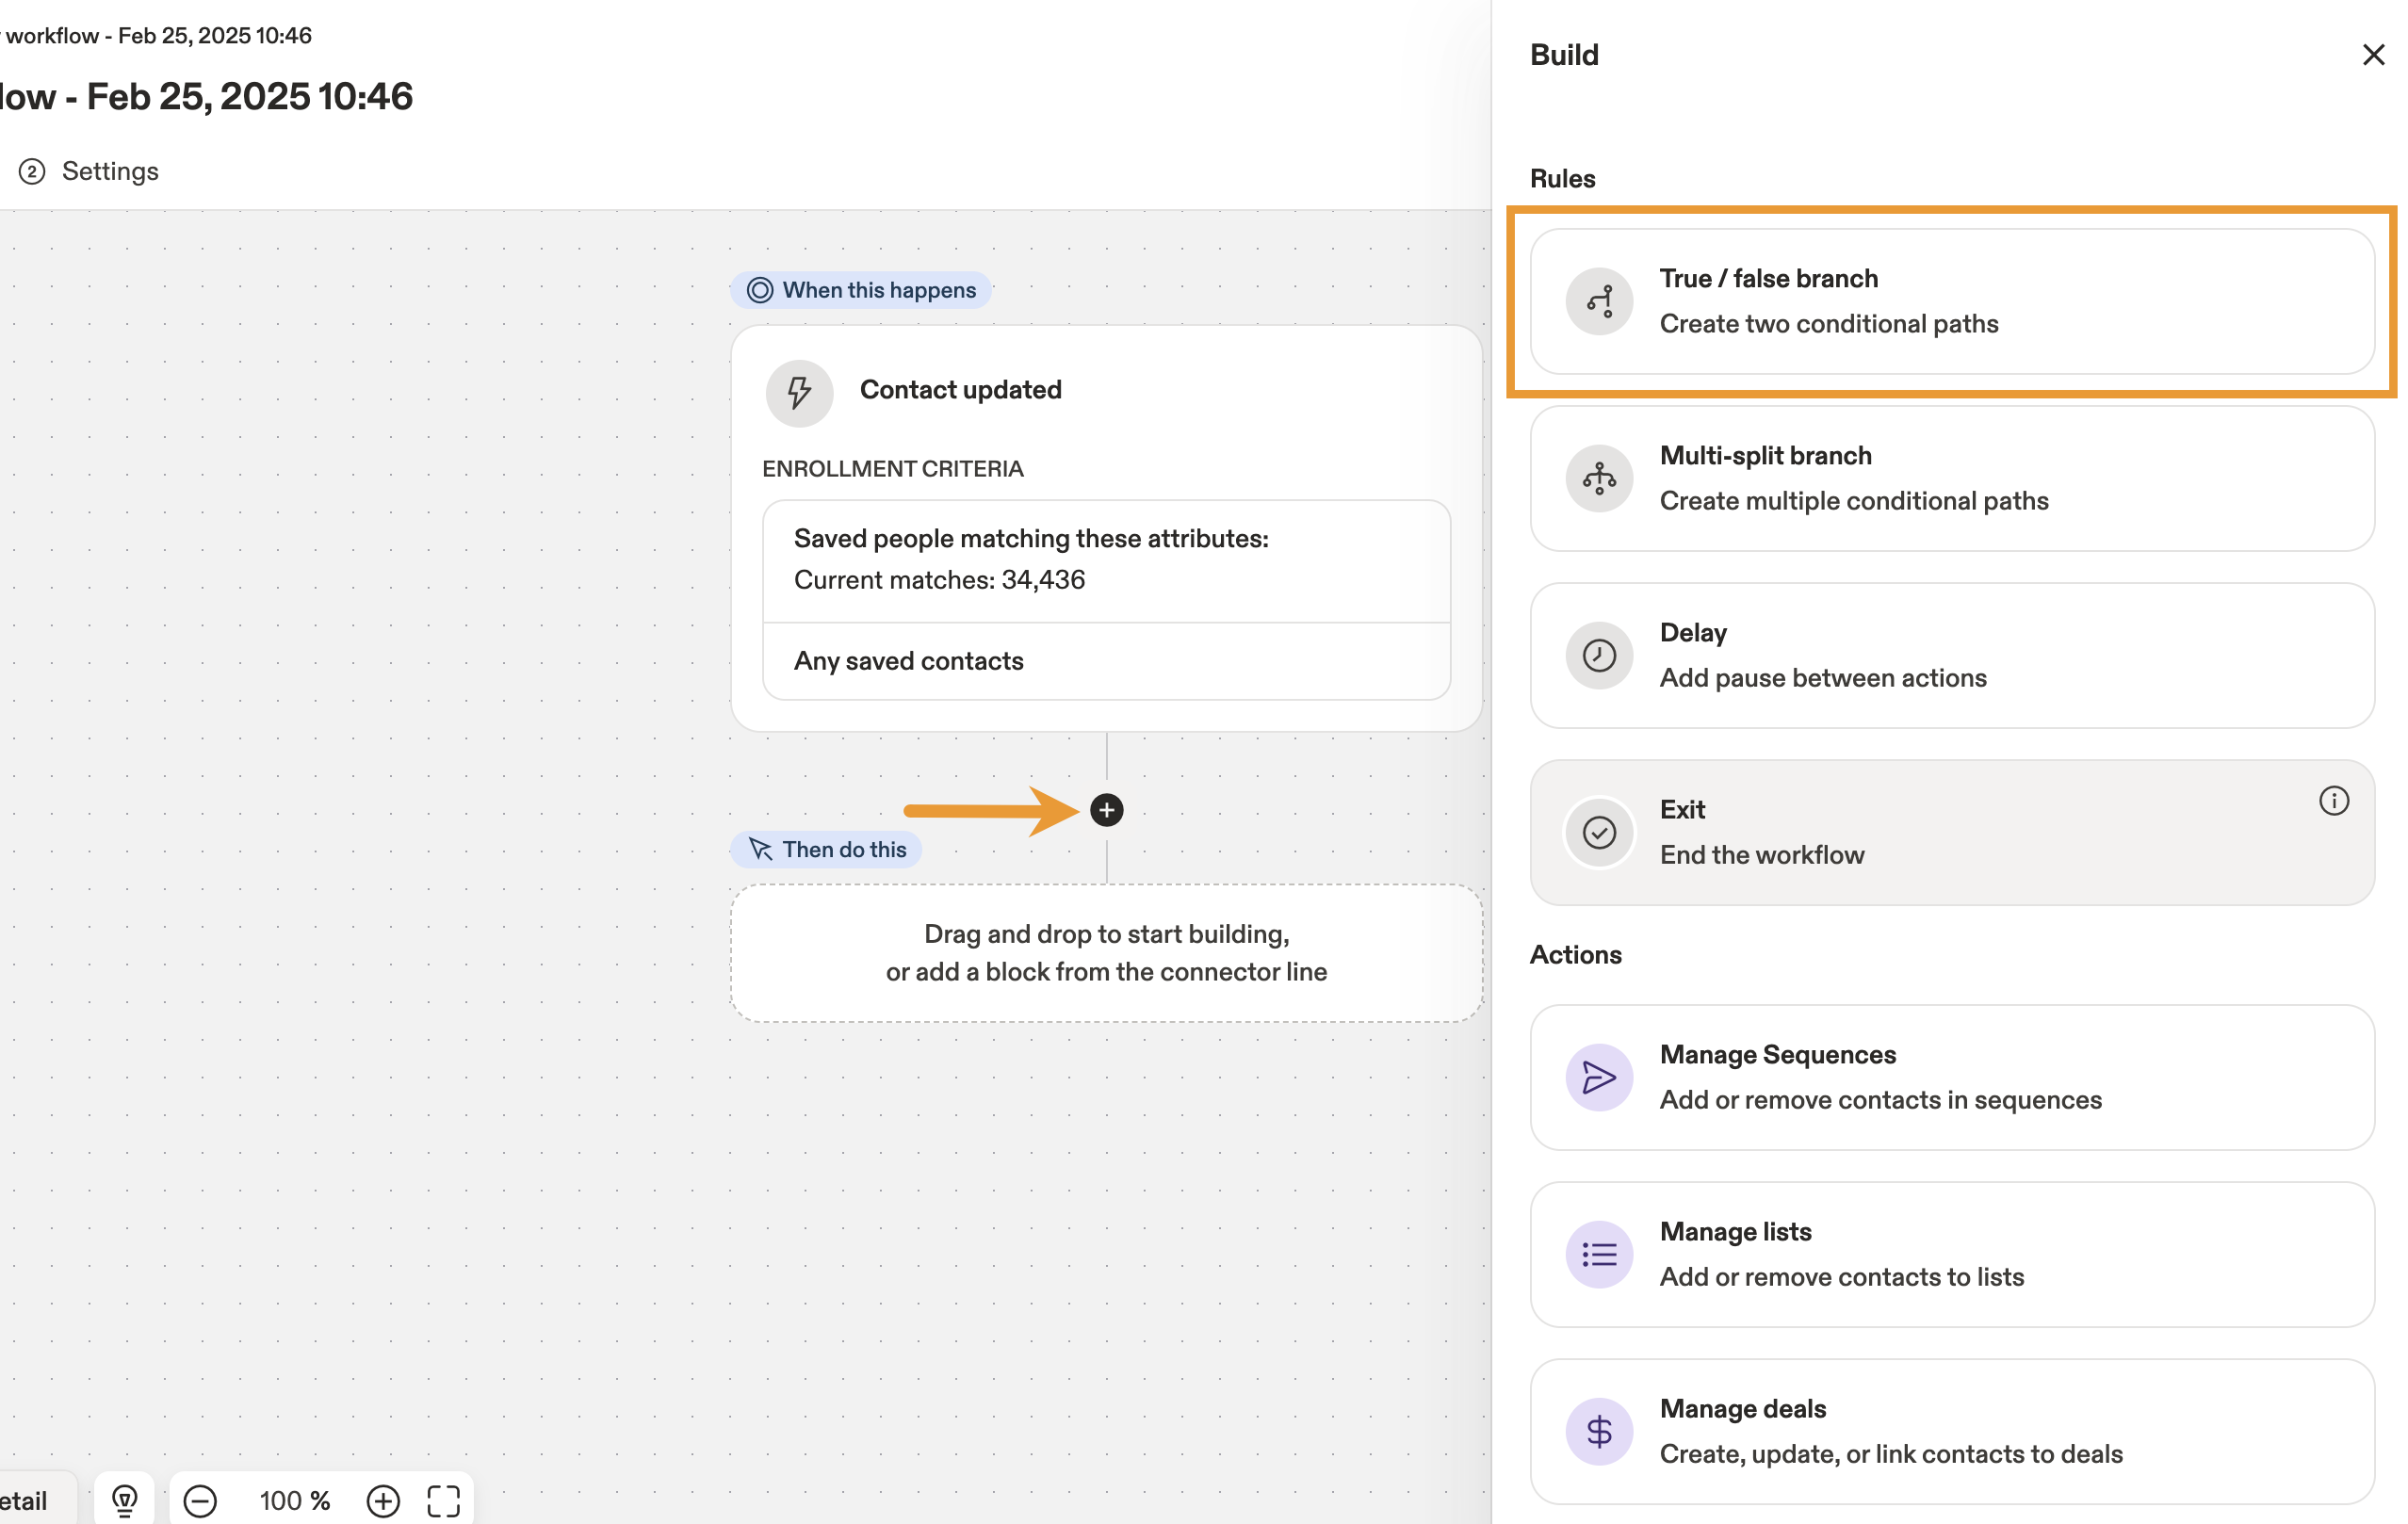
- Add a block to the workflow, then click True / false branch.
- Add a filter for the
truebranch. Then, use the Email Status filter to ensure that this workflow only processes contacts with Verified email addresses. Click Save filters.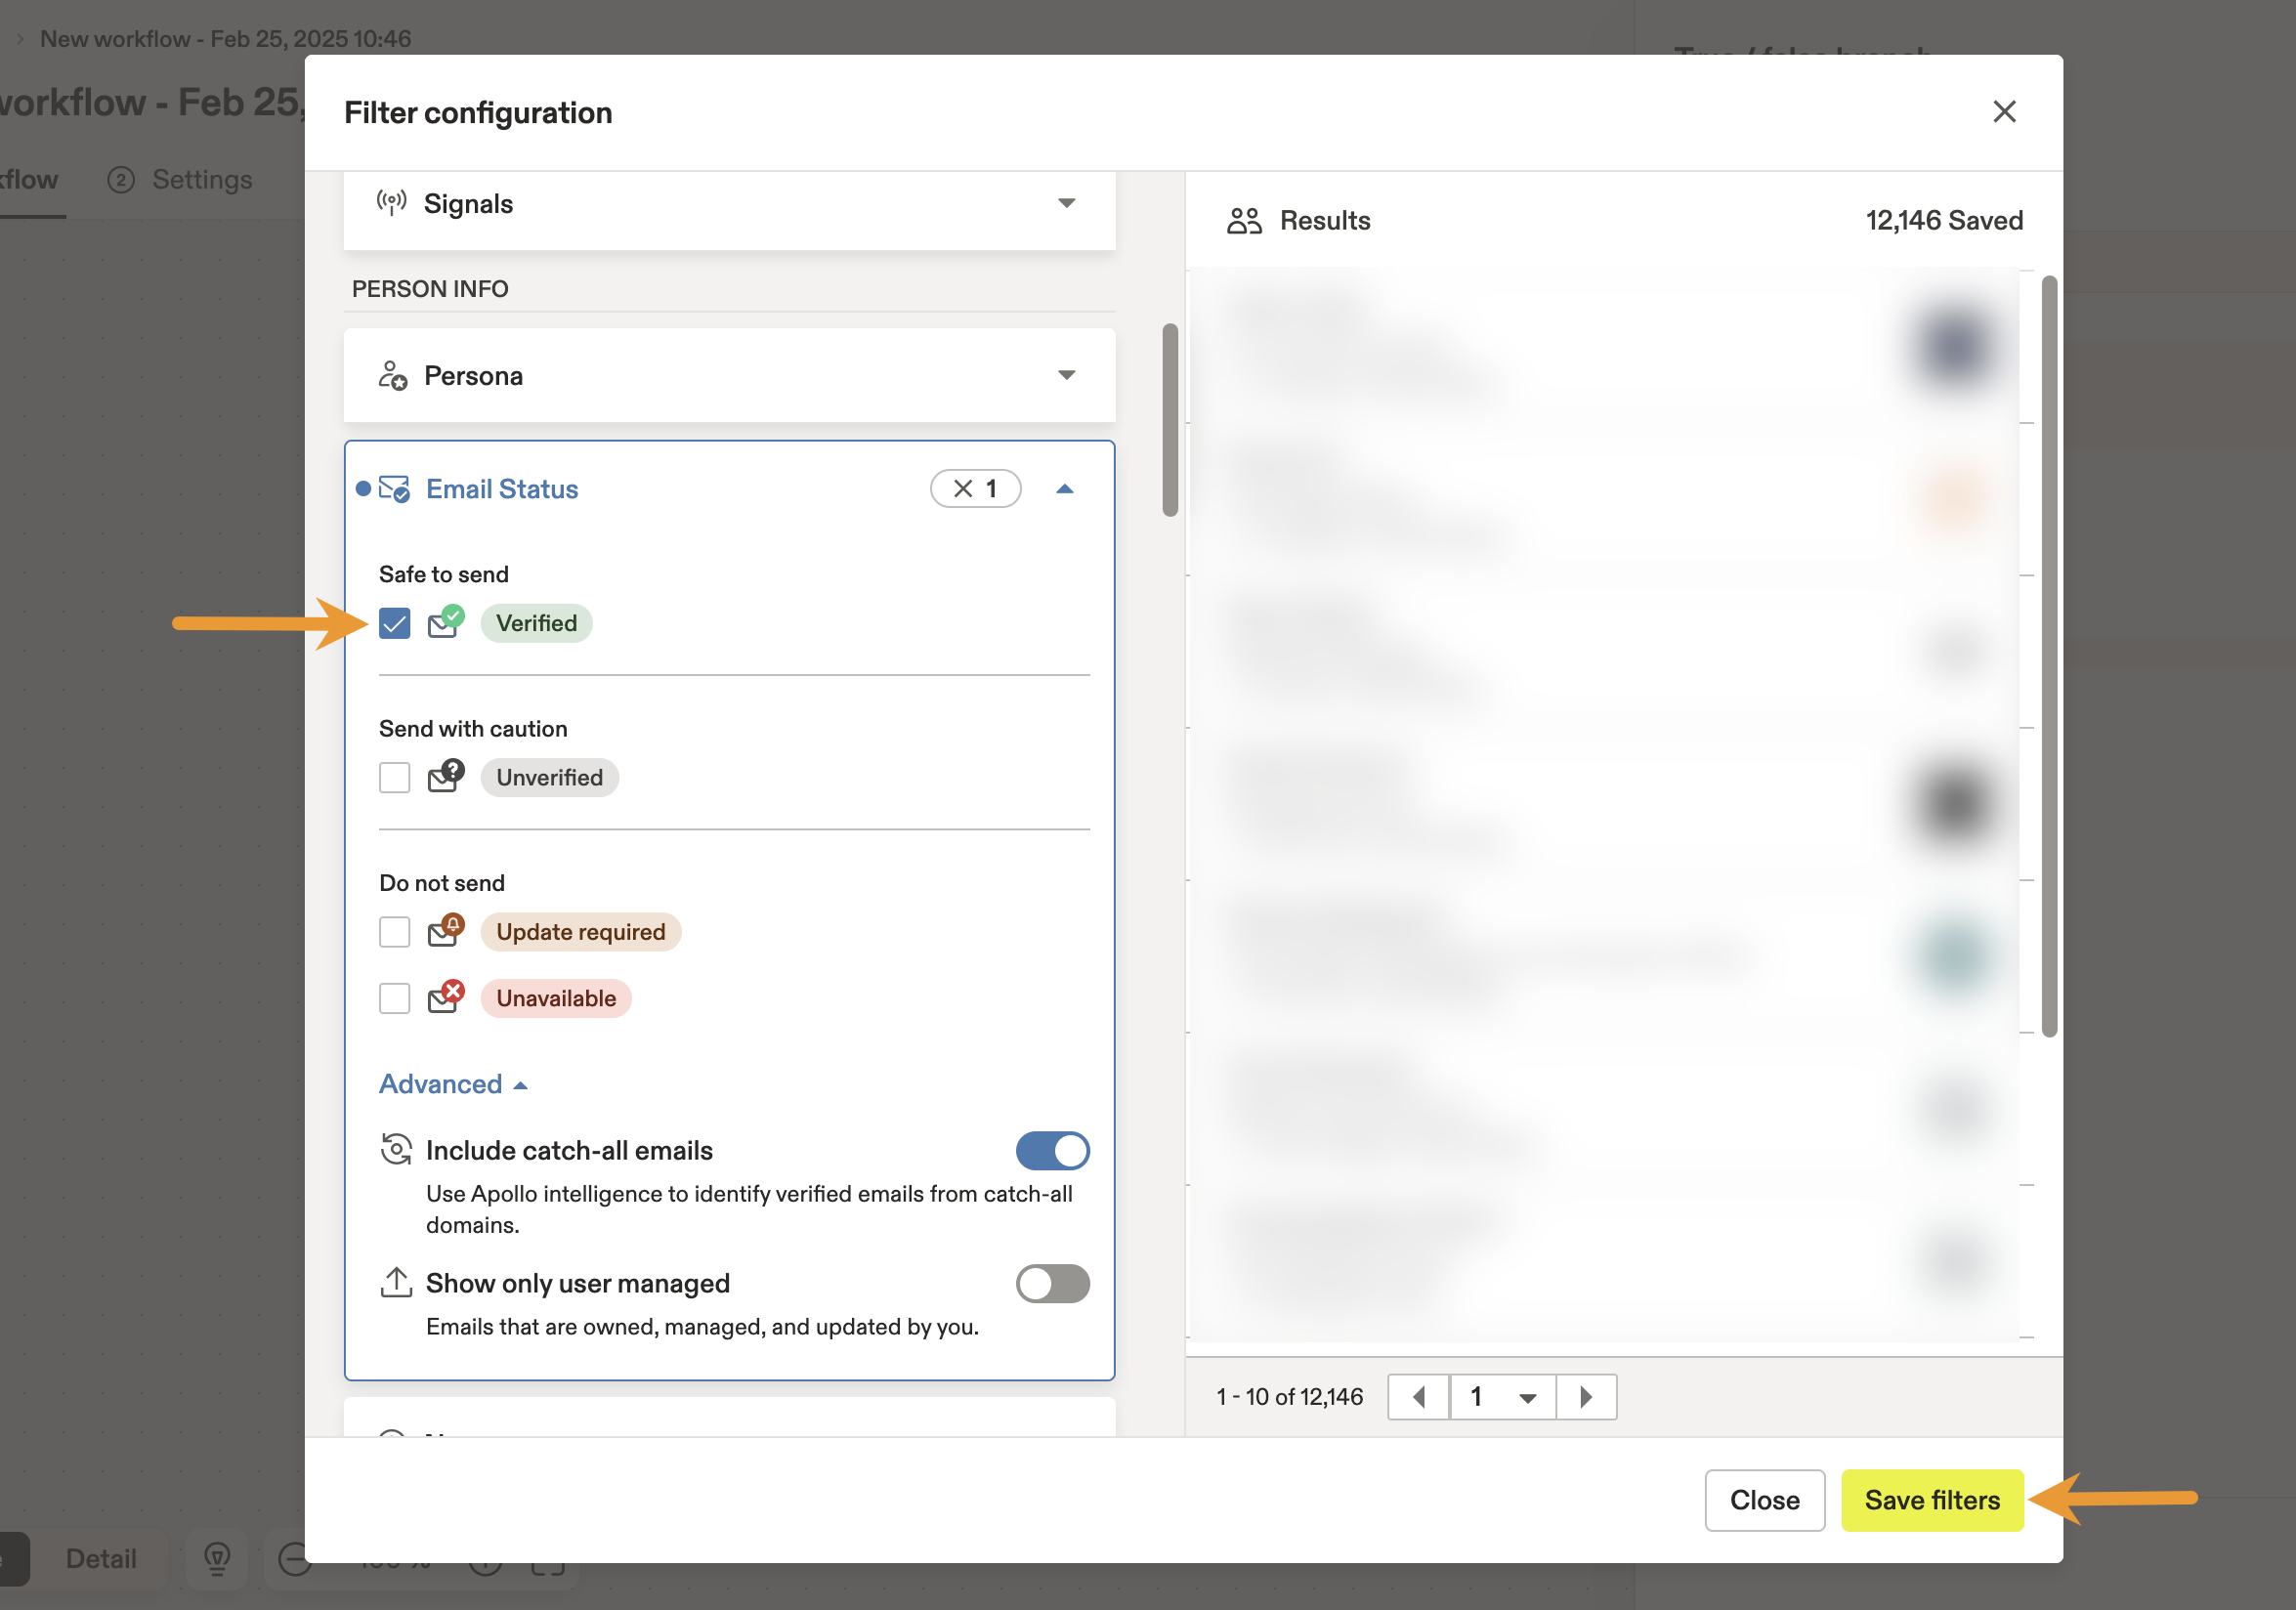
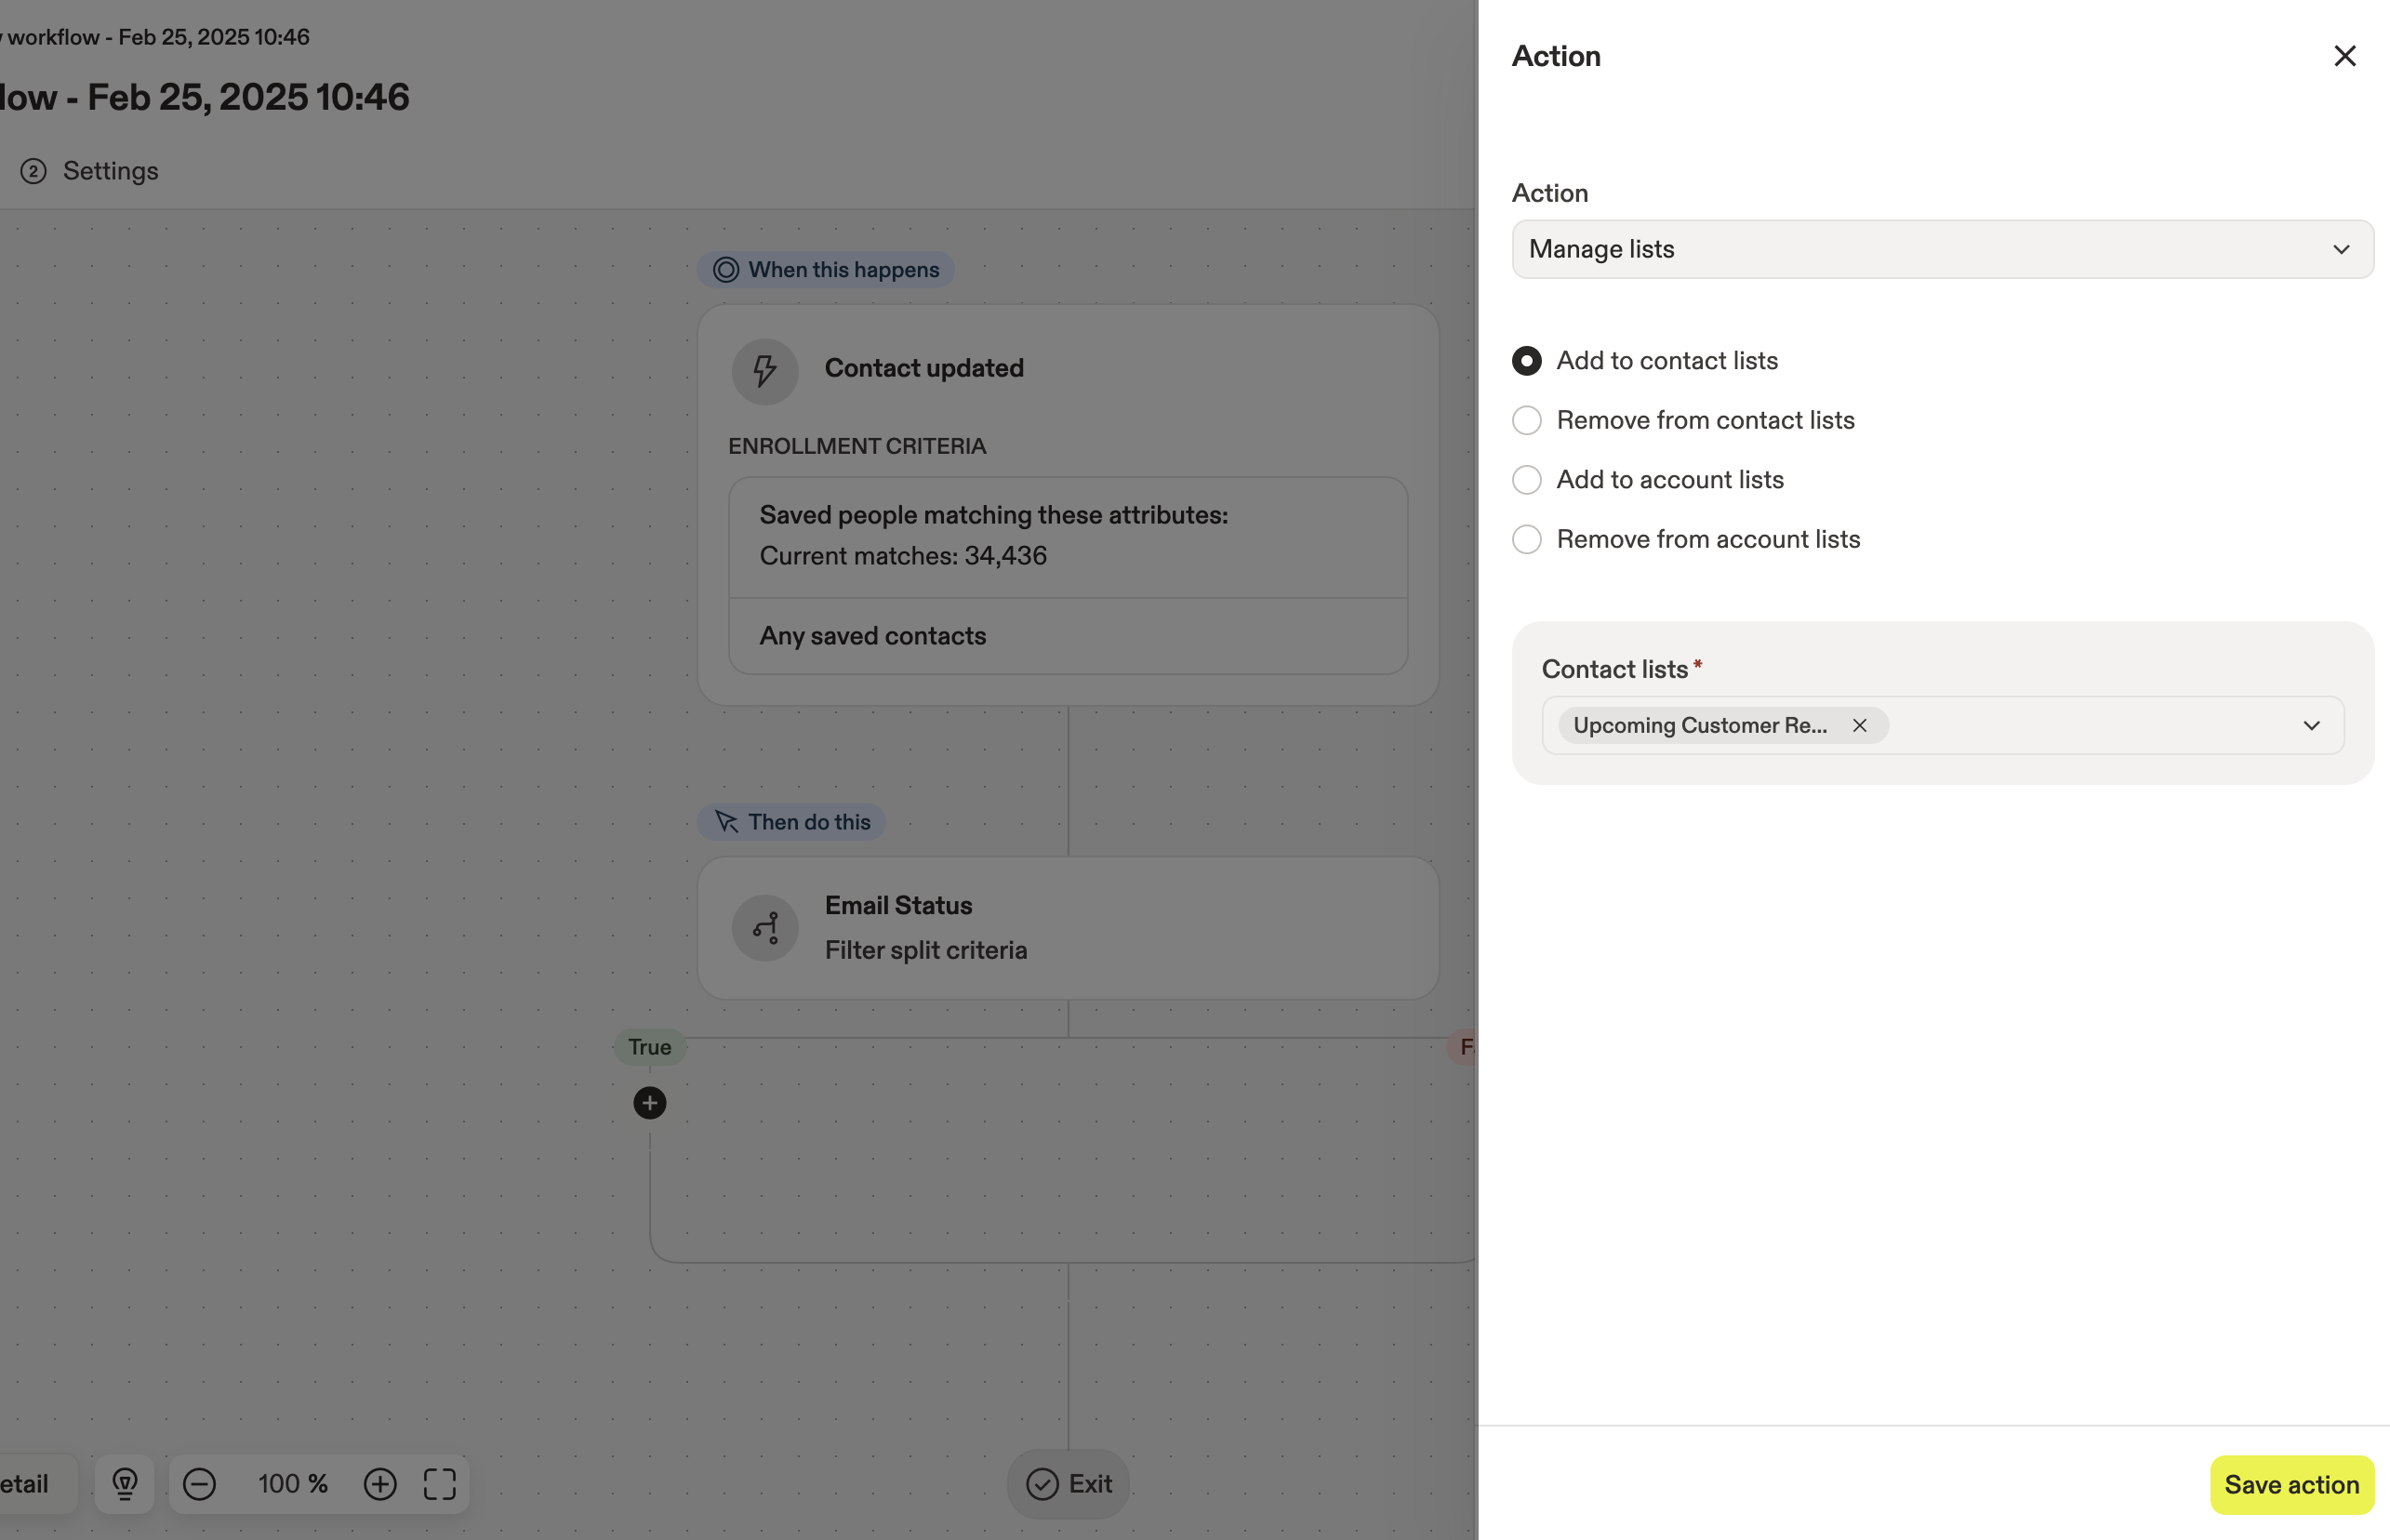
- Add a block to the
truebranch of the workflow, then click Manage lists.
- Click Add to contact lists and choose the list you created for customer renewals. Click Save action.
- Add another block to the
truebranch of the workflow, then click Manage sequences.
- Click Add contacts to sequence and choose the sequence you created to send emails to these renewal contacts.

- Use a Specific user mailbox to send the email. For this example, Apollo recommends using either a generic company mailbox (
customersuccess@company.com) or a mailbox for an executive from the appropriate organization. Be sure to align the email sender with the content of the email in the sequence. Click Save action.
- Add a block to the
falsebranch, then click Exit. This ensures that you don't email contacts without verified email addresses.
- Click the Settings tab and change the re-enrollment criteria. This helps ensure that the same contacts are not processed by the workflow too often. For this example, Apollo set contact re-enrollment to once every 6 months to account for a yearly renewal cycle.

- When you're ready to launch the workflow, toggle the activation slider on and click Save and activate.
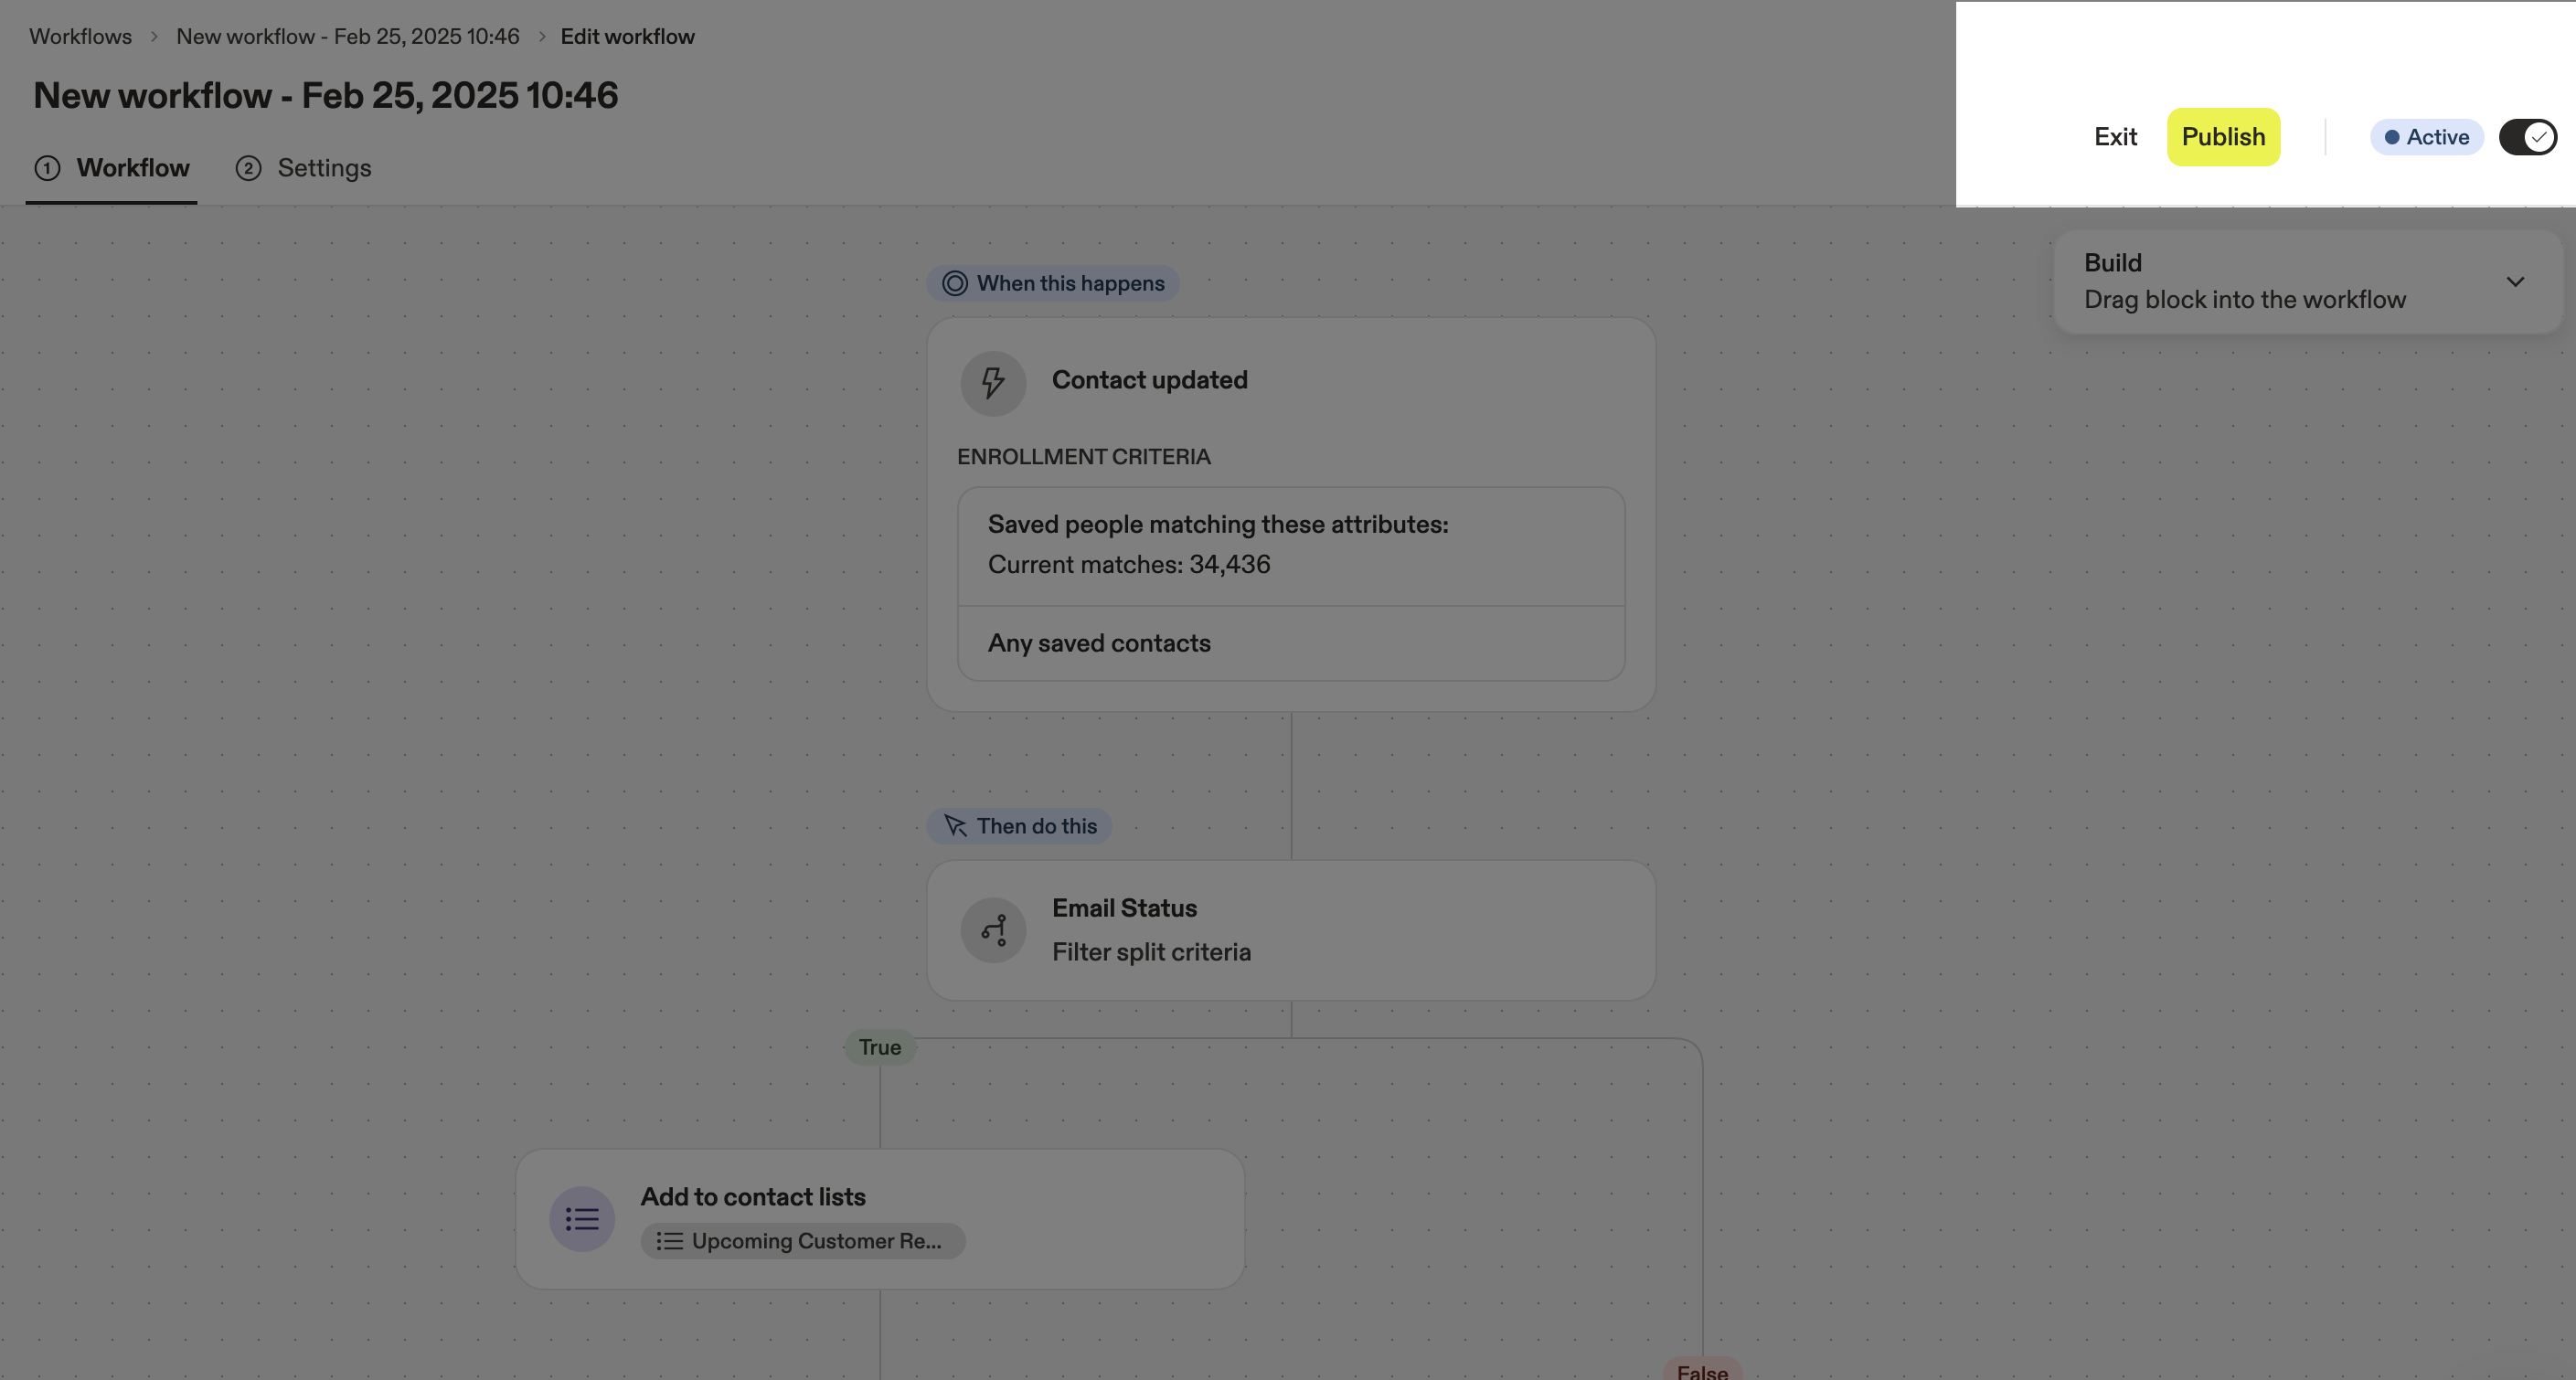
You've activated the workflow.
Remember to keep an eye on the workflow to ensure it continues to trigger appropriately. To do so, open the workflow and click the Activity tab.
Want to learn everything there is to know about workflows in Apollo? Check out the free Apollo Academy course How to Use Workflows to Automate Your Sales Process and get certified on your workflows knowledge.


