
Overview
Workflows automate sales processes that would otherwise require manual work, such as adding contacts to sequences, assigning tasks, enriching data, and updating records.
You can use an AI prompt, a pre-built template, or a blank canvas to create a workflow. After you choose who or what the workflow targets, configure when it runs, review its settings, and launch it.
Access to workflows depends on your Apollo plan. If you need access, upgrade your plan. If you have questions about upgrading, reach out to the sales team.
Anyone with permission to access workflows can create one. Your permission profile determines whether you can activate workflows or need to submit them for approval.
Check out the following sections to create and launch a workflow.
Create a Workflow
You need Can view workflows permission to access workflows. You also need Can activate workflows permission to activate or deactivate them. If you can build and edit workflows but can't activate them, you can submit a workflow to a workspace admin for review. For more information, check out Create and Assign Permission Profiles.
To create a workflow:
- Launch Apollo, then click Workflows.
- Click Create workflow.
- Choose how you want to create the workflow:
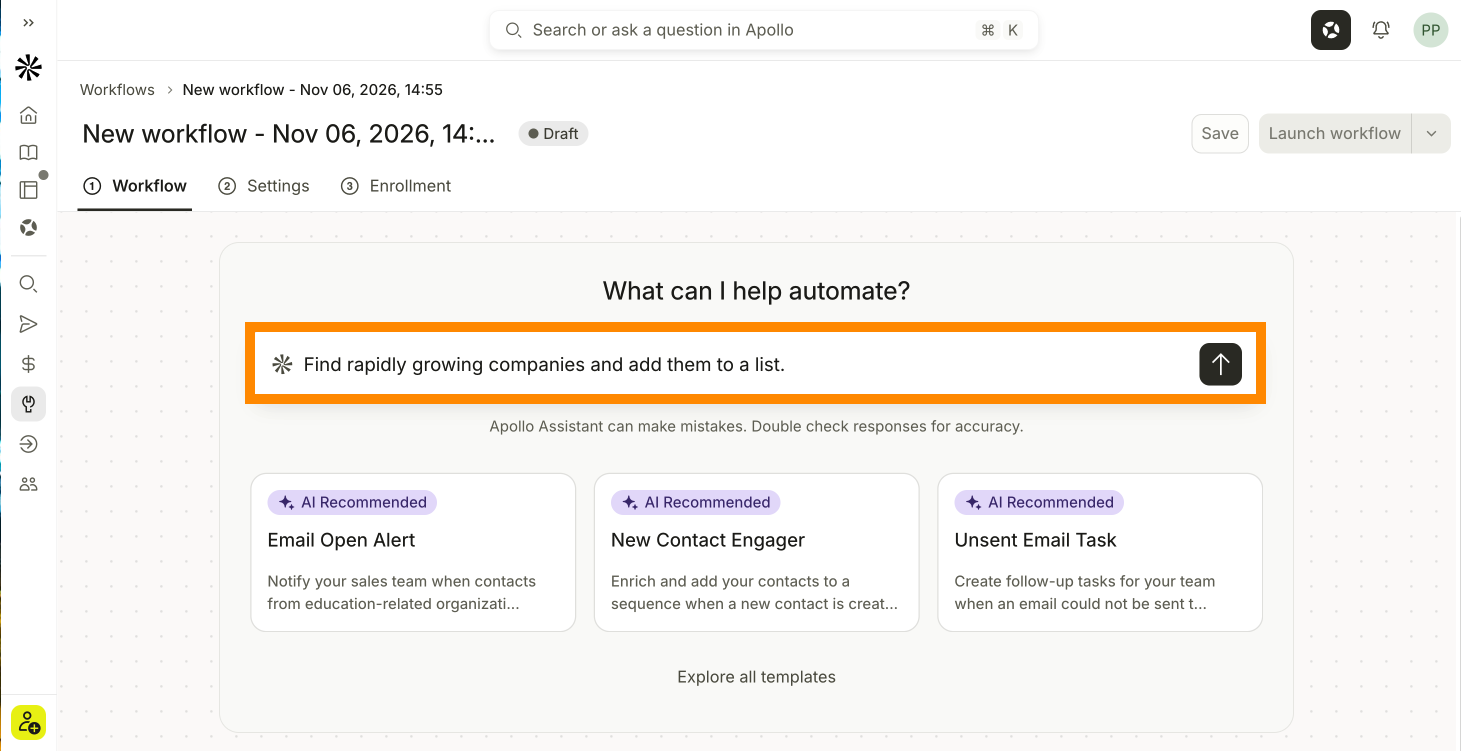
Describe what you want to automate, and Apollo builds a workflow for you.
To create a workflow with AI:
- In the Workflow AI prompt, describe the outcome you want in plain language.
- Answer any follow-up questions about your goal.
- Review the workflow Apollo creates. Apollo won't activate the workflow without your confirmation.
You have now created a workflow with AI.
Continue to review the workflow.
Use a template created by Apollo or the Apollo community to start with preconfigured workflow logic.
To create a workflow from a template:
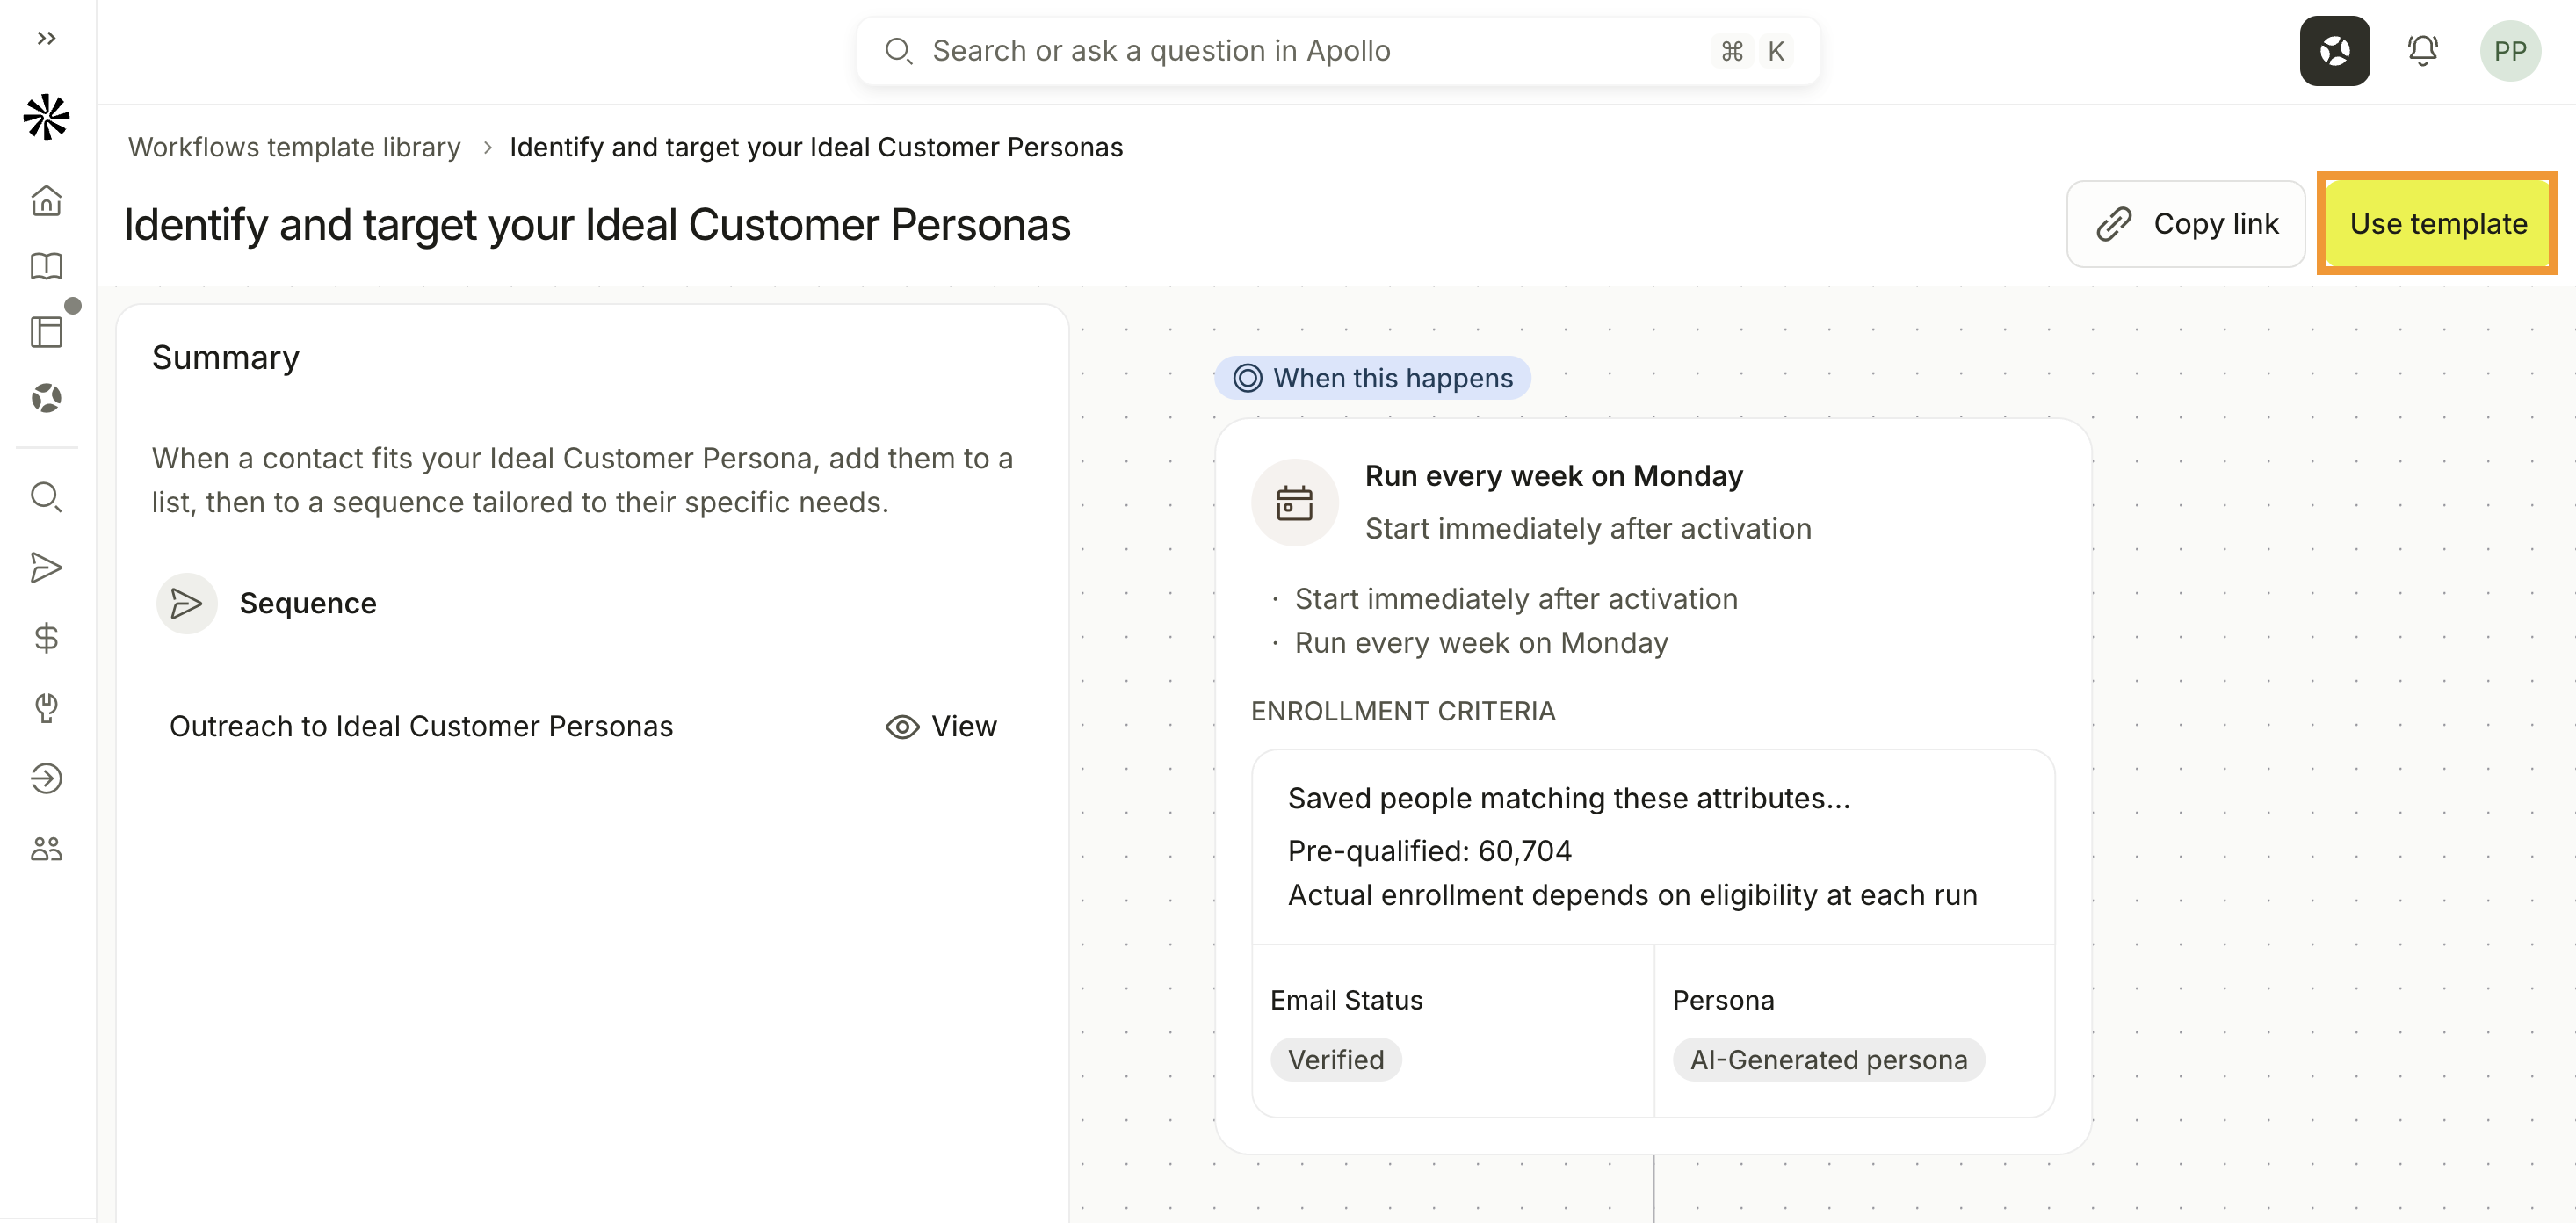
- Click Explore all templates.
- Select a template and review its workflow structure and requirements.
- Click Use template.
- Complete the required setup. Depending on the template, you may need to select lists, sequences, mailboxes, meeting links, or other resources.
- Review the preconfigured triggers, filters, rules, and actions.
You have now created a workflow from a template.
Continue to review the workflow.
Start from scratch when you want complete control over the workflow target, run type, enrollment criteria, and actions.
To create a workflow from scratch:
- Click Start from scratch.
- Choose when the workflow should run:
- Based on a date or schedule: Apollo evaluates matching records at the frequency you configure.
- Based on a trigger event: Apollo evaluates a record after the selected event occurs while the workflow is active.
- Select the workflow target: People, Companies, or Deals.
-
Complete the initial configuration:
- For a scheduled workflow, set the start date, frequency, and optional end date.
- For an event-based workflow, select the event that should trigger the workflow.
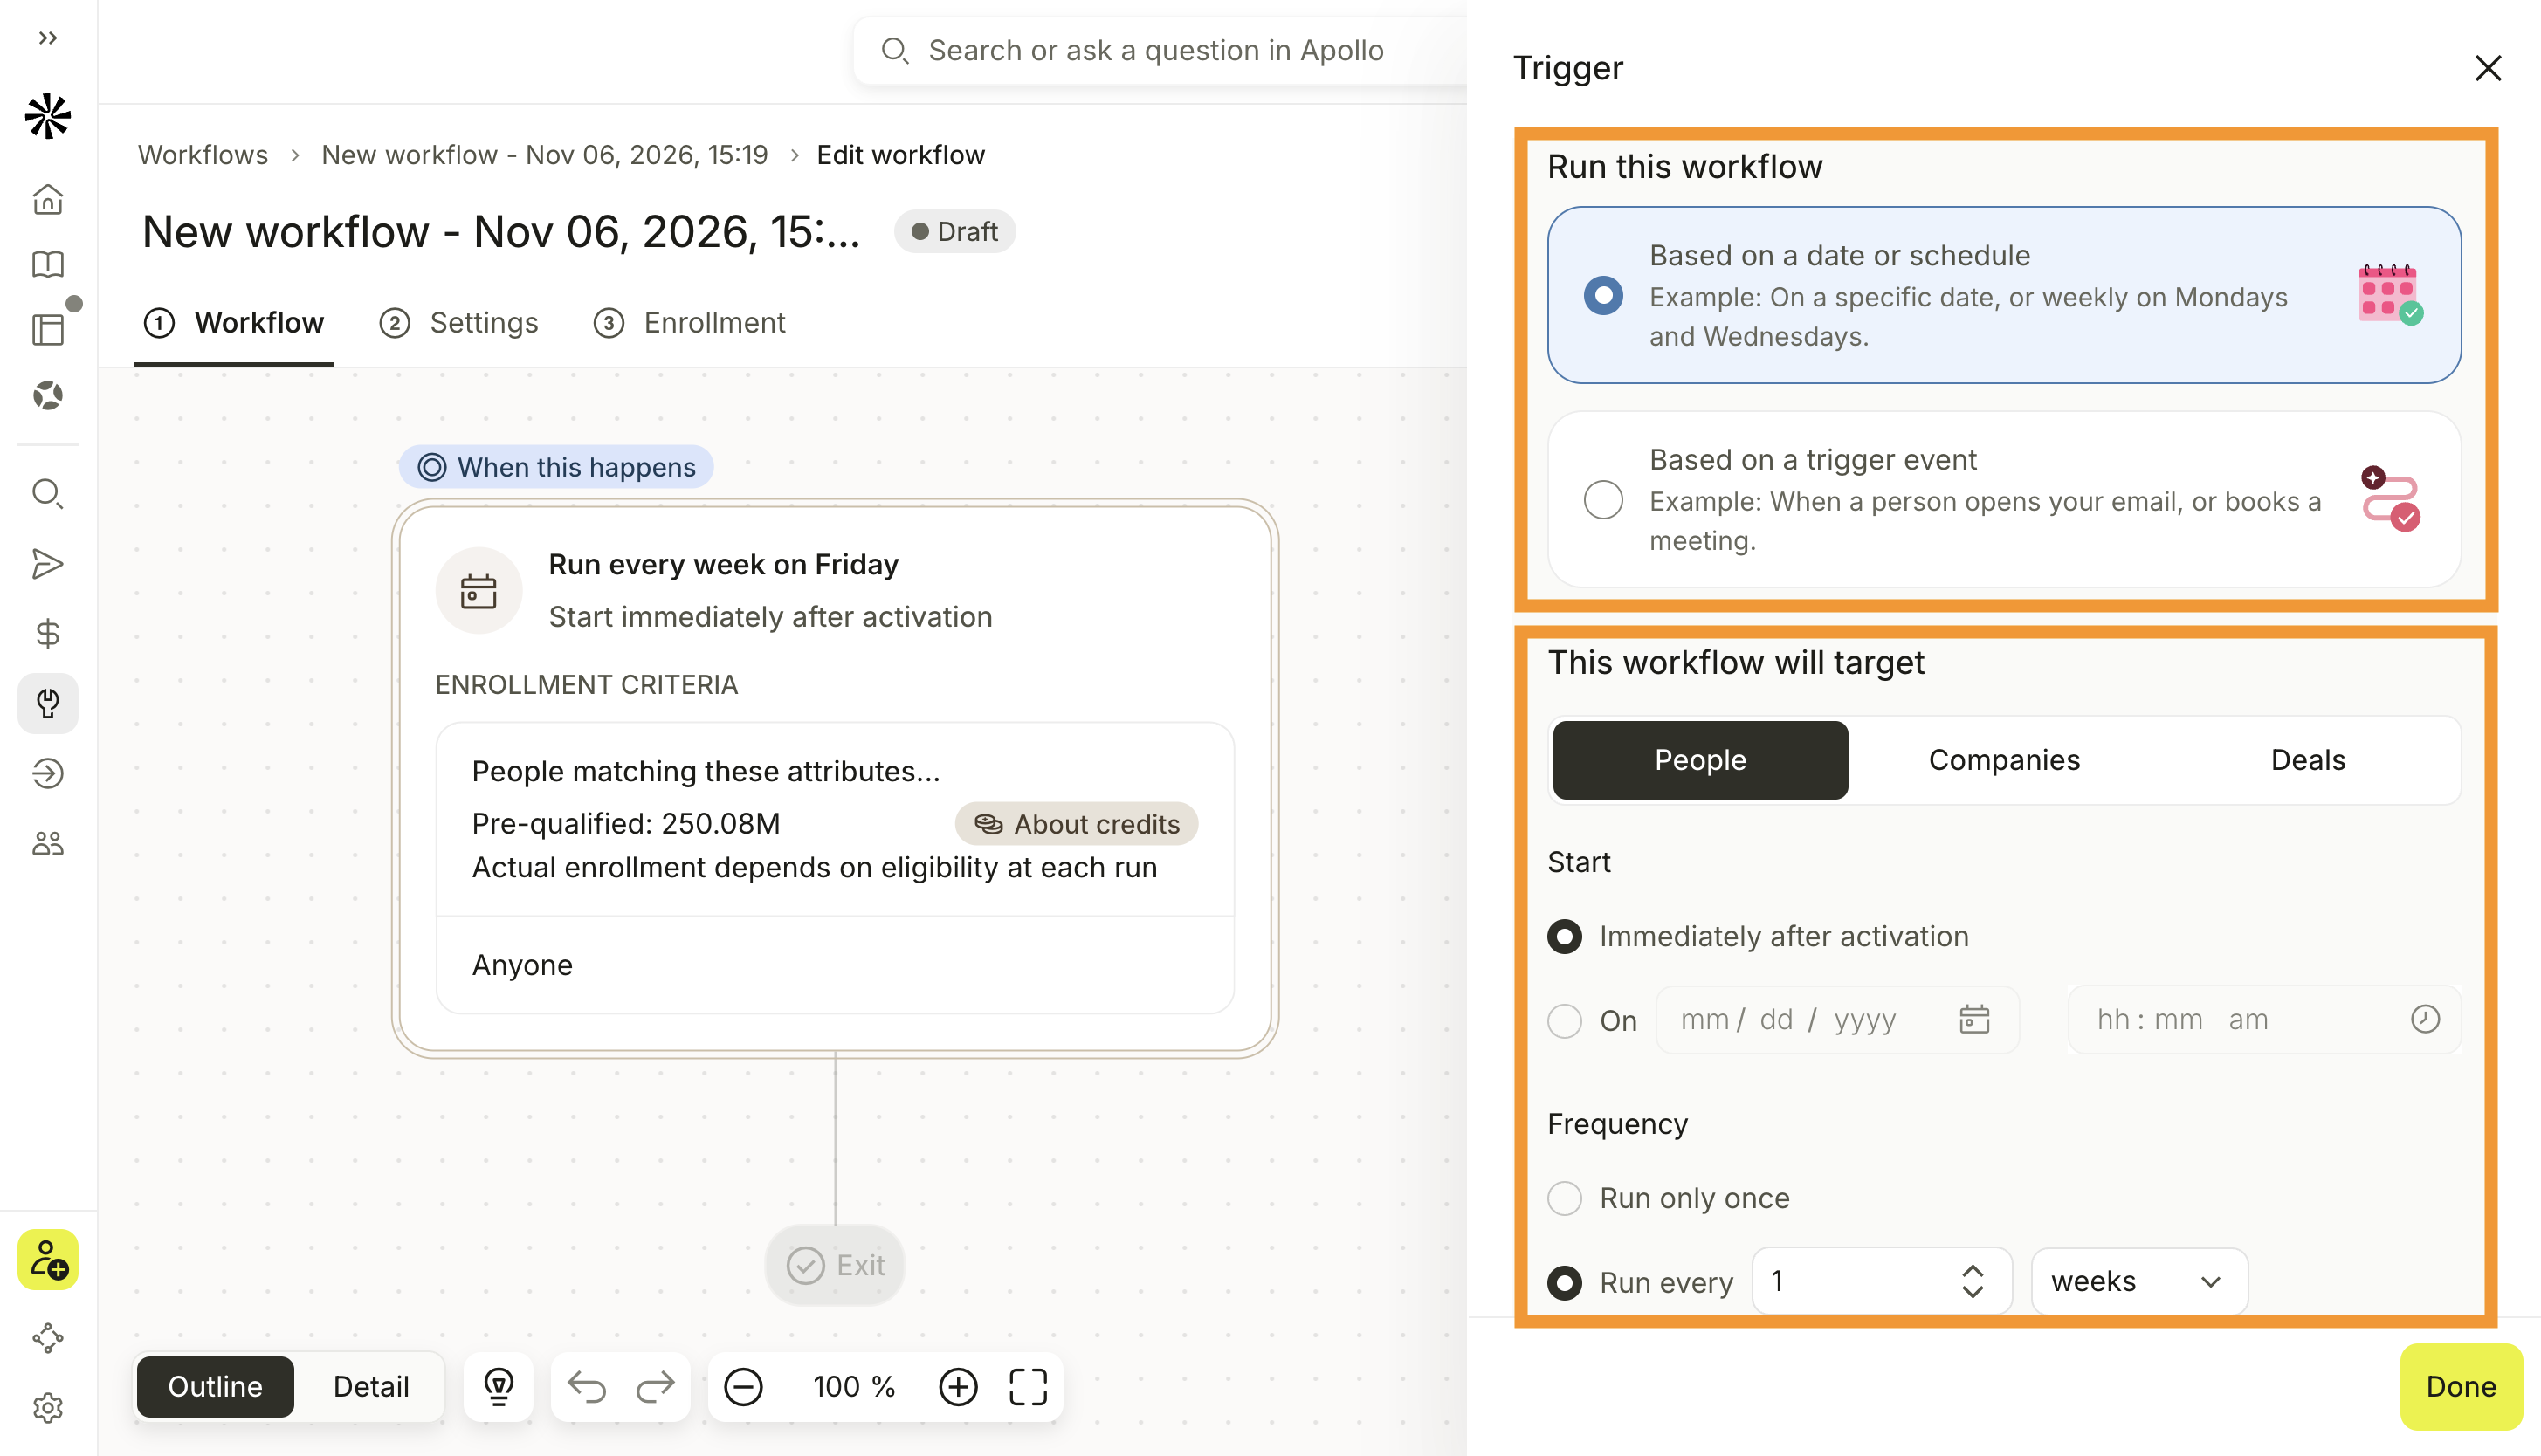
- Configure the enrollment criteria, then click Done.
A scheduled workflow uses your device's timezone for its start time. It doesn't use the timezone of the people or companies enrolled in the workflow.
You have now created a workflow from scratch.
Continue to review the workflow.
Review and Configure the Workflow
After you choose how to create the workflow, Apollo opens it in the workflow builder. Review the workflow and configure its settings before you test or activate it.
If you previously left the workflow builder, launch Apollo, click Workflows, select the workflow, then click Edit workflow.
Regardless of how you create the workflow, review its configuration before you activate it. Confirm that Apollo targets the intended records and that every action produces the expected result. Workflow actions can send emails, update records, or use credits.
Before you continue, review the following workflow details:
- Confirm that the workflow runs on the intended schedule or trigger event.
- On the Workflow tab, confirm that the workflow targets the correct type of record: people, companies, or deals.
- Review the enrollment criteria to confirm that Apollo only processes the intended records.
- Review each rule and action, and resolve any incomplete configurations or errors.
You have now reviewed the workflow configuration.
For instructions on configuring triggers, filters, branches, delays, exits, and actions, check out Configure Workflow Triggers and Actions.
Configure Workflow Settings
Use workflow settings to control enrollment approval, processing limits, notifications, and how often records can enter the workflow.
To configure workflow settings:
- Click Settings.
- Enter a name for the workflow. Click Show details to add an optional description.
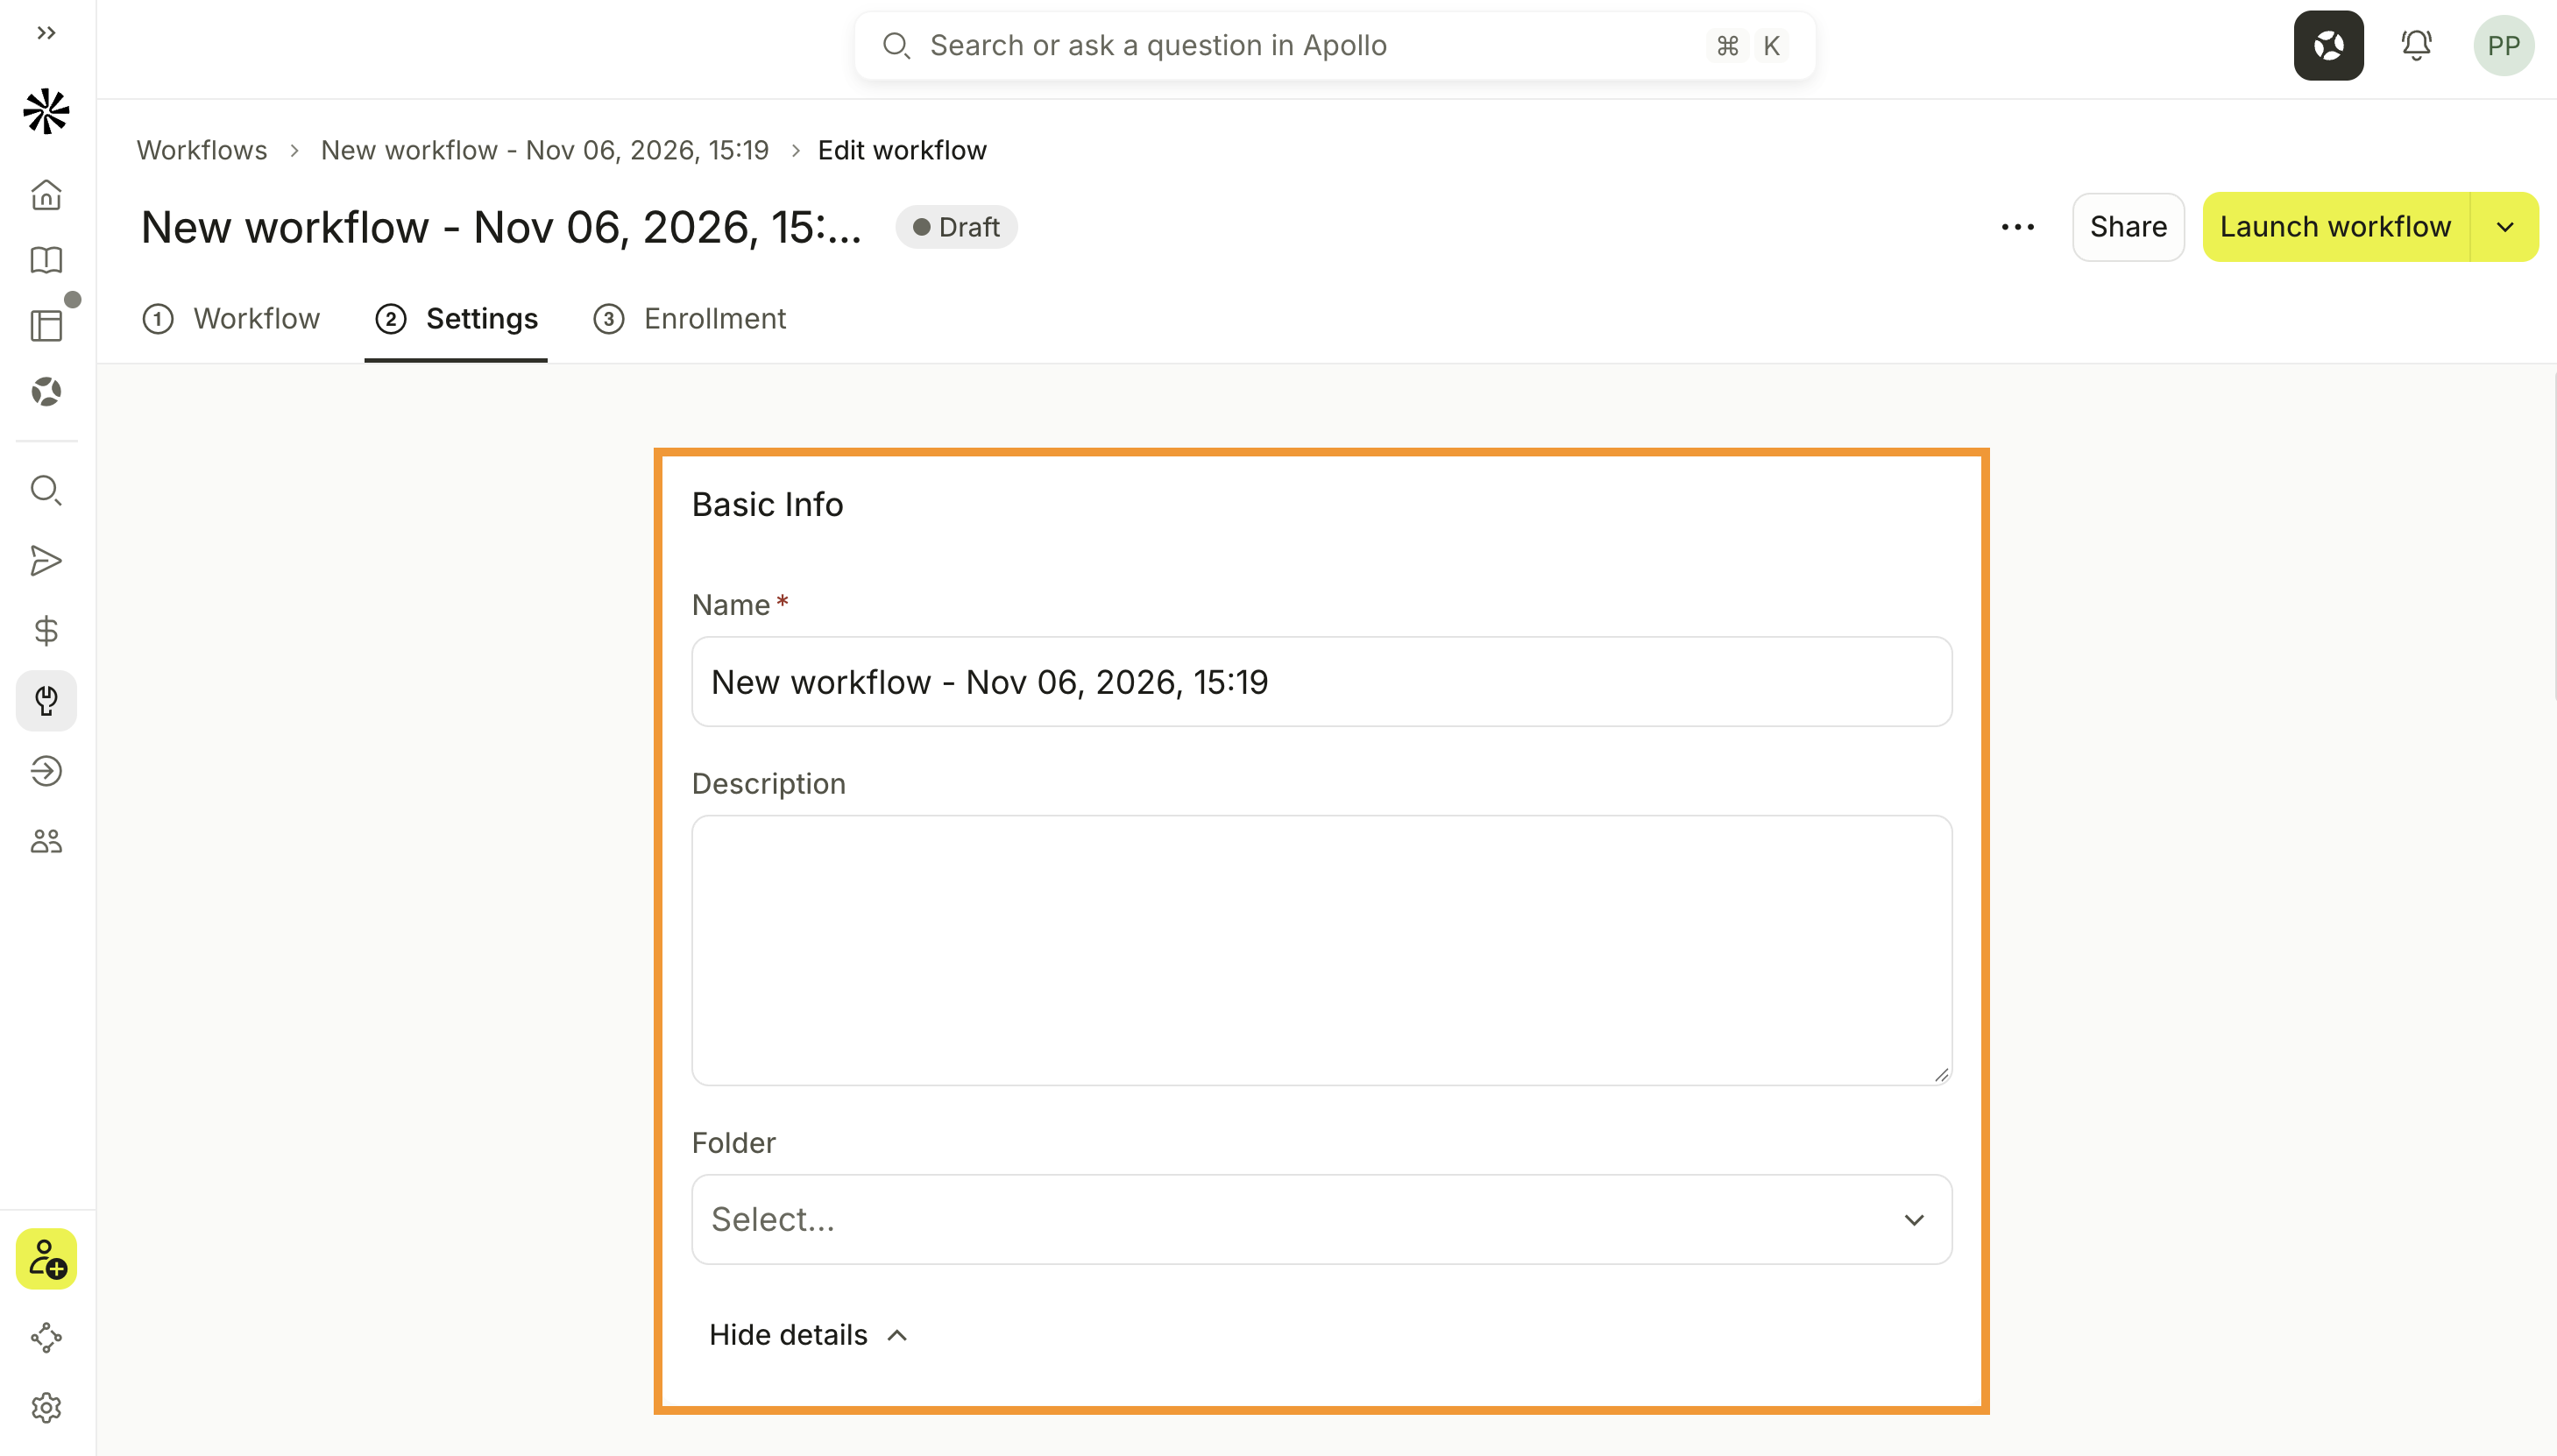
- Configure the settings you need. Use the following table to understand what each setting controls.
| Setting | What it controls |
|---|---|
| Enrollment approval | Select Automatic approval to process eligible records automatically, or select Manual approval to create tasks for reviewing eligible records before Apollo takes action. |
| Limit records processed | Limit the records or credits that the workflow can process per run or across the workflow. |
| Re-enrollment | Choose whether the same record can enter the workflow Every run, Only once, or Once every specified period. |
| Custom table layout | Choose which record information appears in the workflow table. |
| Sort enrollment | Choose the field and order Apollo uses to process eligible records. |
| Enrollment notifications | Receive notifications when records meet the enrollment criteria. |
- Click Save.
You have now configured and saved the workflow settings.
Enrollment approval controls whether individual records need review before Apollo completes workflow actions. It is separate from the Can activate workflows permission, which controls whether a user can activate or deactivate an entire workflow. Manual enrollment approval isn't supported for deal-based workflows.
Test or Activate the Workflow
When you're ready, run a limited trial, activate the workflow, or submit it to a workspace admin for approval.
A trial run isn't a simulation. If you approve the records, Apollo completes the configured actions, which may send emails, update records, or use credits.
Select the option that matches what you want to do.
Use a trial run with manual approval to process a limited number of records before scaling the workflow.
To run a trial:
- Open the menu next to Launch workflow.
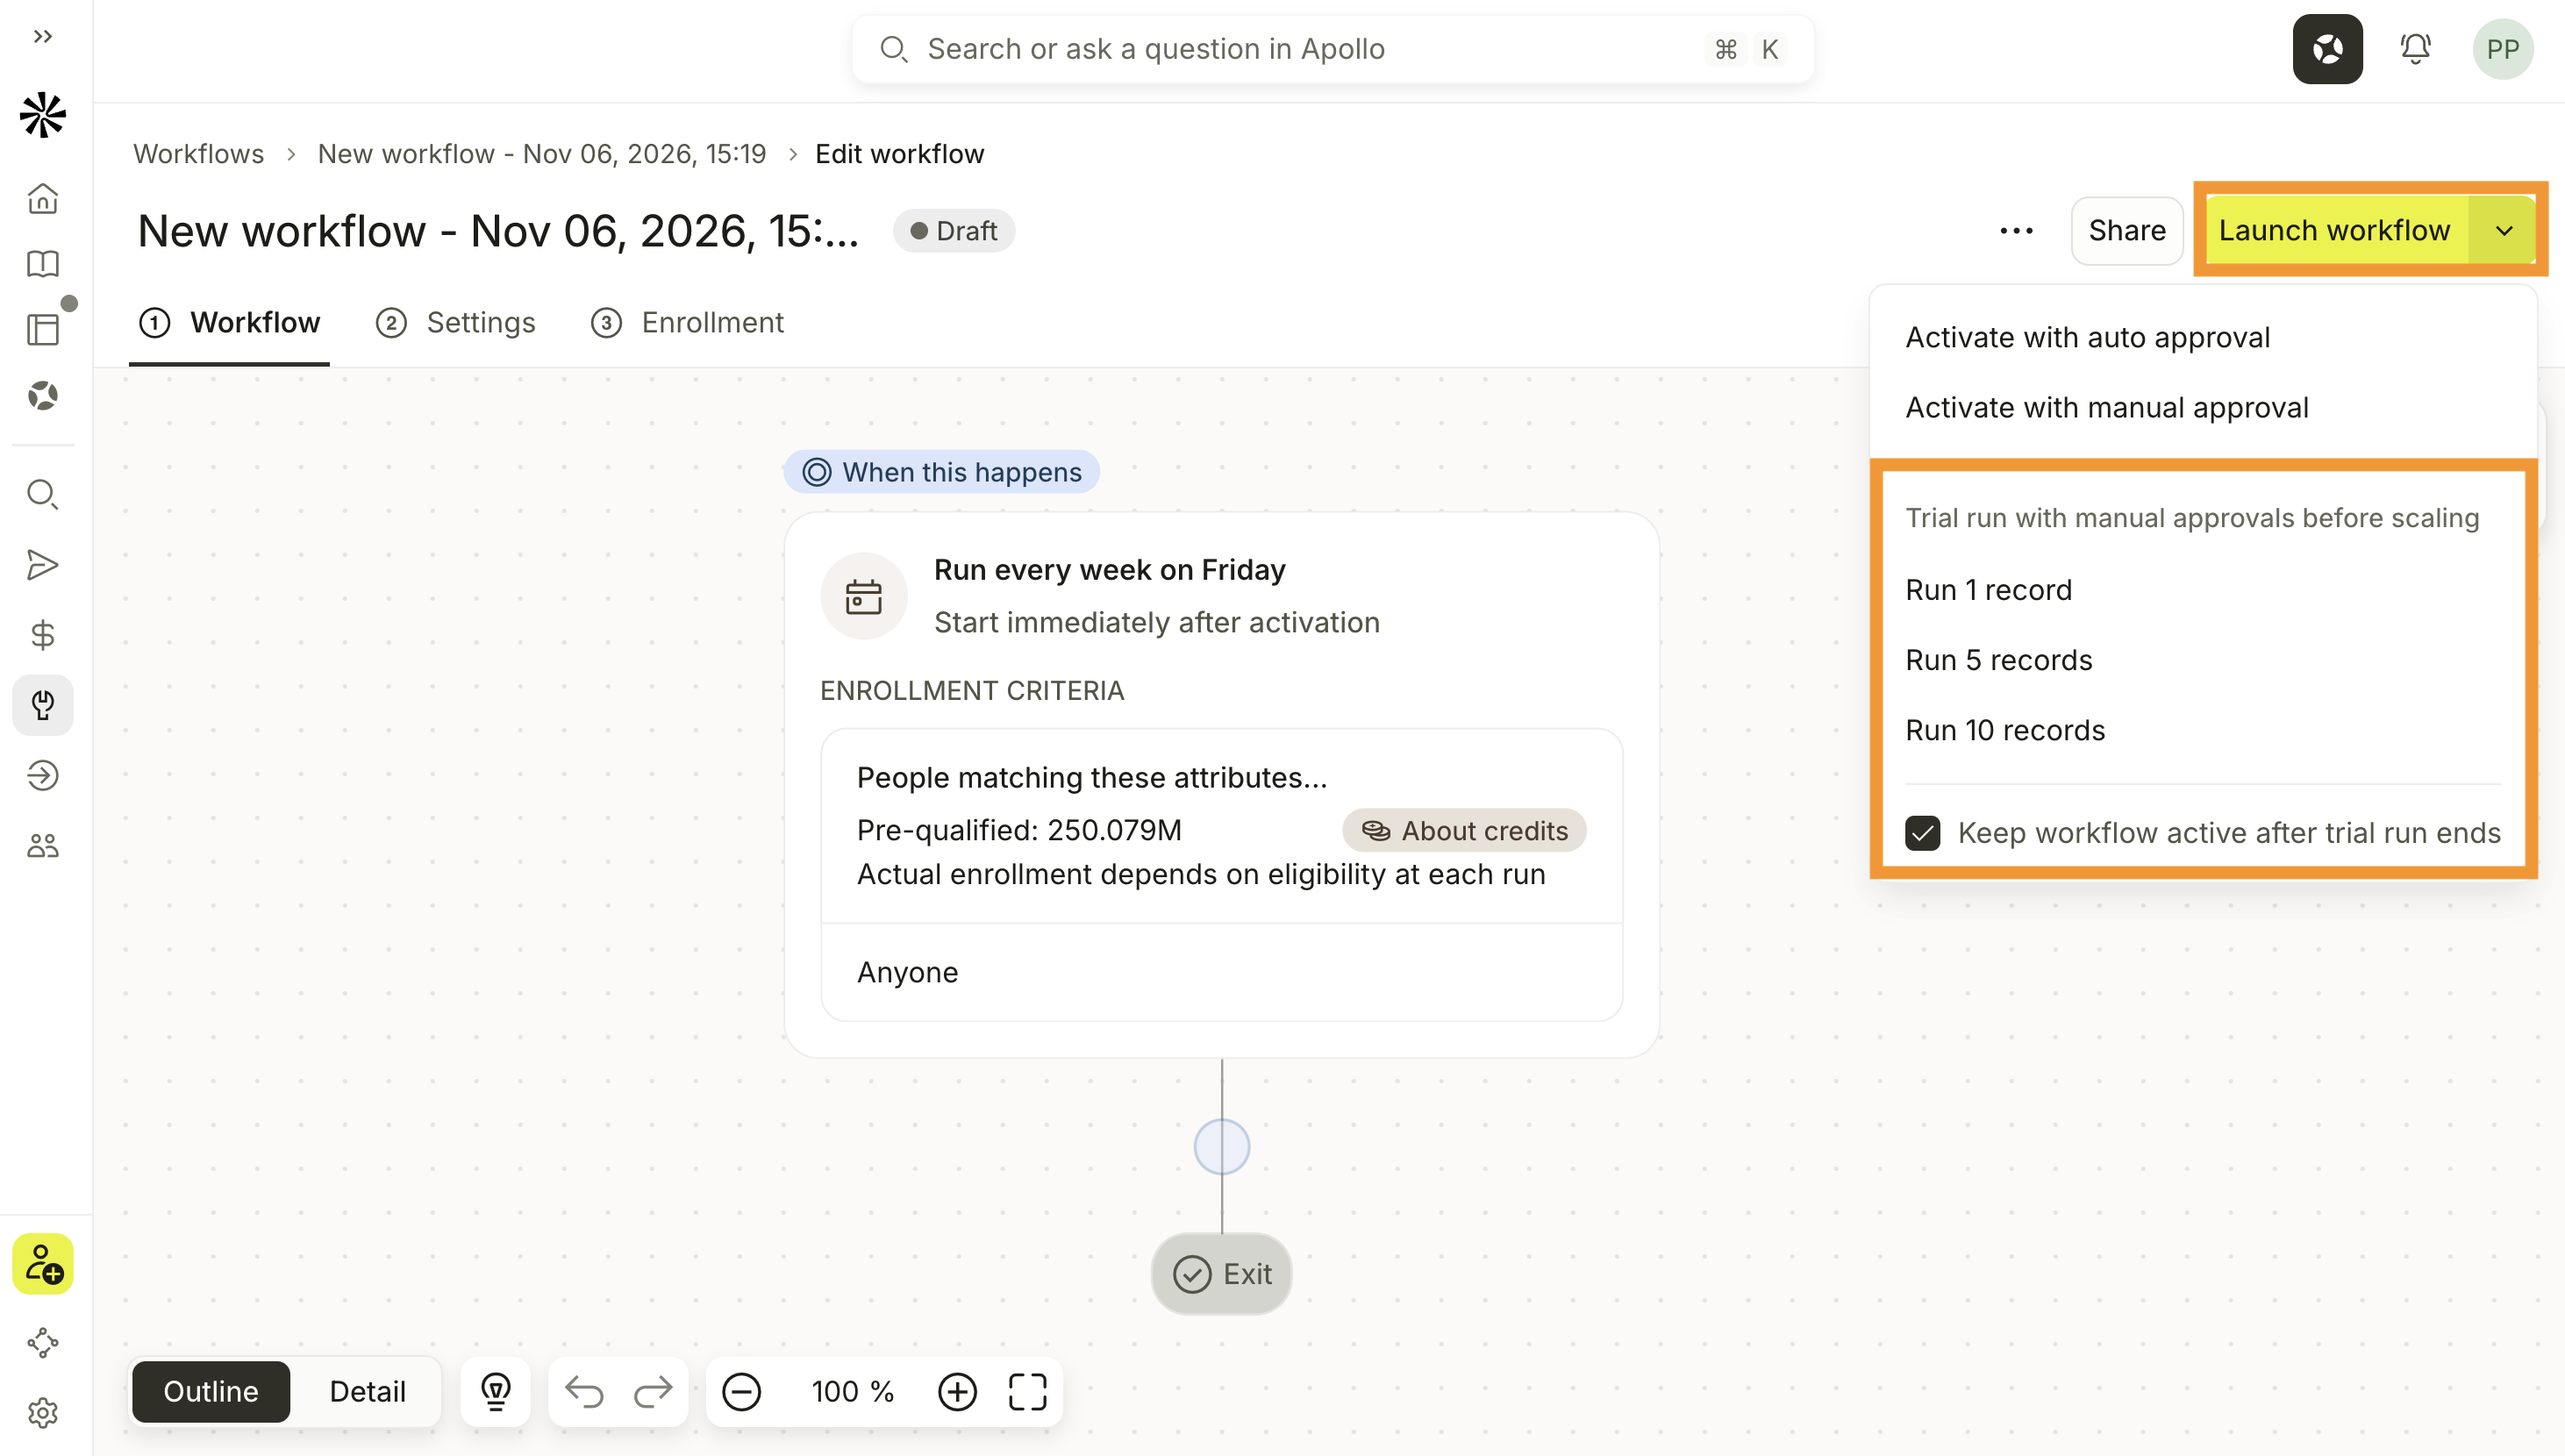
- Under Trial run with manual approvals before scaling, click Run 1 record, Run 5 records, or Run 10 records.
- Check Keep workflow active after trial run ends if you want the workflow to remain active after the trial.
- Review the records selected for the trial, then approve or reject them.
You have now completed a limited trial of the workflow.
When you're ready to activate the workflow, follow the steps in the Activate the workflow tab.
You need Can activate workflows permission to activate the workflow.
To activate the workflow:
- Open the Launch workflow menu.
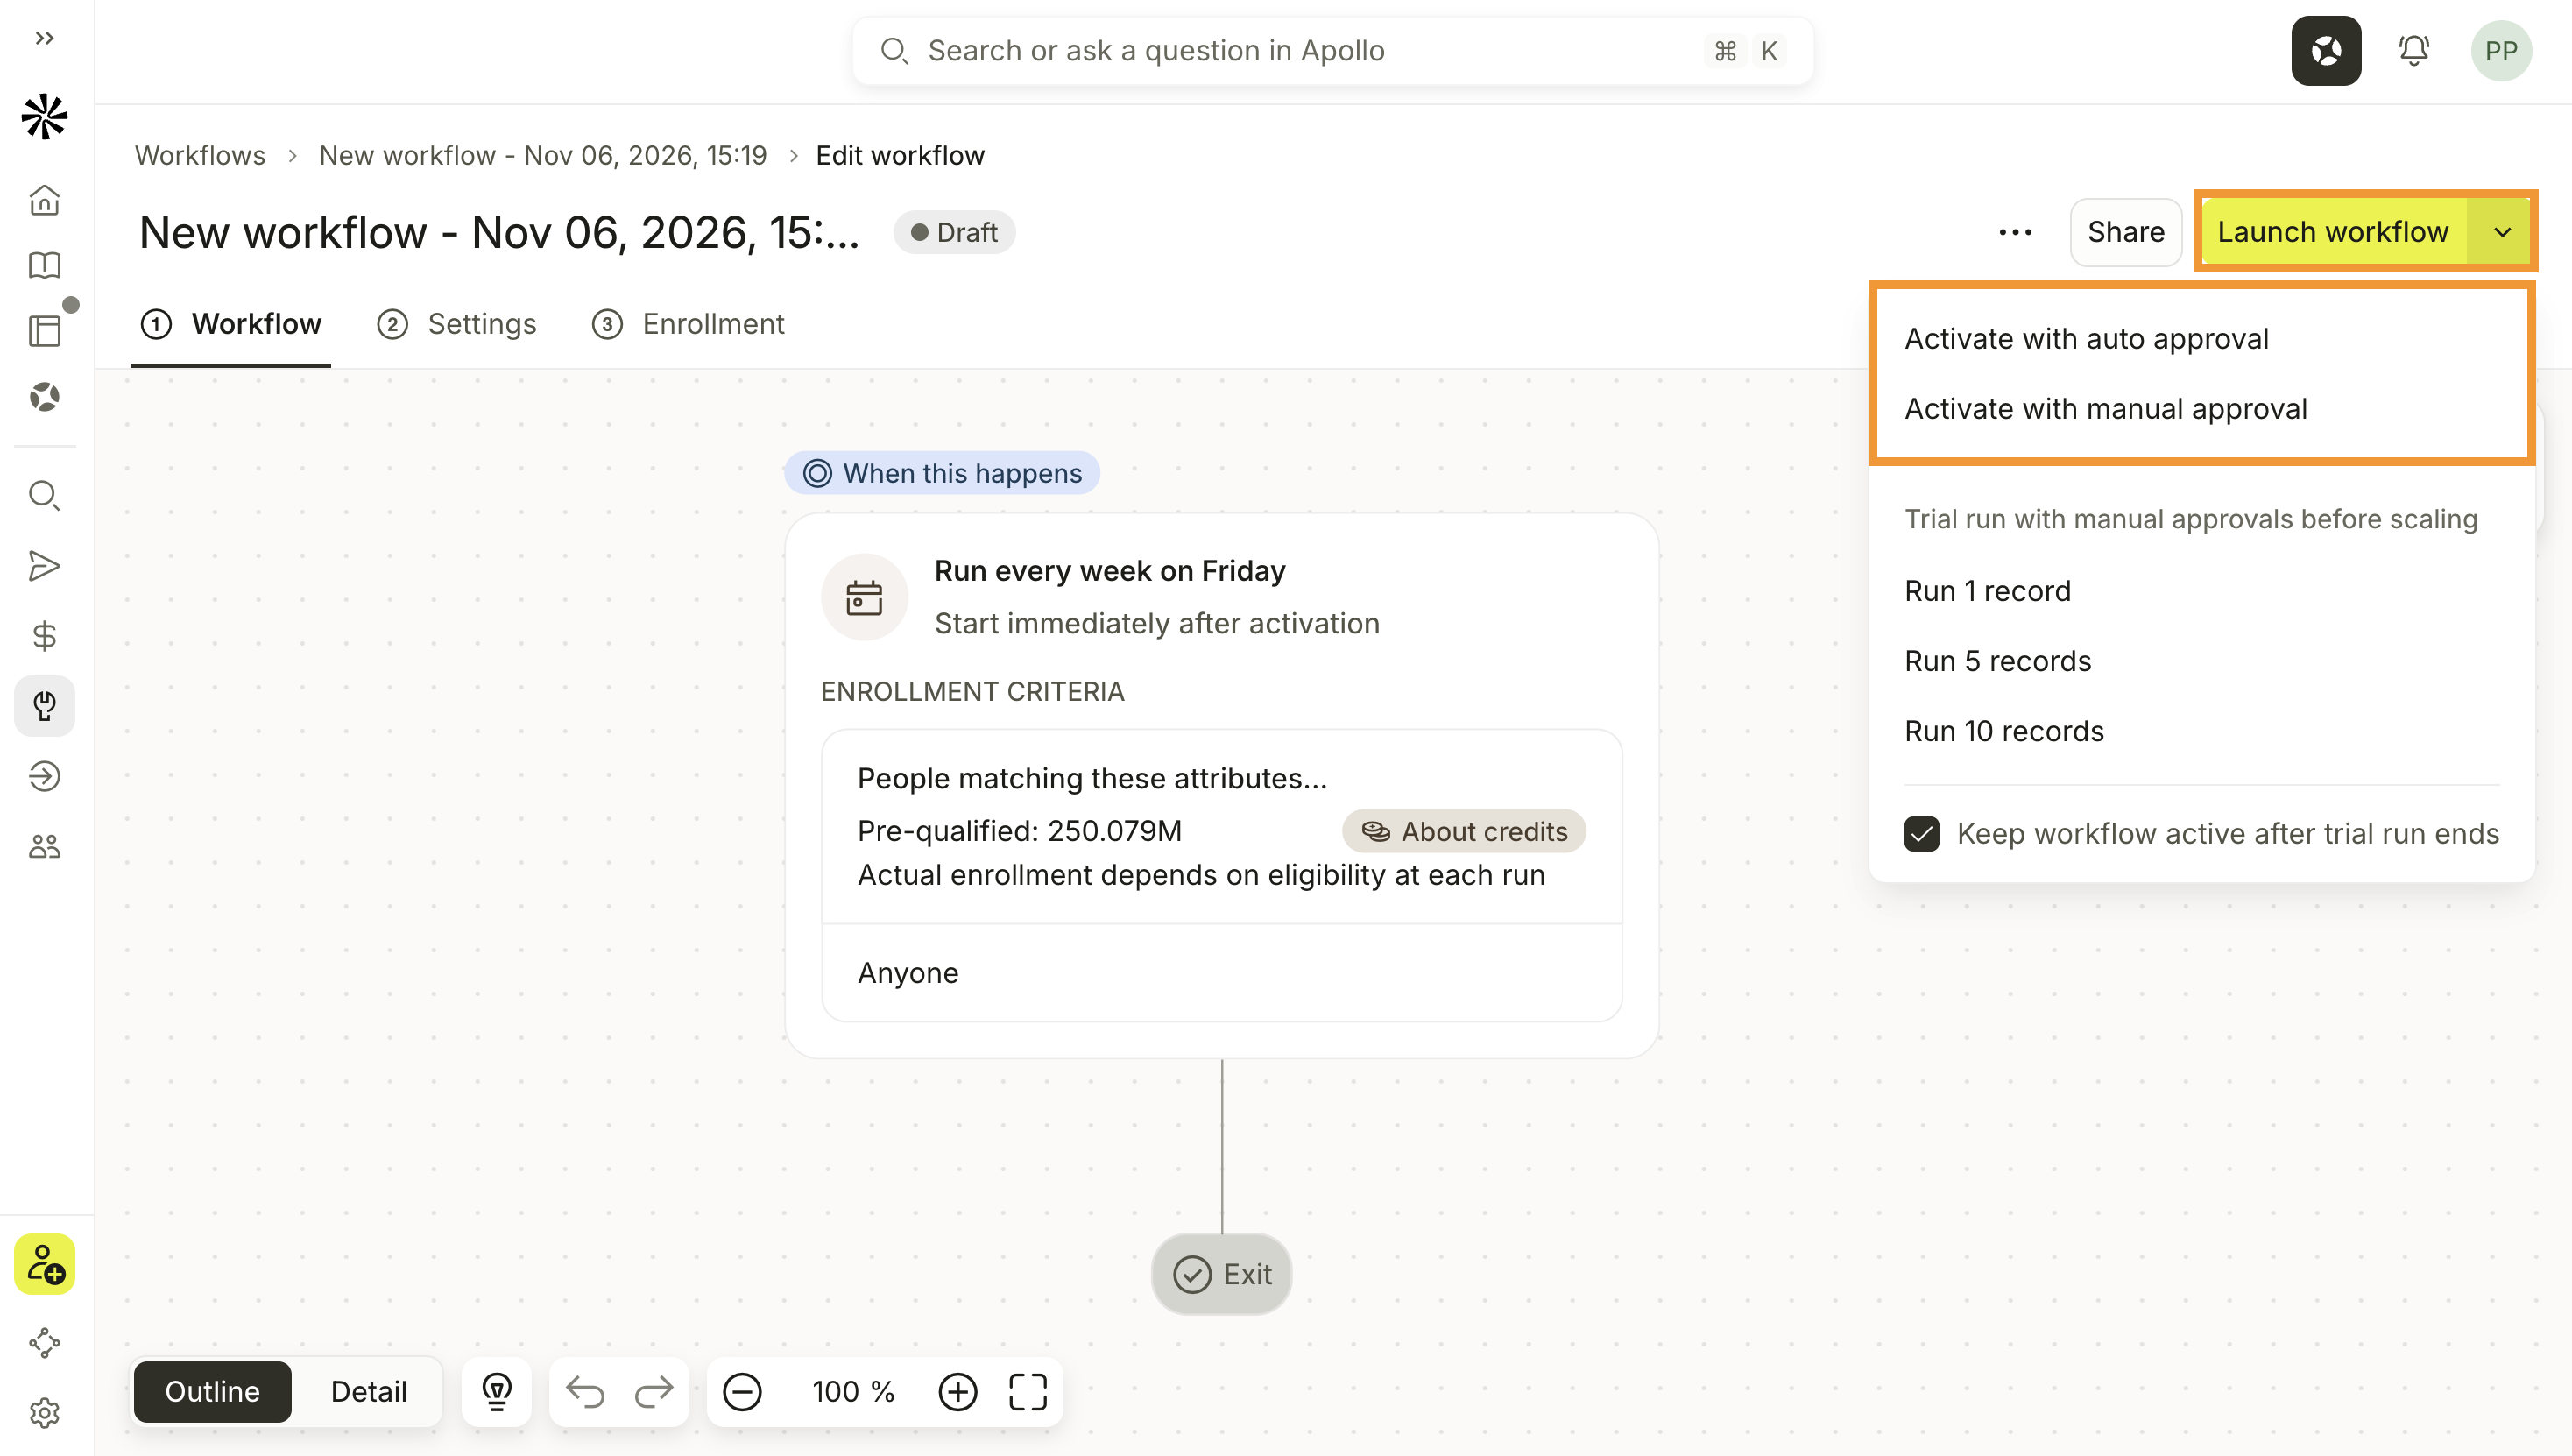
- Select Activate with auto approval or Activate with manual approval.
You have now activated the workflow. It can begin processing eligible records.
If you don't have Can activate workflows permission, submit the workflow to a workspace admin for review.
To submit the workflow for approval:
- Click Save.
- Click Submit for approval. Apollo notifies workspace admins and changes the button to Submitted.
Admins don't approve or reject activation requests from a separate approval queue. An admin opens the submitted workflow, reviews it, and activates it directly.
You have now submitted the workflow to a workspace admin for review.
To edit, deactivate, clone, move, archive, share, or troubleshoot an existing workflow, check out Manage and Troubleshoot Workflows.
Next Steps
Keep building and managing your workflows with the following resources.
| Configure Workflow Triggers and Actions | Configure workflow logic with triggers, enrollment filters, branches, delays, exits, and actions. |
|---|---|
| Manage and Troubleshoot Workflows | Manage active workflows, review enrollment, retry failed records, share workflows, and troubleshoot unexpected behavior. |
| Workflows Overview | See how workflows work and explore ways to automate your sales processes. |
| Workflow Integrations and Actions | Explore available integrations and actions for automating work across your GTM tools. |