Overview
The Send Grid integration allows you to send a higher volume of emails that can bypass the regular email sending limits that major email providers have in place. Your ability to send more emails increases when you set up and integrate a SendGrid account with Apollo.
To use the SendGrid integration, you must authenticate all domains on SendGrid that are used as both mailboxes and as user logins on Apollo.
If you don't have a SendGrid account, check out SendGrid Email API to learn more. Wondering what plan to sign up for? The Apollo integration works with all SendGrid Email API plans. However, SendGrid limits the number of emails you can send per day and month if you're on one of their free plans. For more information on SendGrid plans, check out SendGrid Pricing.
Check out the following sections to prepare your SendGrid account to integrate with Apollo.
Configure Your SendGrid Account
Apollo doesn't support IP allowlisting in SendGrid. If you enable IP allowlisting, you can't deliver SendGrid messages through Apollo. For more information on IP allowlisting, check out IP Access Management on SendGrid Support.
Domain Authentication
Domain authentication tells email providers that SendGrid has your permission to send emails on your behalf. In SendGrid, you can provide the necessary information to point your DNS entries from your DNS provider to SendGrid.
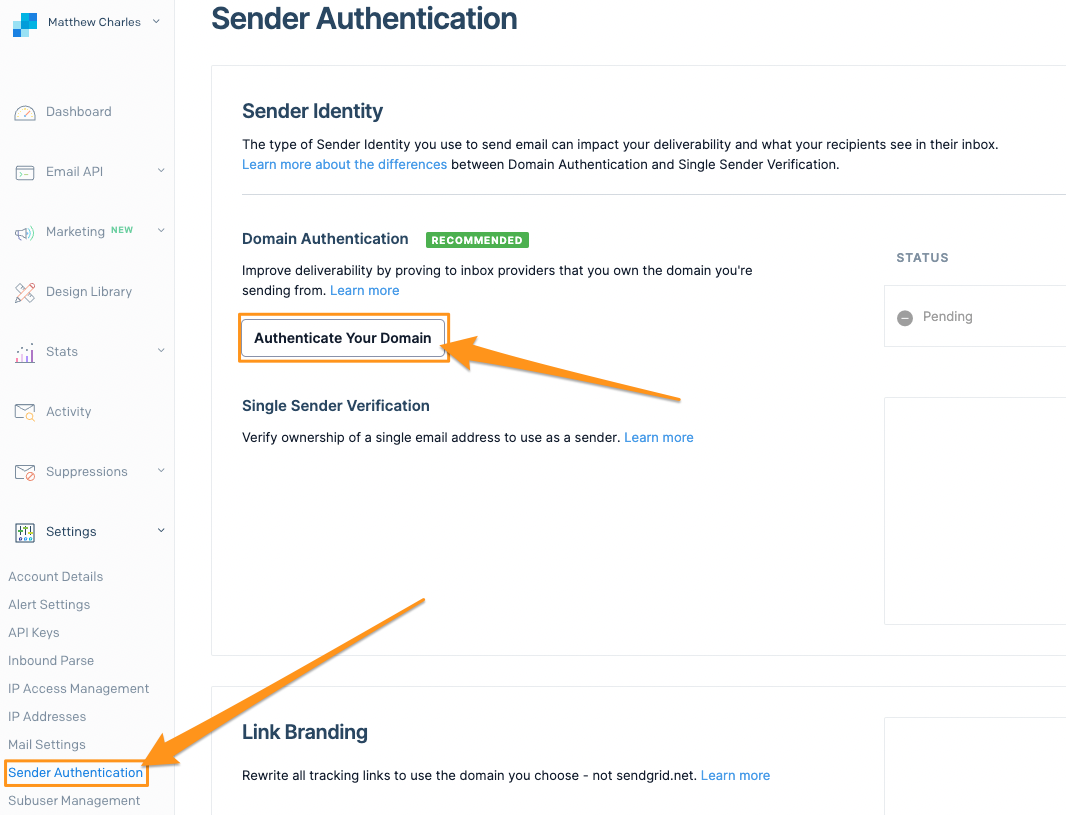
- Launch SendGrid and click Settings > Sender Authentication > Authenticate Your Domain.
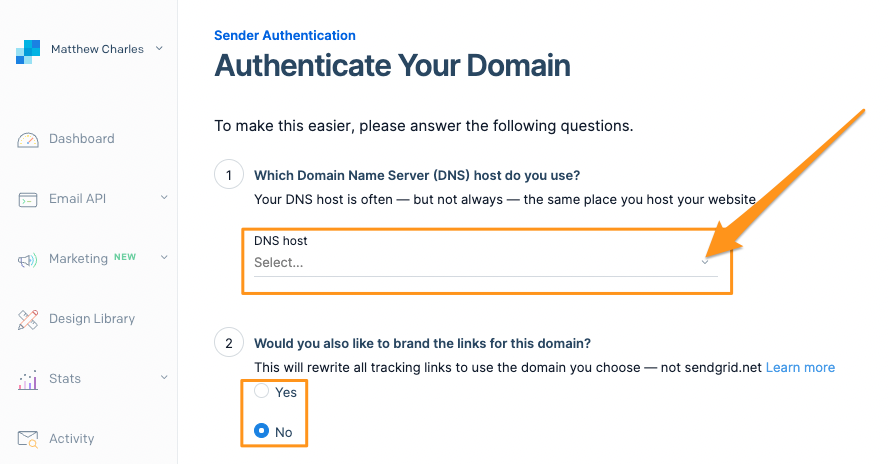
- Select your DNS host, then select if you would like link branding. Then, click Next.
- Enter your sender domain like
jane@ymail.org, and click Next.
You must verify all domains that are used as both mailboxes and as user logins on Apollo before connecting the integration. You must authenticate through SendGrid:
- All domains you're using for user logins
- All domains you're using for multiple mailboxes linked to Apollo, as well as aliases.
If you have multiple mailboxes linked to Apollo, they must all be verified through SendGrid. You won't be able to link your SendGrid account to Apollo until you complete this. The sender authentication section in SendGrid shows your domains as verified if setup was successful.
Check out Sender Identity on SendGrid Support for more information.
- Next, manually install the CNAME records that SendGrid provides. If you don't have access to your company's DNS records, you can email the CNAME records to a coworker.
Check out these videos from SendGrid for more information on how to add your CNAME to some popular DNS service providers.
- After you add the CNAME records to your DNS host, return to sender authorization on SendGrid and click Verify.
Next, generate a SendGrid API key.
Generate a SendGrid API Key
Next, you must generate a SendGrid API key before you can integrate with Apollo.
To generate an API key:
- Launch SendGrid and click Settings > API keys.
- Click Create API Key.
- Enter a name for the key, and choose the level of access you want to give SendGrid in API key permissions.
- To customize your SendGrid access permissions, click Restricted Access and choose the access details.
Although you can use a full-access API key without issues, Apollo strongly recommends restricting the permission set and only enabling full access to the necessary API settings. The required API settings are:
- Mail Send
- Mail Settings > Event Notifications
- Tracking > Click Tracking and Open Tracking
- Sender Authentication: Read access
- Next, click Create & View.
- Click the API key to copy it, then paste it to a secure location.
Be sure to copy and paste your API key to a secure location. Use this key to connect the SendGrid integration with Apollo. Once you close API generation on SendGrid, you can't return for a copy of it again.
- Click Done.
Next Steps
Here are a few helpful next steps you and your team can use as you work with SendGrid and email performance in Apollo:
| Integrate SendGrid with Apollo | You can connect your SendGrid API key to Apollo to start sending high-volume outreach through your authenticated domains. |
|---|---|
| Email Sending Limits Overview | You can review your sending limits to understand how Apollo and mailbox providers throttle volume so you can plan bigger SendGrid-powered campaigns confidently. |
| Troubleshoot Bounced Emails | Your team can review bounce causes and fixes to keep your SendGrid-sent messages landing successfully instead of getting flagged by inbox providers. |
| Improve Your Email Deliverability | You can optimize your domain health and sending habits to boost inbox placement when scaling outreach through SendGrid. |
| Email Tracking Overview | You can track opens and clicks to see how SendGrid-delivered messages perform and spot engagement trends faster. |