Overview
With the HubSpot integration, Apollo allows you to manually configure and change the way that HubSpot fields are mapped to Apollo fields. This helps ensure that you map data correctly across both systems.
Check out the following sections to update the data mapping between Apollo and HubSpot.
Map Fields
Making updates? Field mapping changes only apply to records created or updated in HubSpot after you save the mapping.
Existing records that haven't changed since the mapping was created aren't automatically re-synced. To apply new mappings, update the record in HubSpot or trigger a new sync event.
By default, when you connect Apollo to your HubSpot account, Apollo automatically syncs the following fields with HubSpot:
| Type | Synced Data |
|---|---|
| Apollo contact push |
|
| Apollo account push |
|
| HubSpot contact pull |
|
| HubSpot account pull |
|
Fields that Apollo can enrich display an enrichment icon next to the field type in the Apollo field column. This helps you quickly identify which fields are being actively enriched by Apollo.
Check out Recommended Default Field Mapping for best practices on how to map default fields to your CRM.
You can add additional default and custom fields at any time.
To map more fields:
- Launch Apollo and click Settings > Integrations.
- Select the HubSpot integration.
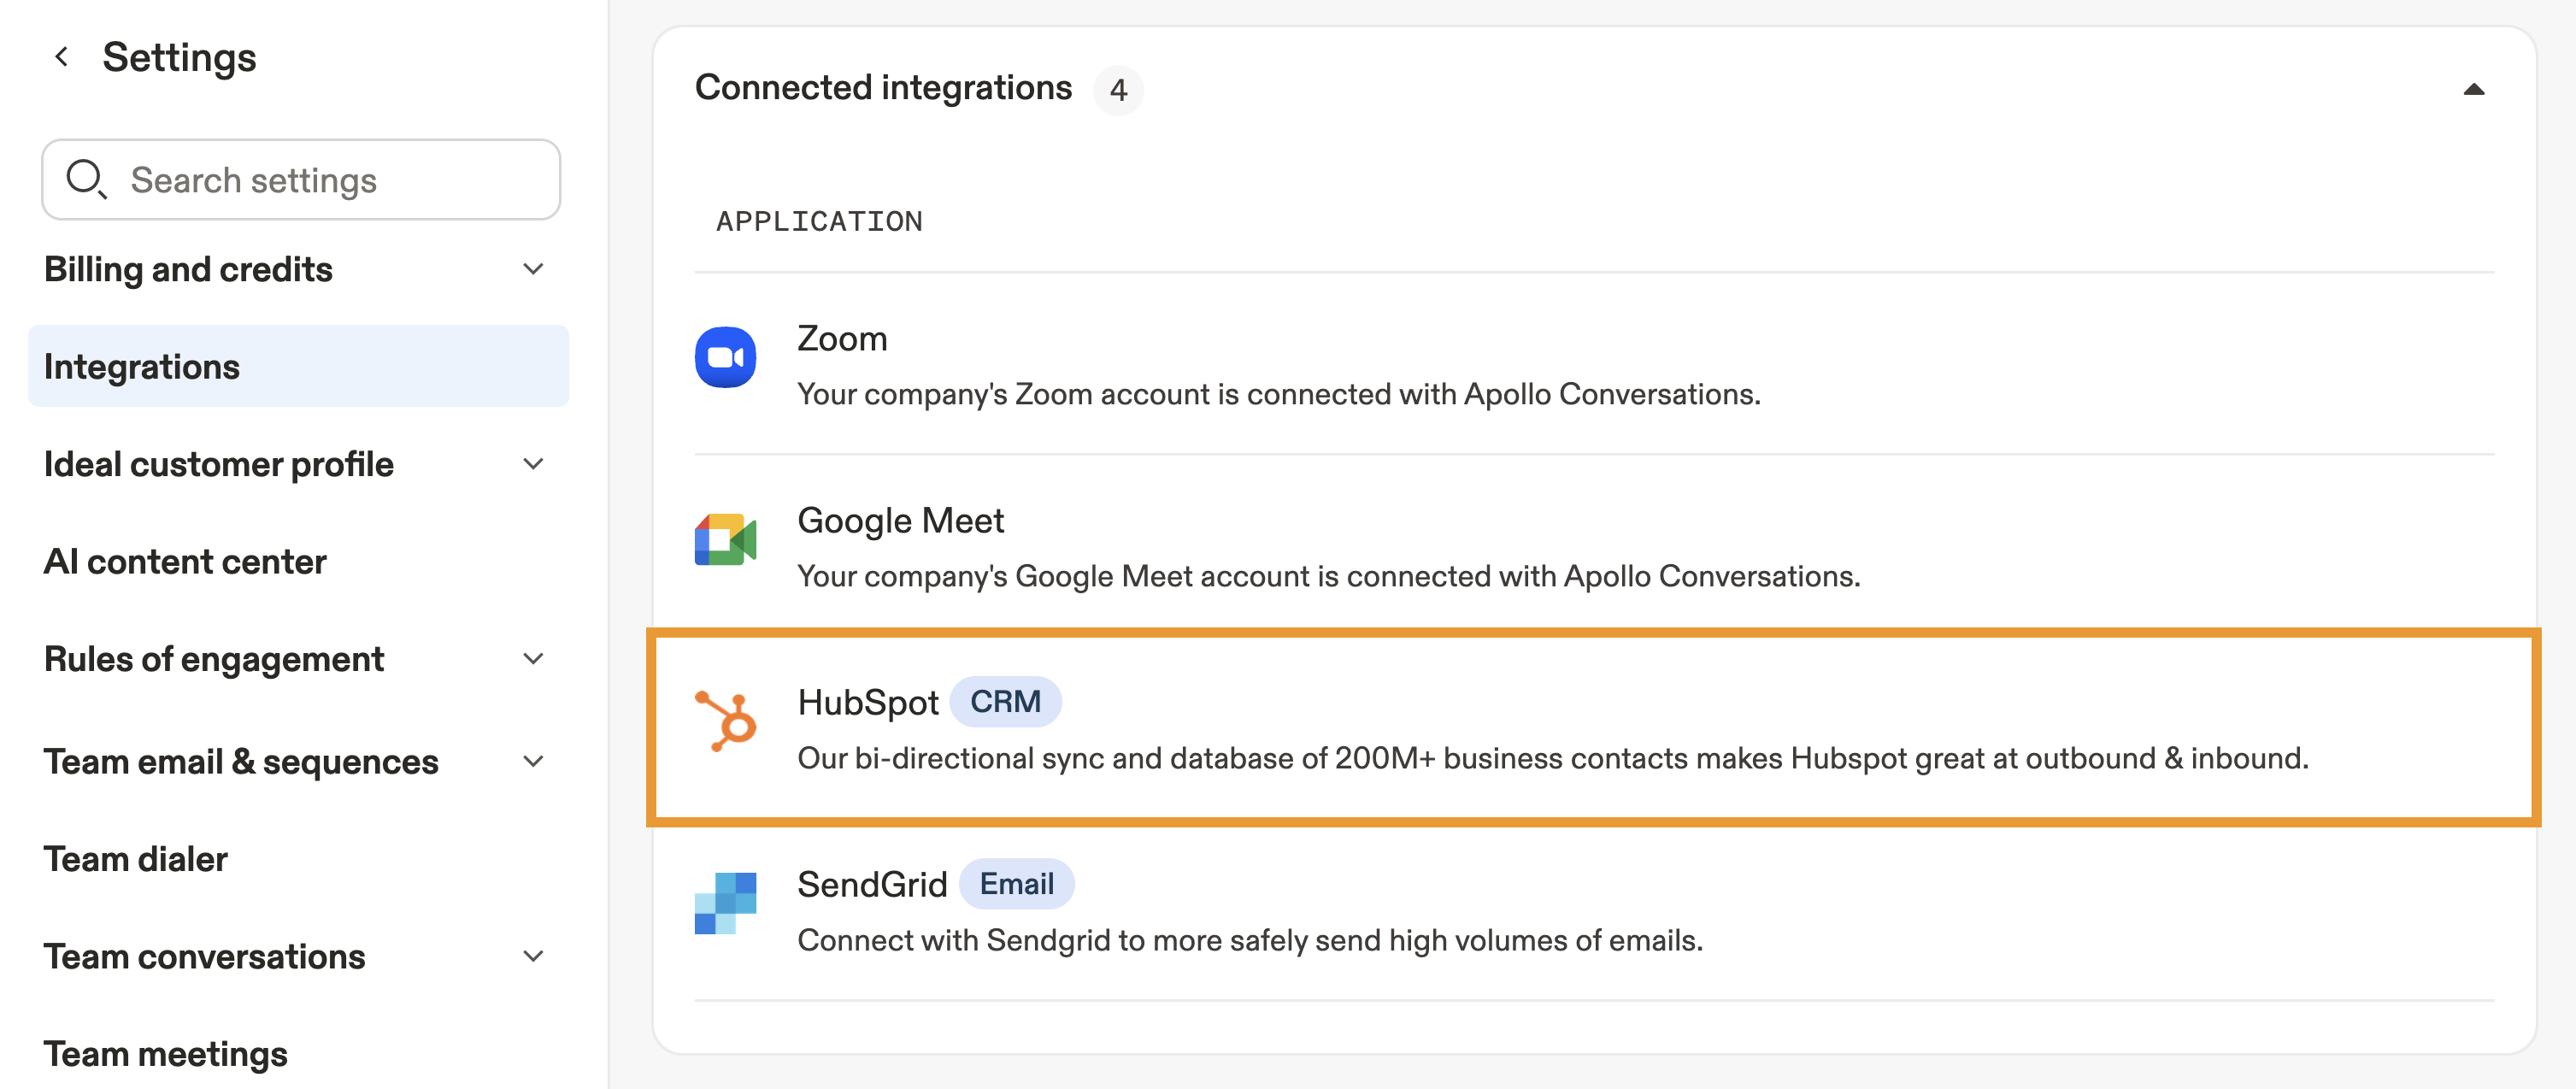
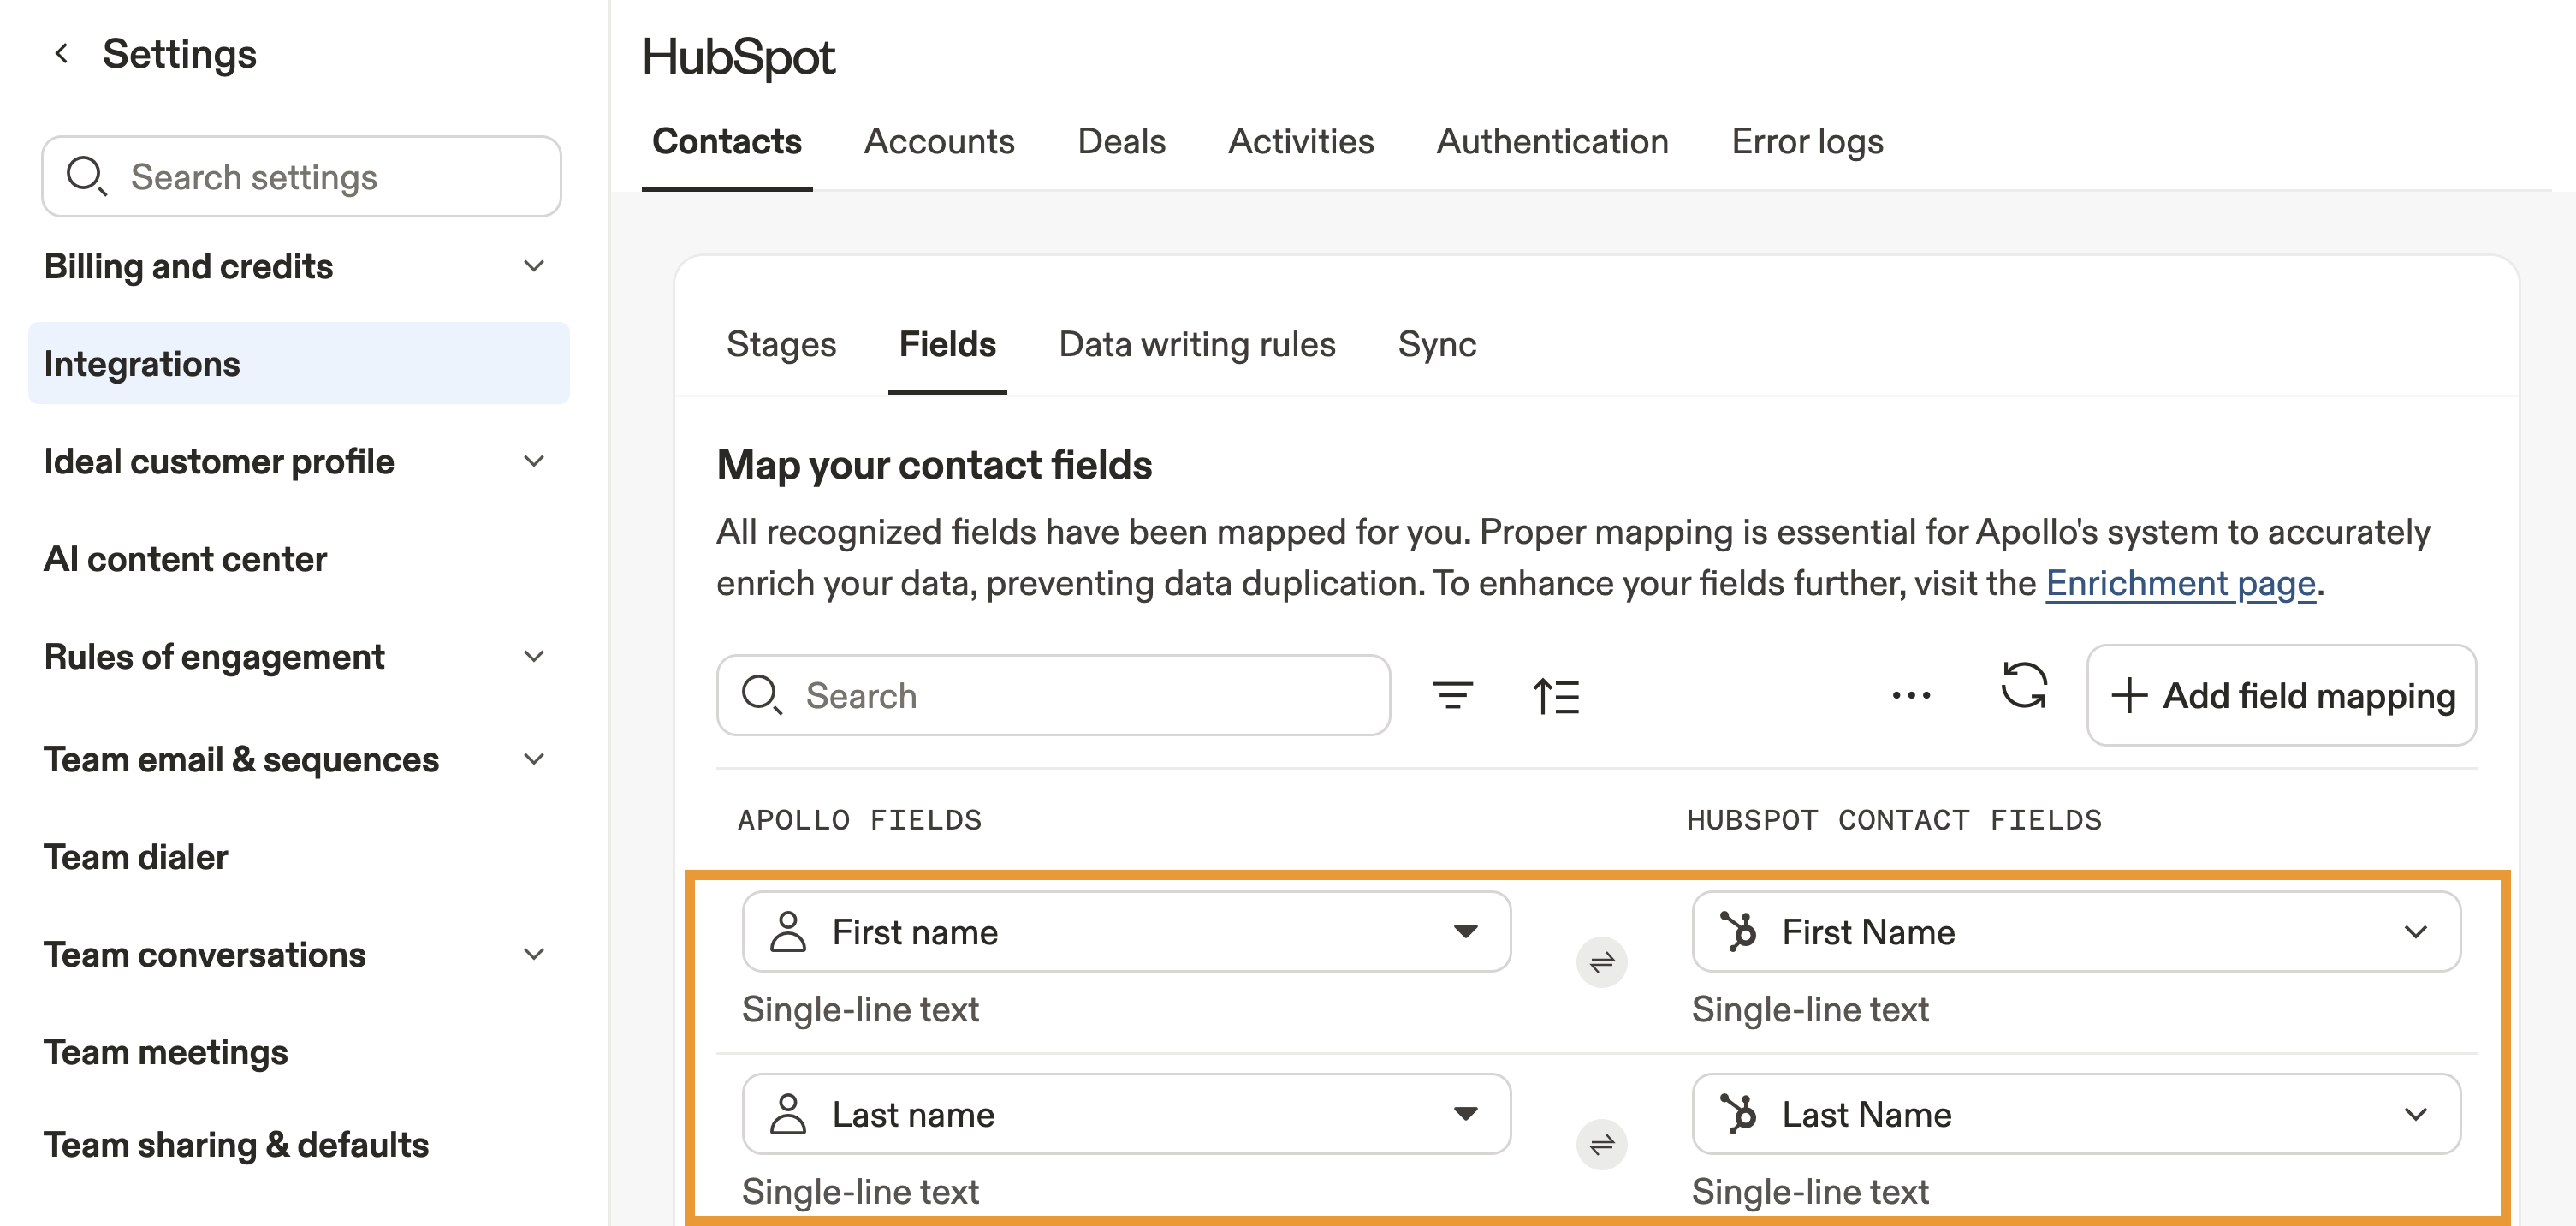
- Click Contacts, Accounts, or Deals, then click Fields.
- Select the field you want to map, then select a corresponding field on the other platform.
- Alternatively, click Add field mapping to include any additional fields you want to map between Apollo and HubSpot.
The do not call field syncs a contact's stored DNC status between Apollo and HubSpot. To use this field, you must first enable DNC phone screening on Apollo.
Apollo only syncs the DNC status already stored for the contact. Apollo doesn't run a live DNC check during CRM sync.
- Repeat this process for any other fields that you want to update.
- When finished, click Save.
To avoid errors, HubSpot admin should either create a custom HubSpot property for Apollo industries, or edit the default HubSpot property for industries. Next, download the .txt file of all of Apollo's industries and paste them as picklist values in HubSpot so that the fields match in Apollo.
You have now updated field mapping.
Configure Data Writing Rules
You can configure whether Apollo auto-fills or overwrites contact or account data in your HubSpot fields. By auto-filling or overwriting data in your CRM, you can take full advantage of Apollo's CRM enrichment with updated Apollo data.
To set data writing rules:
- Launch Apollo, and click Settings > Integrations > HubSpot.
- Click Contacts or Accounts.
- Click Data writing rules.
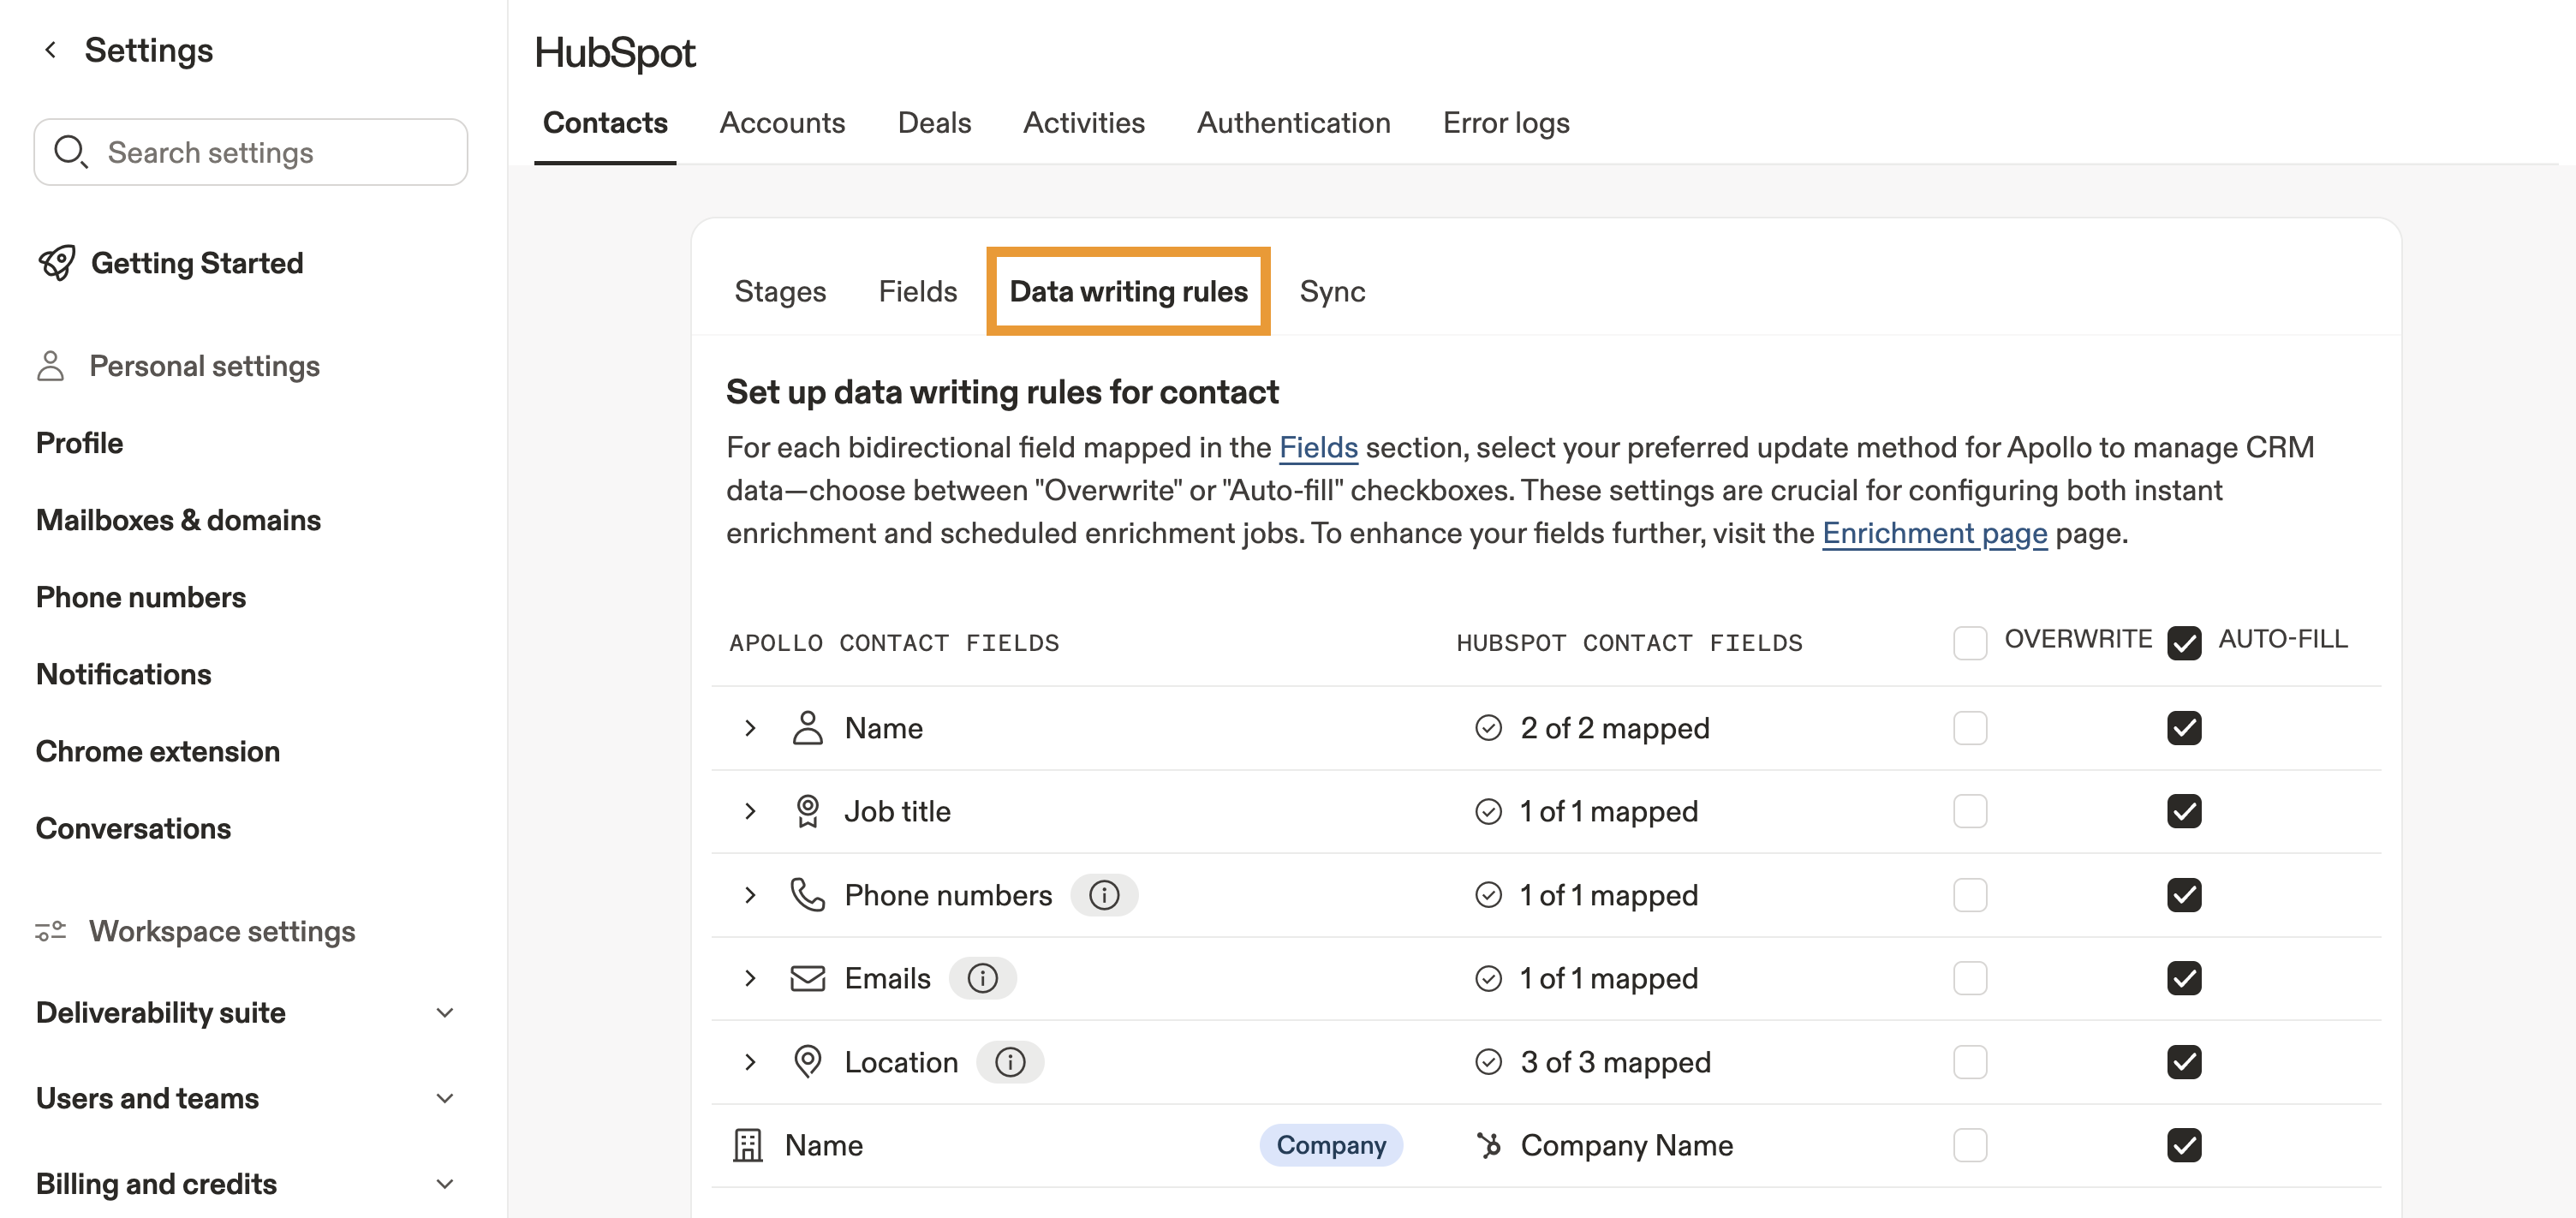
- Select whether to overwrite or auto-fill your HubSpot fields with Apollo data when Apollo pushes records back to your CRM:
- Auto-fill: Allow Apollo to automatically fill in empty fields for contacts or accounts in HubSpot. Apollo only auto-fills fields when relevant data is available.
- Overwrite: Allow Apollo to automatically overwrite existing field data for your contacts or accounts. Apollo only overwrites data if relevant information is available and differs from the data already in your HubSpot field.
Auto-fill and overwrite only apply when Apollo pulls data from HubSpot or processes a sync update. These rules don't retroactively update existing records unless a new sync event occurs.
Manual actions always take precedence. If you manually enrich a field with Apollo CRM enrichment, Apollo pushes that update even if you disabled auto-fill or overwrite for the field.
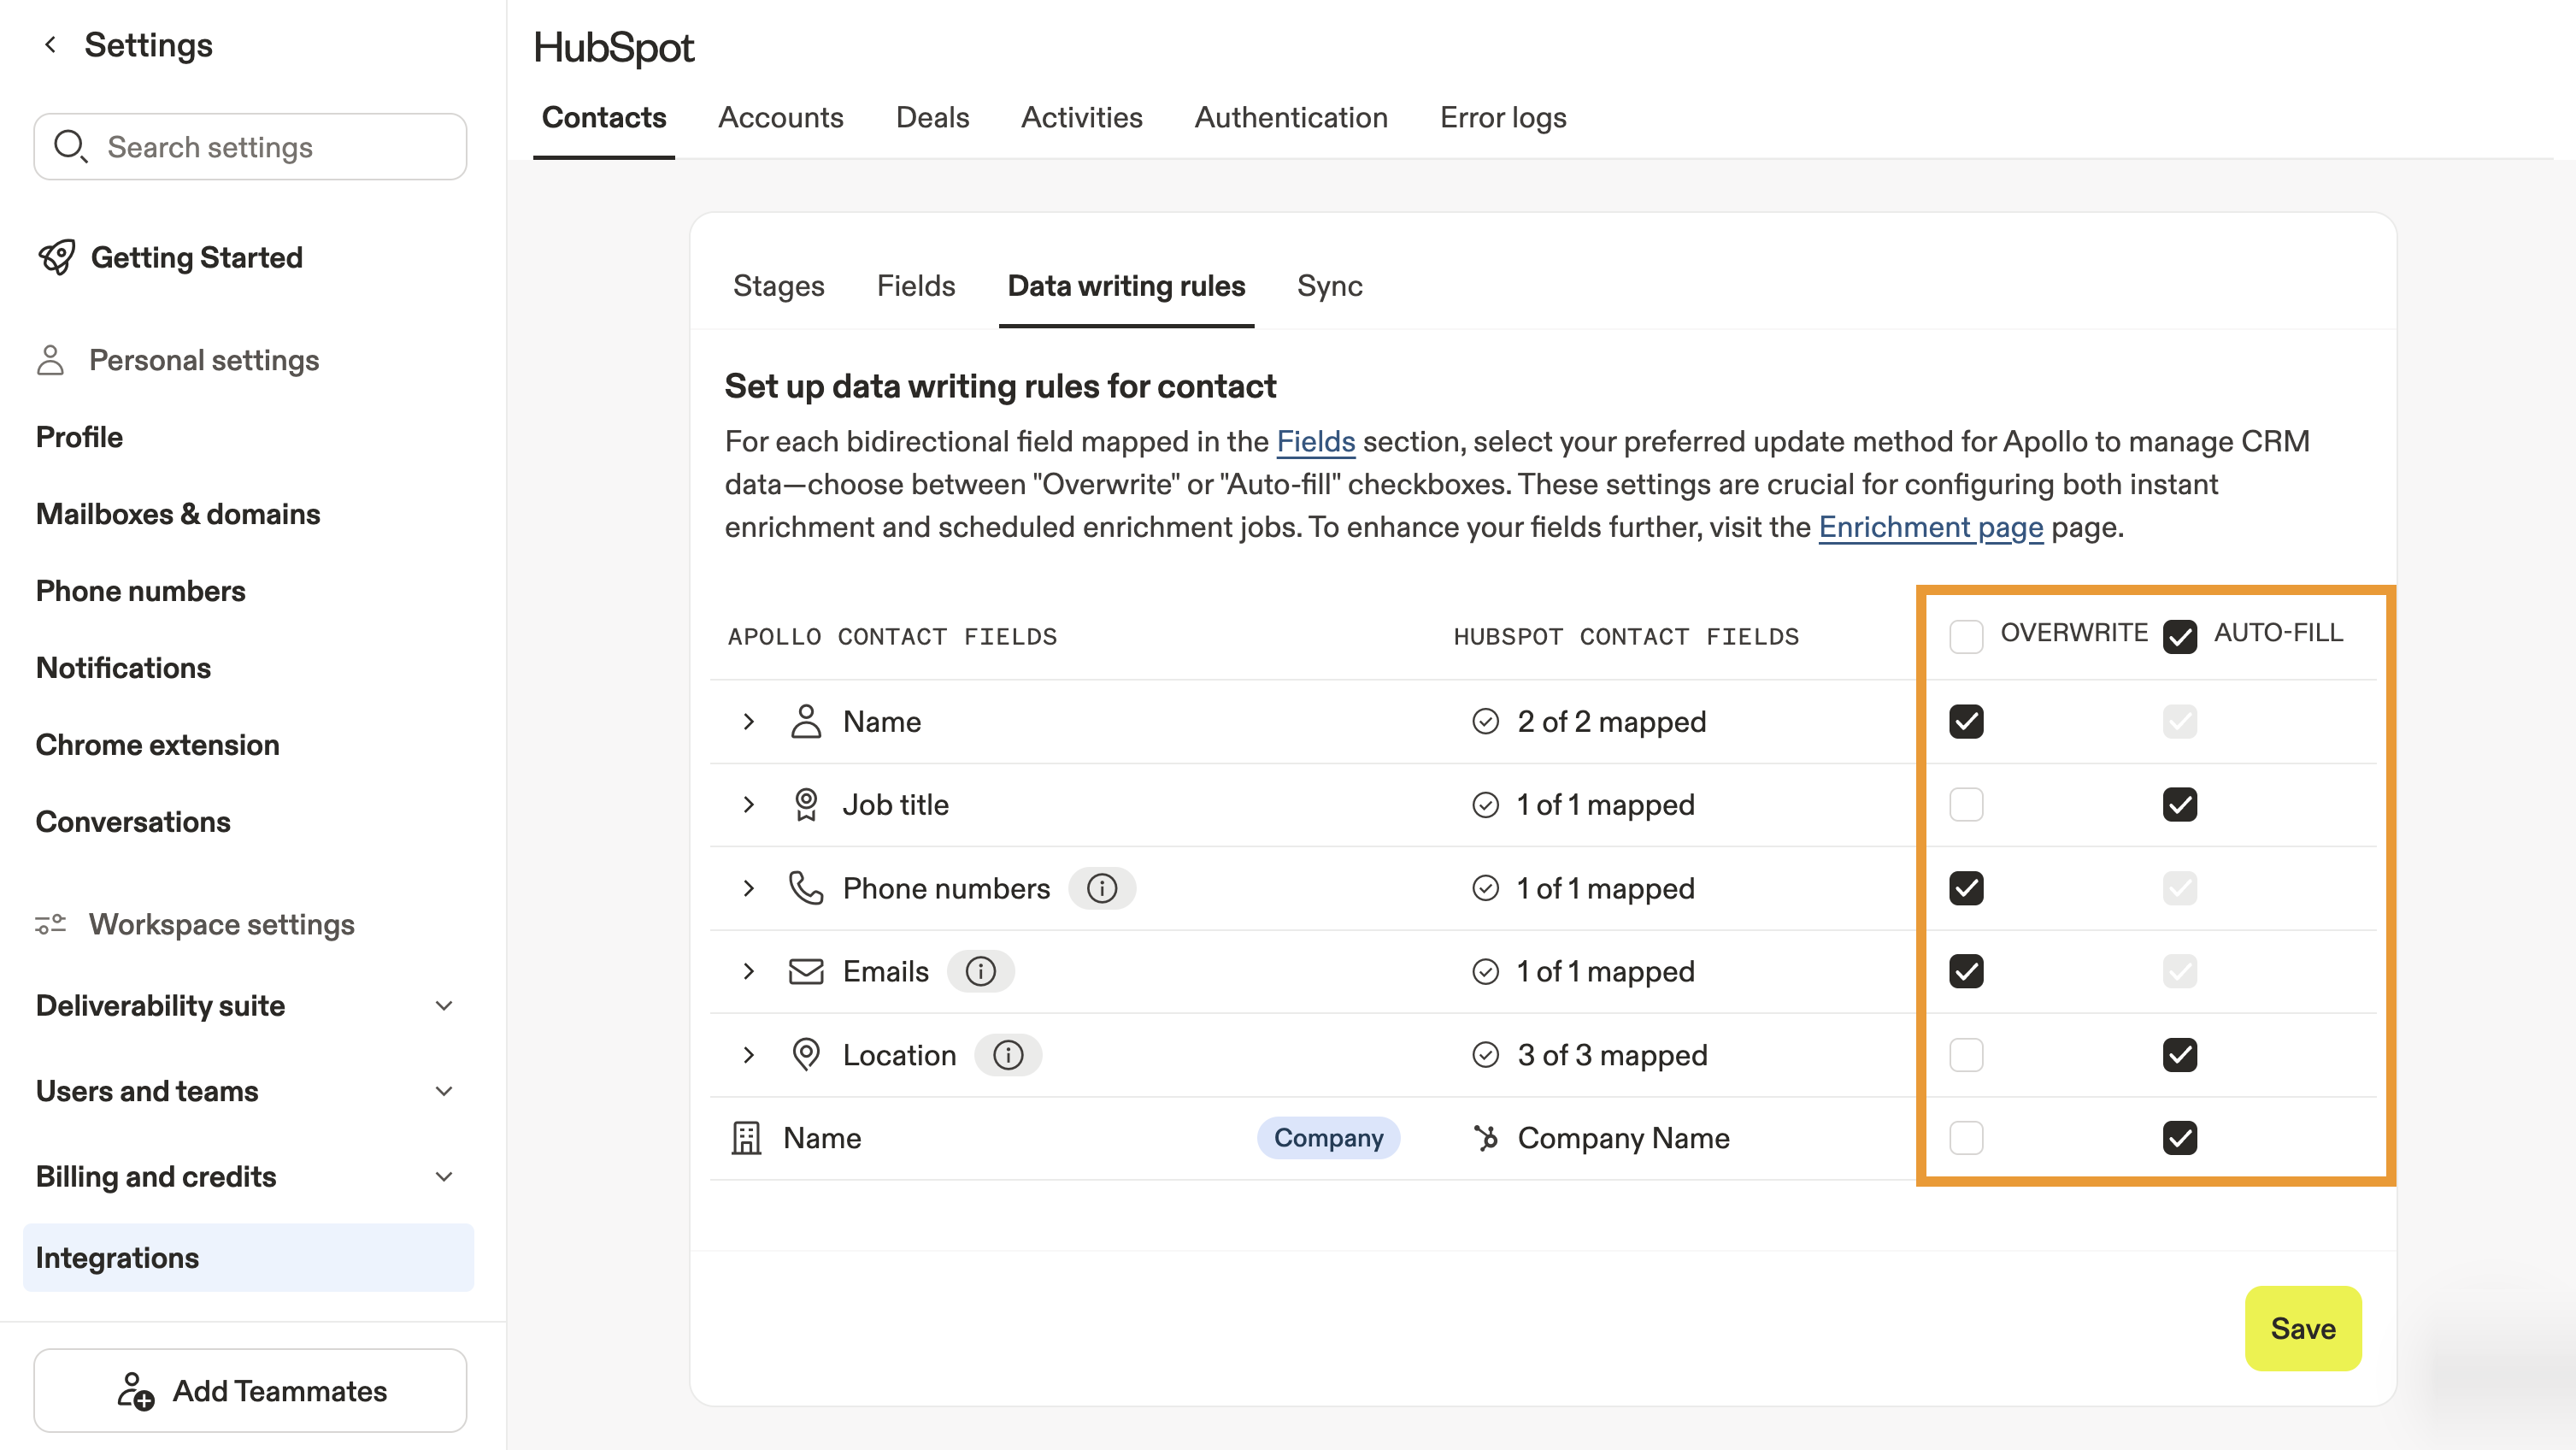
- When finished, click Save.
You have now updated your data writing rules for HubSpot.
Map Apollo Stages
While you can manually map Apollo stages to HubSpot, Apollo automapping makes the process quick and easy.
To map your Apollo stages to HubSpot:
- Launch Apollo, and click Settings > Integrations > HubSpot.
- Click Contacts or Accounts.
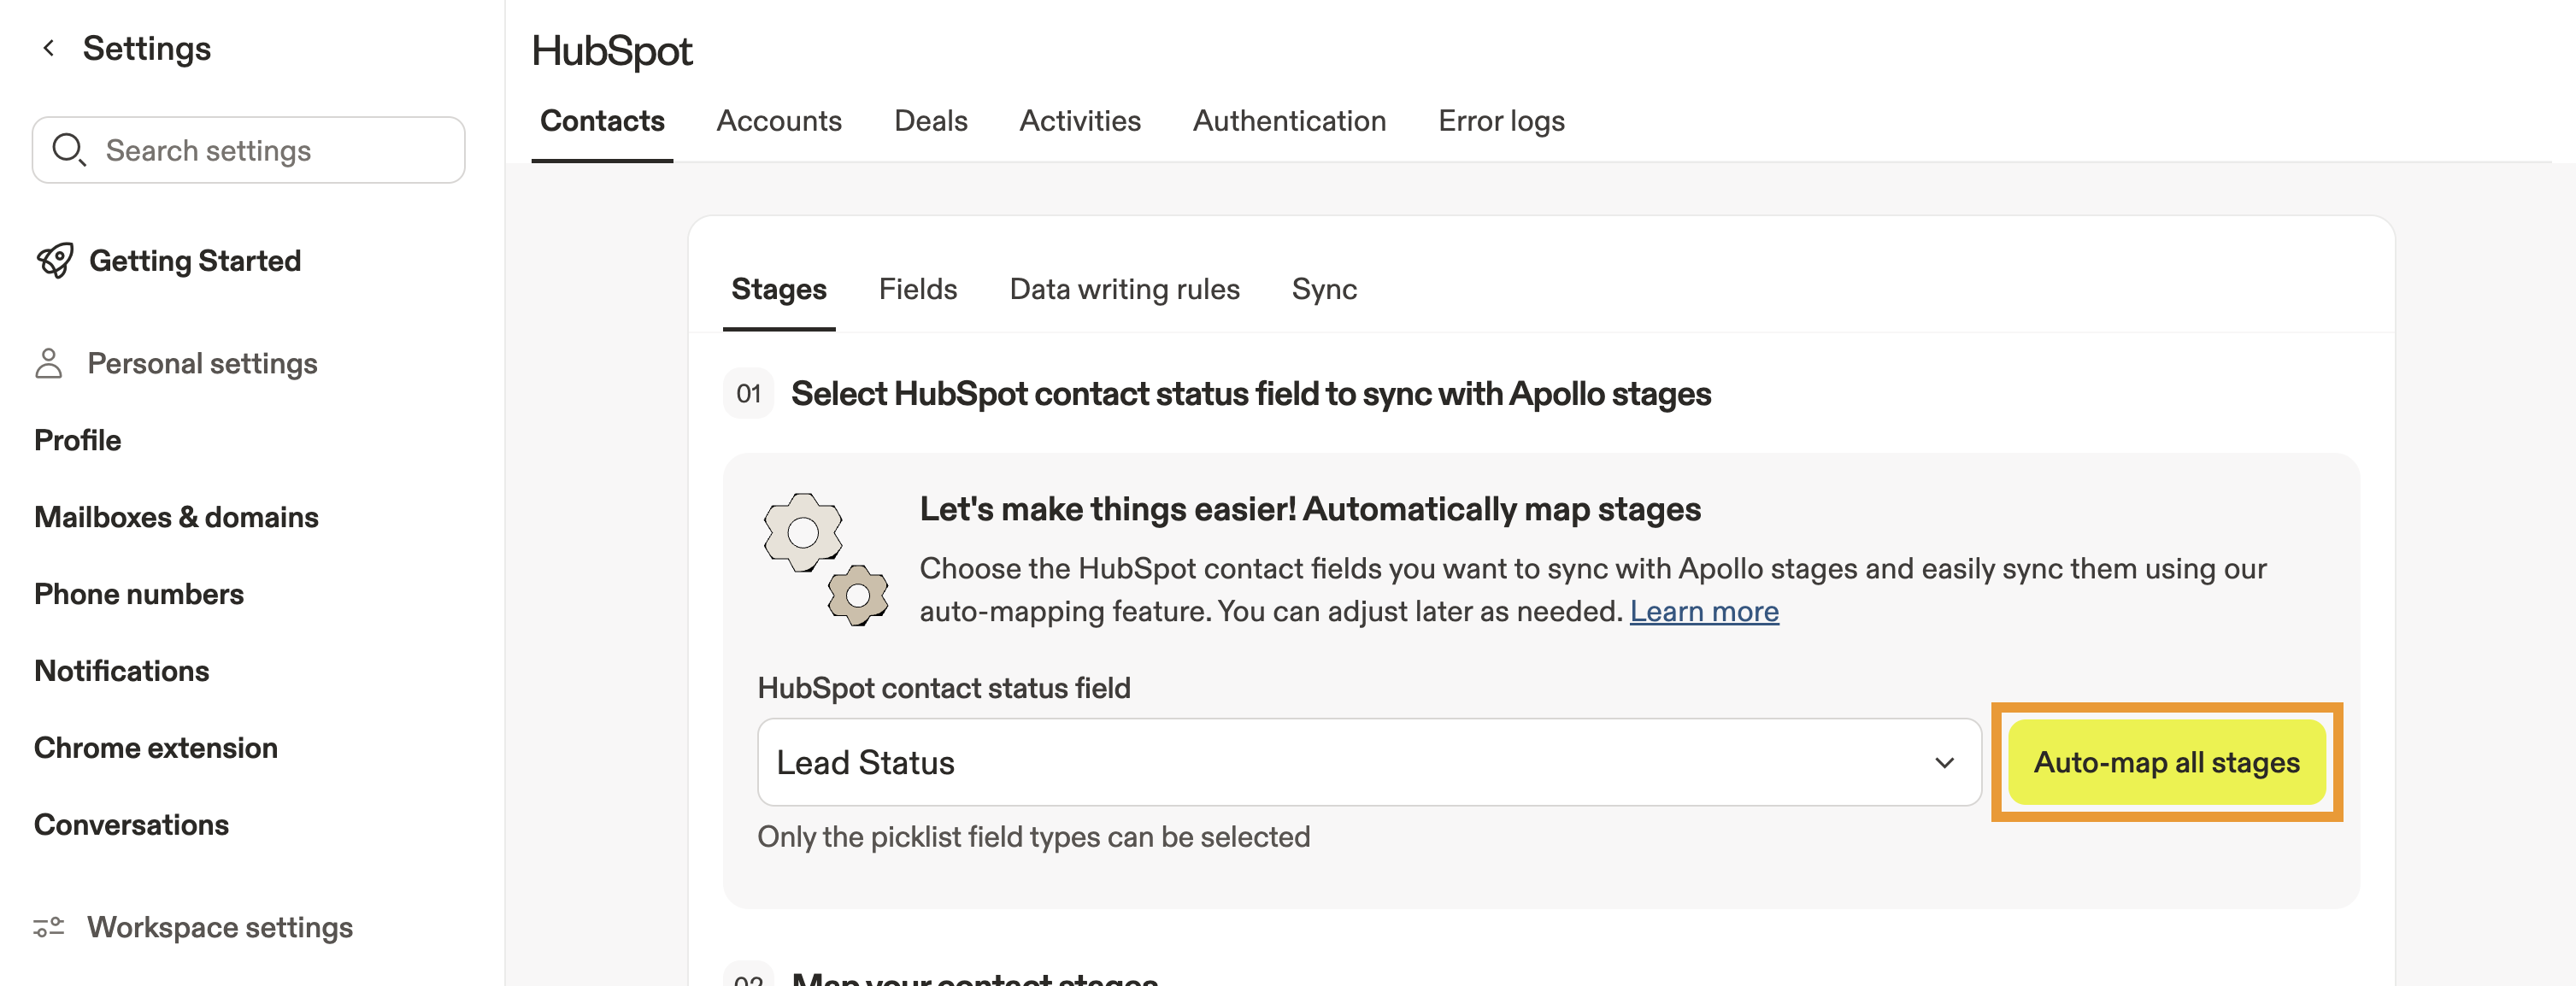
- Click Stages.
- Click Auto-map all stages to automatically map your stages.
- Alternatively, manually map each stage by matching an Apollo stage to a HubSpot stage or status.
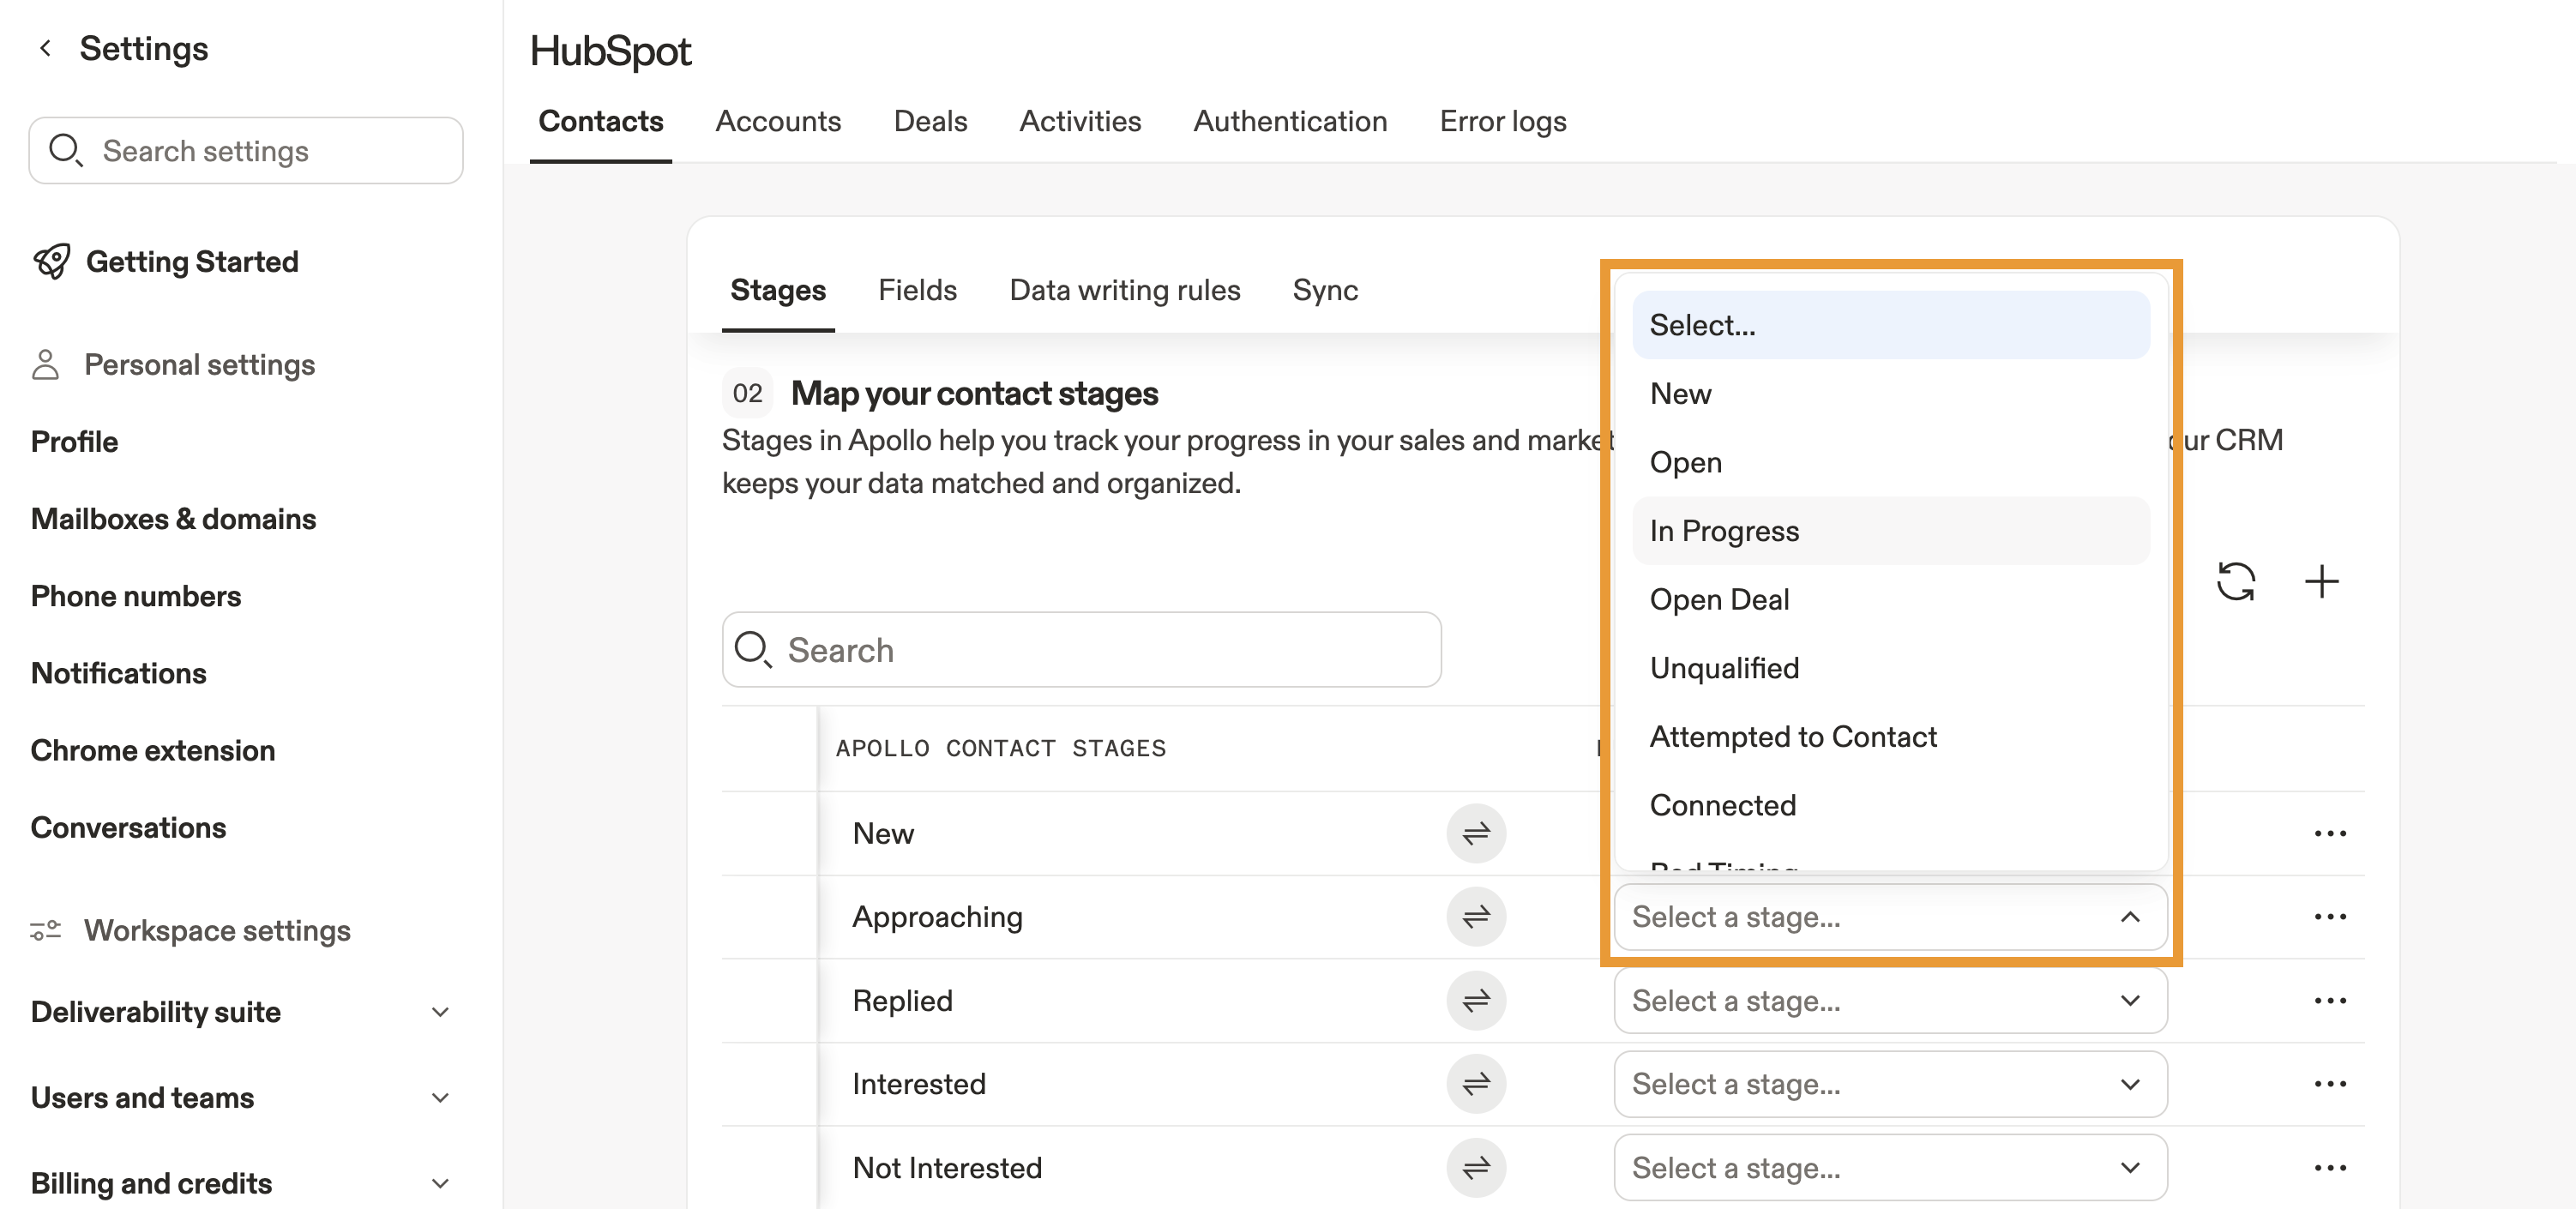
- Repeat these steps for any other stages you want to map.
- When finished, click Save.
Apollo and HubSpot stages must map one-to-one. If you map a single stage or status to multiple stages, syncing breaks. If you rename, add, or delete a HubSpot stage or status, update the matching stage in Apollo — and reassign any records if you delete a stage entirely. Keeping both platforms aligned ensures accurate stage syncing.
Fix Common Mapping Errors
If your HubSpot field mappings are configured but not syncing as expected, review these common issues:
- Picklist or dropdown value mismatch
- Multi-checkbox or multi-select fields
- Data overwriting existing HubSpot values
- Industry field errors
Picklist or dropdown value mismatch
Apollo sends values as plain text. If your HubSpot field is a dropdown / picklist, the value from Apollo must exactly match one of the existing options in HubSpot, including capitalization and spacing. If it doesn't match, HubSpot rejects the value and the field won't update.
Fix: Add the Apollo value as a new option in HubSpot, or use a plain text field instead of a dropdown / picklist.
Multi-checkbox or multi-select fields
Apollo doesn't support syncing to HubSpot multi-checkbox fields. Mapping to these field types can result in failed syncs or blank values.
Fix: Use a single-value field such as a text or dropdown property in HubSpot.
Data overwriting existing HubSpot values
By default, Apollo overwrites existing HubSpot values when syncing.
Fix: In your mapping settings, set the sync behavior to Fill empty fields only if you want Apollo to avoid overwriting existing data.
Industry field errors
Apollo industry values don't match HubSpot's default industry picklist.
Fix: Create a custom HubSpot property for Apollo industry values, or update the default HubSpot industry options to match Apollo.
FAQs
|
Frequently asked questions |
||
| Why did my HubSpot push fail after I mapped a field? | What are read-only HubSpot properties? | What should I do if I see a read-only value error? |
| How do I map phone numbers from Apollo to HubSpot? | Why are mobile or work numbers not appearing in HubSpot? | Why didn't my new field mapping update existing HubSpot records? |
| Why can't I find lead source in field mapping? | How do I change the source value Apollo sends to HubSpot? | Can an old field mapping still cause push failures? |
Why did my HubSpot push fail after I mapped a field?
A push can fail if the mapped HubSpot property cannot accept the value Apollo is sending. Two common causes are mapping to a read-only HubSpot property and mapping to a dropdown or enumeration field whose allowed values don't match the value coming from Apollo.
If the push fails, review the error in Settings > Integrations > HubSpot > Error logs, then check the mapped field in Settings > Integrations > HubSpot > Contacts, Accounts, or Deals > Field mapping.
What are read-only HubSpot properties?
Read-only HubSpot properties are fields that HubSpot calculates or manages itself and that can't be updated through HubSpot API. Examples include system-calculated properties like HubSpot score.
If Apollo is mapped to one of these properties, HubSpot rejects the update and the push fails. In that case, remove the mapping or map the Apollo field to a different writable HubSpot property.
What should I do if I see a read-only value error?
A READ_ONLY_VALUE error usually means Apollo is trying to send data to a HubSpot property that can't be edited through HubSpot API. This can also appear as a Property values were not valid error in some cases.
Open your HubSpot field mapping, find the Apollo field mapped to the read-only property, and change the mapping; alternatively, remove the mapping. After you save the update, retry the push from the error log or from the record.
How do I map phone numbers from Apollo to HubSpot?
Each Apollo phone type must be mapped to its own HubSpot property. Apollo stores multiple phone types, such as primary, mobile, work, corporate, home, and other. Each type needs a separate mapping in Settings > Integrations > HubSpot > Field mapping.
If you map only one phone field, Apollo only pushes that one phone type. Any phone types you don't map won't sync to HubSpot.
Why are mobile or work numbers not appearing in HubSpot?
This usually happens when only one general phone field is mapped. Mapping a single phone field doesn't automatically send Apollo mobile, work, home, or other phone types to HubSpot.
Check your contact field mapping and make sure each number type is mapped to their own HubSpot properties. If a phone type isn't mapped, Apollo doesn't push it.
Why didn't my new field mapping update existing HubSpot records?
Field mapping changes only apply to records created or updated after the mapping is saved.
Existing HubSpot records that haven't changed won't automatically re-sync with the new mapping. Apollo doesn't retroactively update past records based on mapping changes.
Fix: Update the record in HubSpot or trigger a new sync event so Apollo can apply the updated mapping.
Why can't I find lead source in field mapping?
Lead source may not appear as a standard field in field mapping because Apollo uses a built-in source setting to send a source value, such as Apollo, when creating contacts or companies. By default, this system-level setting maps to HubSpot's Lead Source property.
If you want to control the value sent to lead source, update the source setting in the integration's push settings instead of trying to change it in field mapping.
How do I change the source value Apollo sends to HubSpot?
This is separate from standard field mapping.
To change the source value or the HubSpot property Apollo uses for that value, go to Settings > Integrations > HubSpot > Contacts > Sync and update Source for contacts pushed to HubSpot. You can also configure the equivalent setting for accounts.
Use the source setting when you want Apollo to send a specific default source value during record creation.
Can an old field mapping still cause push failures?
Yes, stale mapping can continue to cause failures even if the mapped HubSpot property is now hidden, changed, or read-only. Apollo keeps using the saved mapping until you remove or replace it.
If you suspect an older mapping is causing errors, open the mapped Apollo field, review the selected HubSpot property, then remove mapping or choose a different writable property and save your changes.
Next Steps
Looking for some more HubSpot content? Here are a few resources to dive into to keep your integration clean, synced, and fully optimized:
| Integrate HubSpot with Apollo | If you're just getting started, connect HubSpot with Apollo to keep activity, contact, and account data flowing smoothly between both systems. |
|---|---|
| Configure HubSpot Sync Settings | You can fine-tune what moves between platforms by configuring HubSpot sync settings so your team always works with clean, current data. |
| Important Information About the HubSpot Integration | Stay ahead of system behaviors and quirks by reviewing important information about the integration to prevent accidental overwrites or unexpected sync results. |