
Overview
Inbound routers help you qualify prospects and route meeting requests to the right destination. Use an intake form to collect information, then route prospects to a meeting type, external URL, or custom message based on their responses.
Admins can use one inbound router link to route requests across teams and meeting hosts. Check out the following sections to create, configure, and manage inbound routers.
Creating inbound routers requires the Manage inbound router permission, which admins have by default. Other team members can receive and view meetings routed to them, but can't create routers unless they're granted this permission.
Create an Intake Form Template
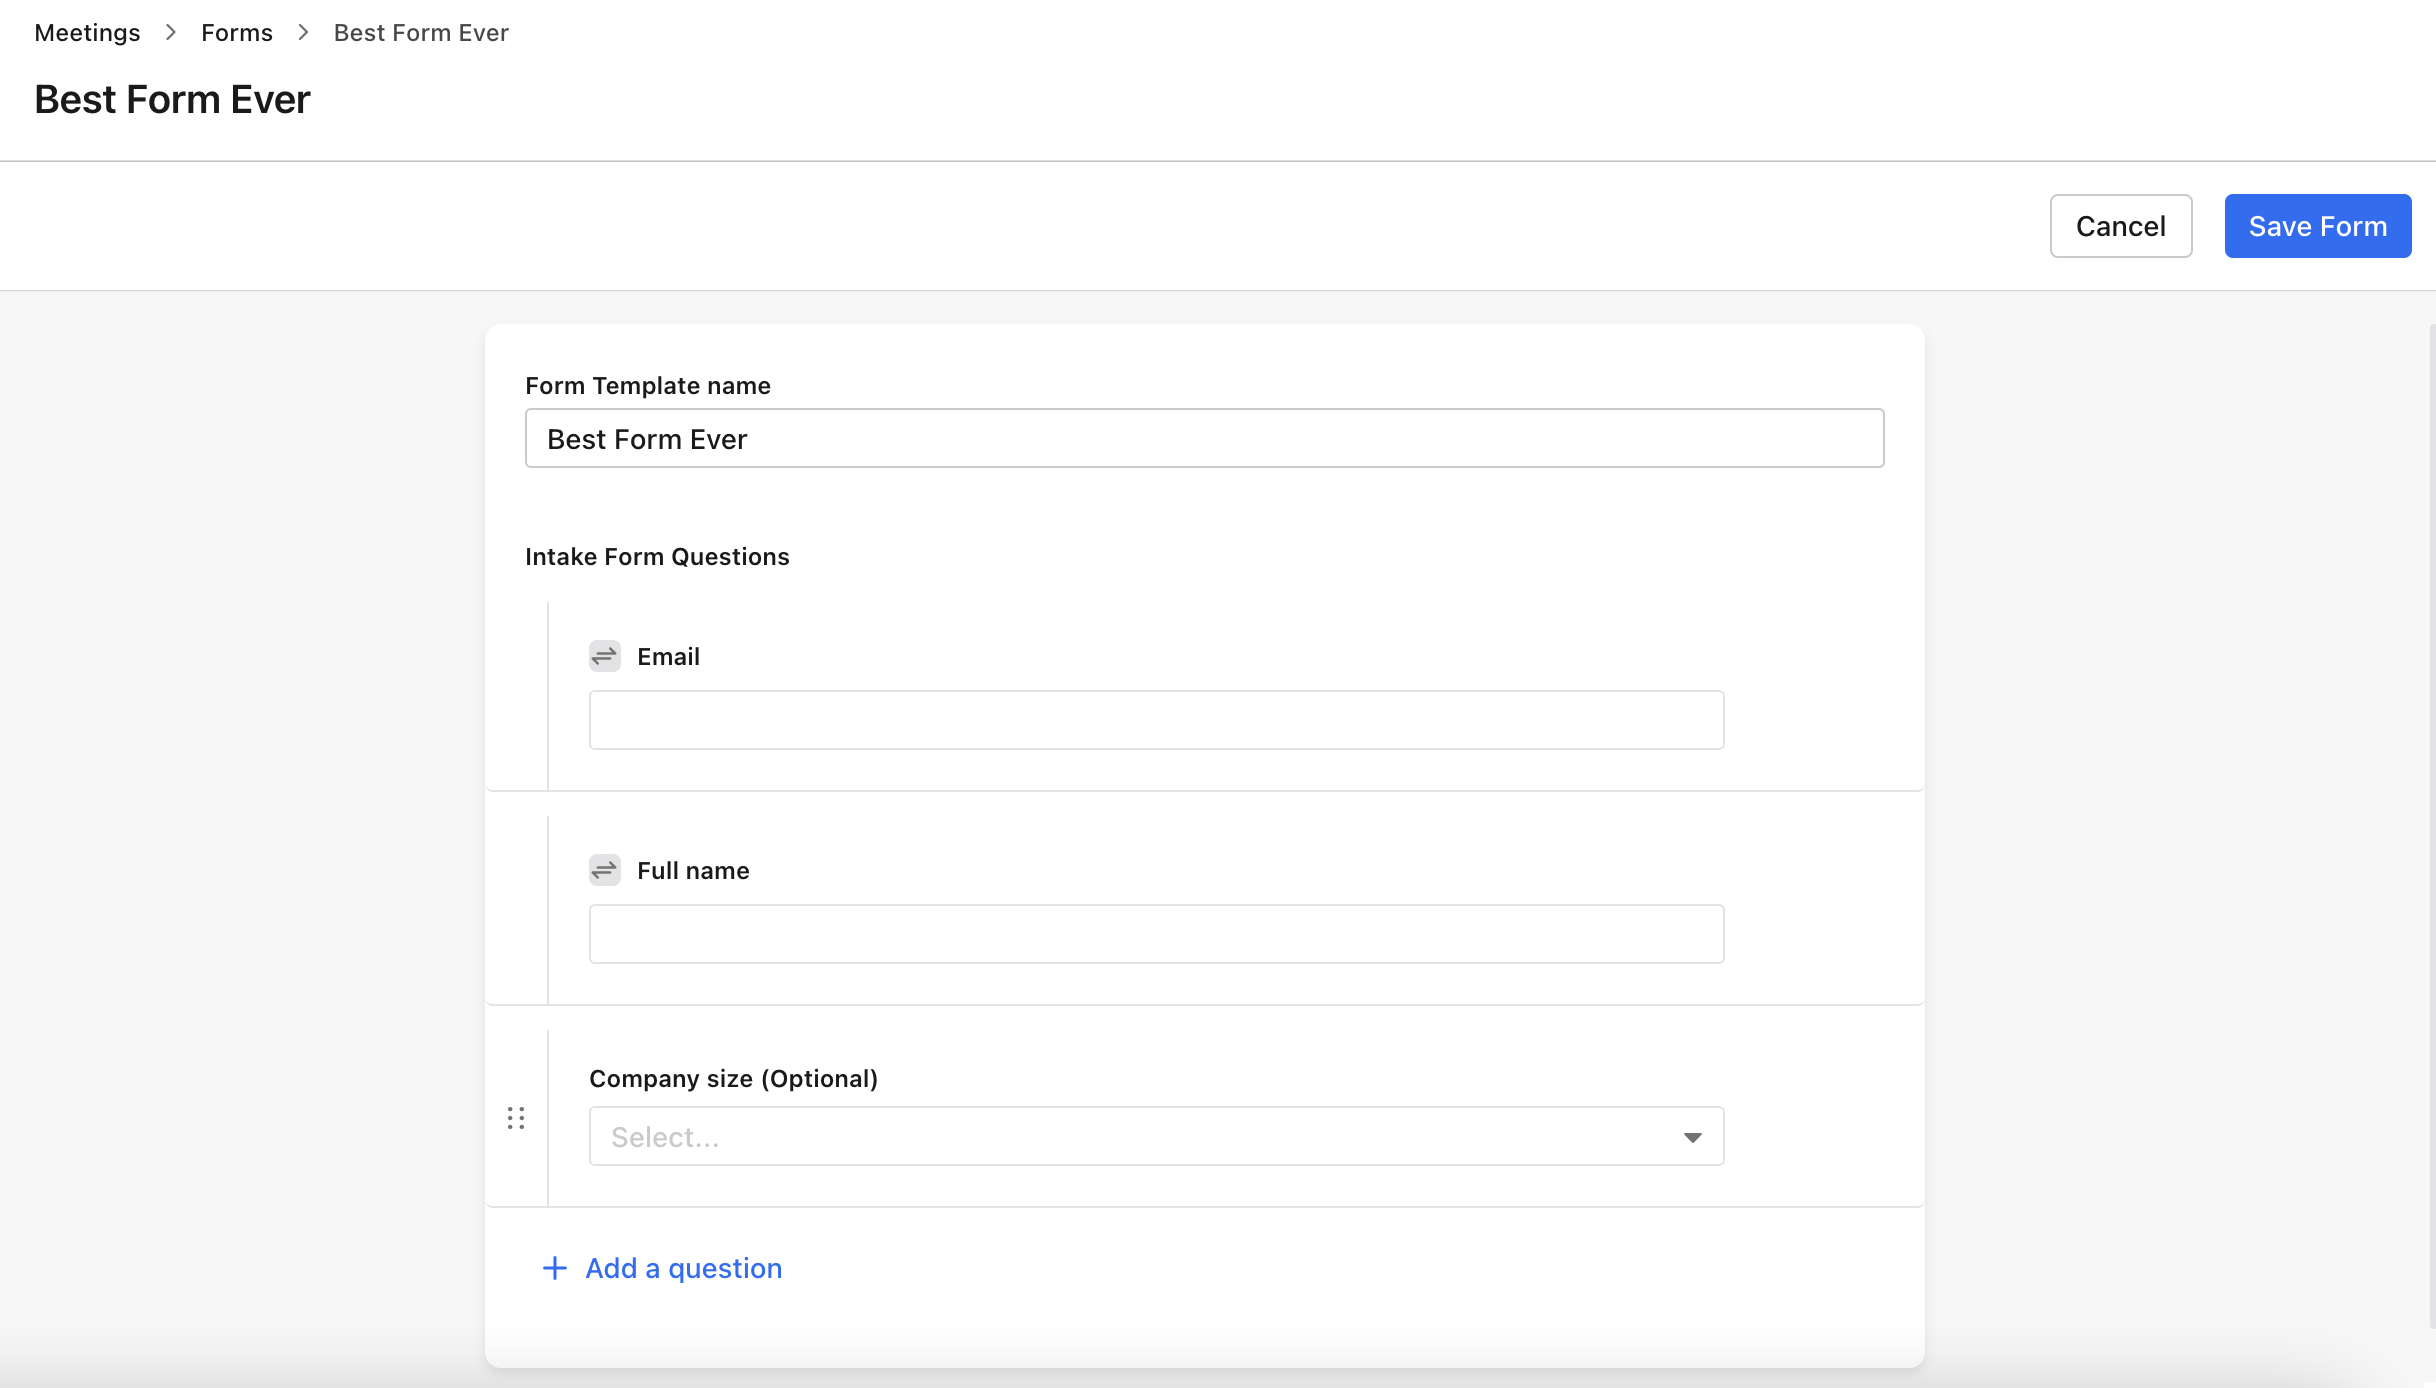
Intake forms collect the details Apollo uses to route a prospect, like company size or which teammate should get the meeting. Build a template once, then reuse it across routers and round-robin meetings.
To create an intake form template:
- Launch Apollo, then go to Meetings.
- Click Admin console.
- Click Create, then Intake forms.
- Enter a name for the form template, then click Create.
- Review the default name and email fields. These are required, but you can rename their questions.
- To add another field, click Add a question, then choose from Personal information or Company information, or create a Custom question. Forms top out at 12 questions.
- For custom questions, pick an input type: Short response, Long response, Single-select, or Multi-select. Single- and multi-select questions can display as radio buttons, checkboxes, or a dropdown. Just add the answer options.
- To sync a question elsewhere in Apollo, map it to a contact or deal field under Apollo field.
- Toggle on Set as required to make a question mandatory, or Set as hidden to hide it from prospects and capture a value from a URL query parameter instead. Hidden questions only support the Short response type.
- Click Add to save each question, then Save when you're done.

A few prebuilt questions, like company location, industry, and technologies, pull their answers from Apollo's database instead of asking the prospect. Availability for company technologies depends on your Apollo plan and inbound package. Once a prospect submits the form, Apollo creates a contact or account if one doesn't already exist.
Using your own HTML form instead of Apollo's form builder? Add a submission handler so the router still triggers.
To turn a form template on or off:
- Launch Apollo, then go to Meetings > Admin console.
- Find the form template, then toggle its status.
You can't deactivate a form template if it's linked to an active router or meeting type, or if it's set as your default. Unlink or replace the form template first.
You have now created an intake form template and reviewed how to manage its status.
Create an Inbound Router
Before you create an inbound router, create the meeting types you want prospects to book and an intake form template to collect their responses. Then, complete the following steps to build and publish your inbound router.
Access to inbound routers and the number of routers your team can create depend on your Apollo plan and inbound package. Some existing teams may retain access to inbound routers based on their previous plan configuration.
To review your available options, check your plan settings or the Apollo pricing page.
Step 1: Set Up an Inbound Router
To create an inbound router:
- Launch Apollo, then go to Meetings.
- Click Admin console.
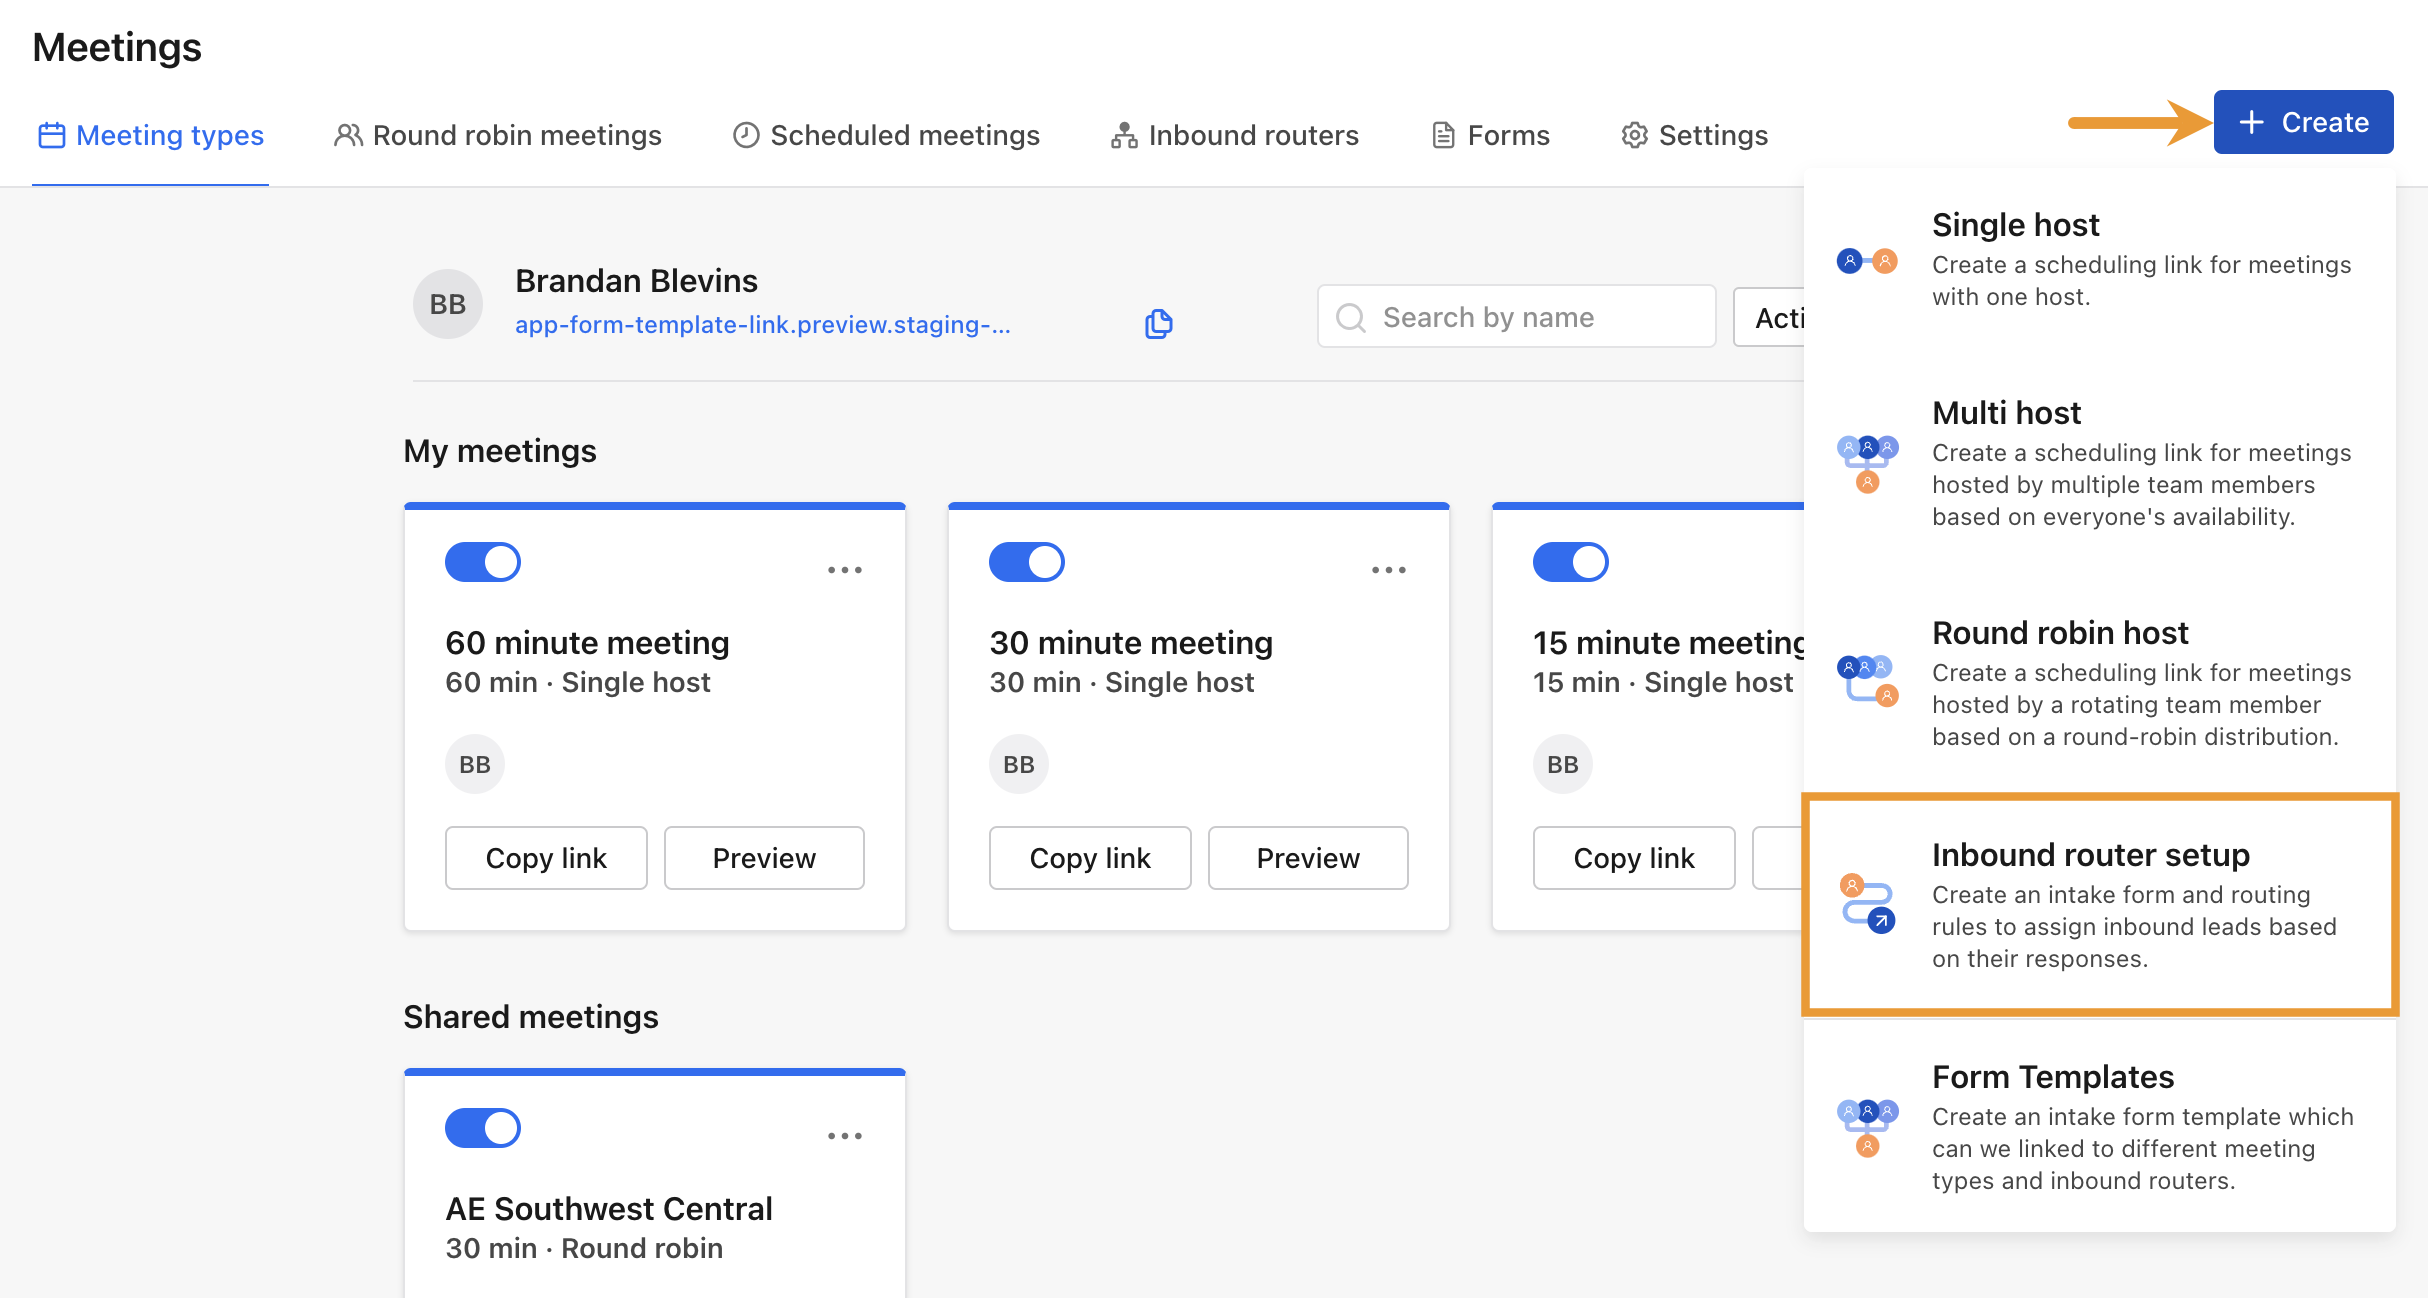
- Click Create, then Inbound router setup.
- Enter a router name, then click Create.
- Click Select intake form.
- Select the intake form template that you want to use, then click Save.
While you build your router, click Save as draft to save your progress without making it live. Prospects can't use a router until you click Publish or Save and publish.
You have now created an inbound router and added its intake form.
Step 2: Add a Meeting Routing Option
Add rules and actions to determine what happens after a prospect submits the intake form. You can add an If/else rule, an Ownership rule, a meeting booking action, an external URL, a custom message, or a default fallback.
- If/else rule: Create yes and no paths based on a prospect's intake form response or an existing Apollo field.
- Ownership rule: Route prospects to an existing account owner or contact owner.
- Book meeting: Let a prospect schedule an existing or new meeting type.
- Send to external URL: Redirect a prospect to a website without offering a meeting.
- Display custom message: Show a custom message without offering a meeting.
- Default fallback: Reuse the same custom message at the end of multiple paths.
Every path in your router needs to end in an action, like a booked meeting, a redirect, or a message, before you can publish.
To route prospects to an existing meeting type:
- In the router's rules and actions area, click Book meeting > Link to existing meeting type.
- Choose a meeting type from your own meetings, or from Shared Meeting Types to route to a round-robin or multi-host meeting.
- Select the meeting type that you want to use.
- Review the meeting type details, then click Add to router.
- Review the router, then click Publish.

You have now added a meeting routing option and published your inbound router. Copy or share the router link so prospects can start booking.
Routing Option: Create an If/else Rule
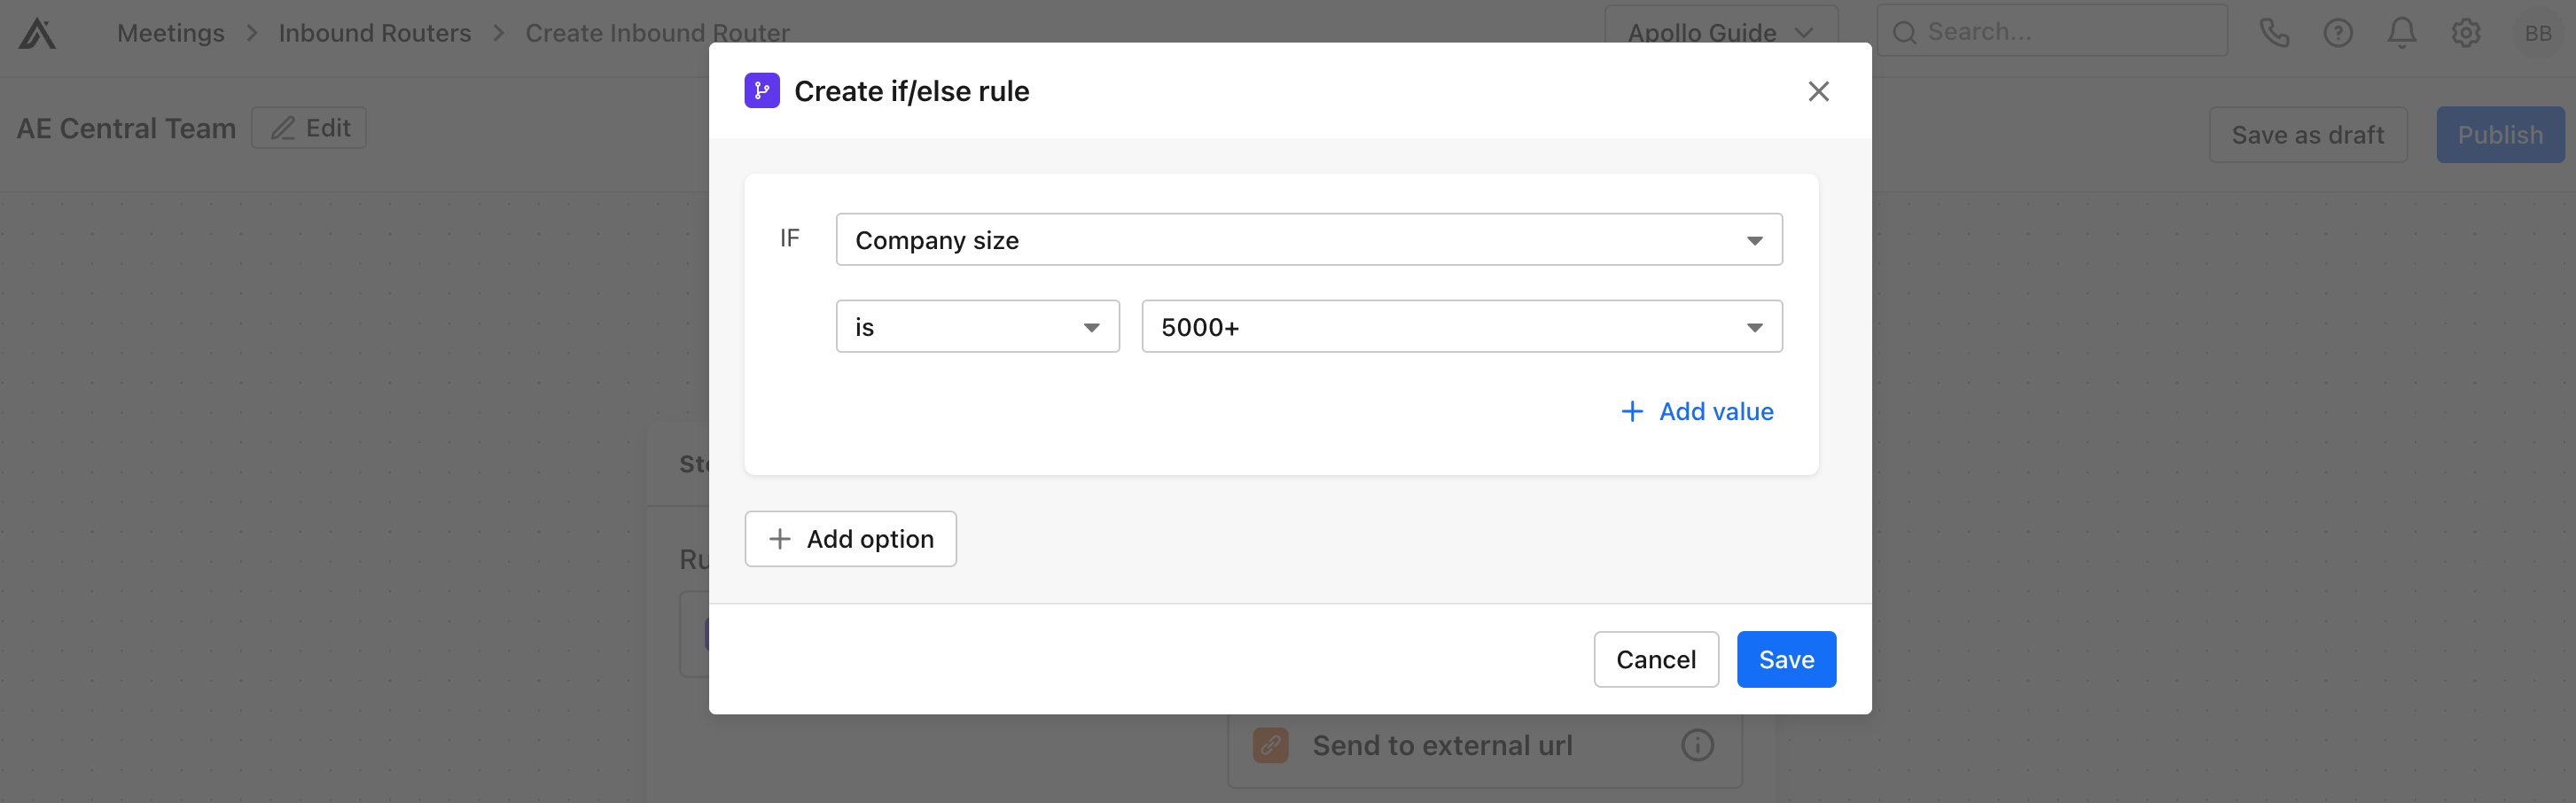
Use an if/else rule to create yes and no paths based on a prospect's intake form response, or based on an existing contact, account, or team field in Apollo. For example, you can route prospects to different meeting hosts based on company size.
- In the router's rules and actions area, click If/else rule.
- Click the Select form question or CRM field dropdown, then choose a form question or a field under Contact fields, Account fields, or Team fields.
- Choose the value that the rule should evaluate, then click Save.
- Click Add rule/action on the yes path and choose the next rule or action.
- Click Add rule/action on the no path and choose the next rule or action.
- Repeat these steps to add more paths, if needed.
- Review the router, then click Publish.
You have now created and published an if/else routing rule.
Routing Option: Create an Ownership Rule
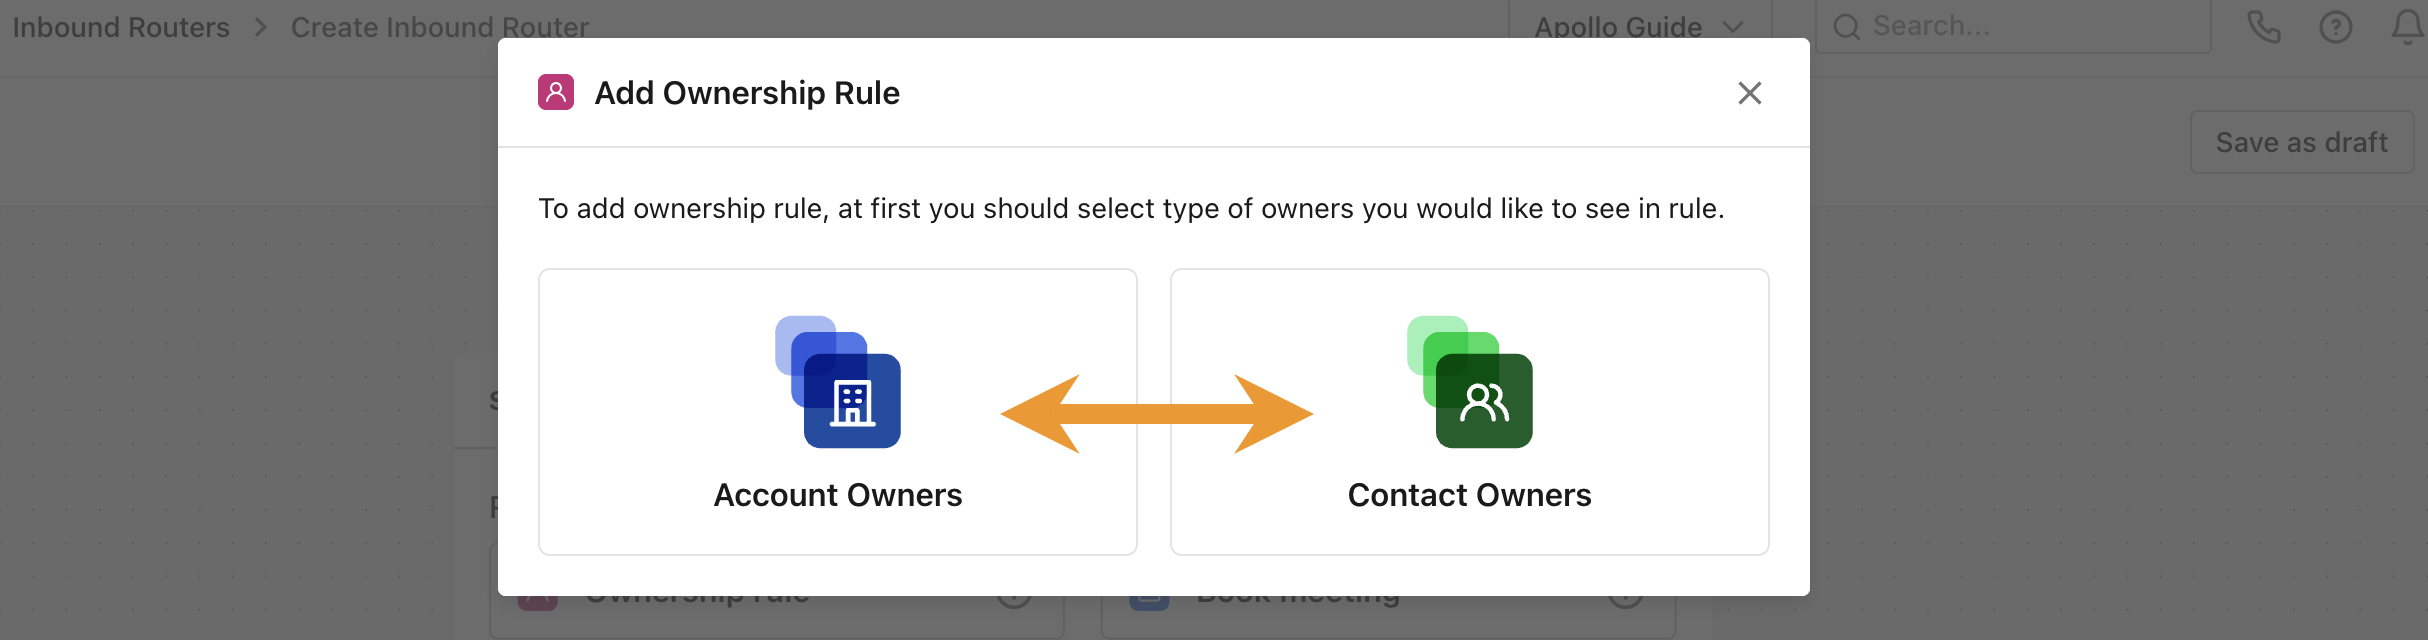
Use an ownership rule to route a prospect to an existing account owner or contact owner. Apollo checks the email address that the prospect enters in the intake form. When the prospect matches an owner you've added to this rule, they follow the yes path and can book a meeting with that owner.
- In the router's rules and actions area, click Ownership rule.
- Select Account Owners or Contact Owners.
- Click Add owners, then search for and select the owners or teams you want to include in this path.
- Optional: Update the default meeting type for all owners, or select a different meeting type for an individual owner.
- Click Save to create the yes path.
- Click Add rule/action on the no path, then choose the next rule or action.
- Review the router, then click Publish.
You have now created and published an ownership routing rule.
Manage Your Inbound Router
Once your inbound router is live, use the Admin console to make changes, share it, or remove it.
From the … menu beside an inbound router, you can:
- Rename: Update the router's name.
- Share: Copy the router's link to share with prospects.
- Force Apollo login: Require prospects to log in before they can access the router.
Check out the following tabs to edit or delete an inbound router.
To edit an inbound router:
- Go to Meetings > Admin console.
- Select the inbound router, or click … beside it and select Edit.
- Make your changes, then click Save as draft or Save and publish.

You have now edited an inbound router.
To delete an inbound router:
- Go to Meetings > Admin console.
- Click … beside the inbound router, then select Delete.
- Review the warning that the linked intake form will be disabled everywhere this router is used, then click Delete to confirm.
You have now deleted an inbound router.
Next Steps
Build on your inbound routing workflow with these related resources:
| Inbound Overview | Learn how Apollo inbound features work together to capture, qualify, and act on inbound interest. |
|---|---|
| Create and Manage Meetings | Set up and manage meeting types for the booking paths in your router. |
| Integrate Your Web Forms with Meetings | Use your own website forms with an inbound router. |
| Use Form Enrichment to Capture More Leads | Enrich form submissions to capture more context without adding more form fields. |
| Create a Workflow | Use a Meeting booked workflow to automate follow-up after a prospect books a meeting. |