Overview
To run a successful account-based sales motion (ABSM), your sales reps need to effectively target a potentially small set of accounts and regional territories. This often means undertaking the time-consuming process of manually identifying and targeting prospects with the right messaging.
Apollo enables your team to automate your ABSM with workflows. Set up workflows that focus on surfacing contacts for your highest priority accounts. Then, either automatically move those contacts into your sequences, or add tasks to account queues so account owners can manually decide how to engage them with them.
The following sections describe how to create a workflows in Apollo for your ABSM strategy and manage contacts that are added to account queues.
Example: Create a Workflow to Target Priority Accounts
The following walkthrough explores how your team can set up a workflow to surface contacts at a high-priority account, but workflows in Apollo offer a variety of automations beyond this specific use case. To explore more automations, refer to Workflows Overview and Create a Workflow.
To run an ABSM workflow, you should avoid using the multi-split branch and true / false branch options. These options conflict with the ABSM option outlined in this example.
To apply this example effectively, you should feed the contacts that are surfaced into a sequence. If you've never created a sequence, or just haven't created the right sequence for the accounts you will be targeting, refer to Sequences Overview to get started.
To create an account-based workflow:
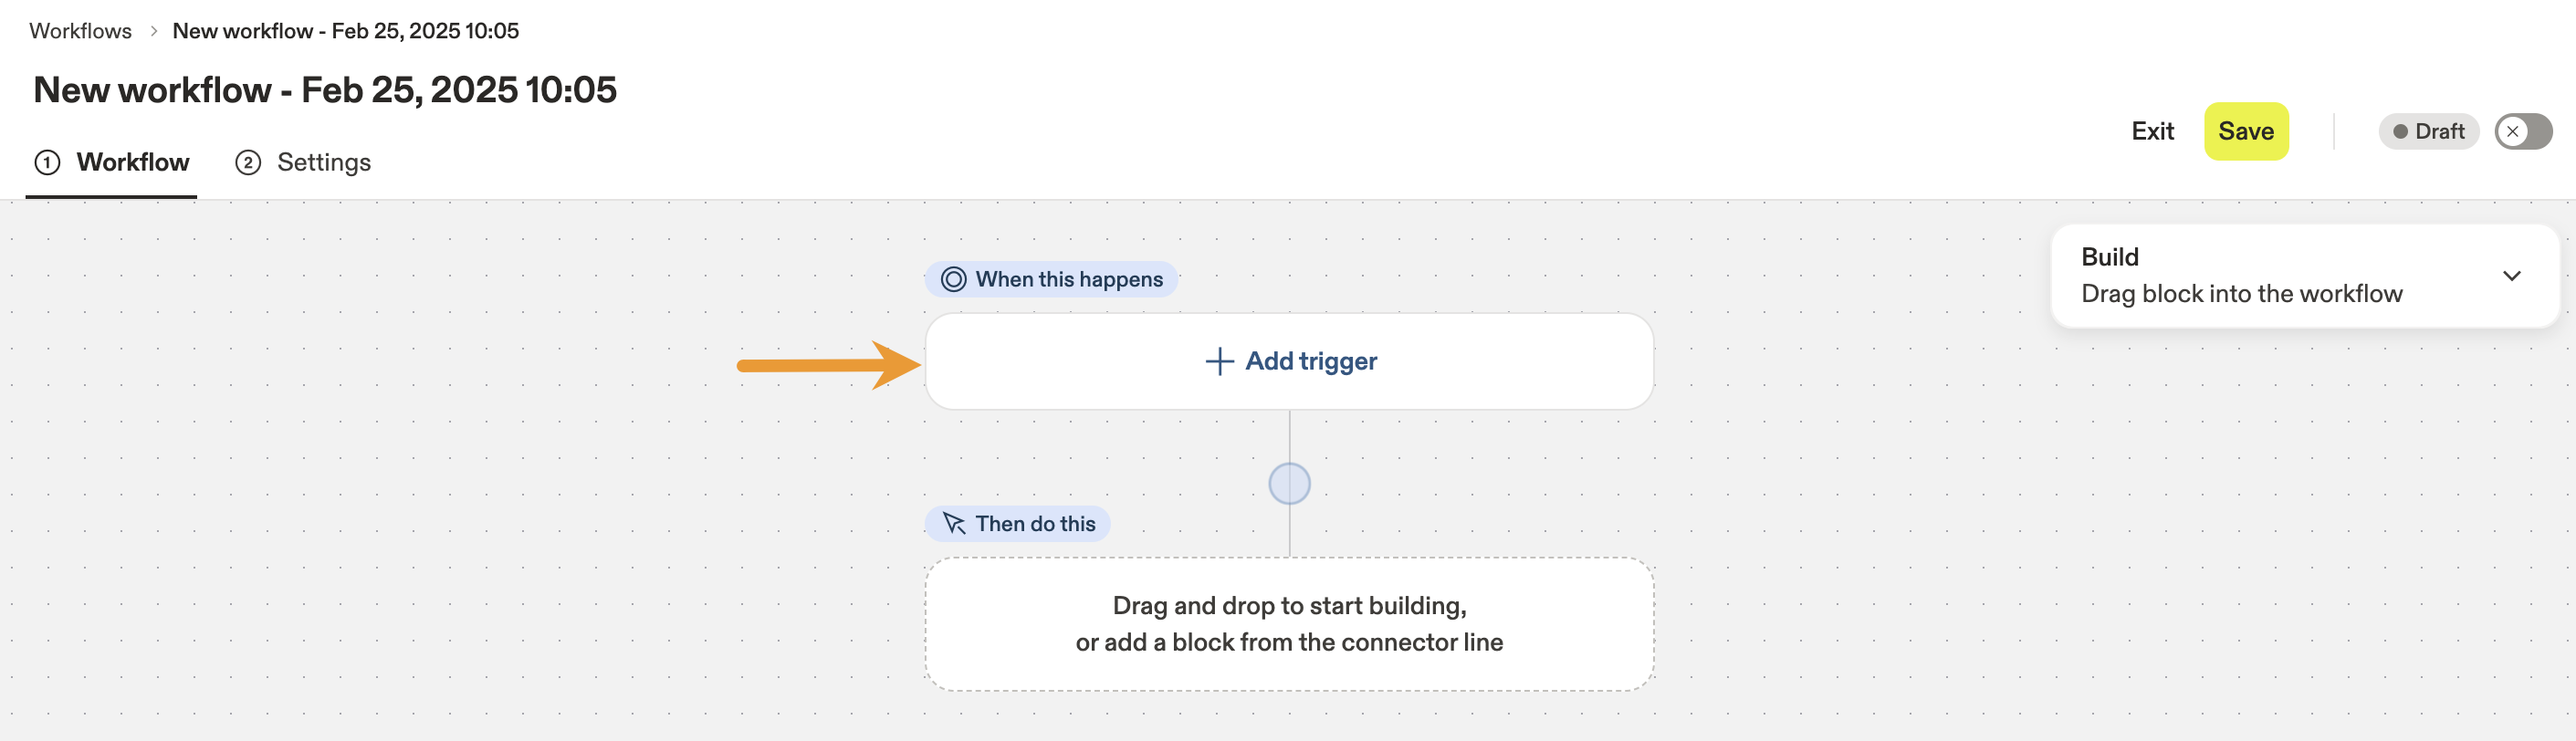
- Launch Apollo and click Workflows.
- Click Create workflow > Create from scratch.

- Click Add trigger to choose enrollment triggers for the workflow.
- For this example, click Based on a date or schedule, choose Companies as the target type, and set the frequency to run every week. Check out Create a Workflow to learn more about the trigger options.
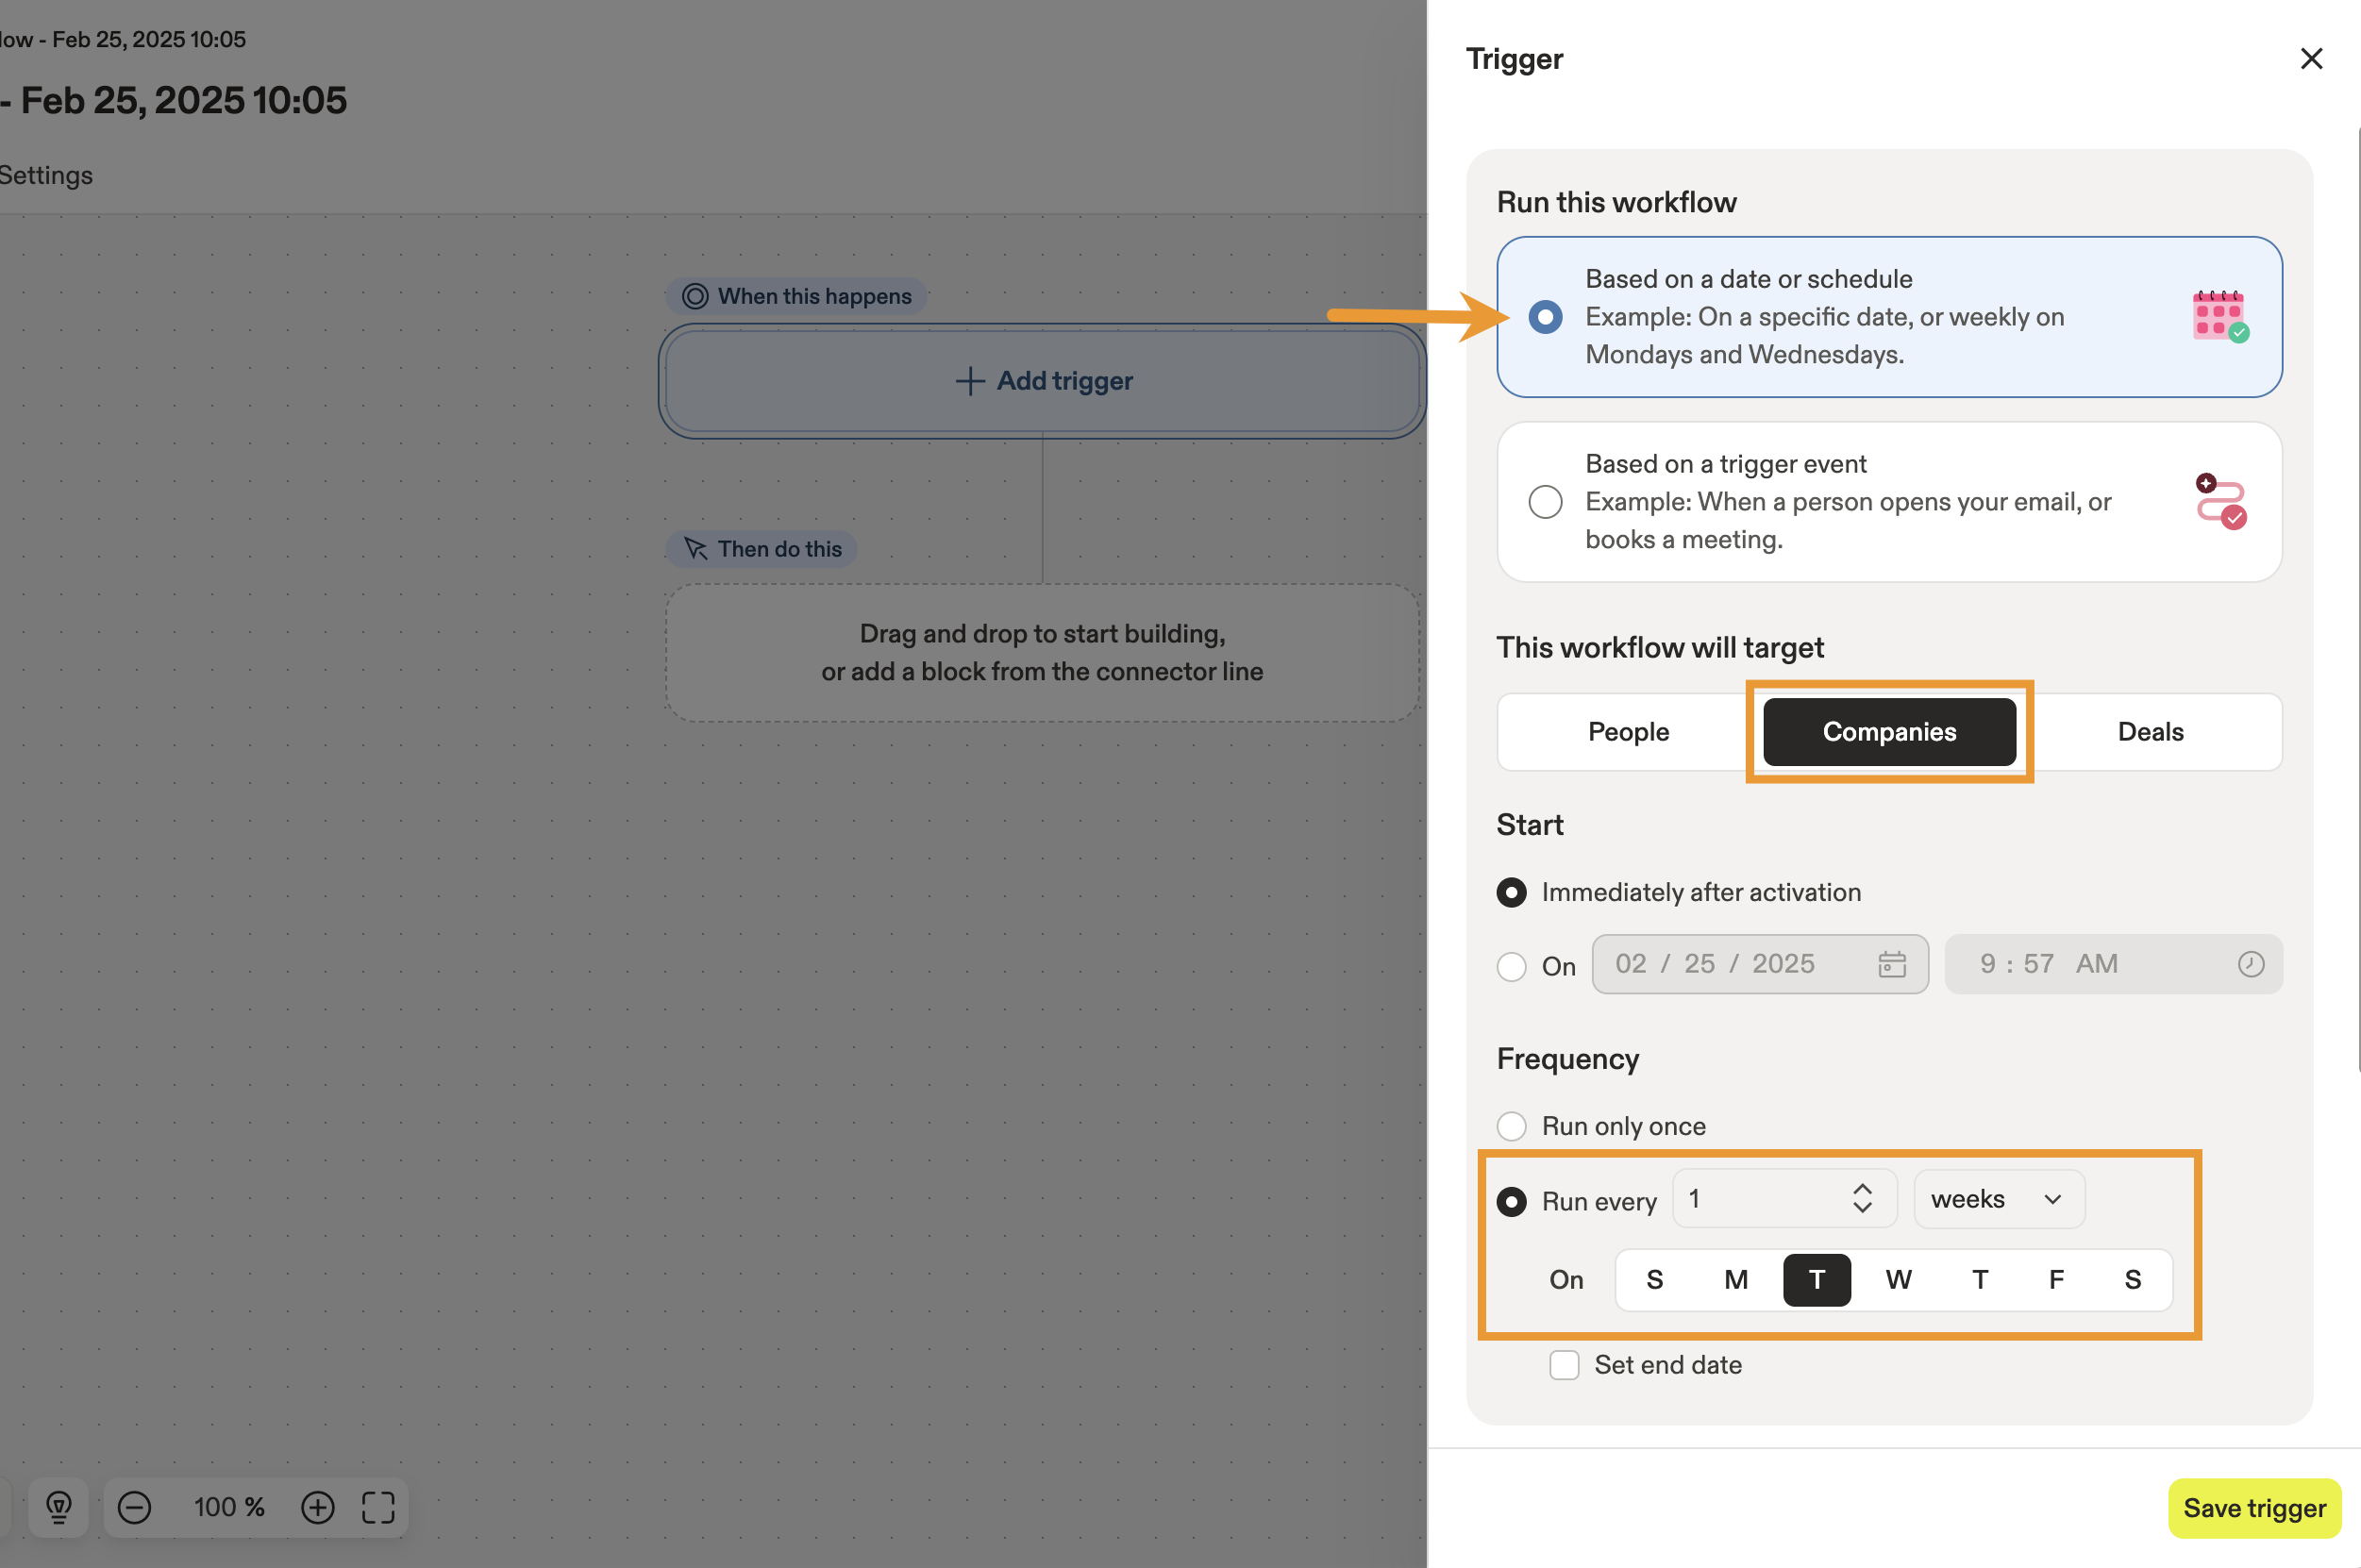
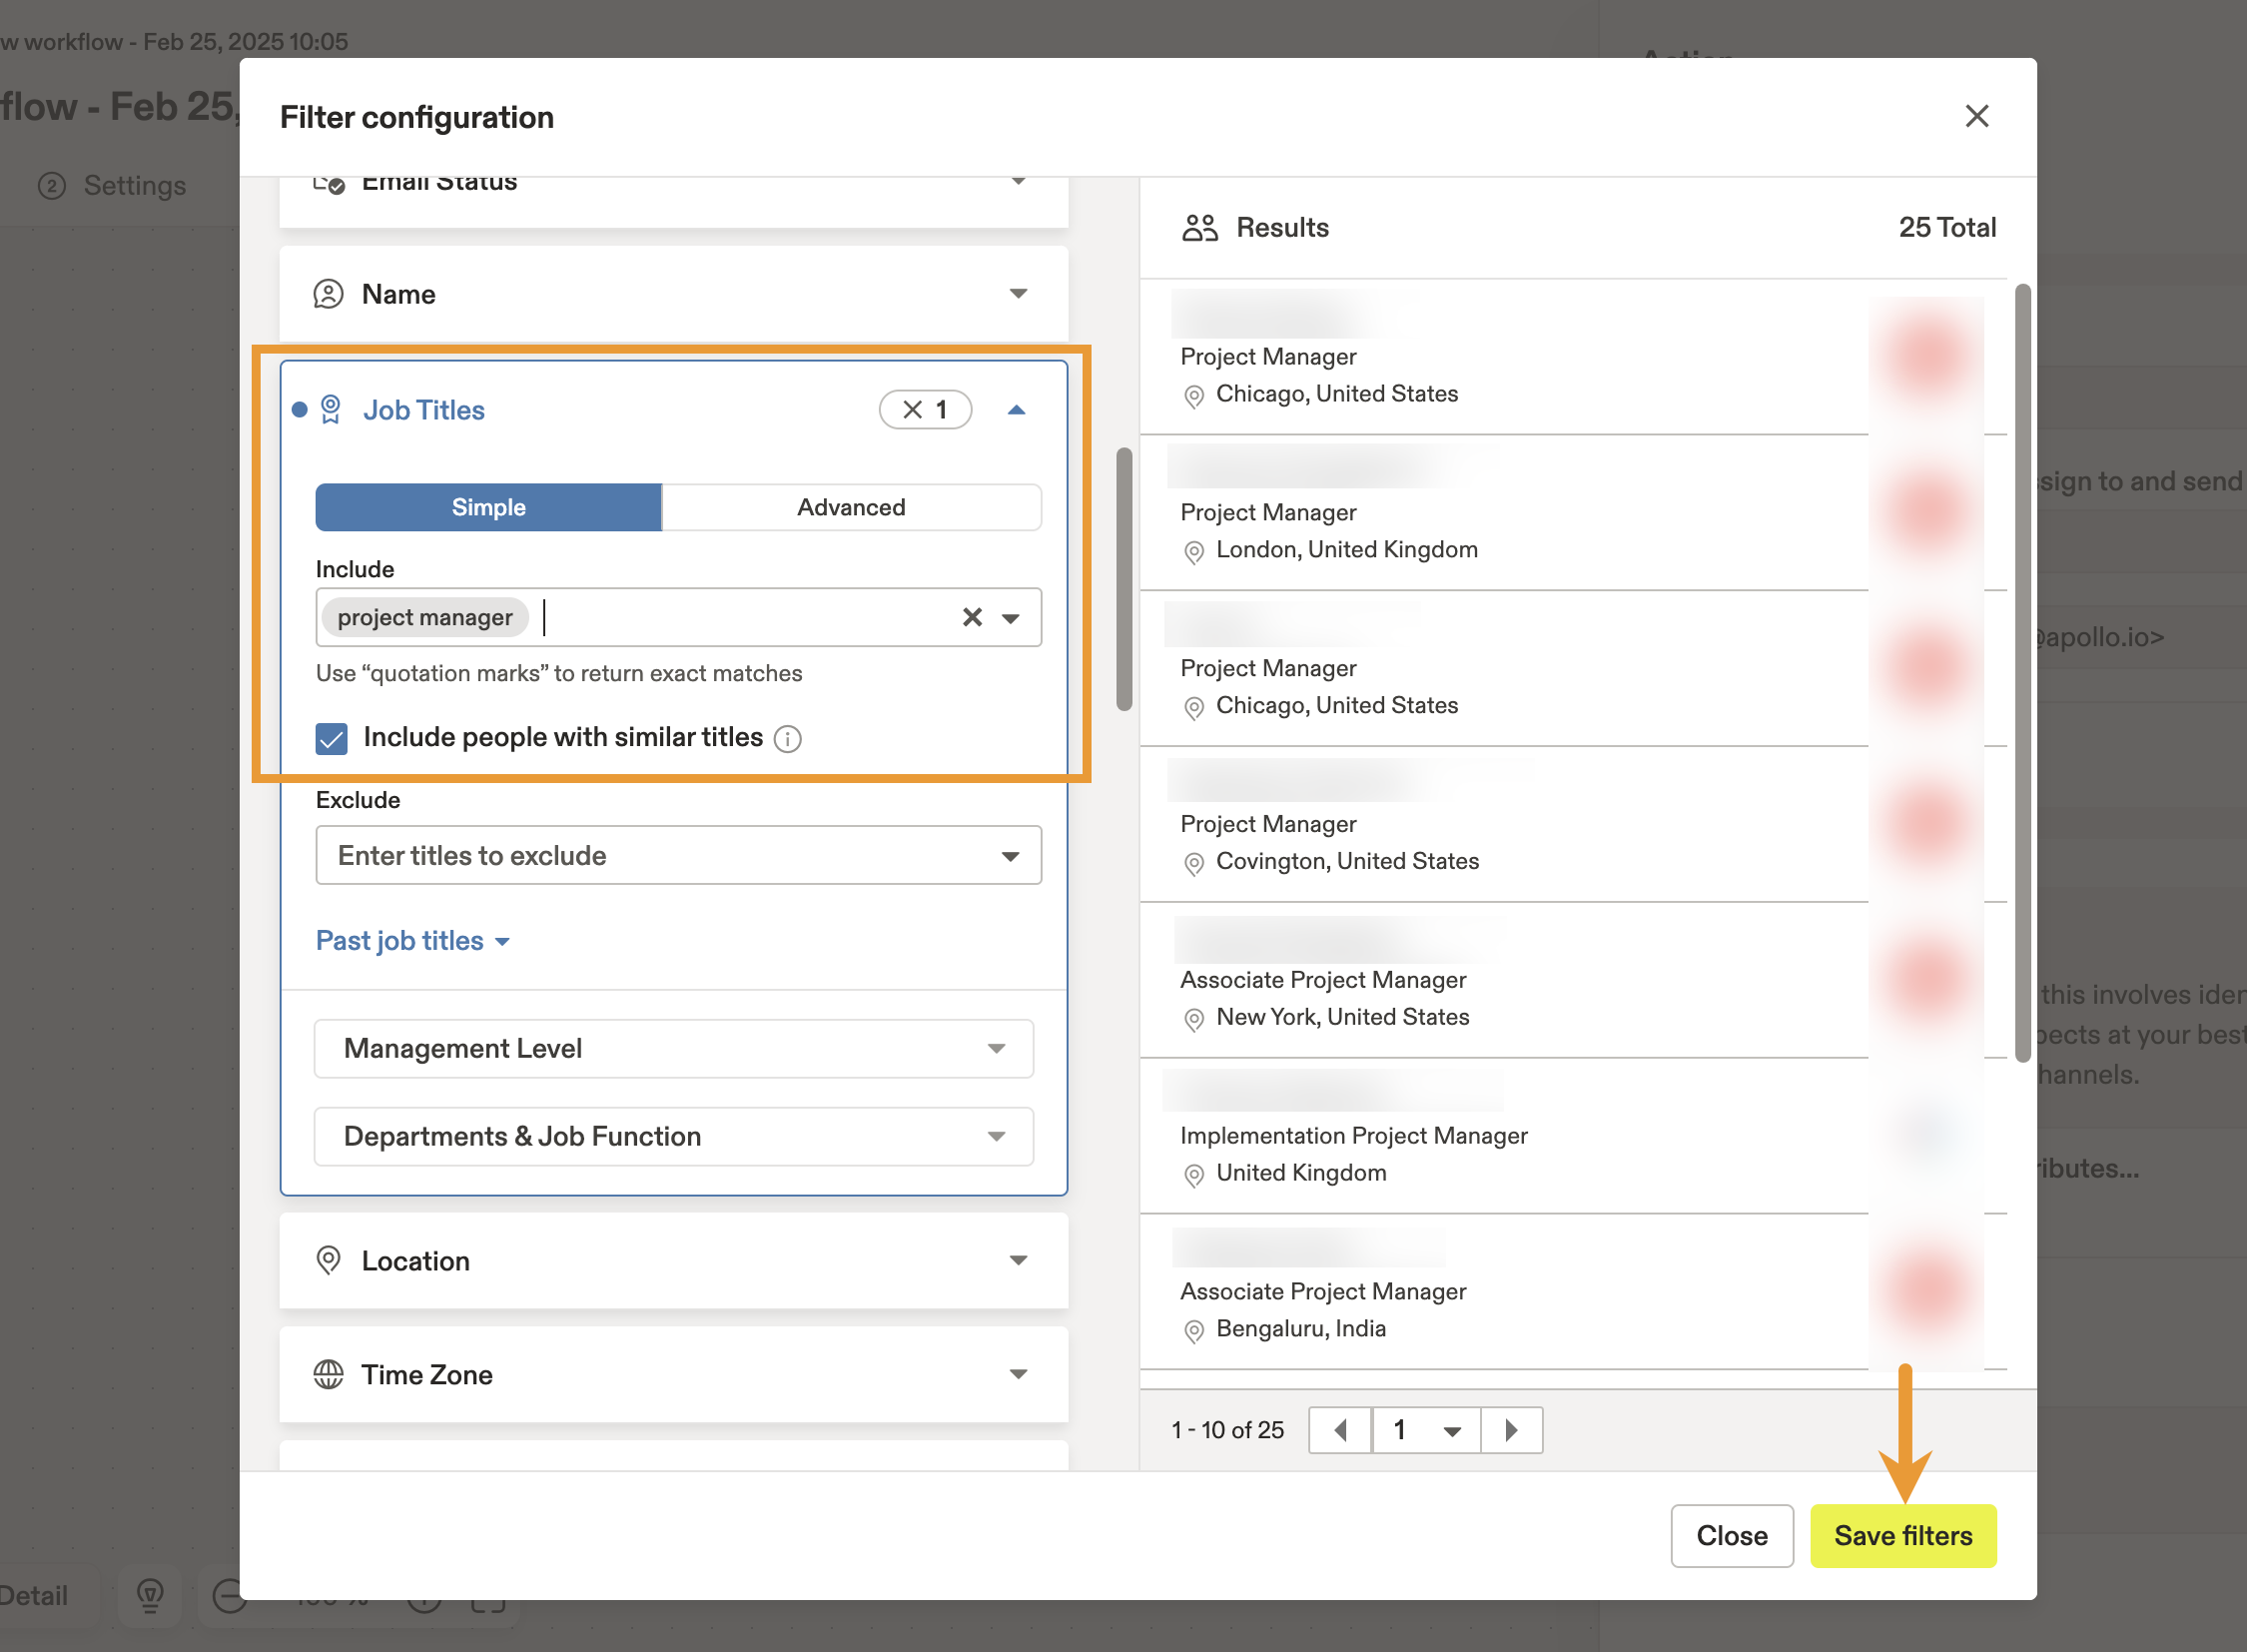
- Click Edit filters to change the workflow's enrollment criteria.

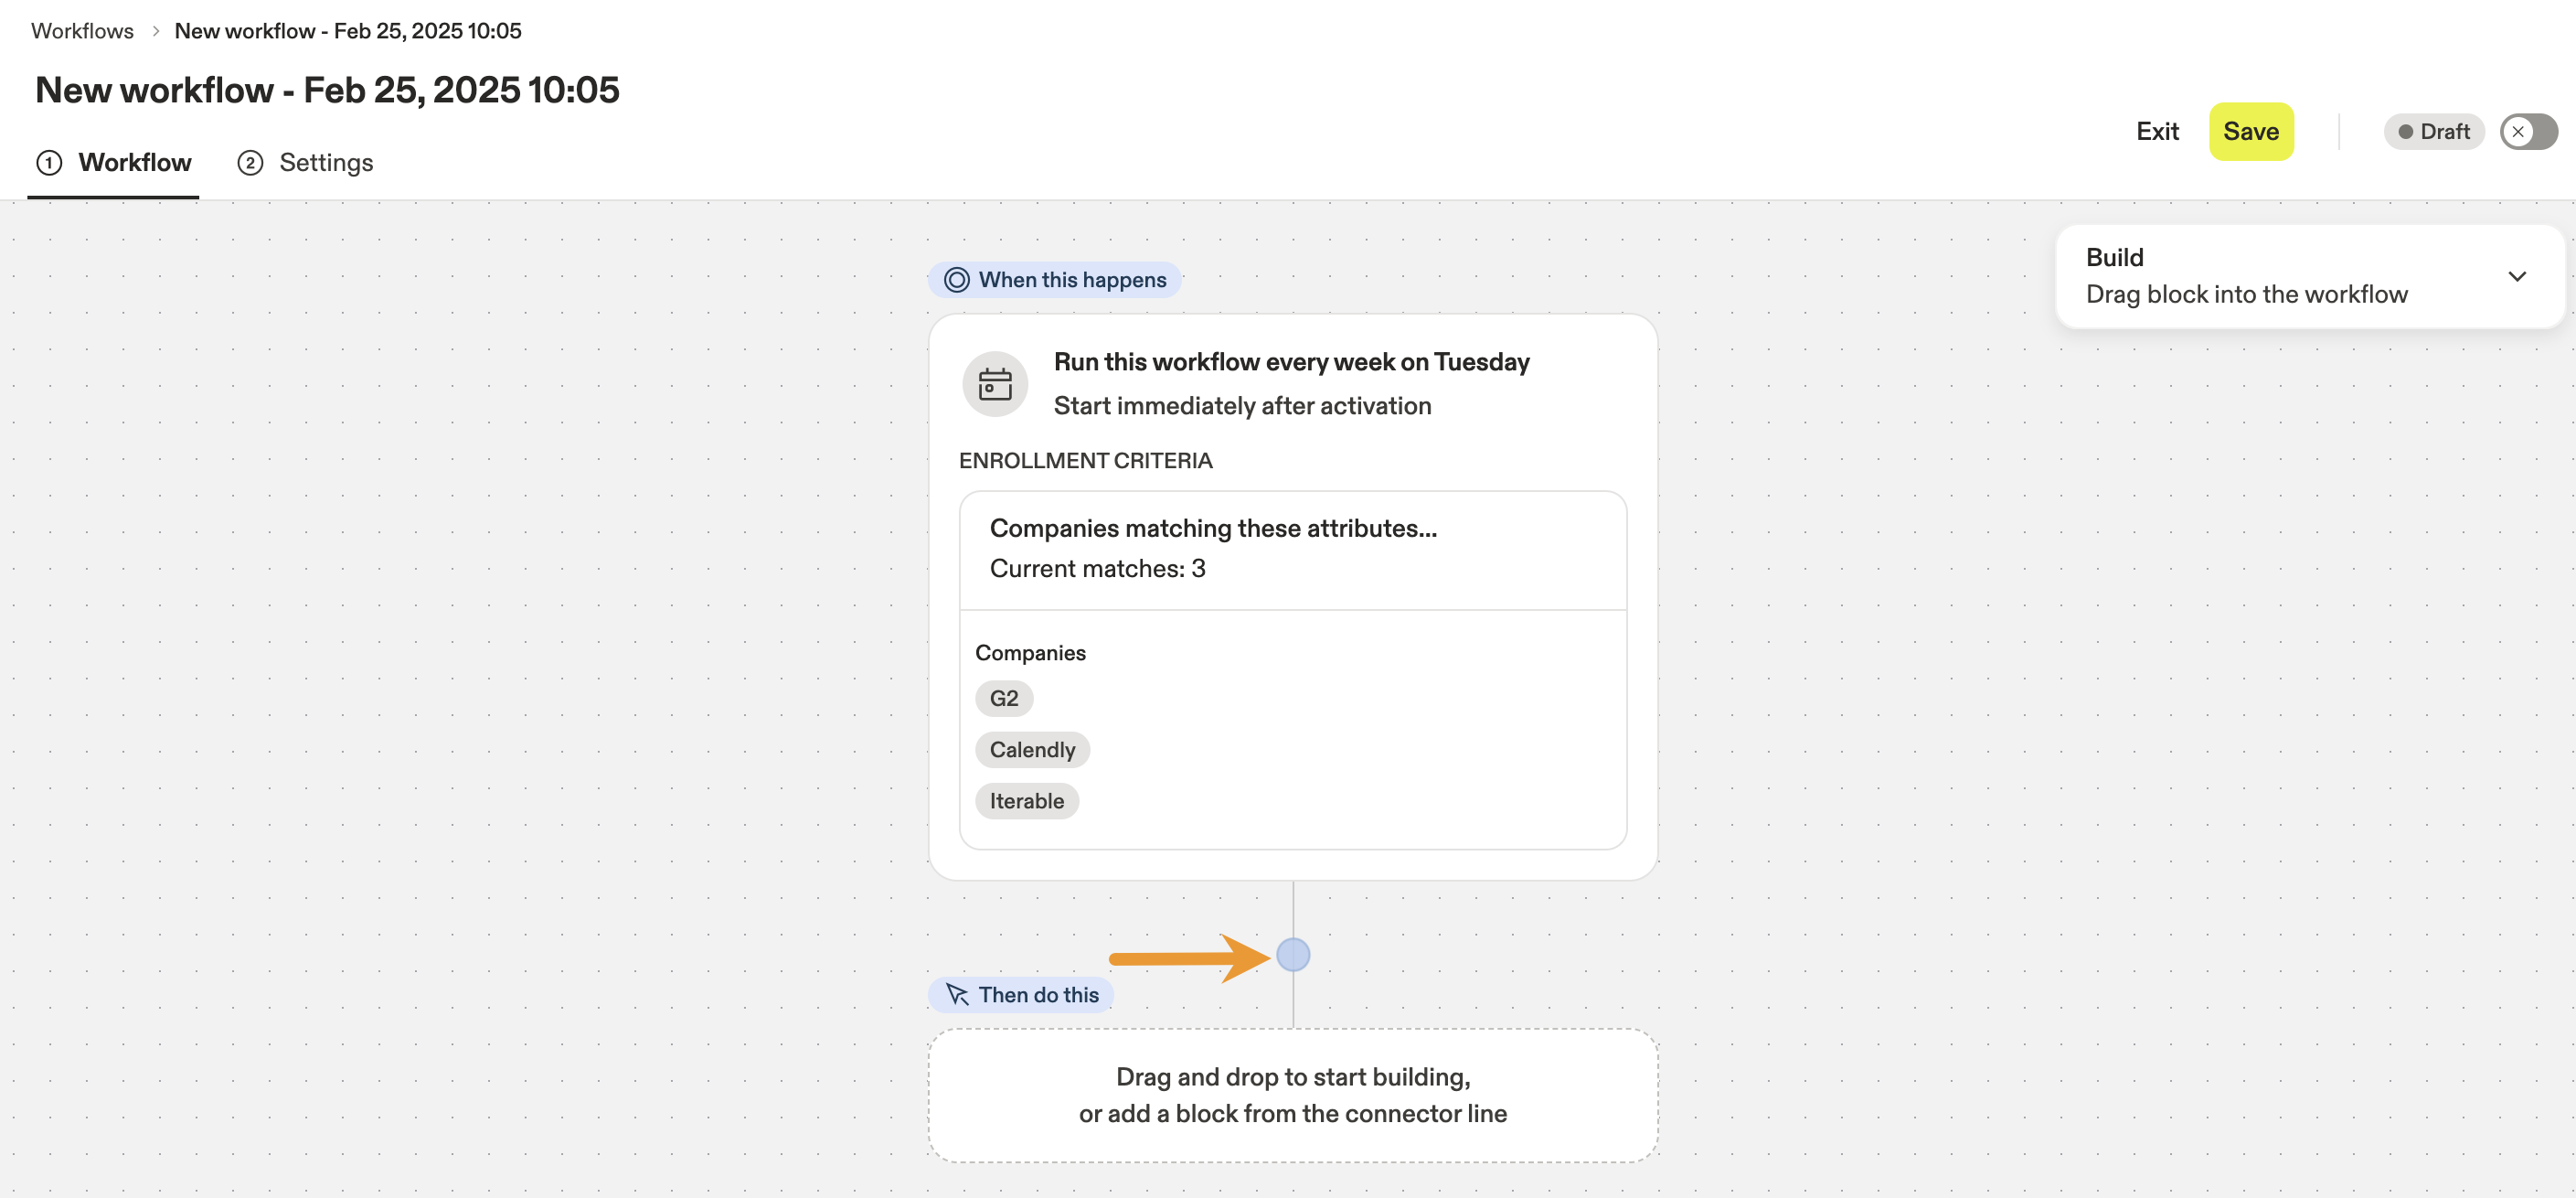
- Click the Company filter and add the accounts you want to target with your workflow. As you add filters, Apollo shows you a preview of the targets that would meet your criteria. Then, click Save filters.

- Click Save trigger.
- Click the + in the workflow to add a block.
- Click Manage sequences to add the action.

- Click Add contacts to sequence, then choose a sequence to use. Contacts that are surfaced by this workflow will be added to the sequence you select.

- Decide which linked mailboxes should be used to send emails to the surfaced contacts. Select Account owner to use the account owner's mailbox, then add a Specific user as a backup option. Click Save action.

- Click Edit filters to further identify the contacts to target within your chosen accounts.
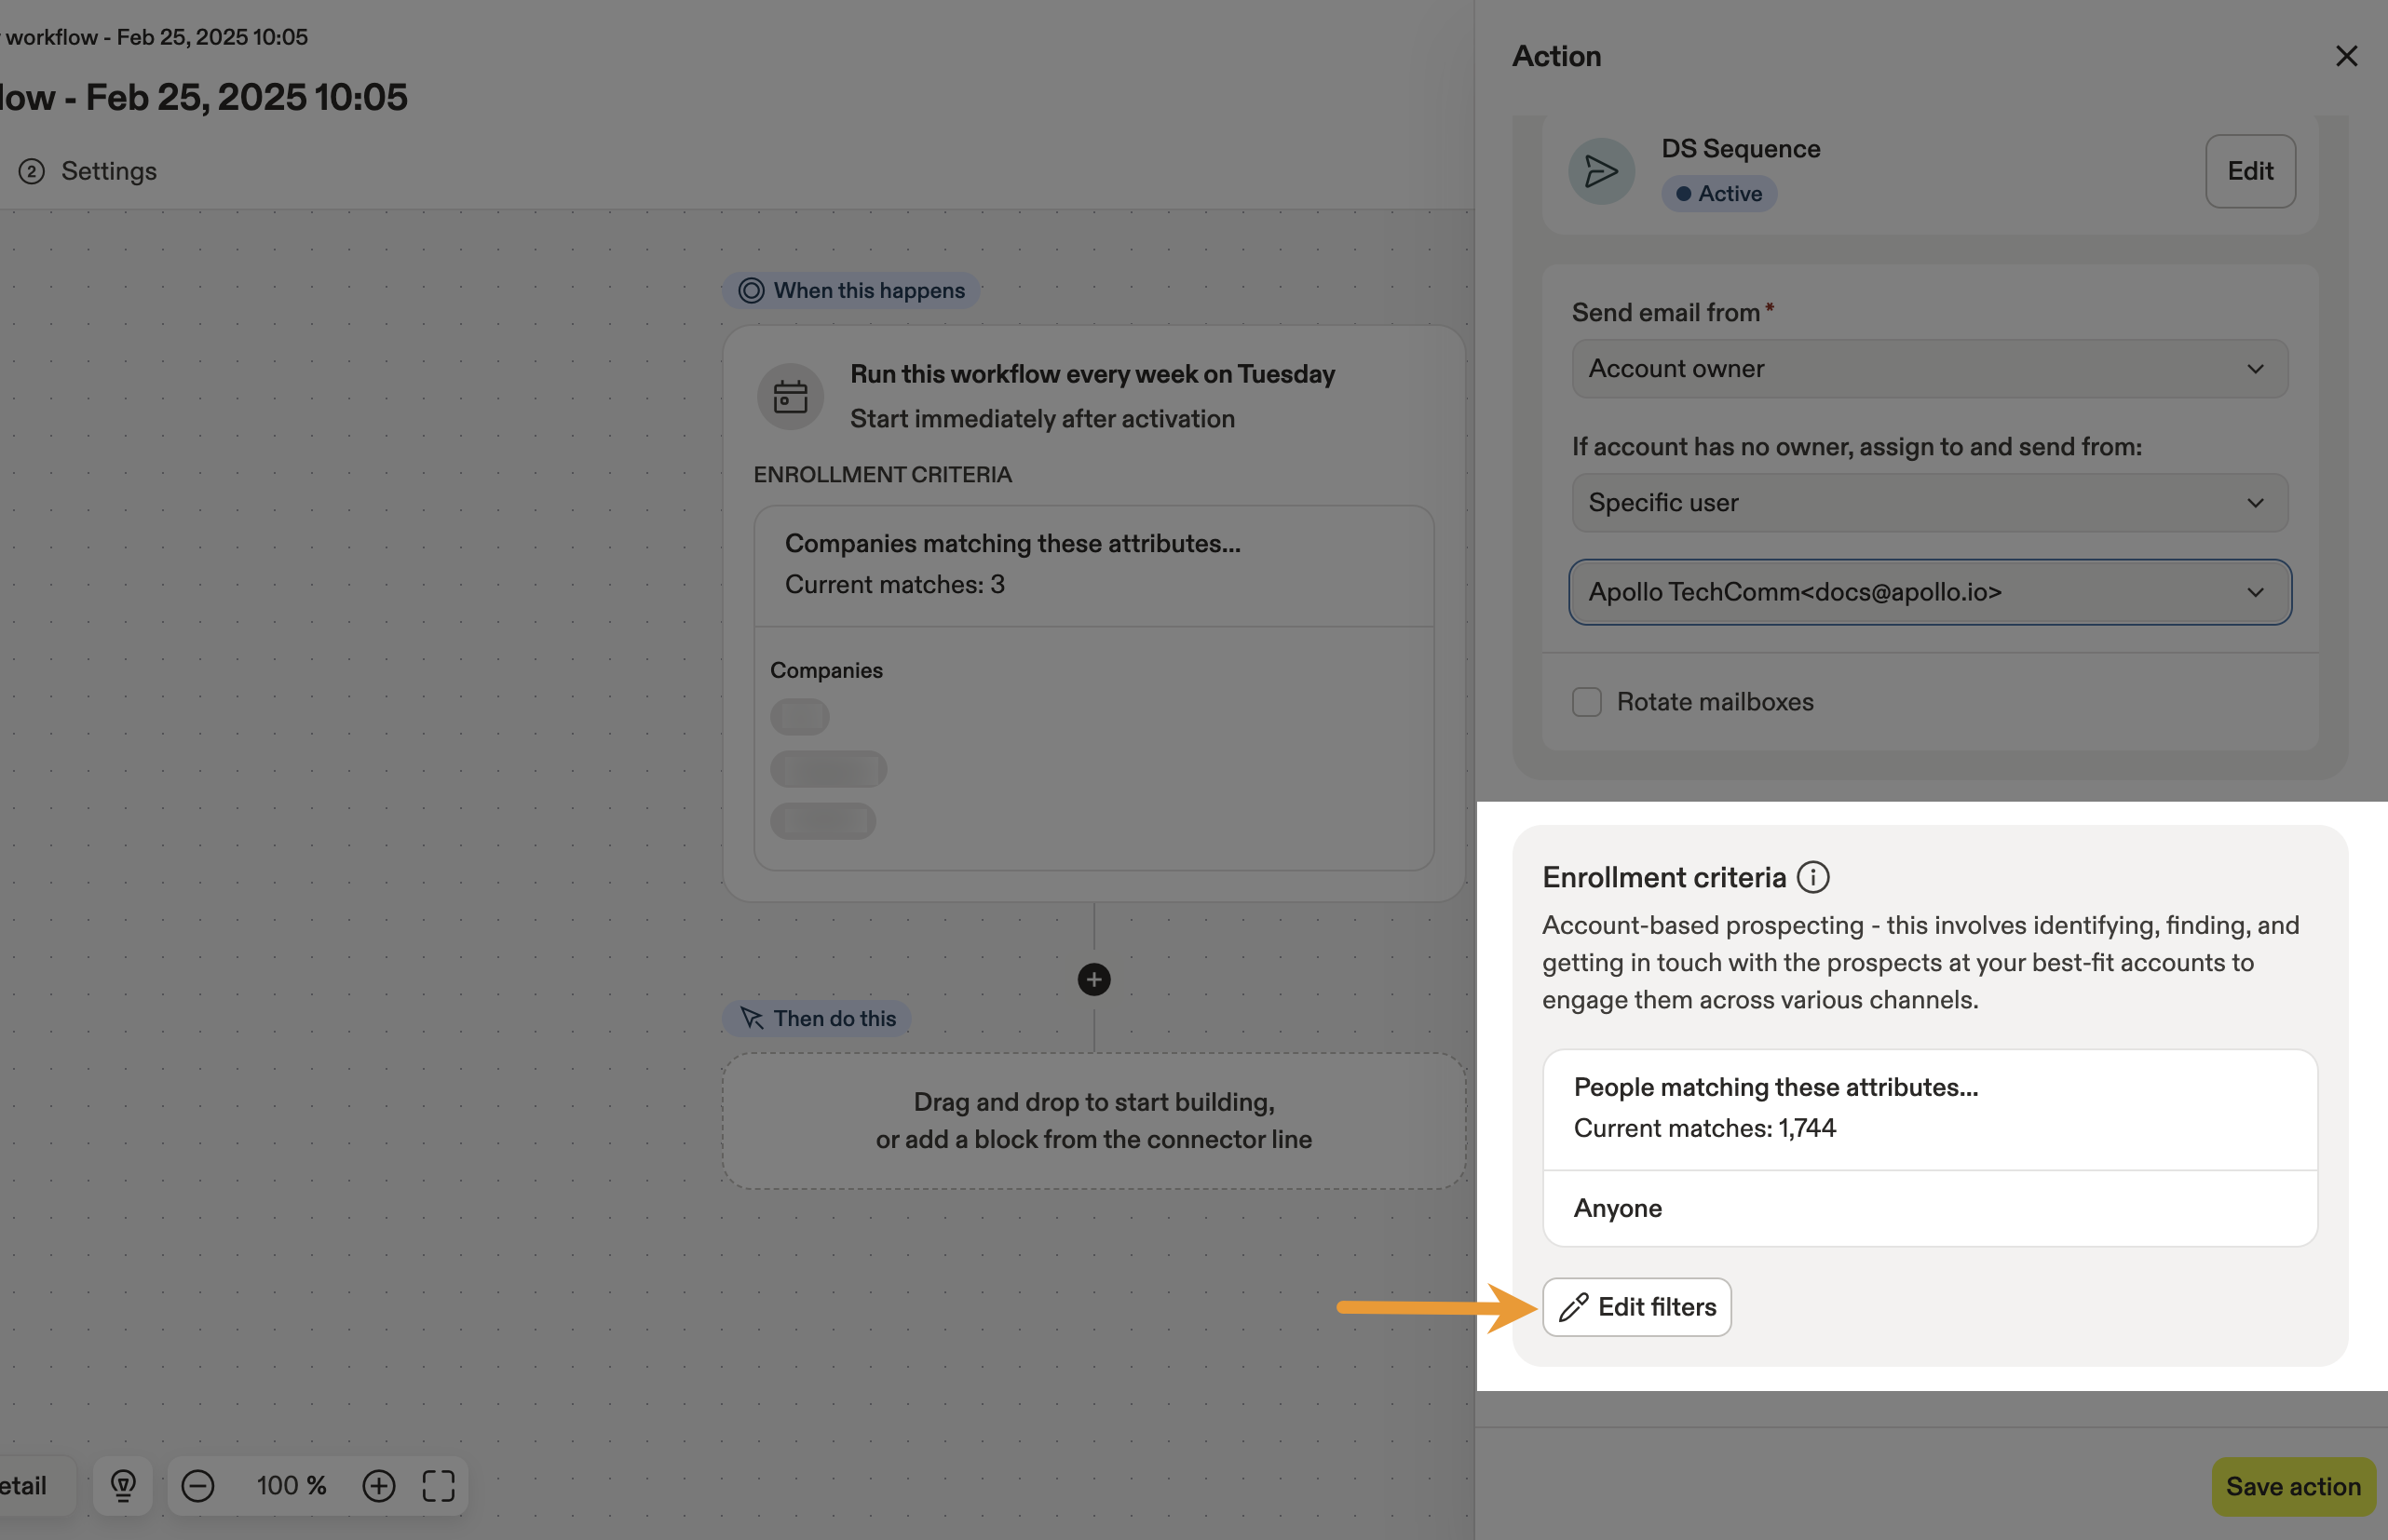
- Add people search filters to narrow the potential contacts at your high-priority accounts. Click the Job Title filter and add the job titles you want to target. Then, click Save filters.
- Click Save action.
- Go to the Settings tab. Click the Max companies (per run) checkbox and enter the maximum number of companies you want processed by this workflow.
Click the Max people per company (per workflow) checkbox and enter the maximum number of contacts you want processed for each account in this workflow.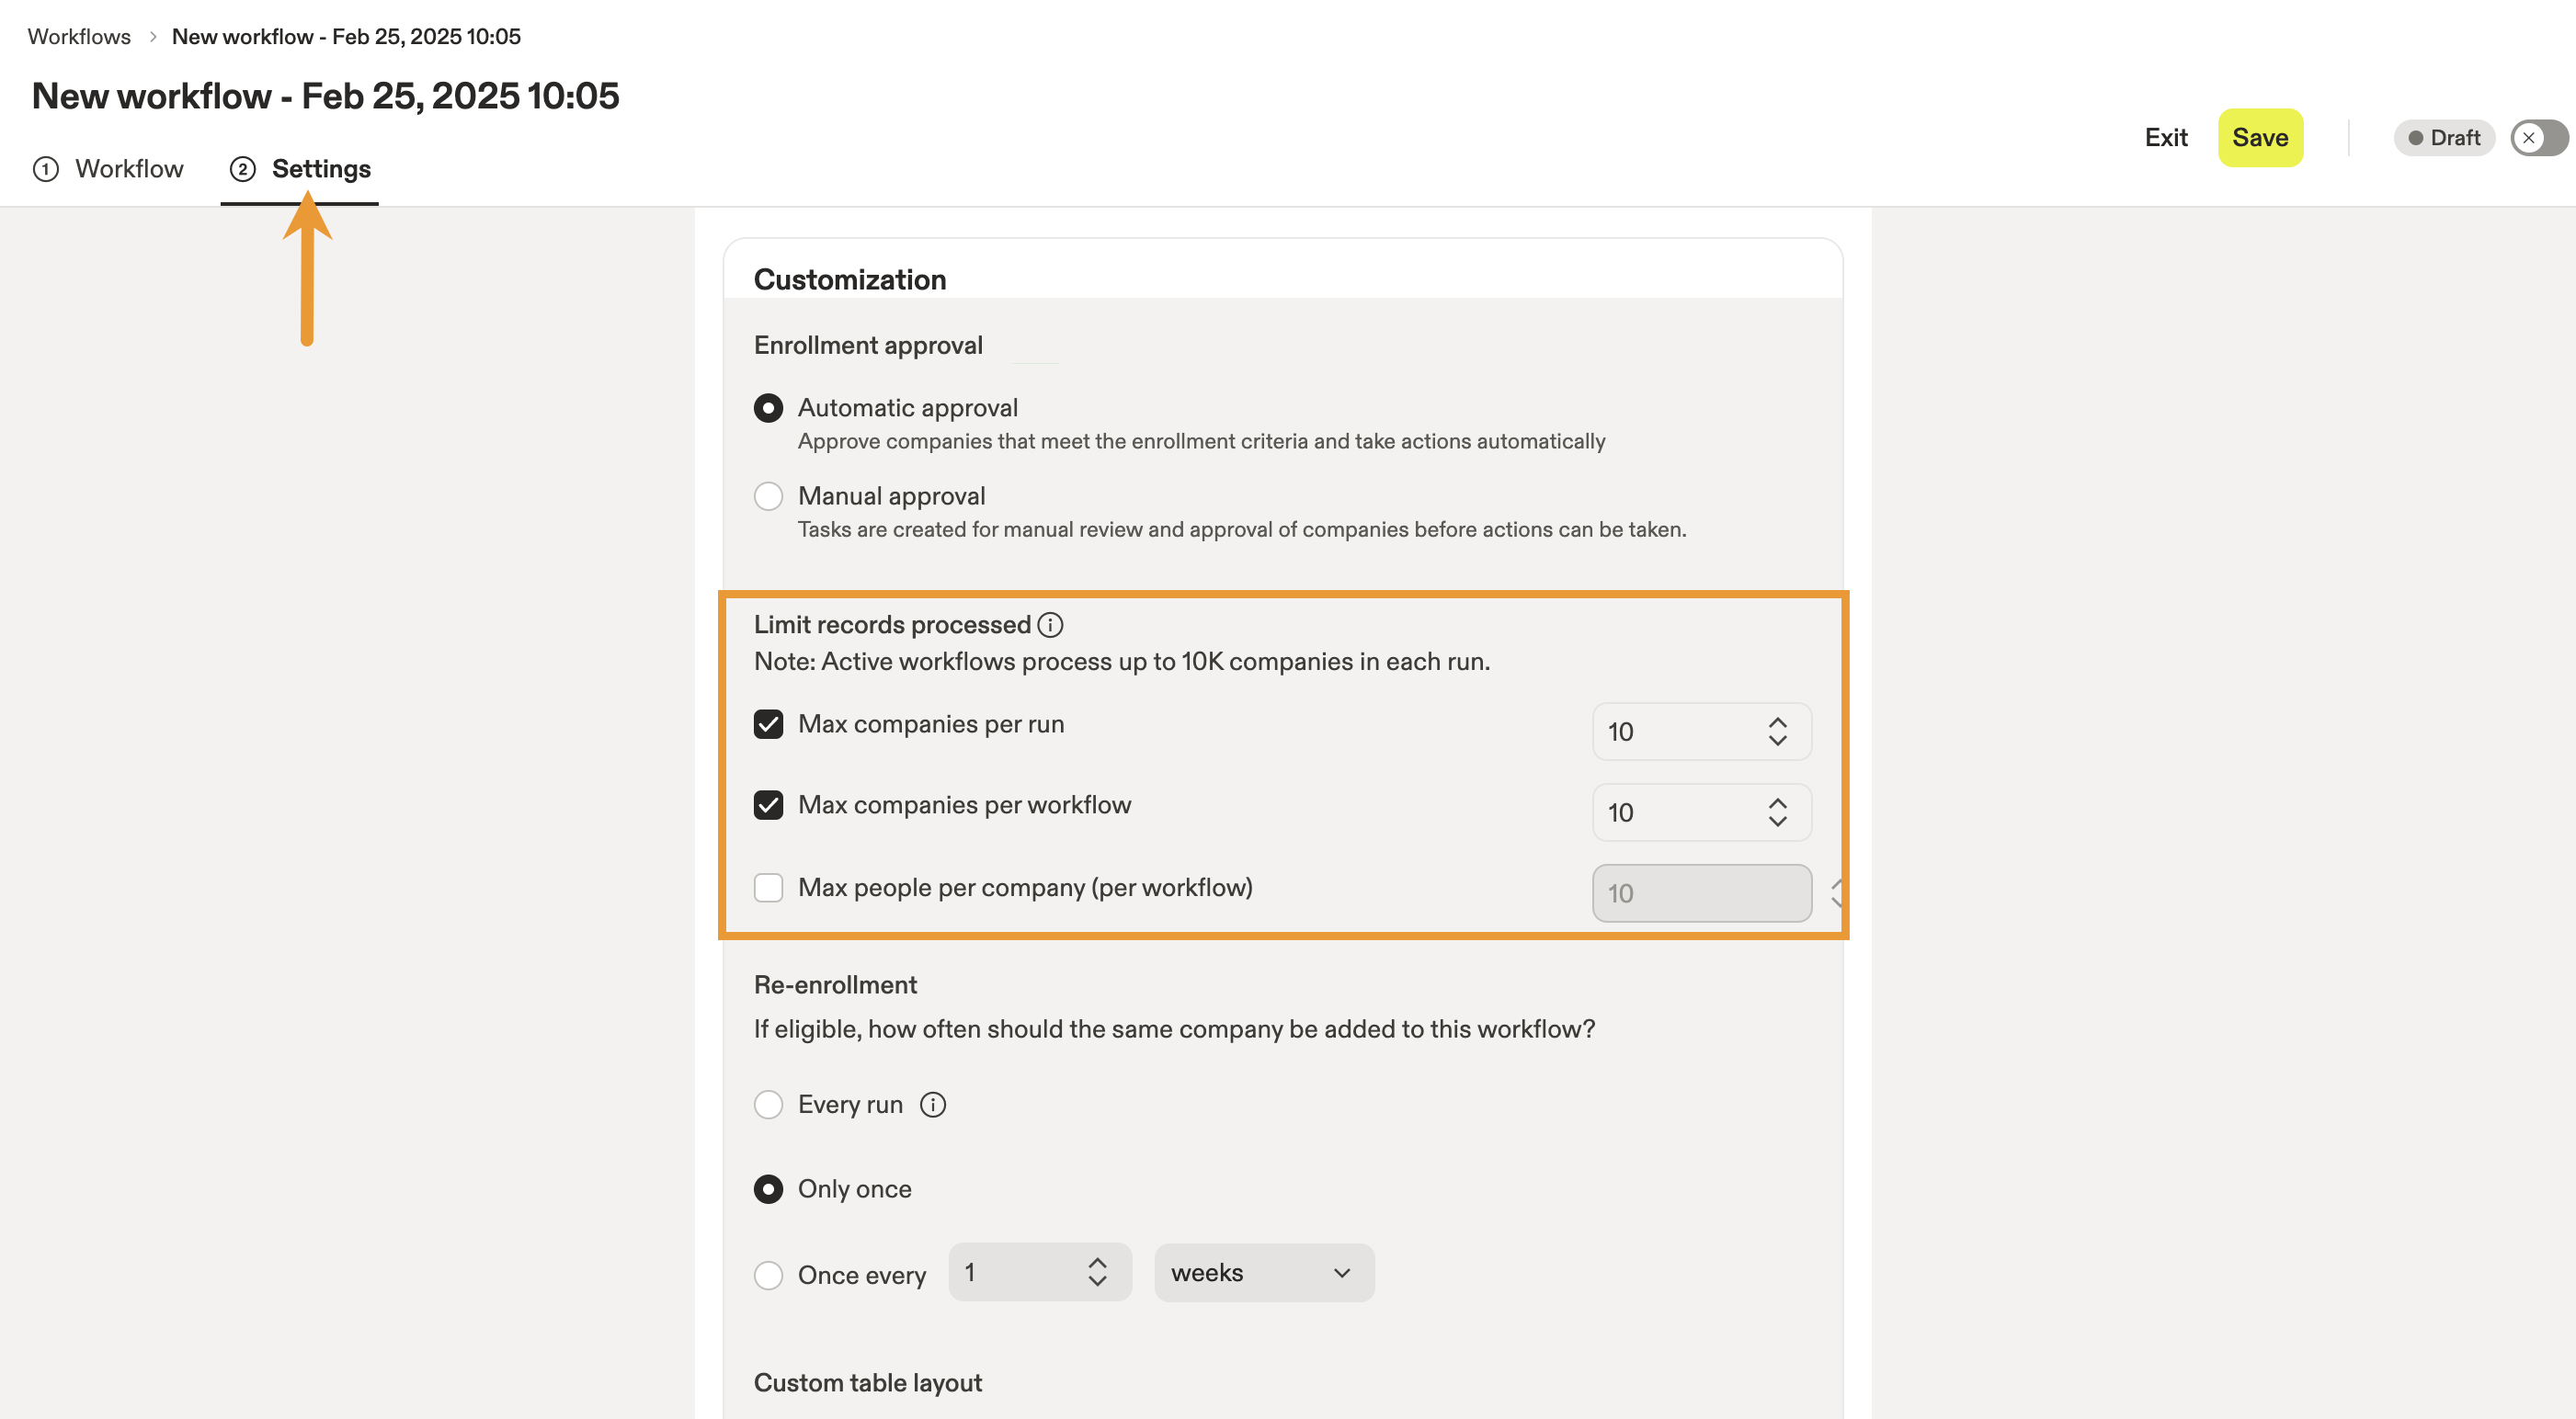
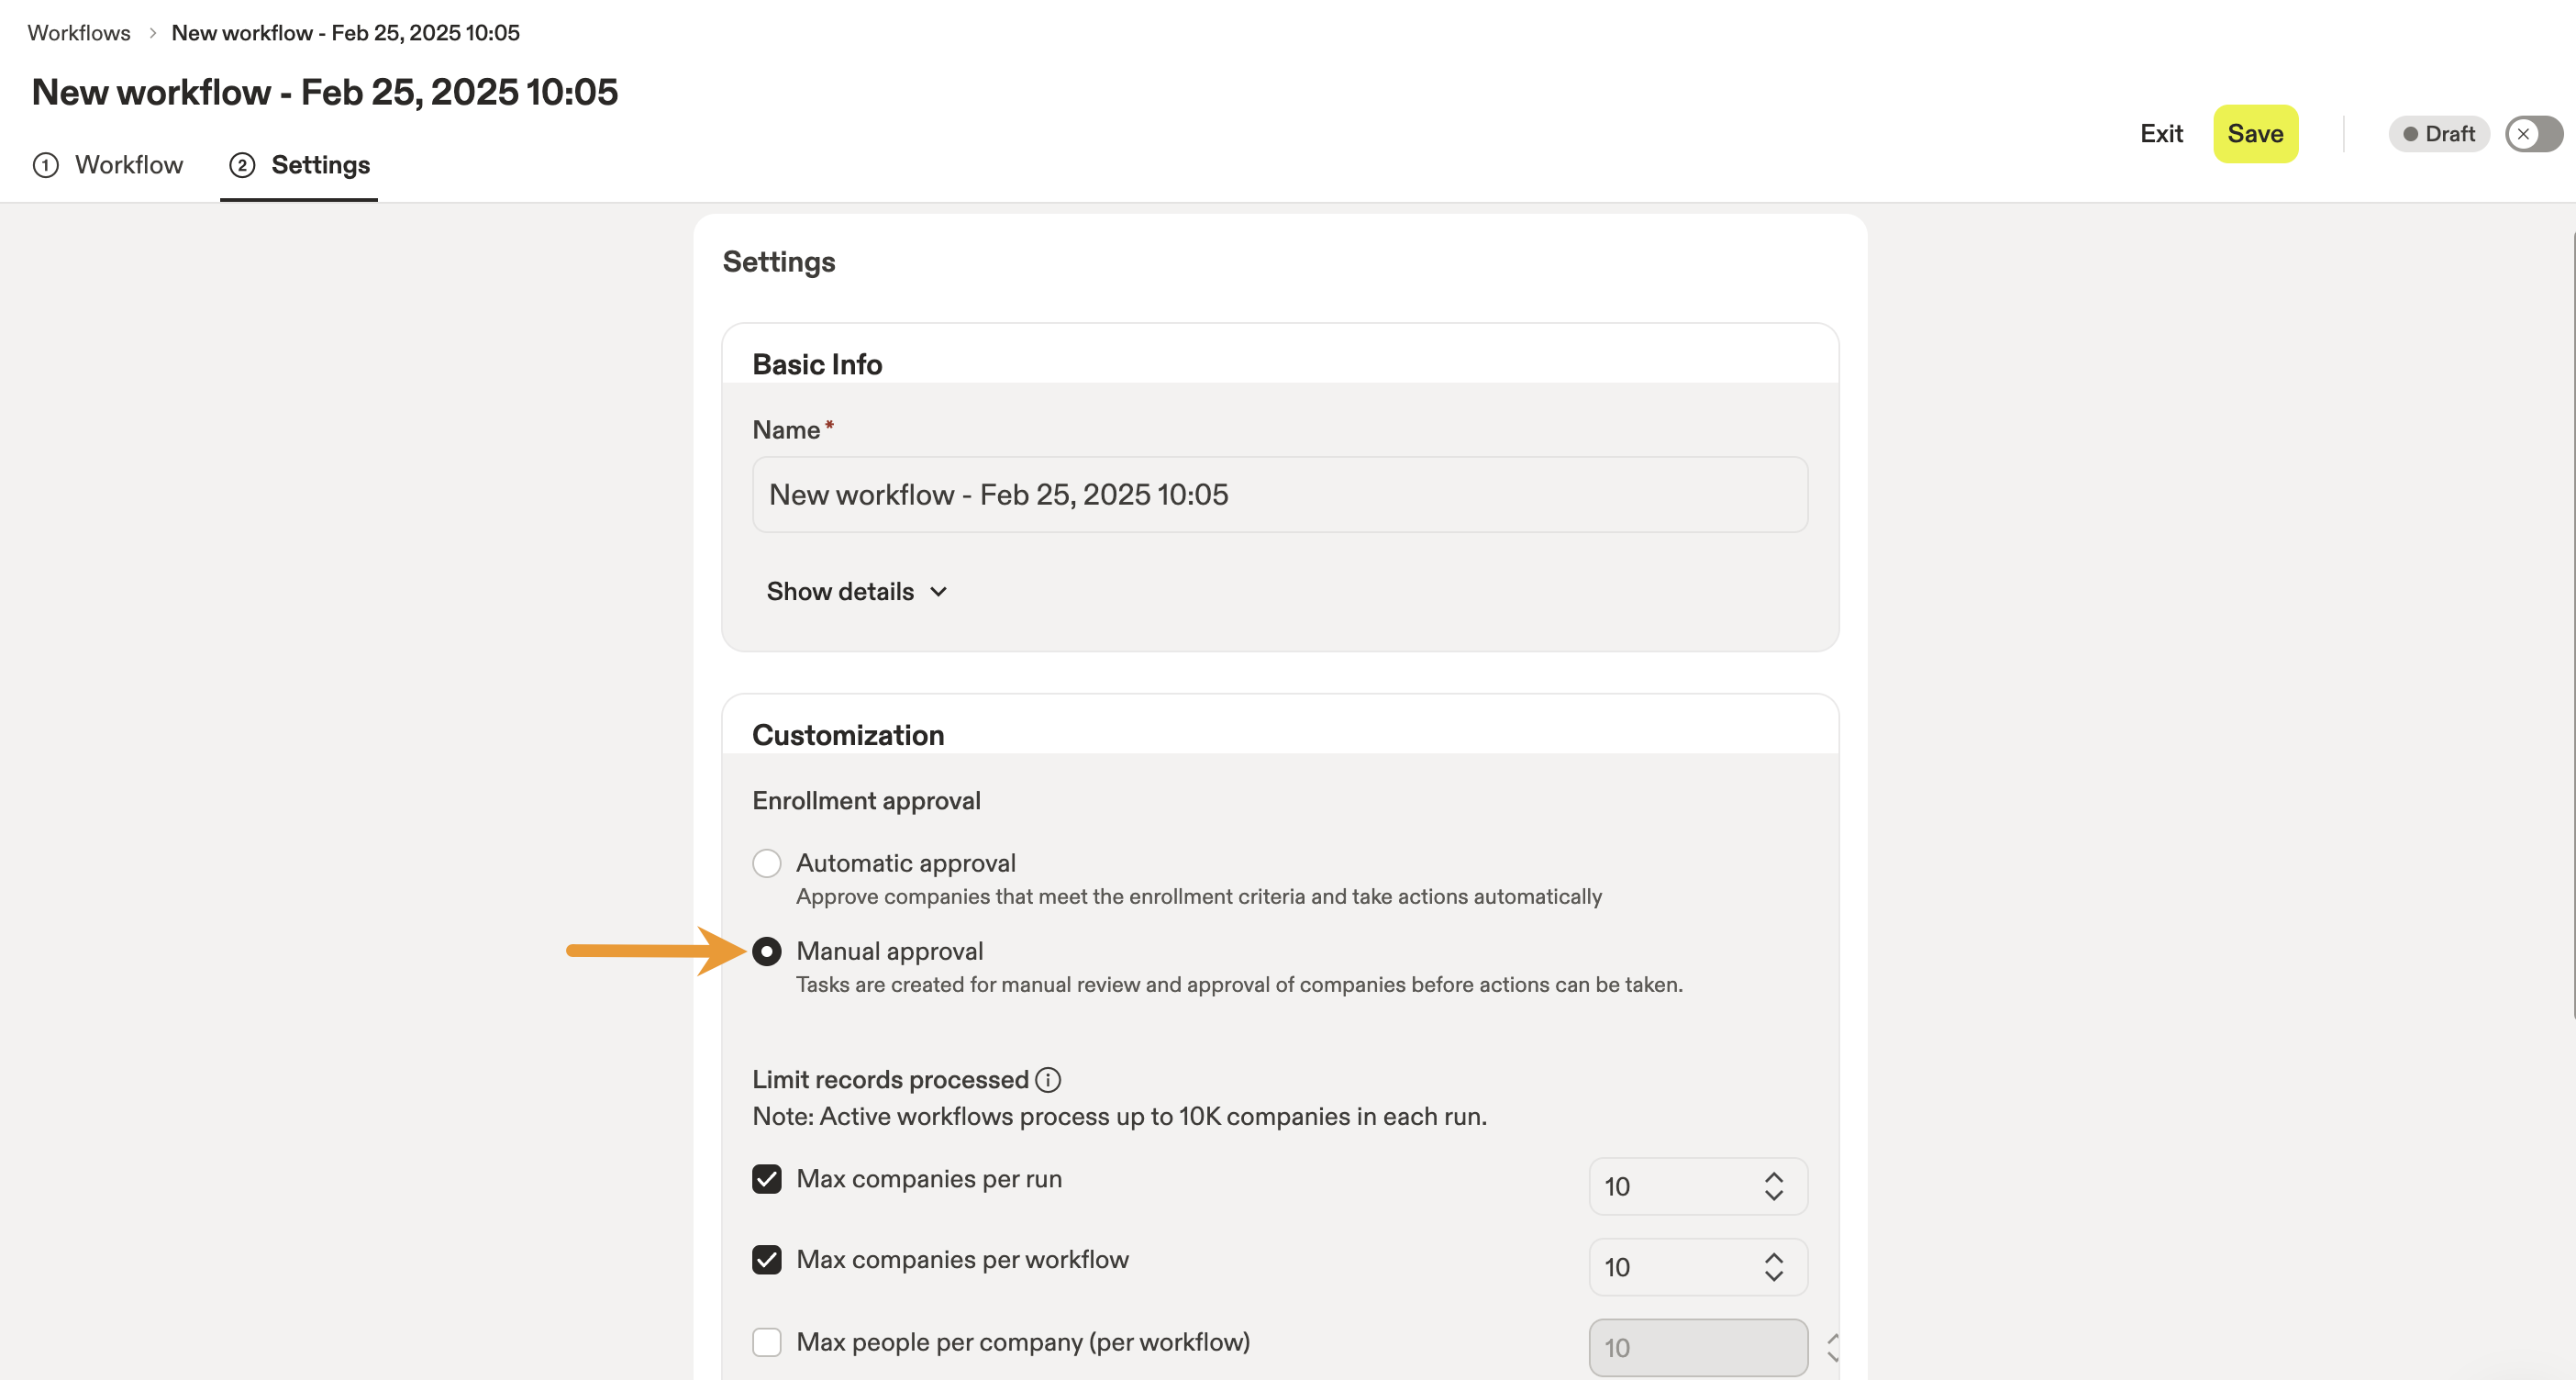
- Click Manual approval. For each contact surfaced by this workflow, this option adds a task for account owners to manually determine whether to add the contact to the chosen sequence. Refer to the Manually Approve or Reject Contacts section to learn more.
- Name your workflow. When you're ready to activate the workflow, toggle the activation slider on, then click Save and activate.
Your workflow is now active. It will run as the enrollment triggers you set are activated.
Manually Approve or Reject Contacts
If you followed this example workflow and set account owners to manually approve contacts, Apollo will assign tasks to the account owners on your team to manually determine whether the contact should be added to the chosen sequence. Contacts that are added to sequences will be displayed on account engagement plans.
If you added contacts surfaced by your workflow directly to sequences, skip to the end of this section. Whether contacts are added manually or automatically via the example workflow, they all move to the engagement plan for an account.
If you are an account owner that wants to take manual action on the tasks:
- Launch Apollo and click Tasks.
- Go to the Add People on Account tab, then click the Add People task for the account you want to review. A separate task is listed for each account that you targeted with your workflow.

- The Pending contacts tab shows the contacts that have been surfaced for review by the account owner. Click Accept to move a contact to the Queued contacts stage and add them to the chosen sequence.
If you click Reject, the contact is moved to the Rejected contacts stage, where you can still accept them in the future.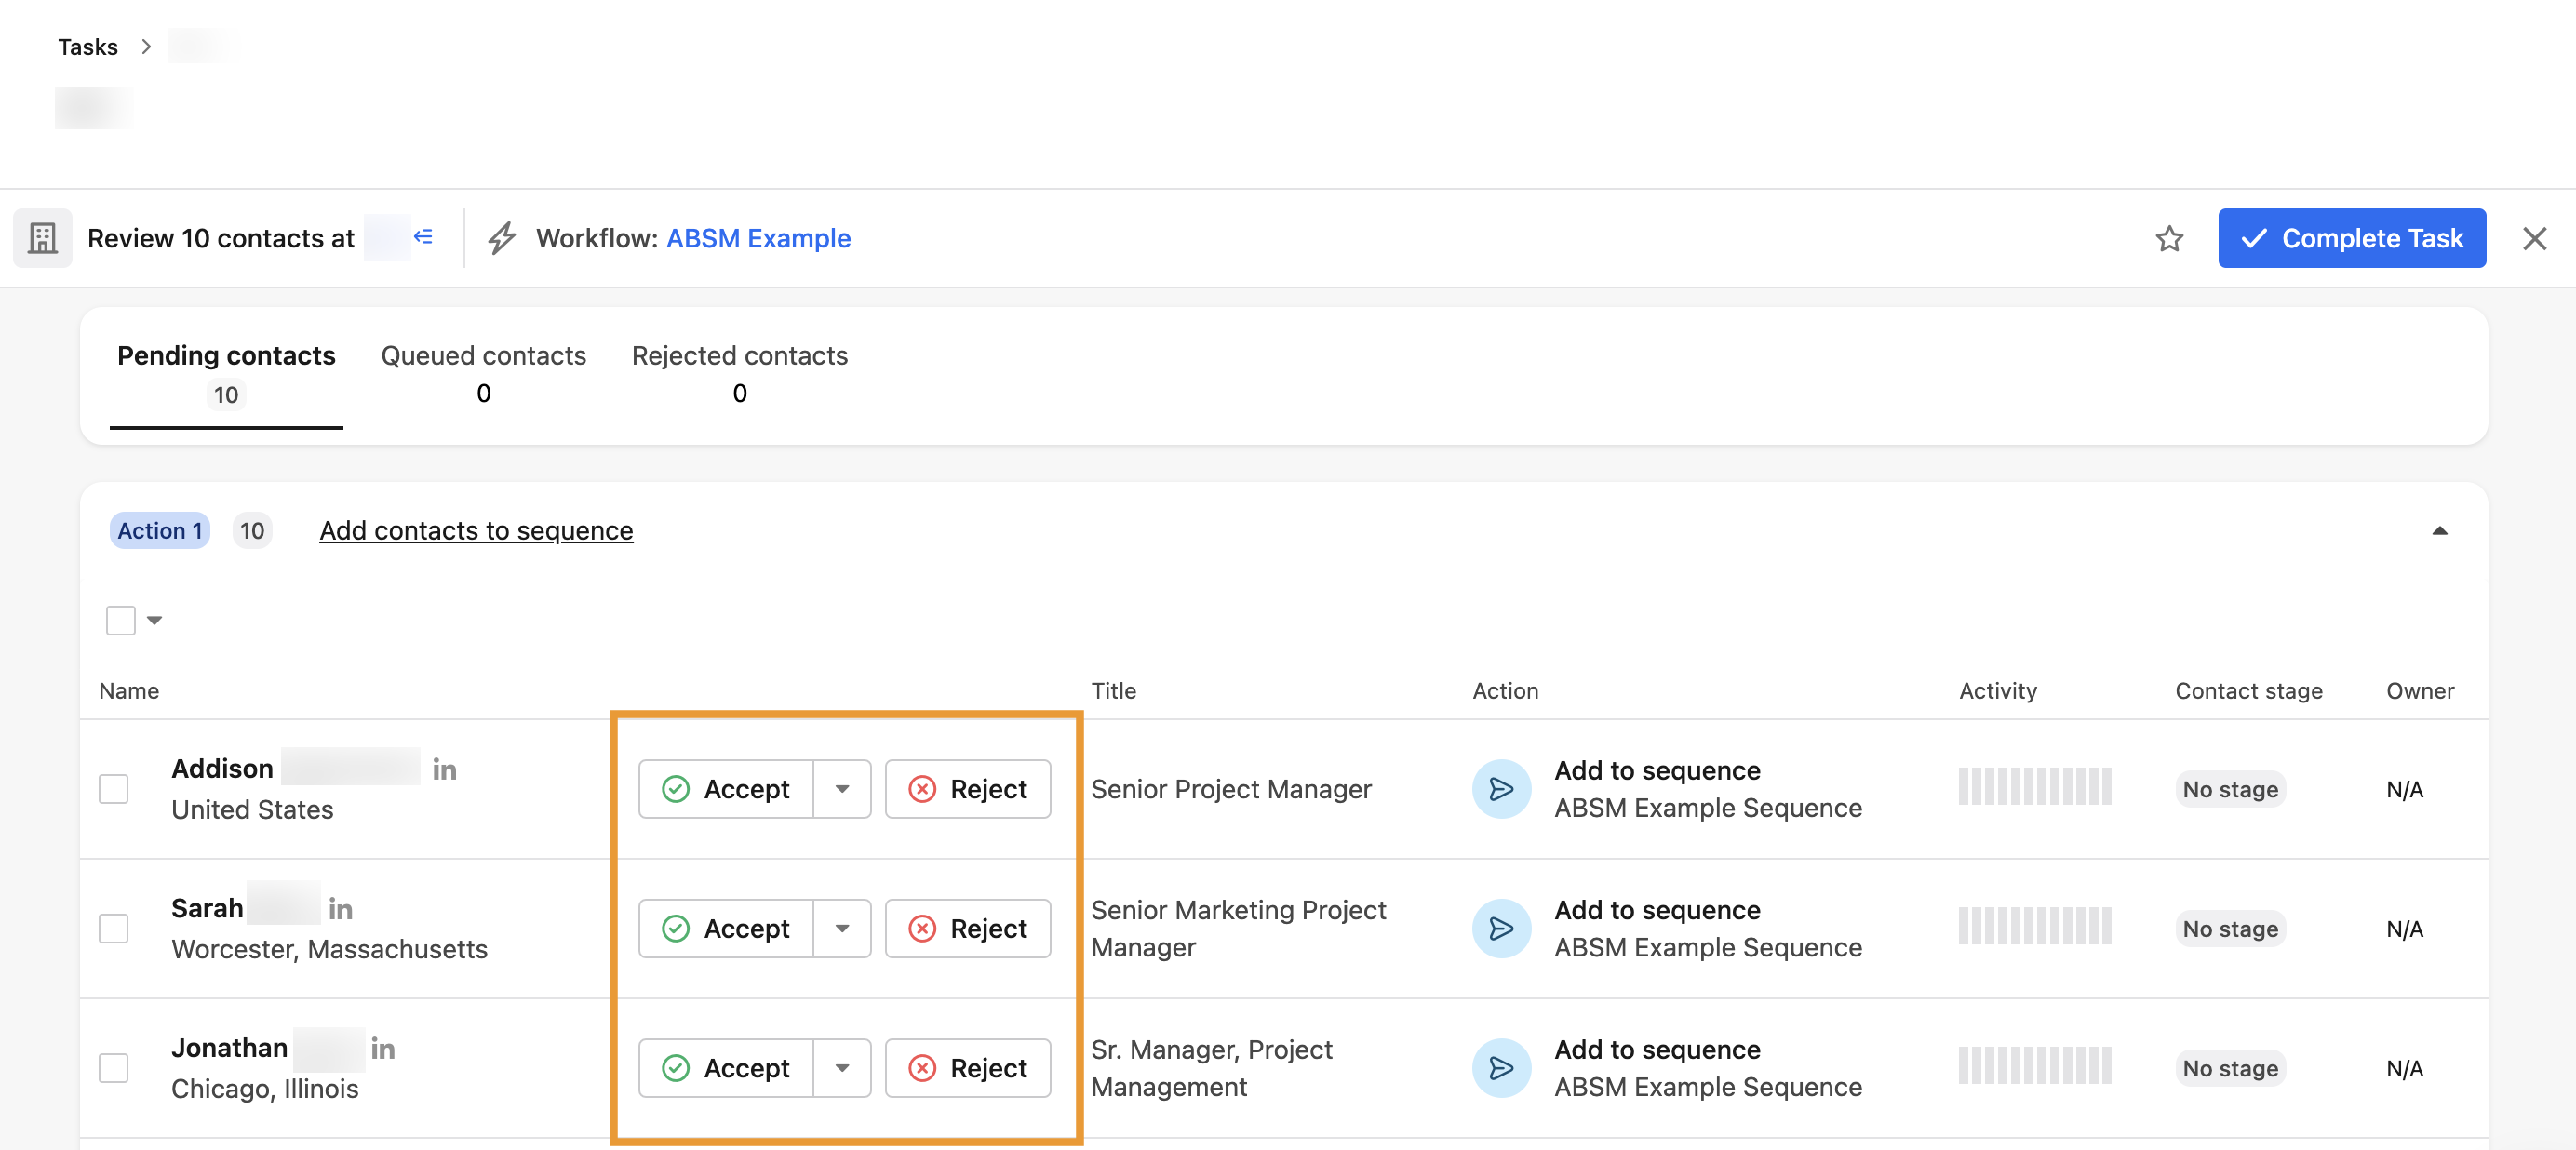
- After you take action on all of the pending contacts, click Complete Task.
Accepted contacts will be added to your chosen sequence's first step.
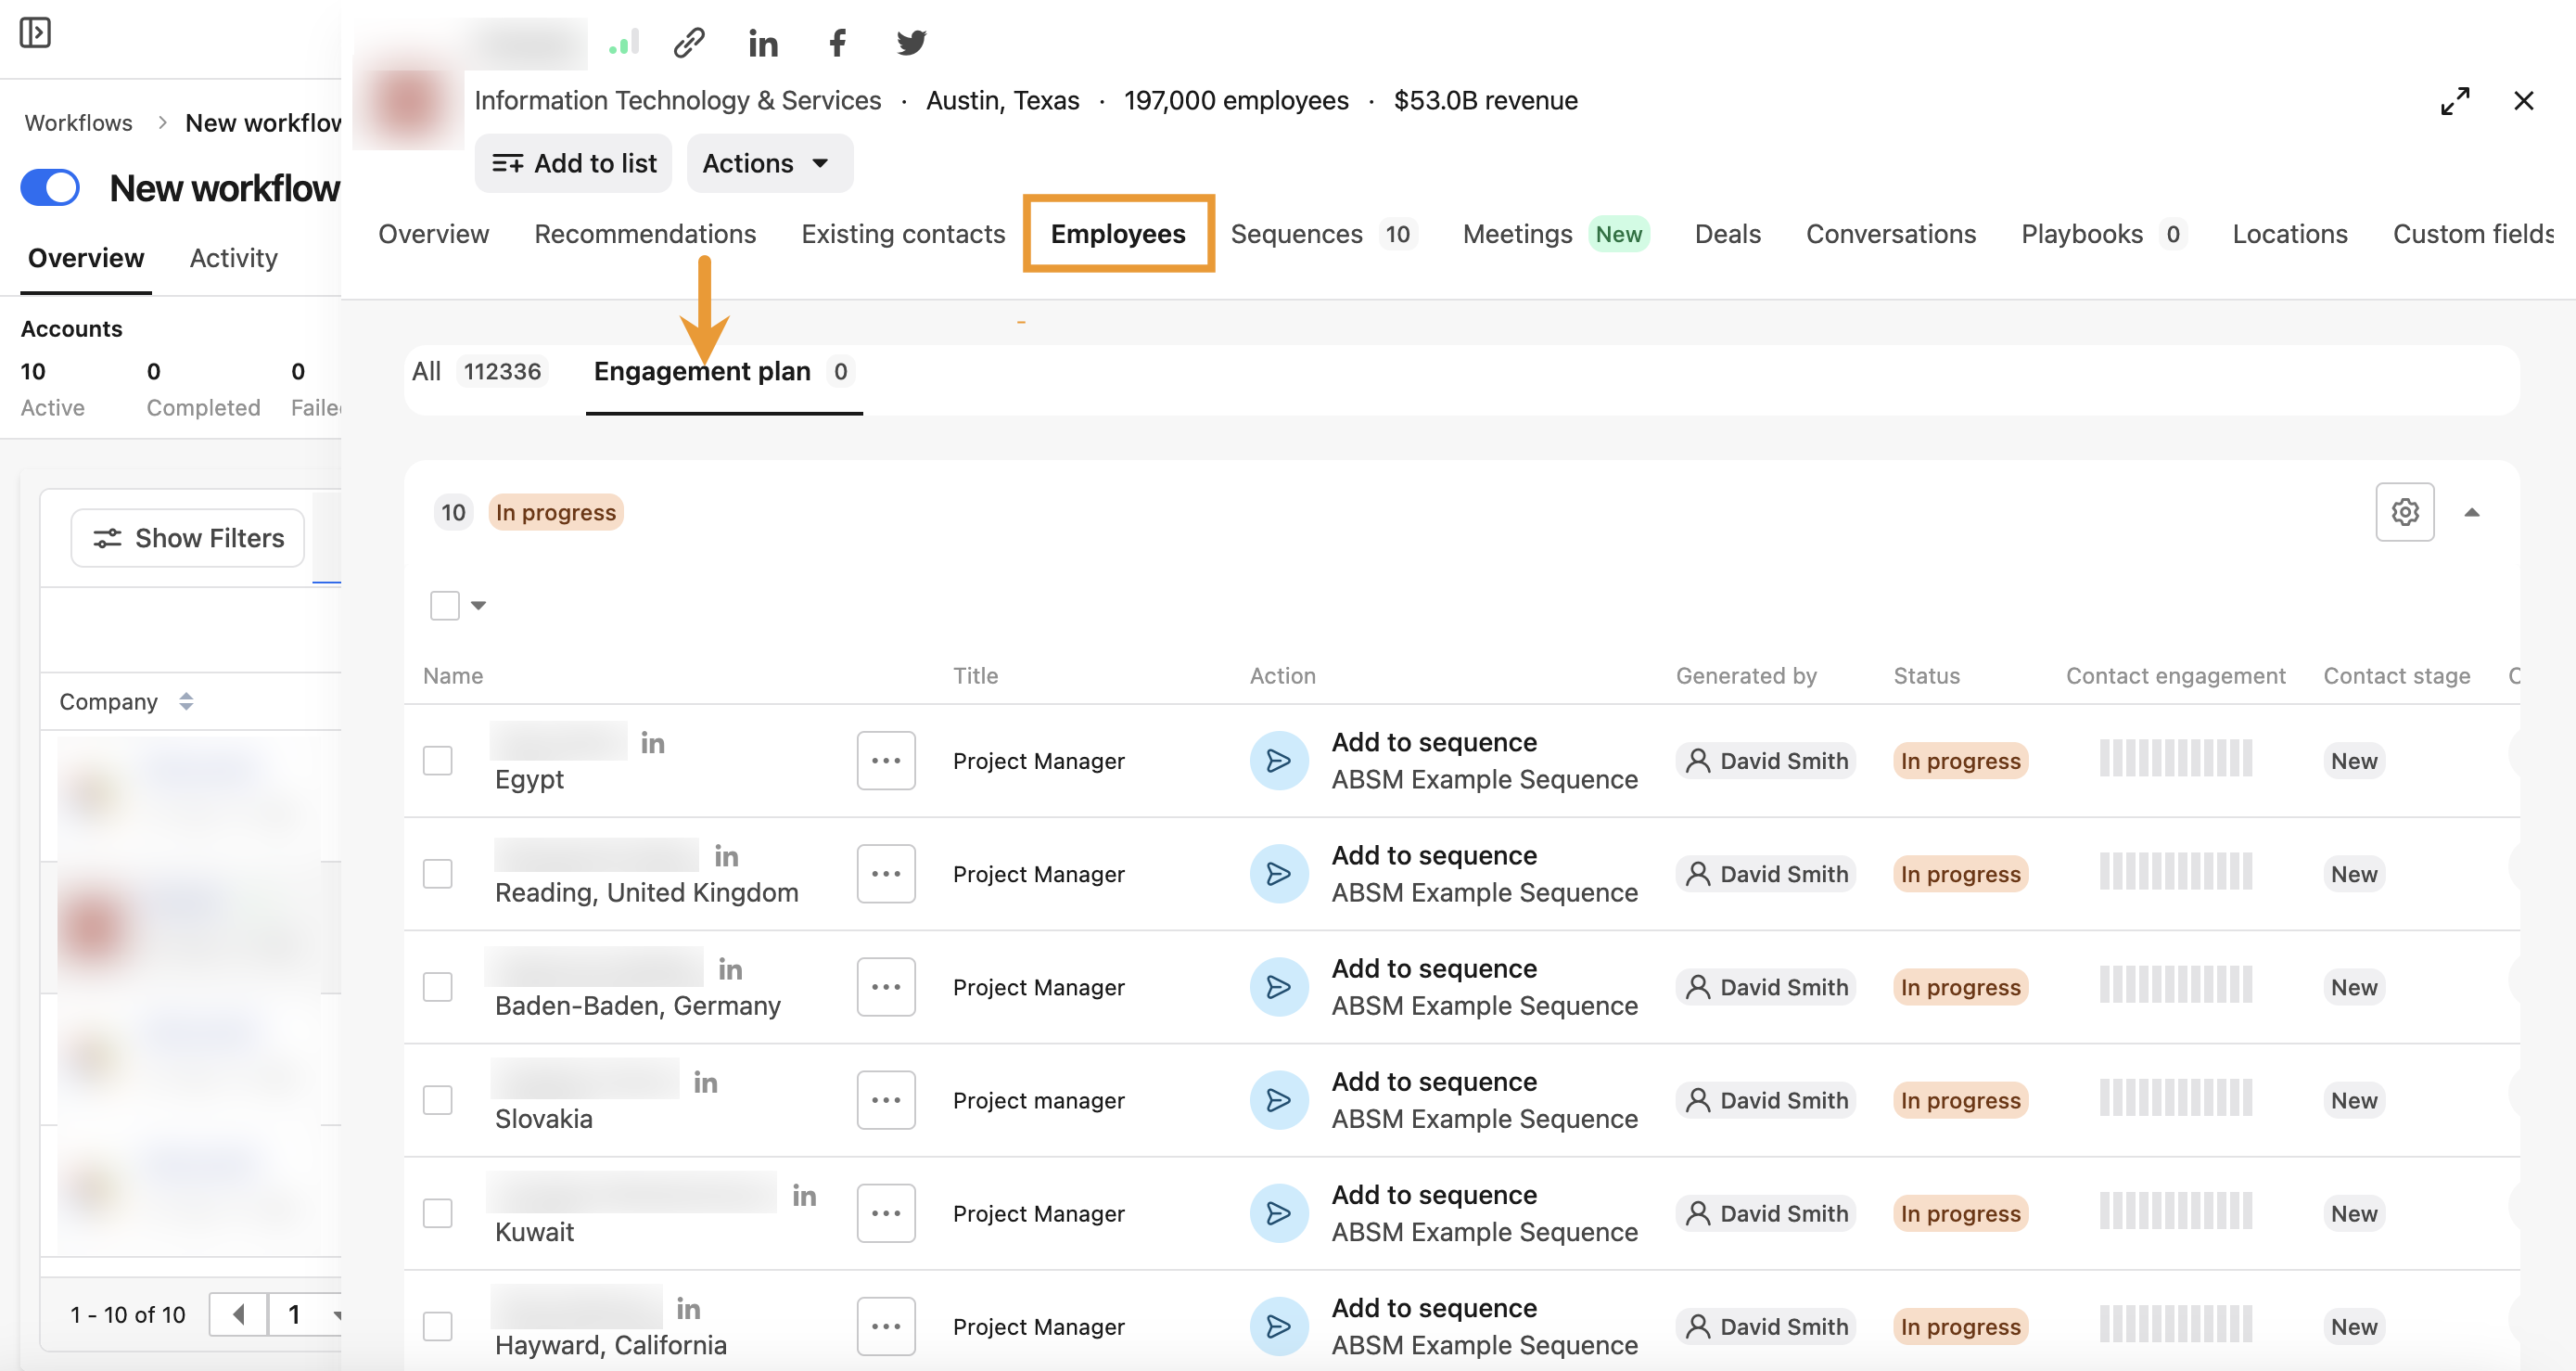
Whether you add them manually or automatically, contacts that you add to a sequence are also added to the engagement plan for the associated account. To view these contacts, go to an account profile page, then click Employees > Engagement plan.
Want to learn everything there is to know about workflows in Apollo? Check out the free Apollo Academy course How to Use Workflows to Automate Your Sales Process and get certified on your workflows knowledge.