Overview
Workflows help you automate actions in Apollo that would otherwise require manual clicks, like adding contacts to sequences and lists, or scheduling tasks for your reps.
Access to workflows depends on your Apollo plan. If you need access, upgrade your plan. If you have questions about upgrading, Apollo sales can help.
Check out the following sections to create and use a workflow.
Create a Workflow
Workflows are private by default. Workflow owners can share a workflow.
| Non-Admin |
Non-admin can only:
|
|---|---|
| Admin | Admin on Apollo can view and edit all workflows created by their team, including private workflows, as well as all related sequences and lists. Admin can grant non-admin permission profiles Workflows super admin access to let them view and edit all workflows. |
To create a workflow:
- Launch Apollo and click Workflows.
- Click Create a workflow.
- You can create a workflow with the AI assistant, from a template, or from scratch:
To build a workflow with the AI Assistant:
- Describe the workflow you want to create in plain language, like:
Find rapidly growing companies and add them to a list.
- The assistant either creates your workflow or asks clarifying questions to understand your goal. The assistant asks you before activating the workflow.
Instead of manually building a workflow, try using the AI assistant. Describe your workflow goal in natural language and let Apollo generate recommendations, set up triggers and actions, and configure your workflow instantly.
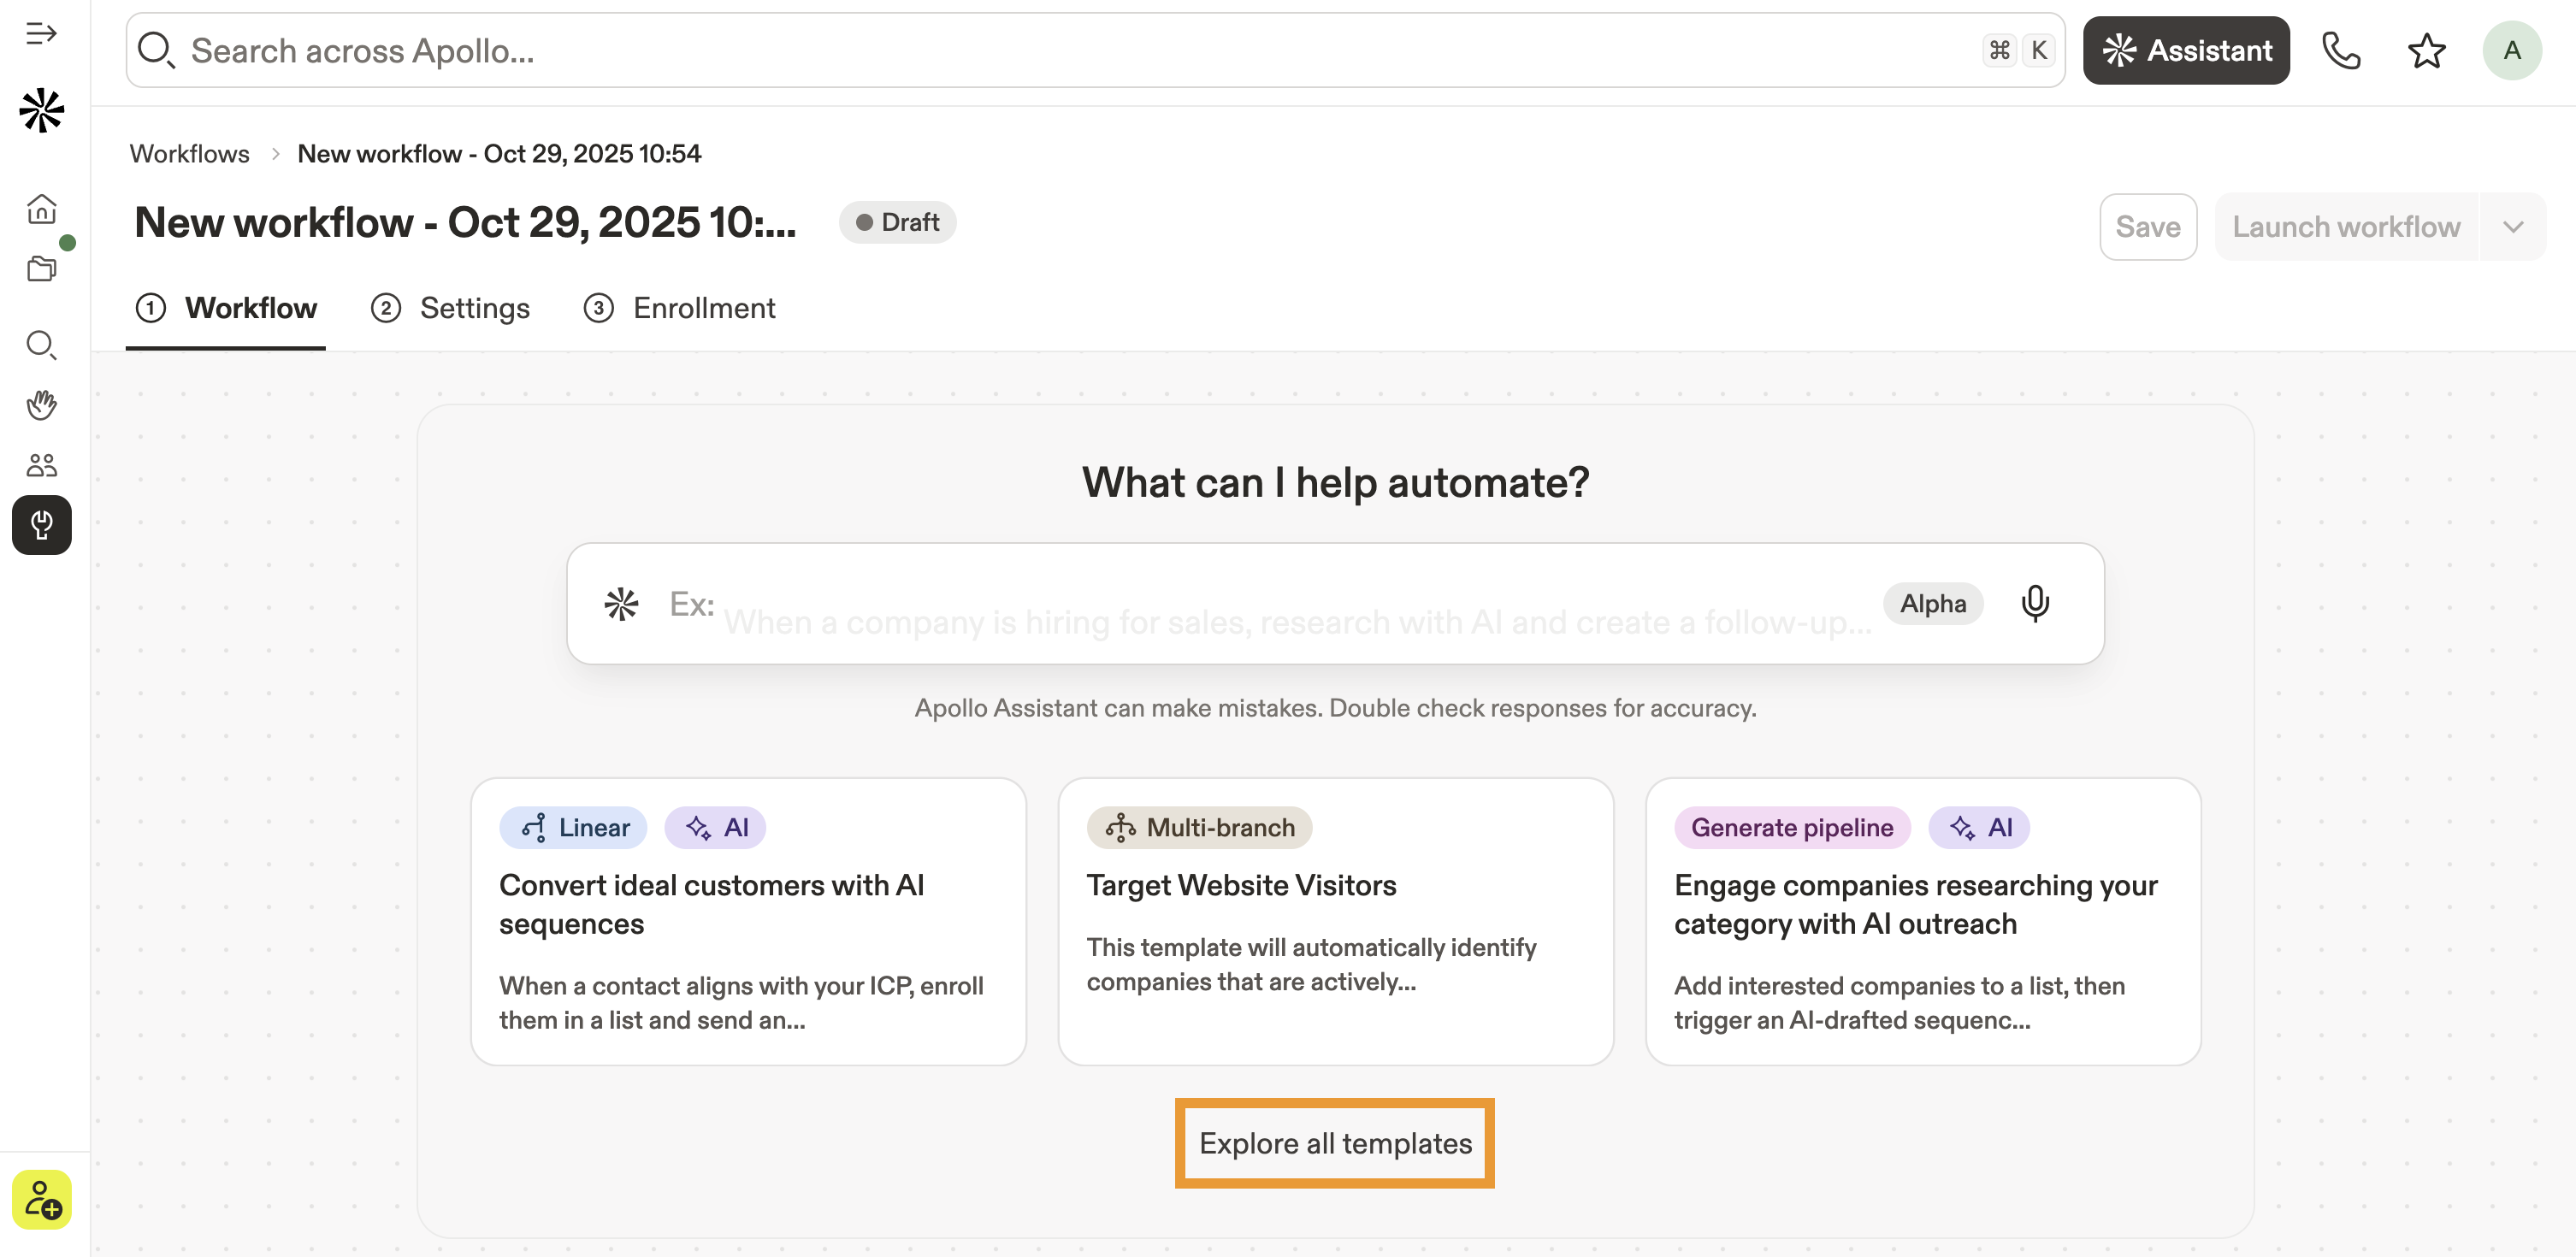
Pre-built templates constructed by Apollo and the Apollo community help you spin up workflows that work in just a few clicks.
- Click Explore all templates.
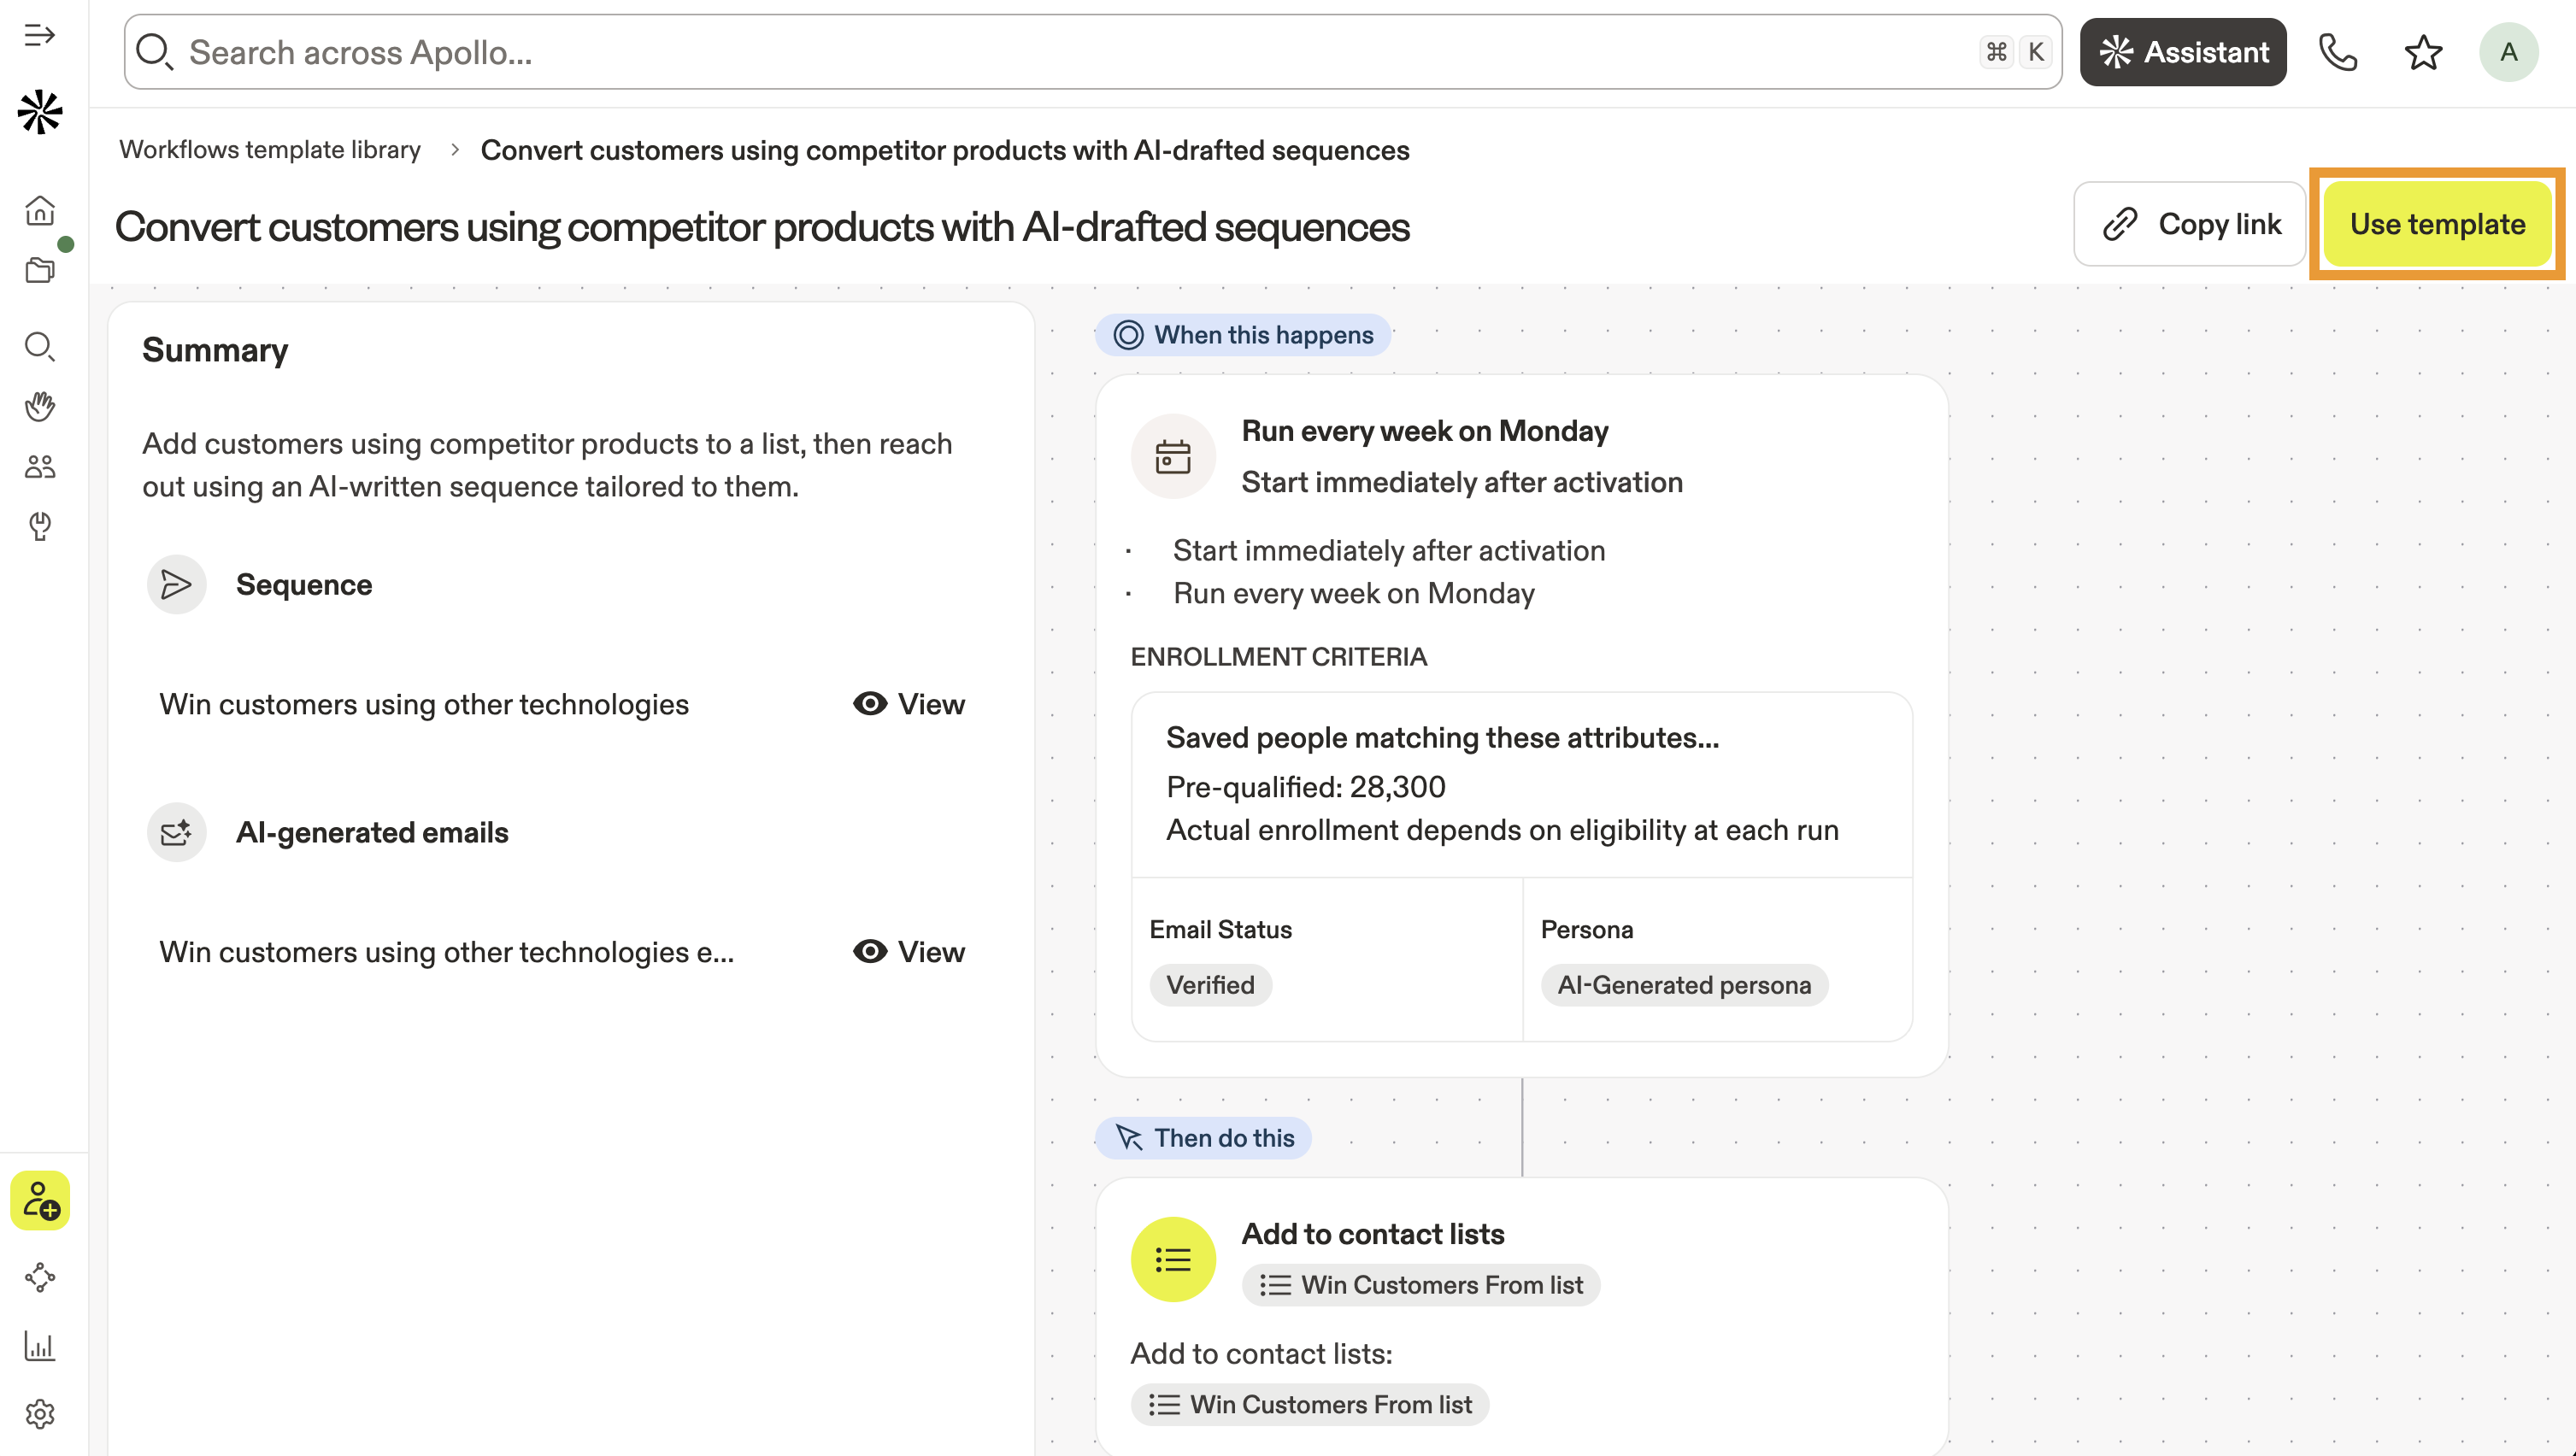
- Click Preview template beside a template.
- Apollo shows the workflow.
- Click Use template.
- Personalize the template with your customer's pain points and your product's value proposition. Tailor these details to the specific persona that you're targeting with the workflow. If your workflow targets companies, you also need to provide relevant buying intent topics for your product.
- Add a meeting link from Apollo, or alternatively, add a link to any calendar or video conferencing platform you use. Apollo uses the meeting link in workflow emails.
- Click Save & continue.

- (Optional) Edit the workflow by adjusting the triggers or actions.
- (Optional) If your workflow uses a sequence, Apollo automatically activates it when the workflow runs for the first time. To preview the emails in the sequence, click Edit beside the sequence and select a contact. Apollo generates an email preview with the contact.

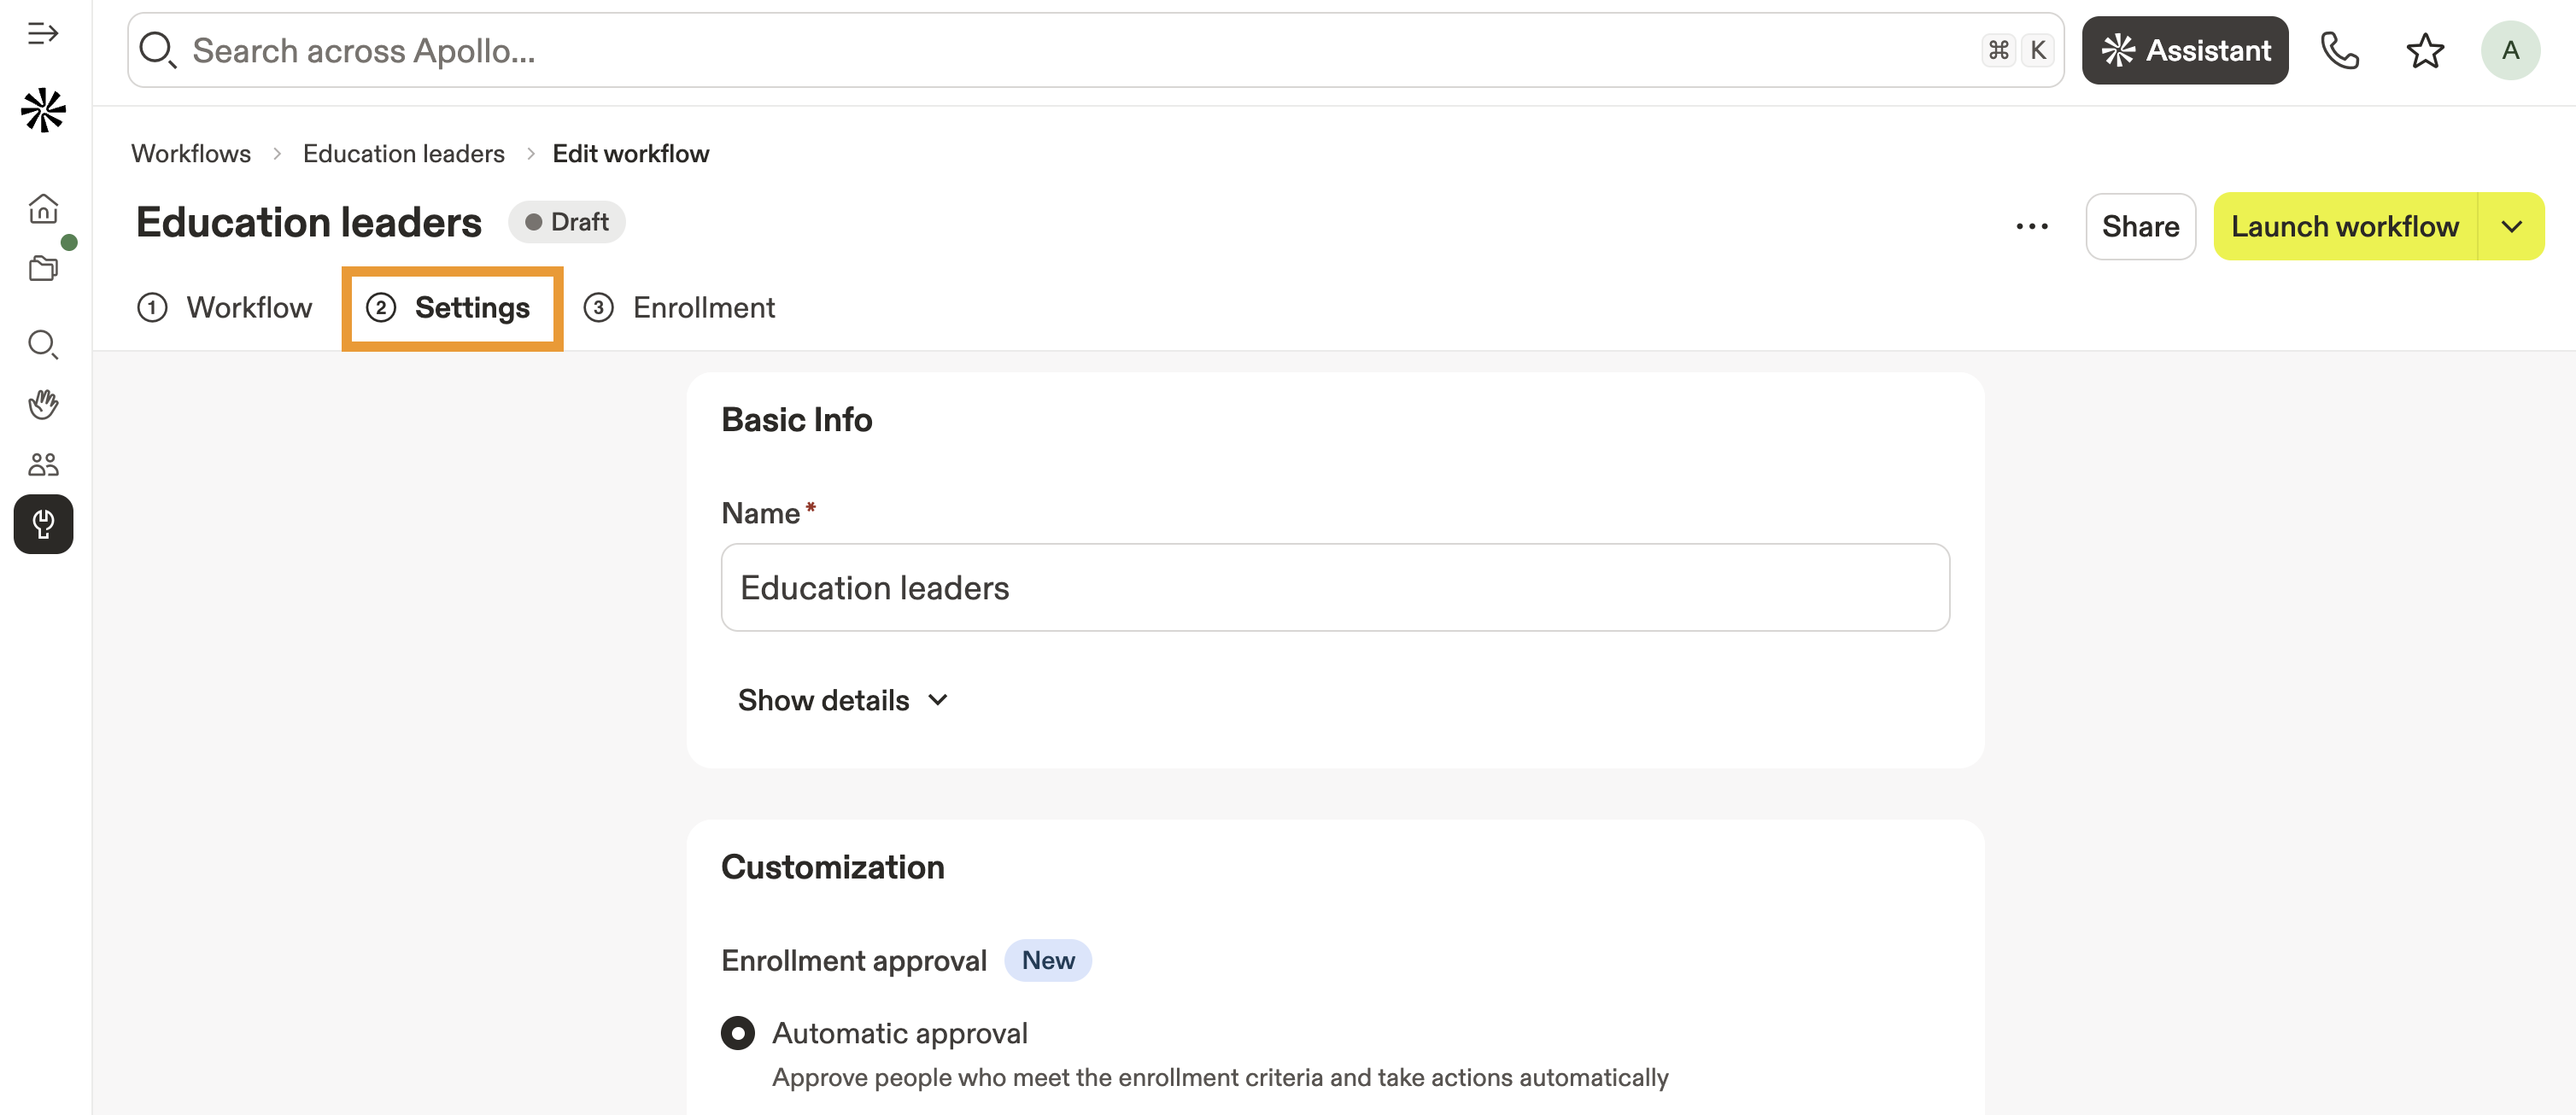
- (Optional) Click Settings to rename the workflow, add a description, or organize the workflow in a saved folder. You can also configure these additional settings:
- Enrollment approval: You can automatically approve people who meet the workflow's enrollment criteria, or let Apollo create tasks for manual review before workflow enrollment or actions can begin.
- Limit records processed: You can limit how many people are processed each time the workflow runs, or how often the same person should be added to the workflow.
- Re-enrollment: You can choose how often the same person should be added to the workflow, either every time the workflow runs, only once, or once per selected timeframe.
- Custom table layout: Select a custom table layout for workflow views, as well as default sort and sort order.
- Enrollment notifications: Check to get notifications when people meet enrollment criteria.
You have successfully created a new workflow from a template.
To create a workflow from scratch:
- Click Start from scratch.
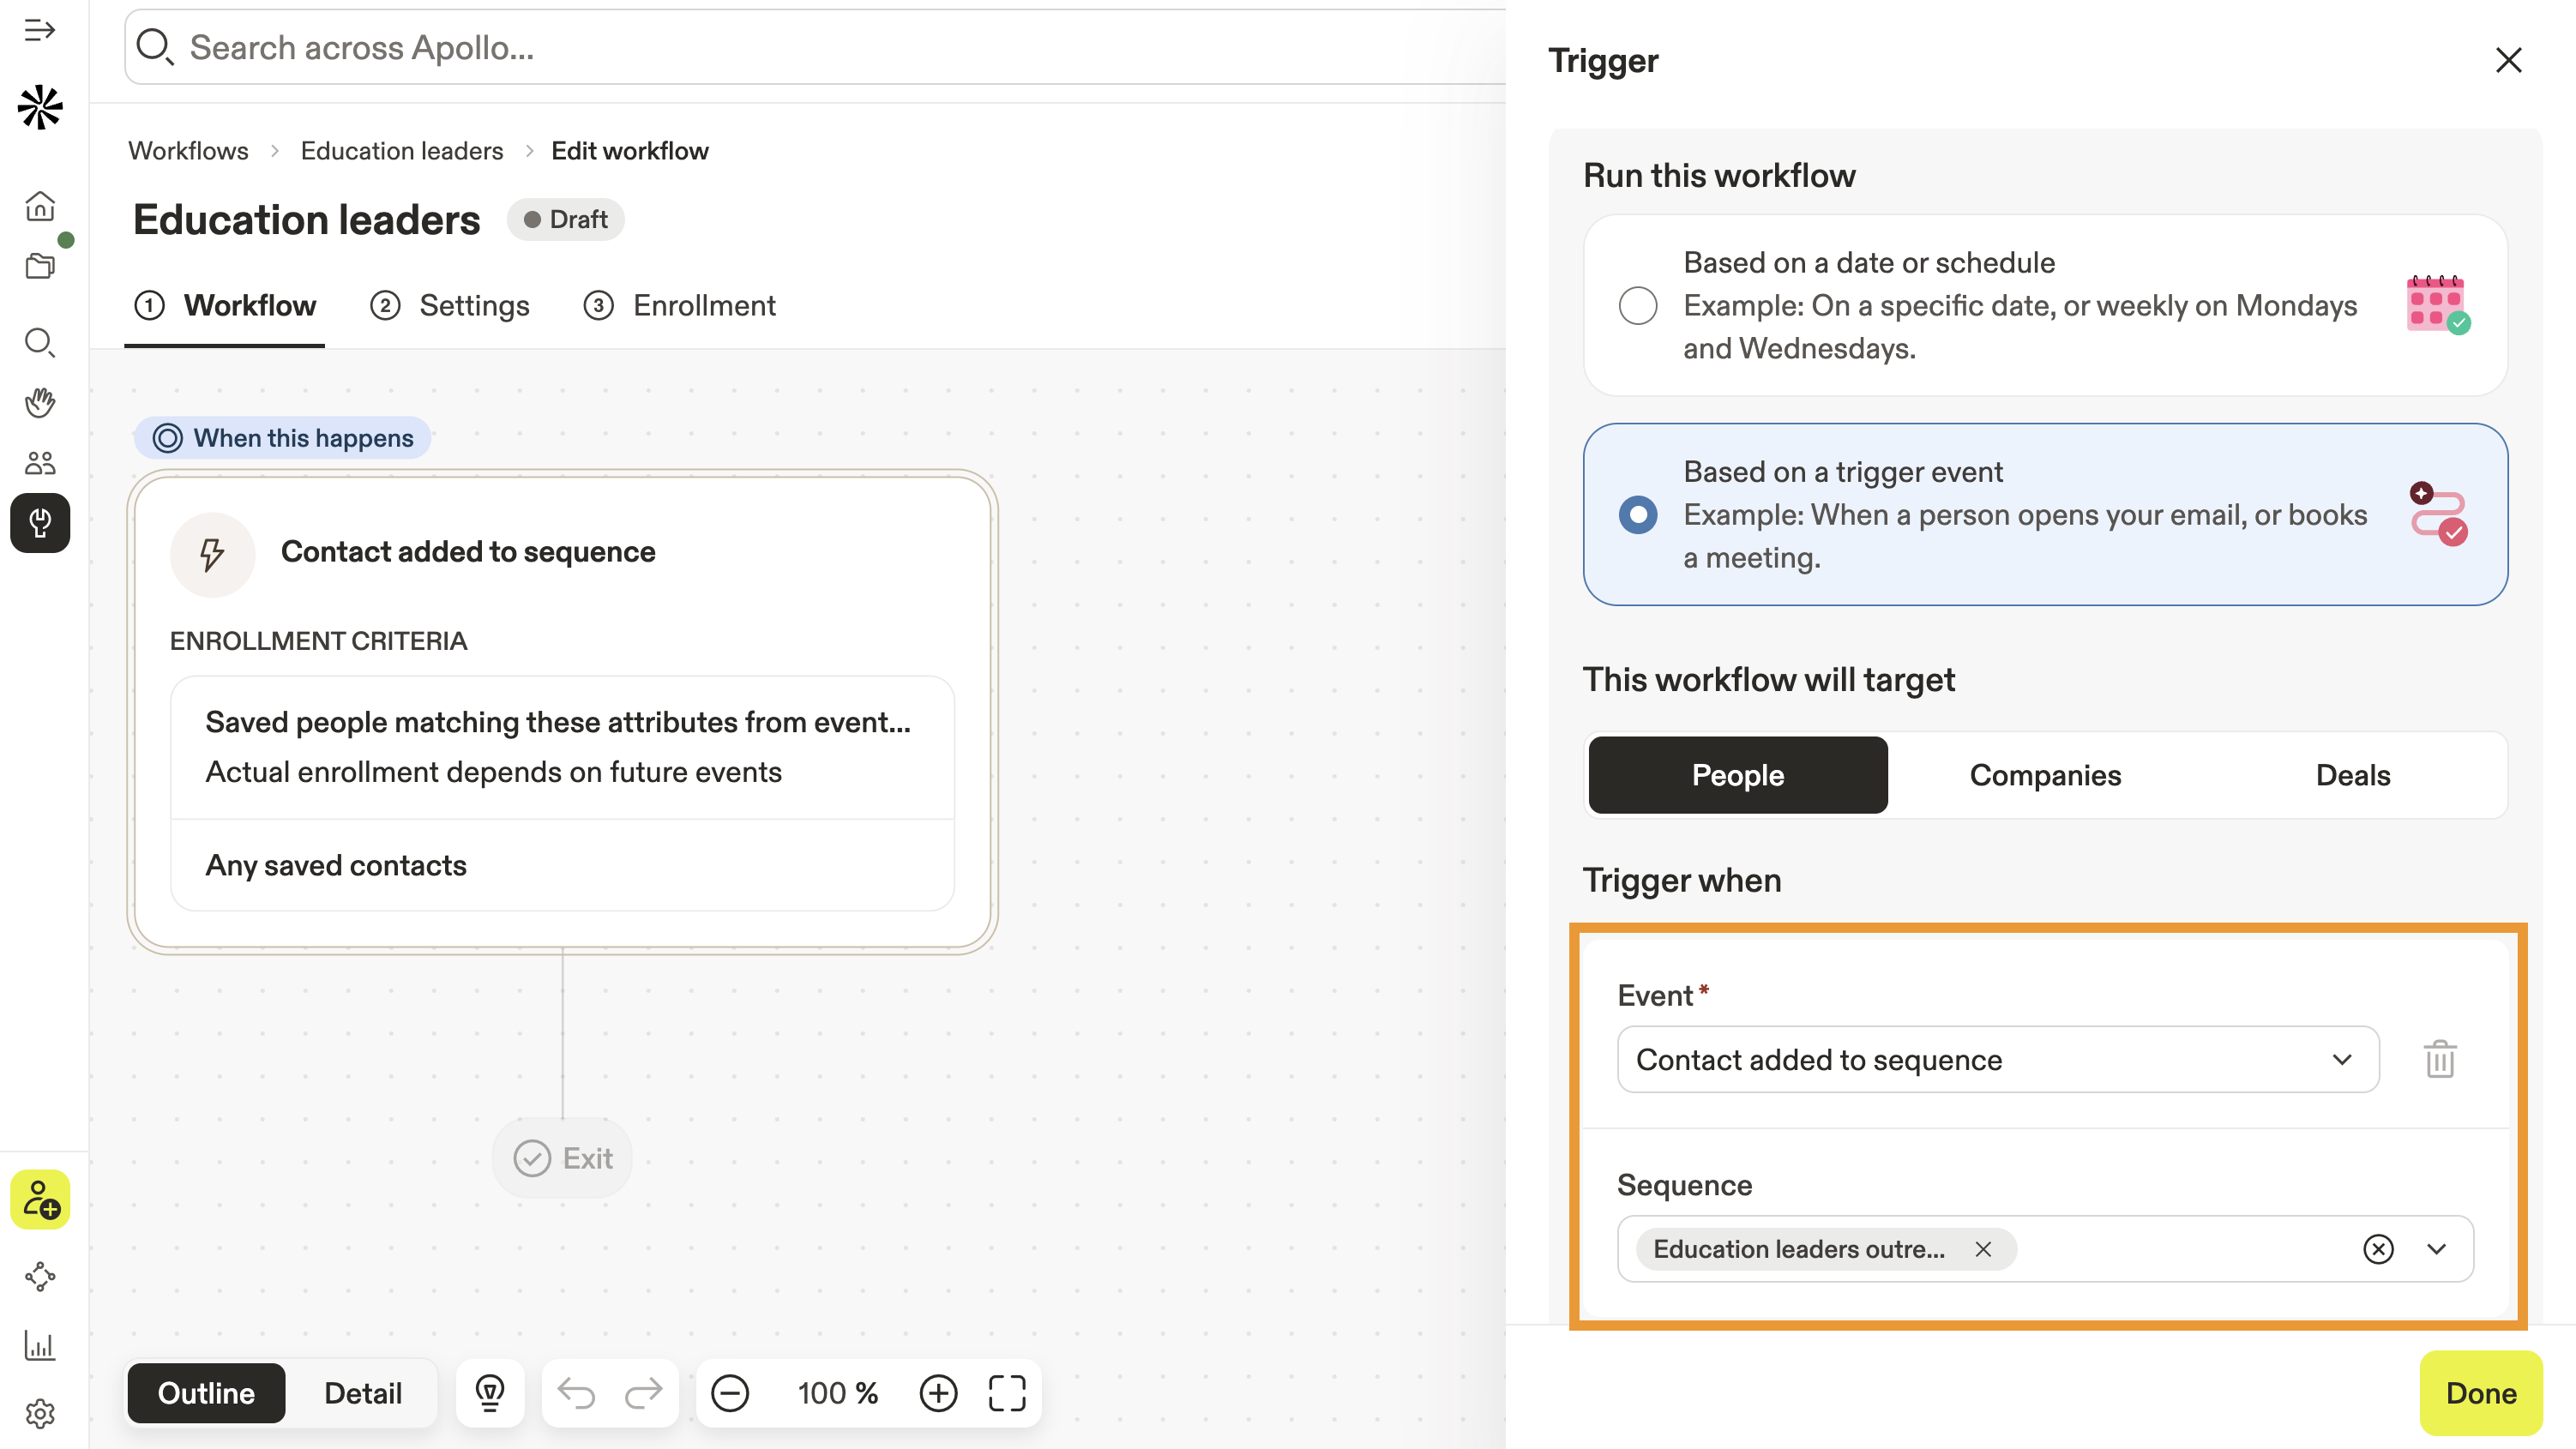
- Choose when to run a workflow, either based on a schedule or based on a trigger event.
| Based on a date or schedule |
|
||||||||||||||||||||||||||||||||||||||||||||||||||||||||||||||||||||||||||||||||||
|---|---|---|---|---|---|---|---|---|---|---|---|---|---|---|---|---|---|---|---|---|---|---|---|---|---|---|---|---|---|---|---|---|---|---|---|---|---|---|---|---|---|---|---|---|---|---|---|---|---|---|---|---|---|---|---|---|---|---|---|---|---|---|---|---|---|---|---|---|---|---|---|---|---|---|---|---|---|---|---|---|---|---|---|
| Based on a trigger event |
Skip the Line
You can add individual records to a workflow without requiring them to run through triggers, making it easy to enroll records one-off. The following triggers are available: People Triggers
Companies Triggers
Deal Triggers
|
- >
- Next, click Edit filters to set the enrollment criteria for your workflow. If you don't apply filters, your workflow targets all people, companies, or deals.
- Add search filters to refine your results, then click Save filters.
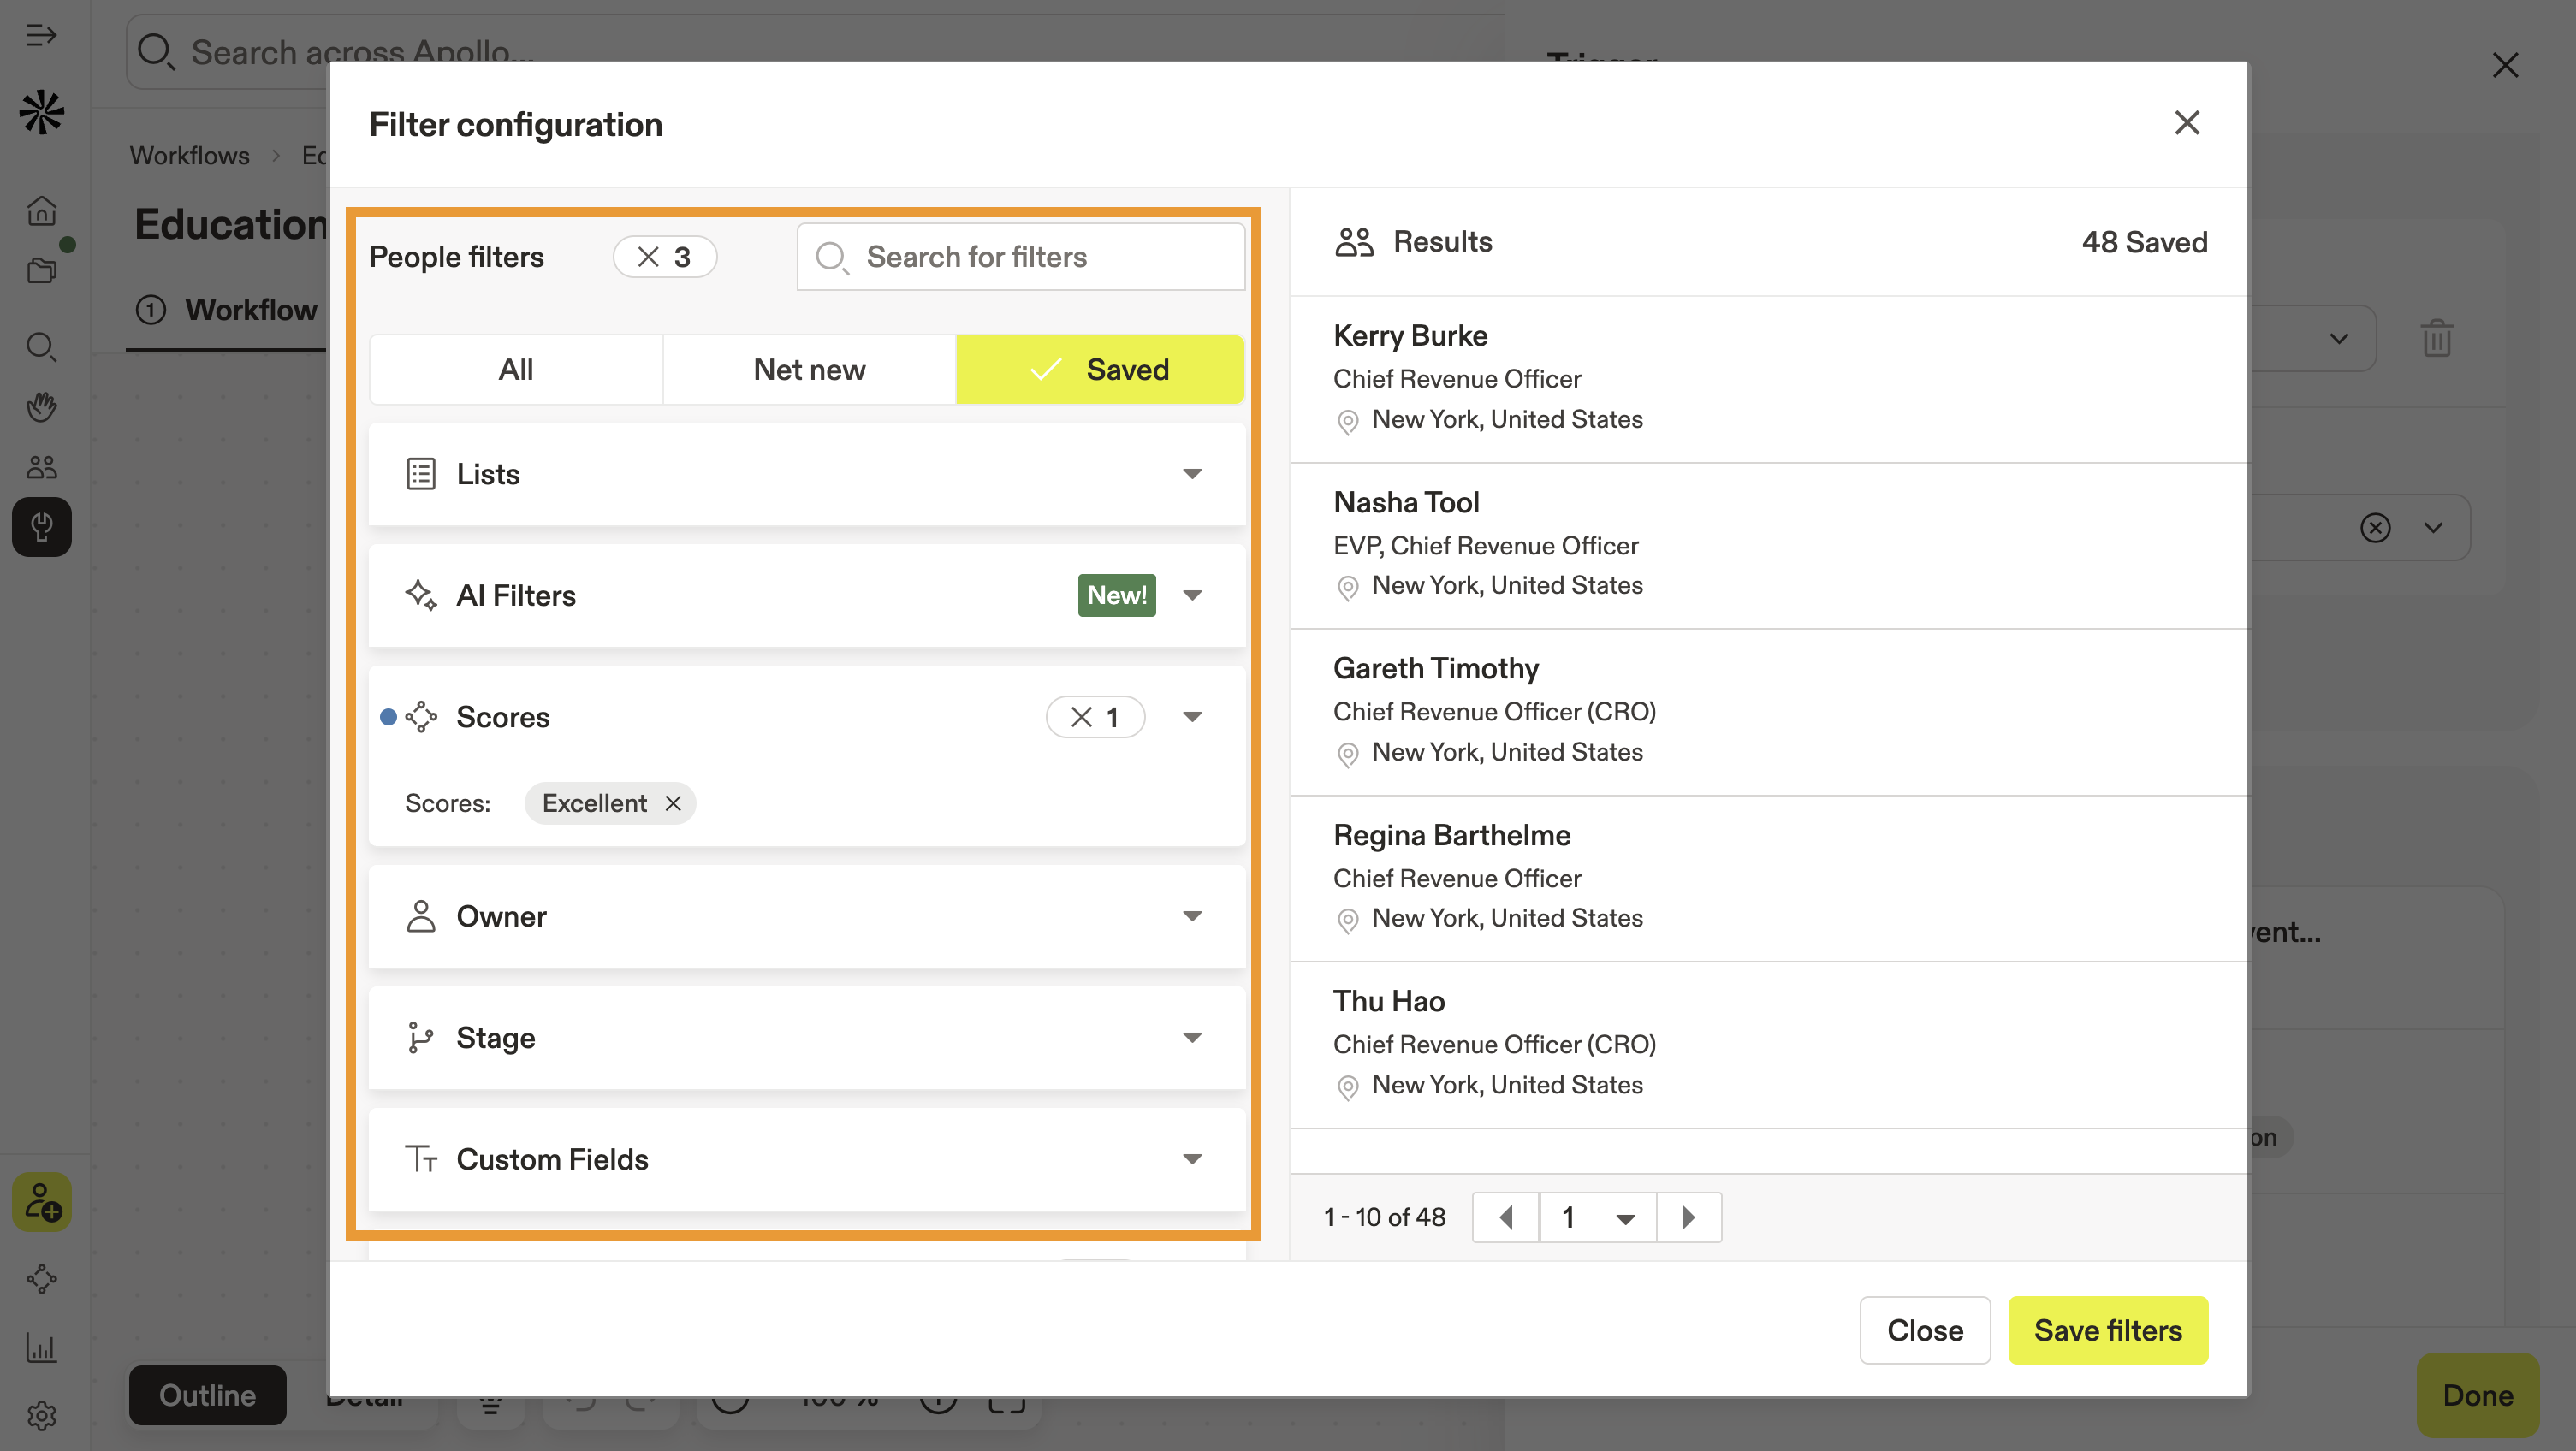
- Click Done.
- Next, click and drag a rule, agent, or action.
| Rule |
Rules let you create branches based on conditional logic and help you build more complex, nuanced workflows. You can use the following rules: True-false branchBranch the workflow based on whether a target matches the filters you choose.
Multi-split branchBranch your workflow by applying different filters to each path. A multi-split branch allows more than two outcomes, unlike a simple true/false split.
Traffic branchBranch the workflow based on the percentage you set.
DelayPause time before the next action is taken in the workflow with a delay. You can delay workflow actions by minutes, hours, days, weeks, or months.
ExitAdd an exit to any conditional branch on your workflow. People, companies, or deals that filter to the exit are removed from the workflow.
|
|---|---|
| Agent |
Use Apollo AI to research or qualify people or companies.
Research with AIUse Apollo AI to research contacts or companies based on your configuration.
Qualify recordsUse Apollo AI to research contacts and companies, qualify them using conditions and filters, and take action based on the qualification results.
|
| Action |
Actions are automations that run when the branch is triggered.
Plug It In
Is your favorite app or action missing? Let Apollo know which third-party integrations you'd like to see available in workflows. You can add the following actions:
IntegrationsIntegrate workflows with a third-party app and automate actions.
For the full list of available integrations and actions, check out Workflow Integrations and Actions. Manage sequencesManage contacts on sequences.
Manage listsAutomatically add and remove contacts or accounts from lists.
Manage dealsAutomatically create or update deals.
Enrich dataAutomatically add or update people's email addresses, phone numbers, or job changes when data is missing or inaccurate.
(Optional) Toggle Find data via waterfall to use waterfall enrichment for emails or phone numbers. Credit Where It's Due
Data enrichment costs credits. You can view your credit usage on Apollo. Assign manual tasksAssign tasks to yourself or teammates.
Update contact or accountUpdate a contact or account field.
Send notificationsAutomatically send workflow notifications via email or Slack to inform teammates when they need to take manual actions. Apollo sends the notification each time the workflow is triggered. This action isn't available when you add a rule to create branches in your workflow.
Send webhooksConfigure webhooks to automatically sync events between Apollo and your third-party platform.
|
- (Optional) Next, click Settings to rename the workflow, add a description, or organize the workflow in a saved folder. You can also configure these additional settings:
- Enrollment approval: Automatically approve people who meet the workflow's enrollment criteria, or let Apollo create tasks for manual review before enrollment or actions can begin.
- Limit records processed: Set the maximum number of people, companies, and credits processed each time the workflow runs.
- Re-enrollment: Set the maximum number of people and companies added to the workflow, and cap the total credits consumed across the whole workflow.
- Custom table layout: Select a custom table layout for workflows views, as well as default sort and sort order.
- Enrollment notifications: Toggle on to receive notifications when people meet the enrollment criteria.
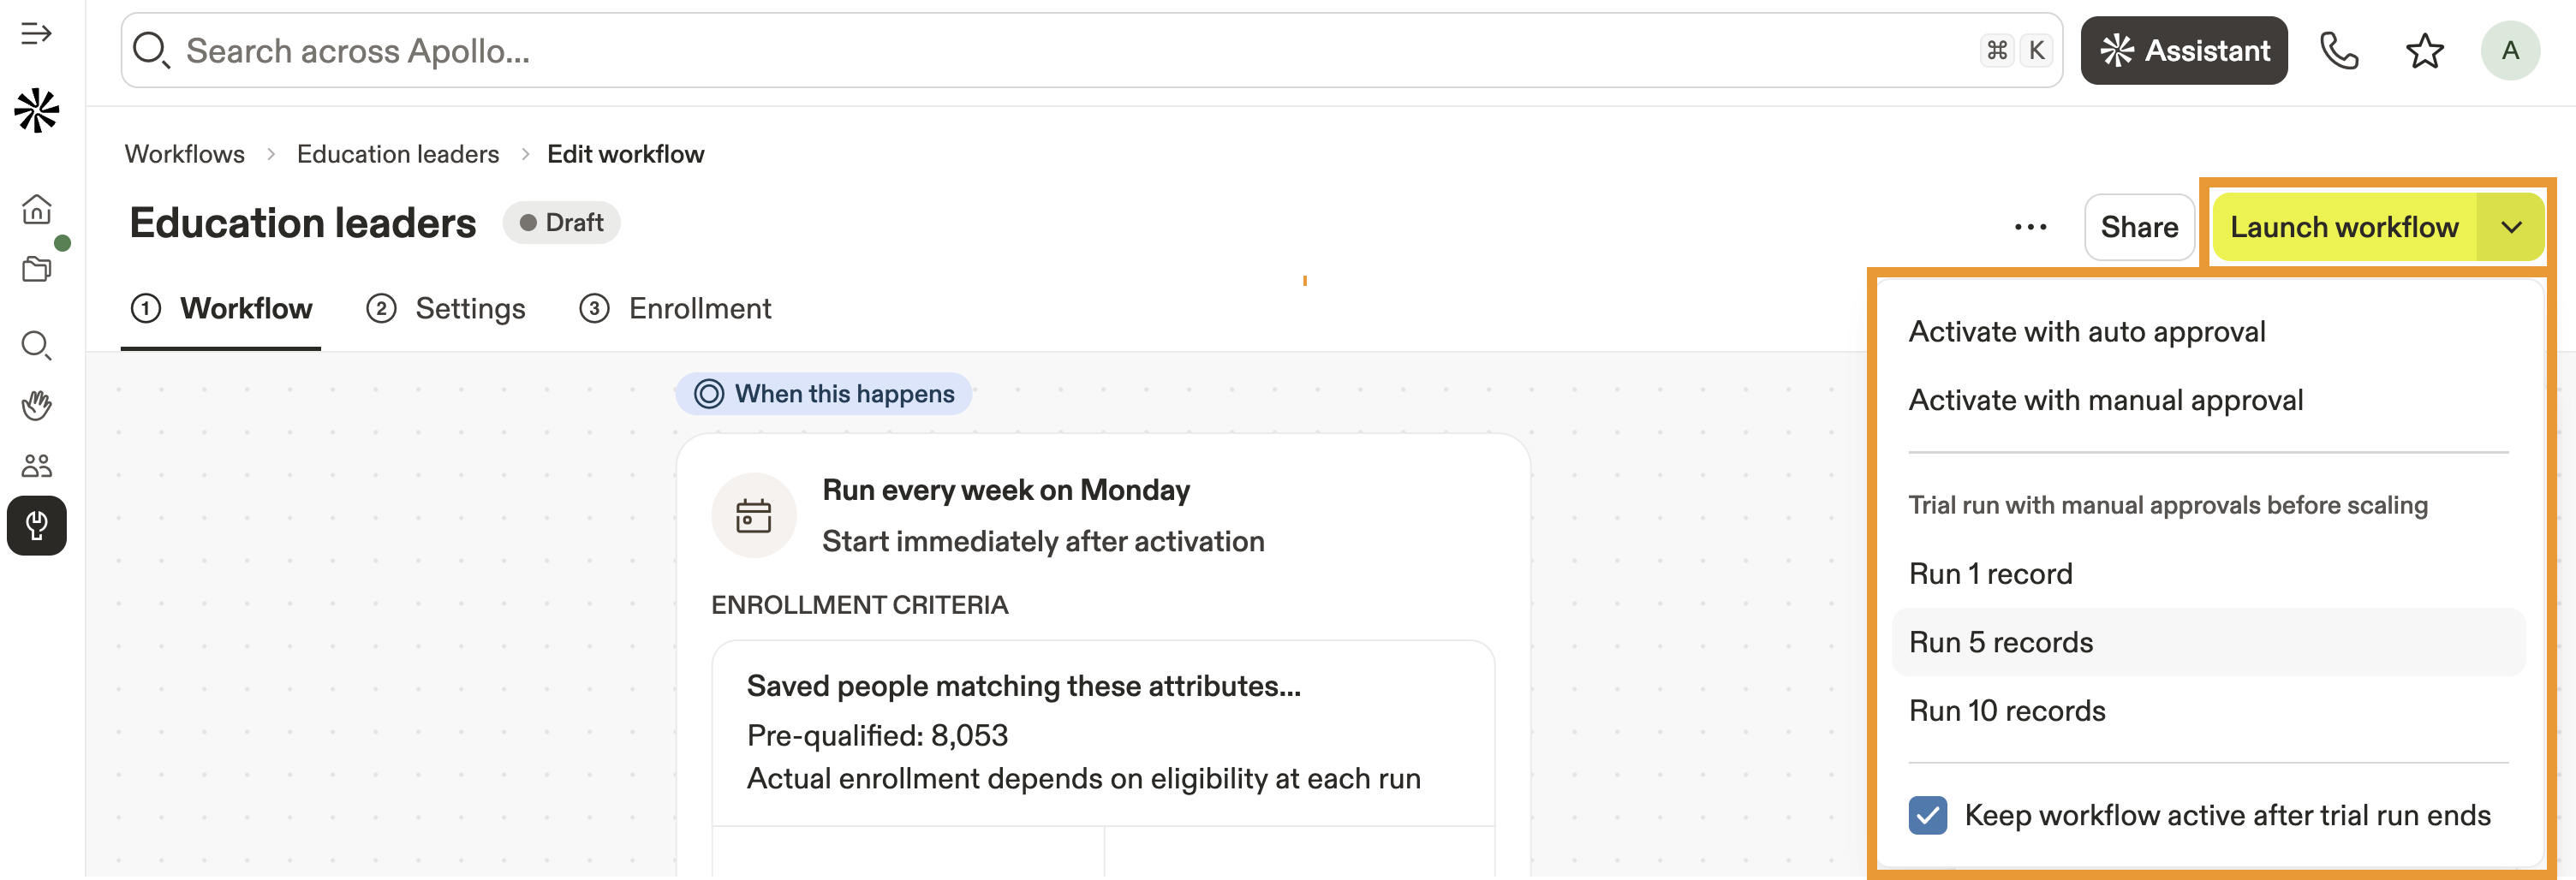
- When finished, click Launch workflow to begin the workflow.
- (Optional) To run a live trial of your workflow, choose the number of records that you want to process during the trial, then manually approve or reject the targets. You can remove pending approvals in the Enrollment tab.
- Check Keep workflow active if you want the workflow to continue to run after the trial.
You have now created a workflow from scratch.
Edit a Workflow
To edit a workflow:
- Launch Apollo and click Workflows.
- Select a workflow.
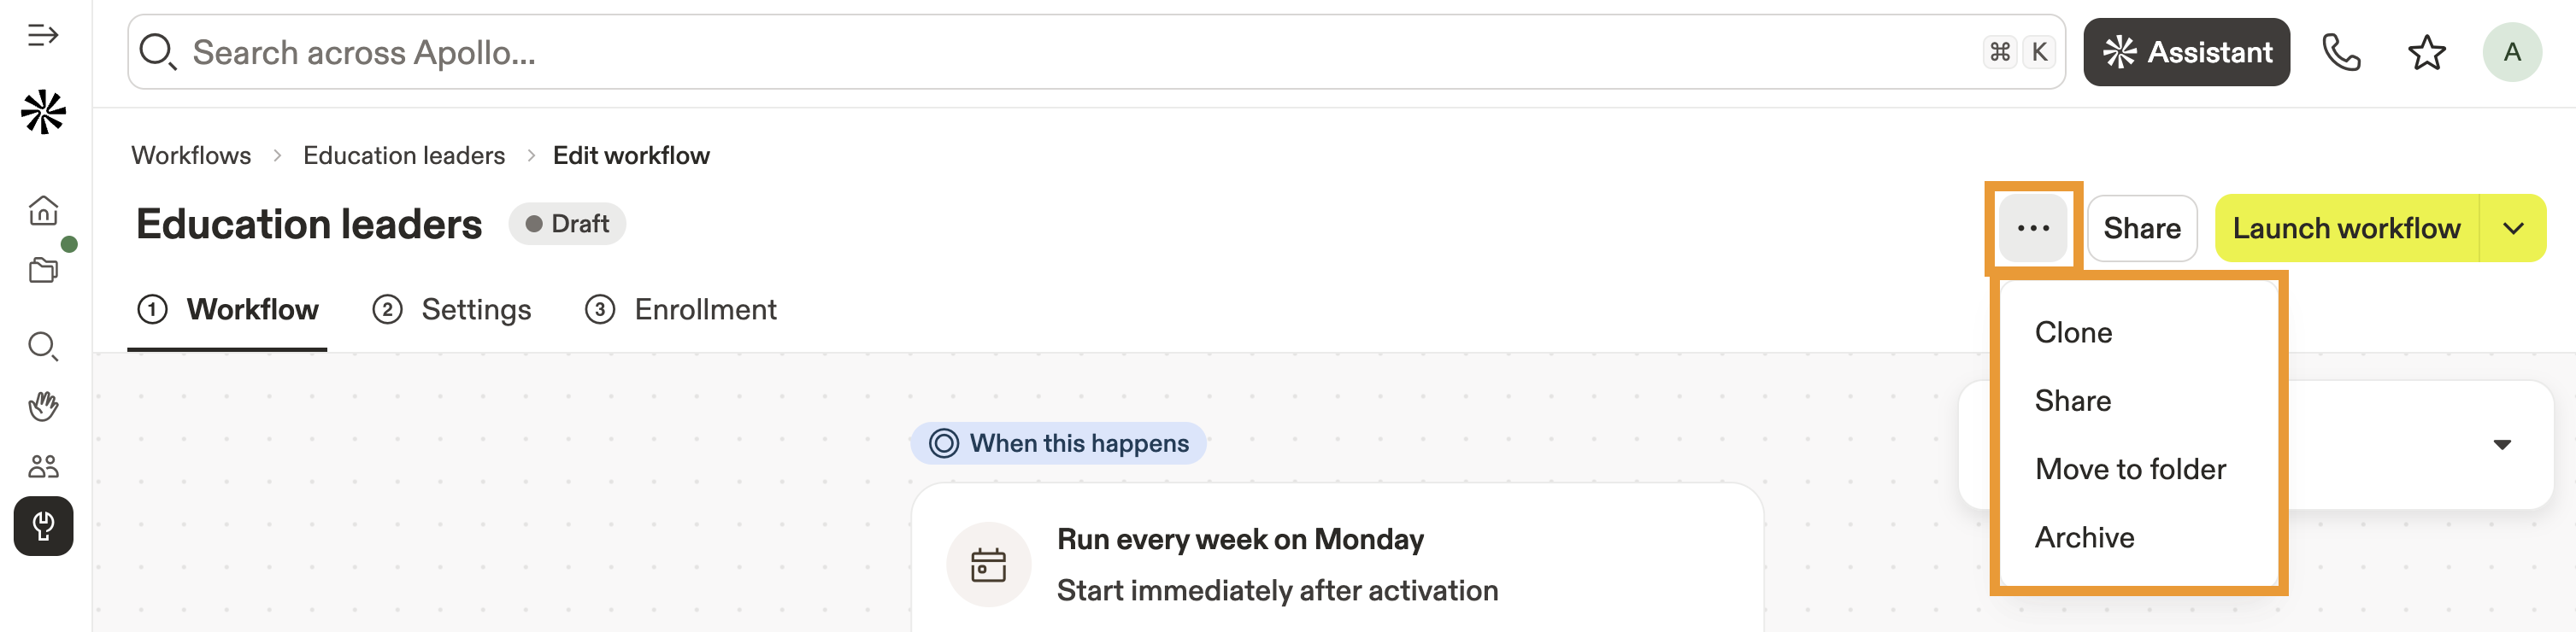
- Click Edit workflow to add or edit actions or branches.
- Click ... to clone, move, or archive the workflow.
- Click Deactivate to turn the workflow off.
Add Individual Records to a Workflow
To add individual records to a workflow:
- Launch Apollo, then click People.
- Apply your filters, then select the contacts you want to add. Apollo shows a new set of actions.
- Click Workflows. Apollo shows the list of workflows available for enrollment.
- Click a workflow to enroll the records.

New records bypass the workflow's triggers and are added directly. If Apollo detects previously enrolled records, select them and click Add records to re-enroll, or click Cancel to exit.
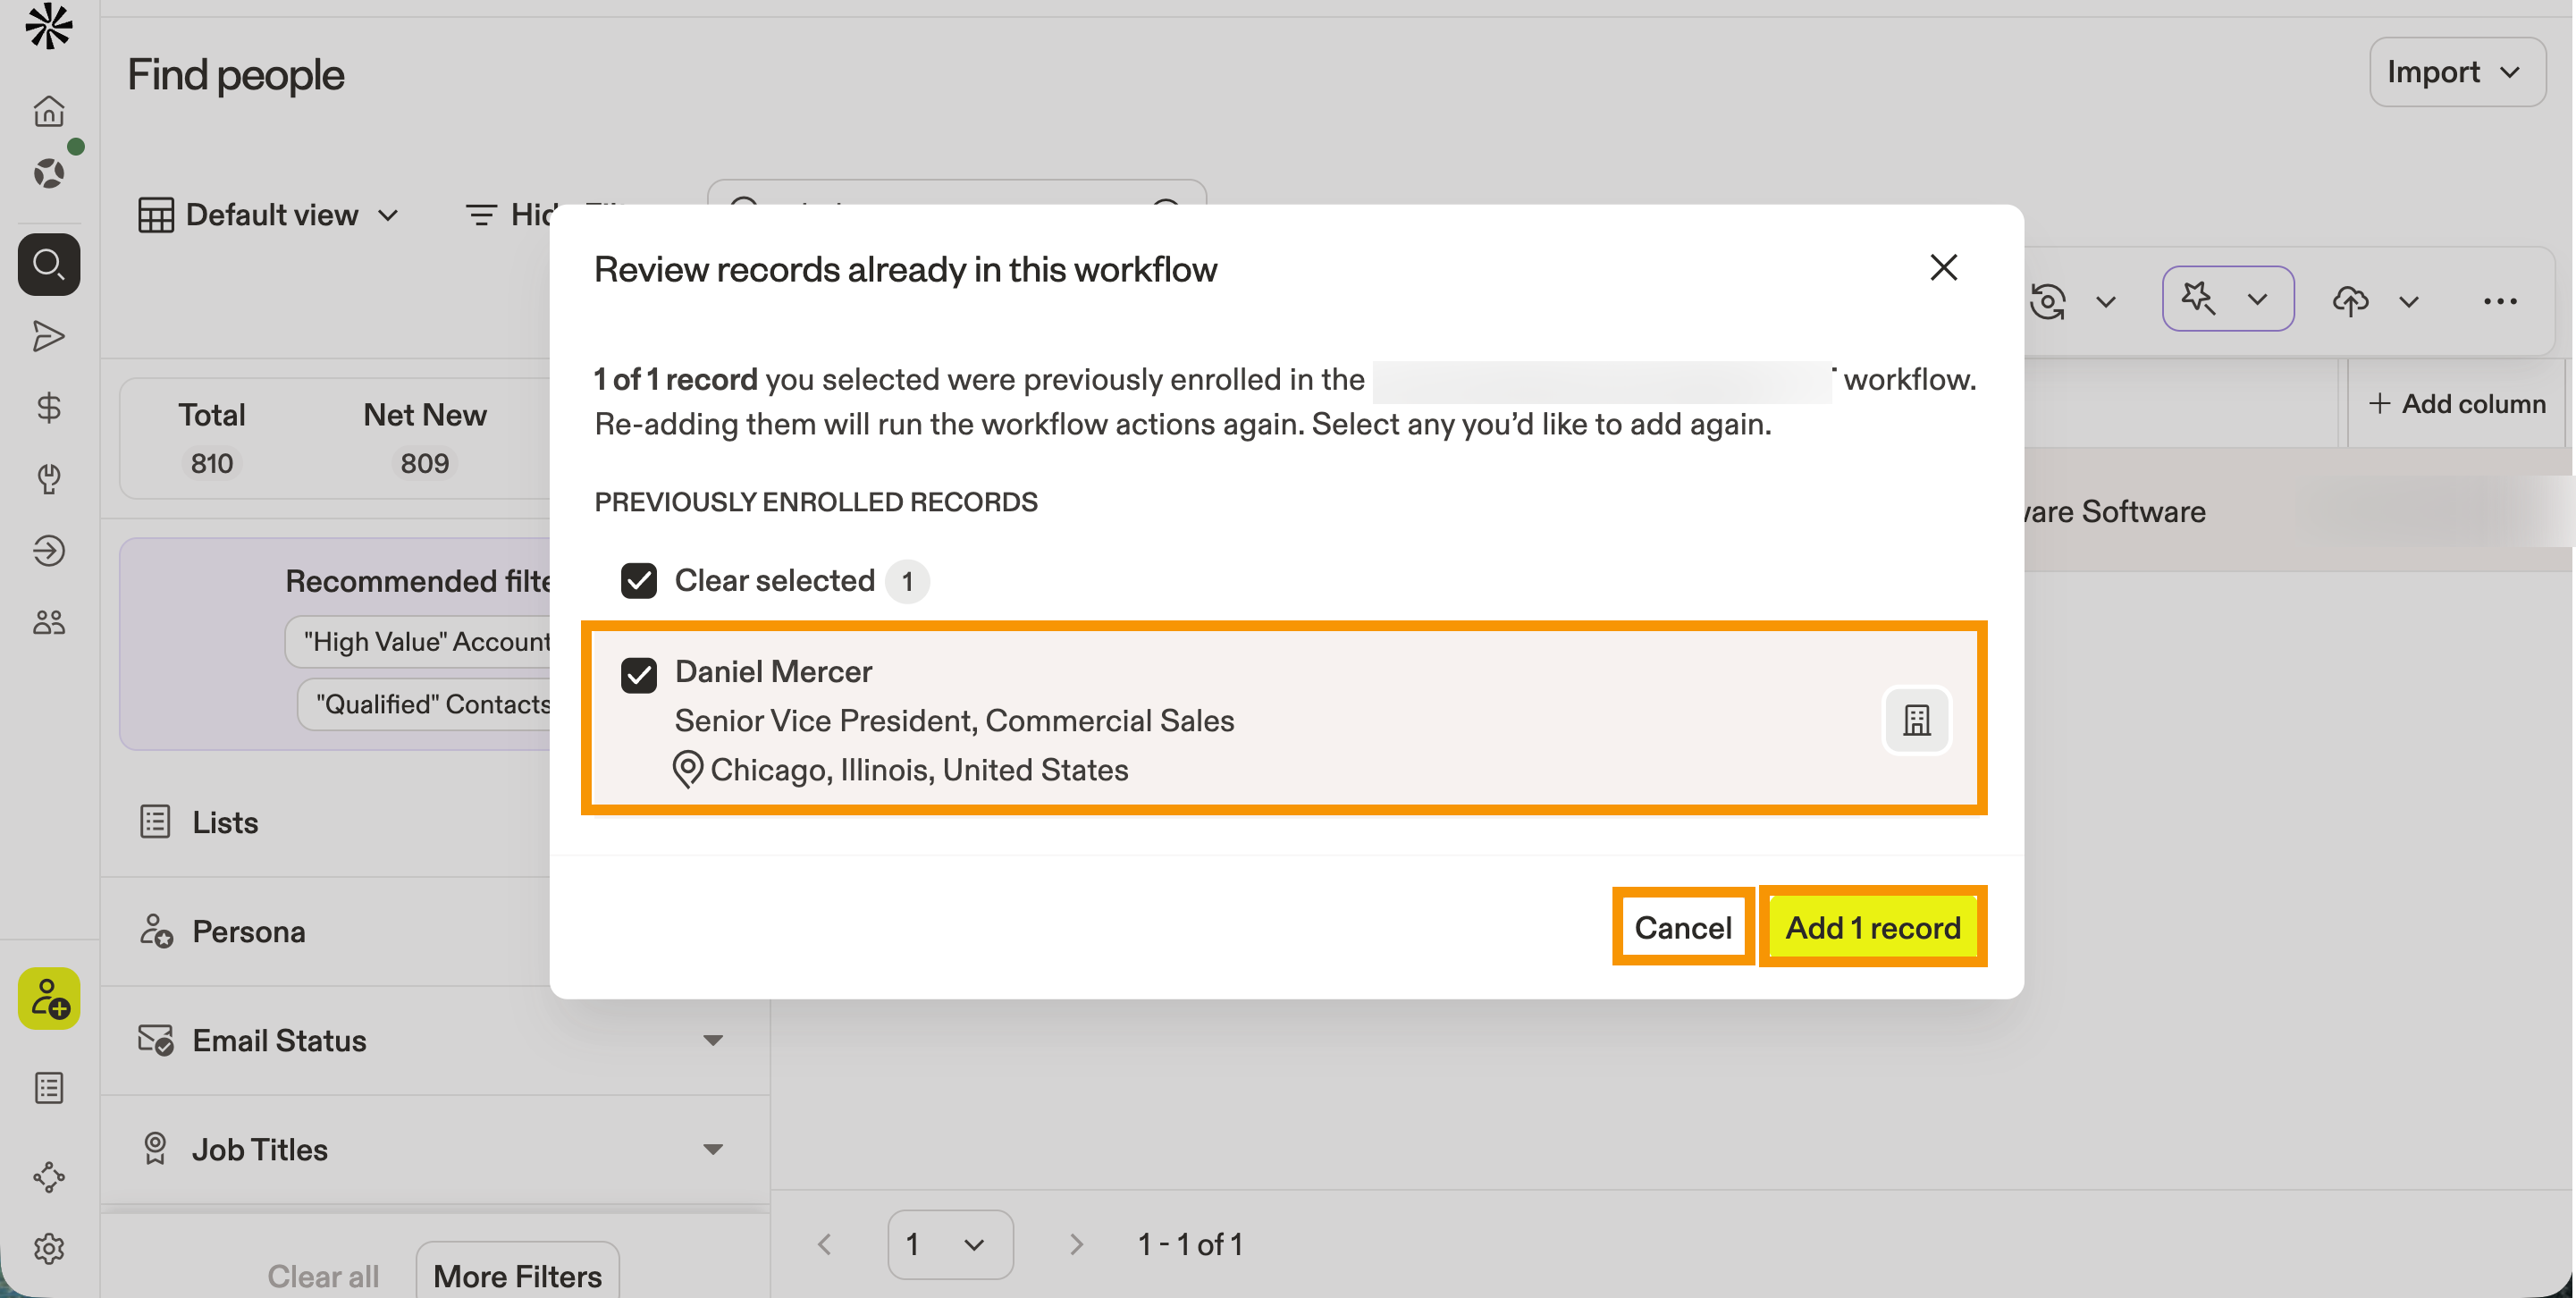
If you re-enroll records, they'll go through the workflow steps again.
You've now added individual records to a workflow.
Review Enrollments in a Workflow
Apollo tracks a workflow's run history and the contacts, companies, or deals that completed or failed the workflow.
To review a workflow's enrollments:
- Launch Apollo and click Workflows.
- Select a workflow.
- Click Enrollment. Apollo shows you the workflow's limits, run history, and the contacts, companies, or deals that completed or failed the workflow.
Manually added records appear as a line item that includes the name of the user who added them.

- (Optional) Click another run to review it.
A record fails when the workflow can't complete all required actions. The reasons for record failures are below:
- Credit limit: The record fails because the workflow or workflow owner's credit limit was reached. To fix, review the workflow settings or the workflow owner's credit limits.
- Missing contact owner: The record fails because the contact doesn't have a contact owner. To fix, assign a contact owner.
- Missing account owner: The record fails because the account doesn't have an owner. To fix, assign an account owner.
- Inactive mailbox: The record fails because the contact owner doesn't have an active mailbox. To fix, the contact owner must link a mailbox.
- (Optional) To retry failed records:
- To retry all failed records, click Retry failed records. Apollo reruns the records through the workflow steps.
- To retry specific failure types, click ▾ next to Retry failed records, then select Retry credit limit failures, Retry missing contact owner failures, Retry missing account owner failures, or Retry inactive mailbox failures.
- To retry an individual record, click ⟳ on the contact's status.

You've now reviewed your workflow enrollments.
Share a Workflow
You can share workflows with your team or externally via social media to accelerate collaboration and promote best practices for sales automation.
To share a workflow:
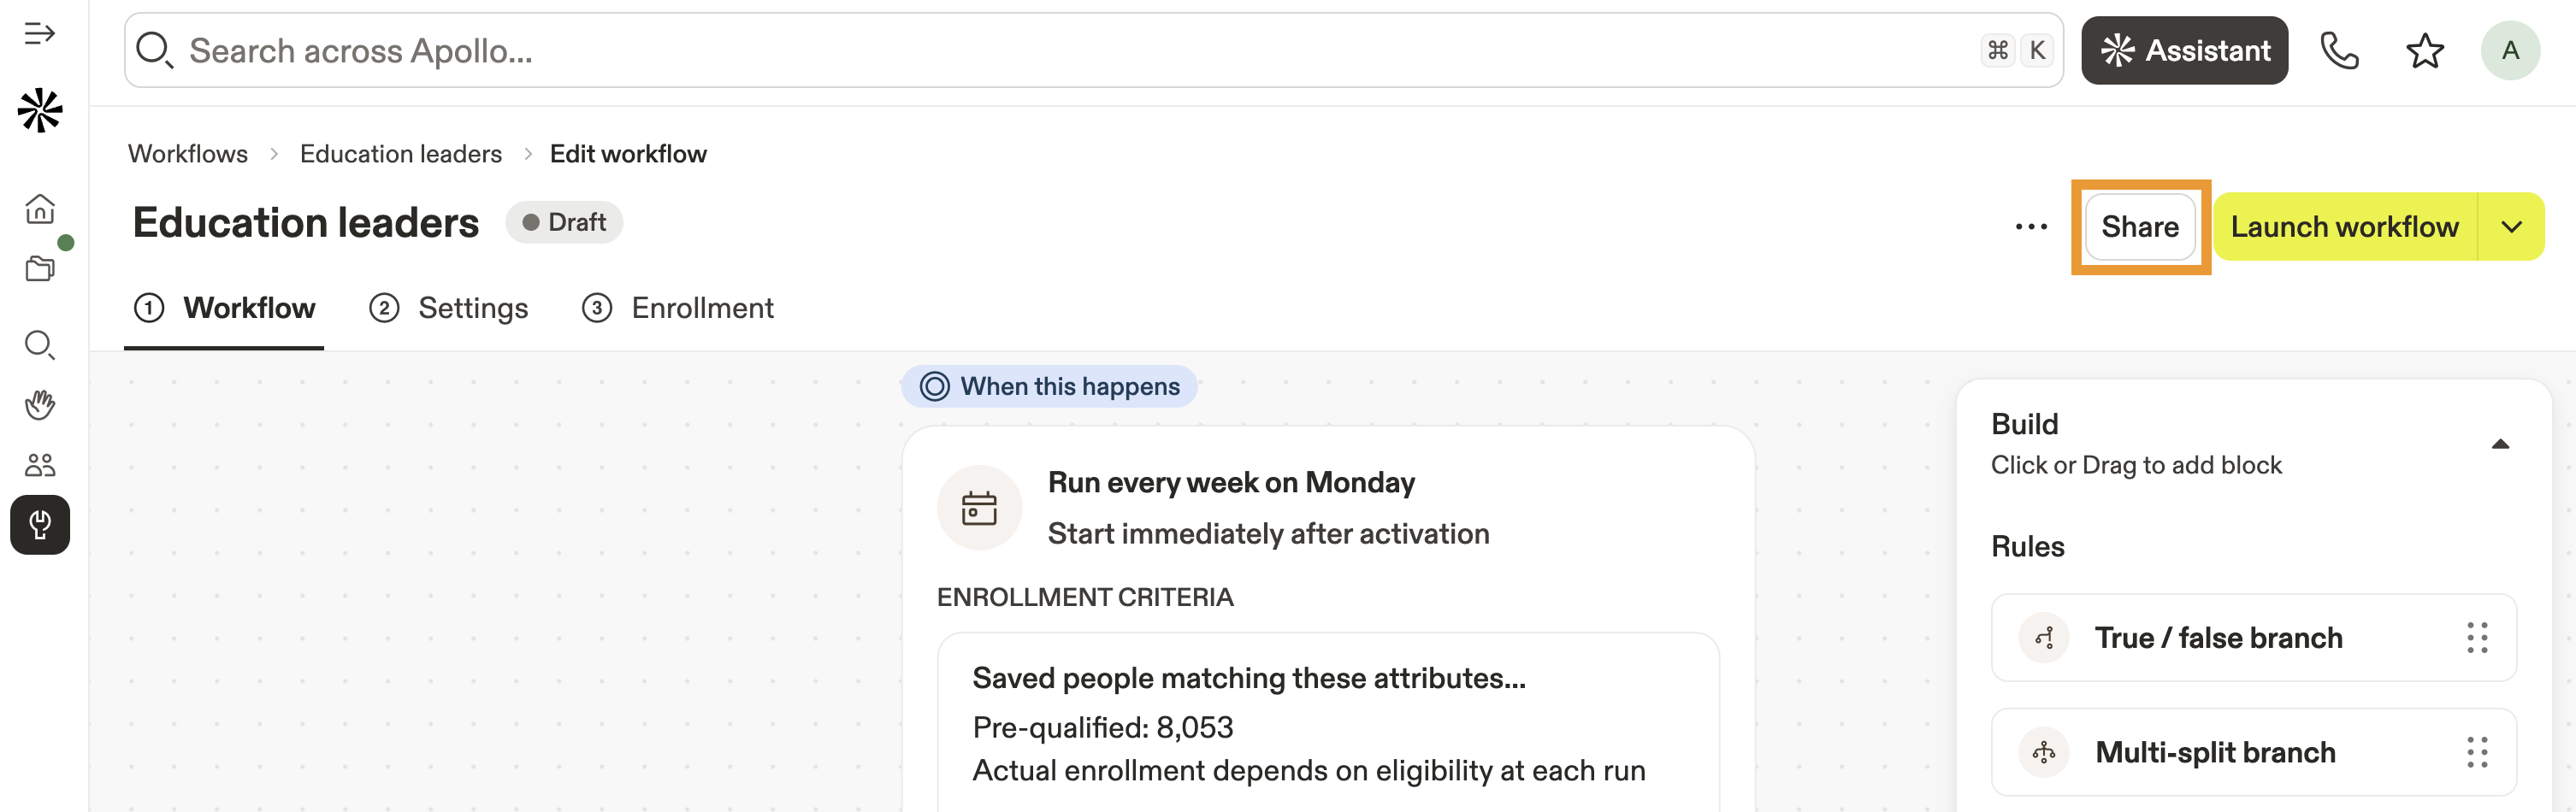
- Launch Apollo and click Workflows.
- Select a workflow, then click Share.
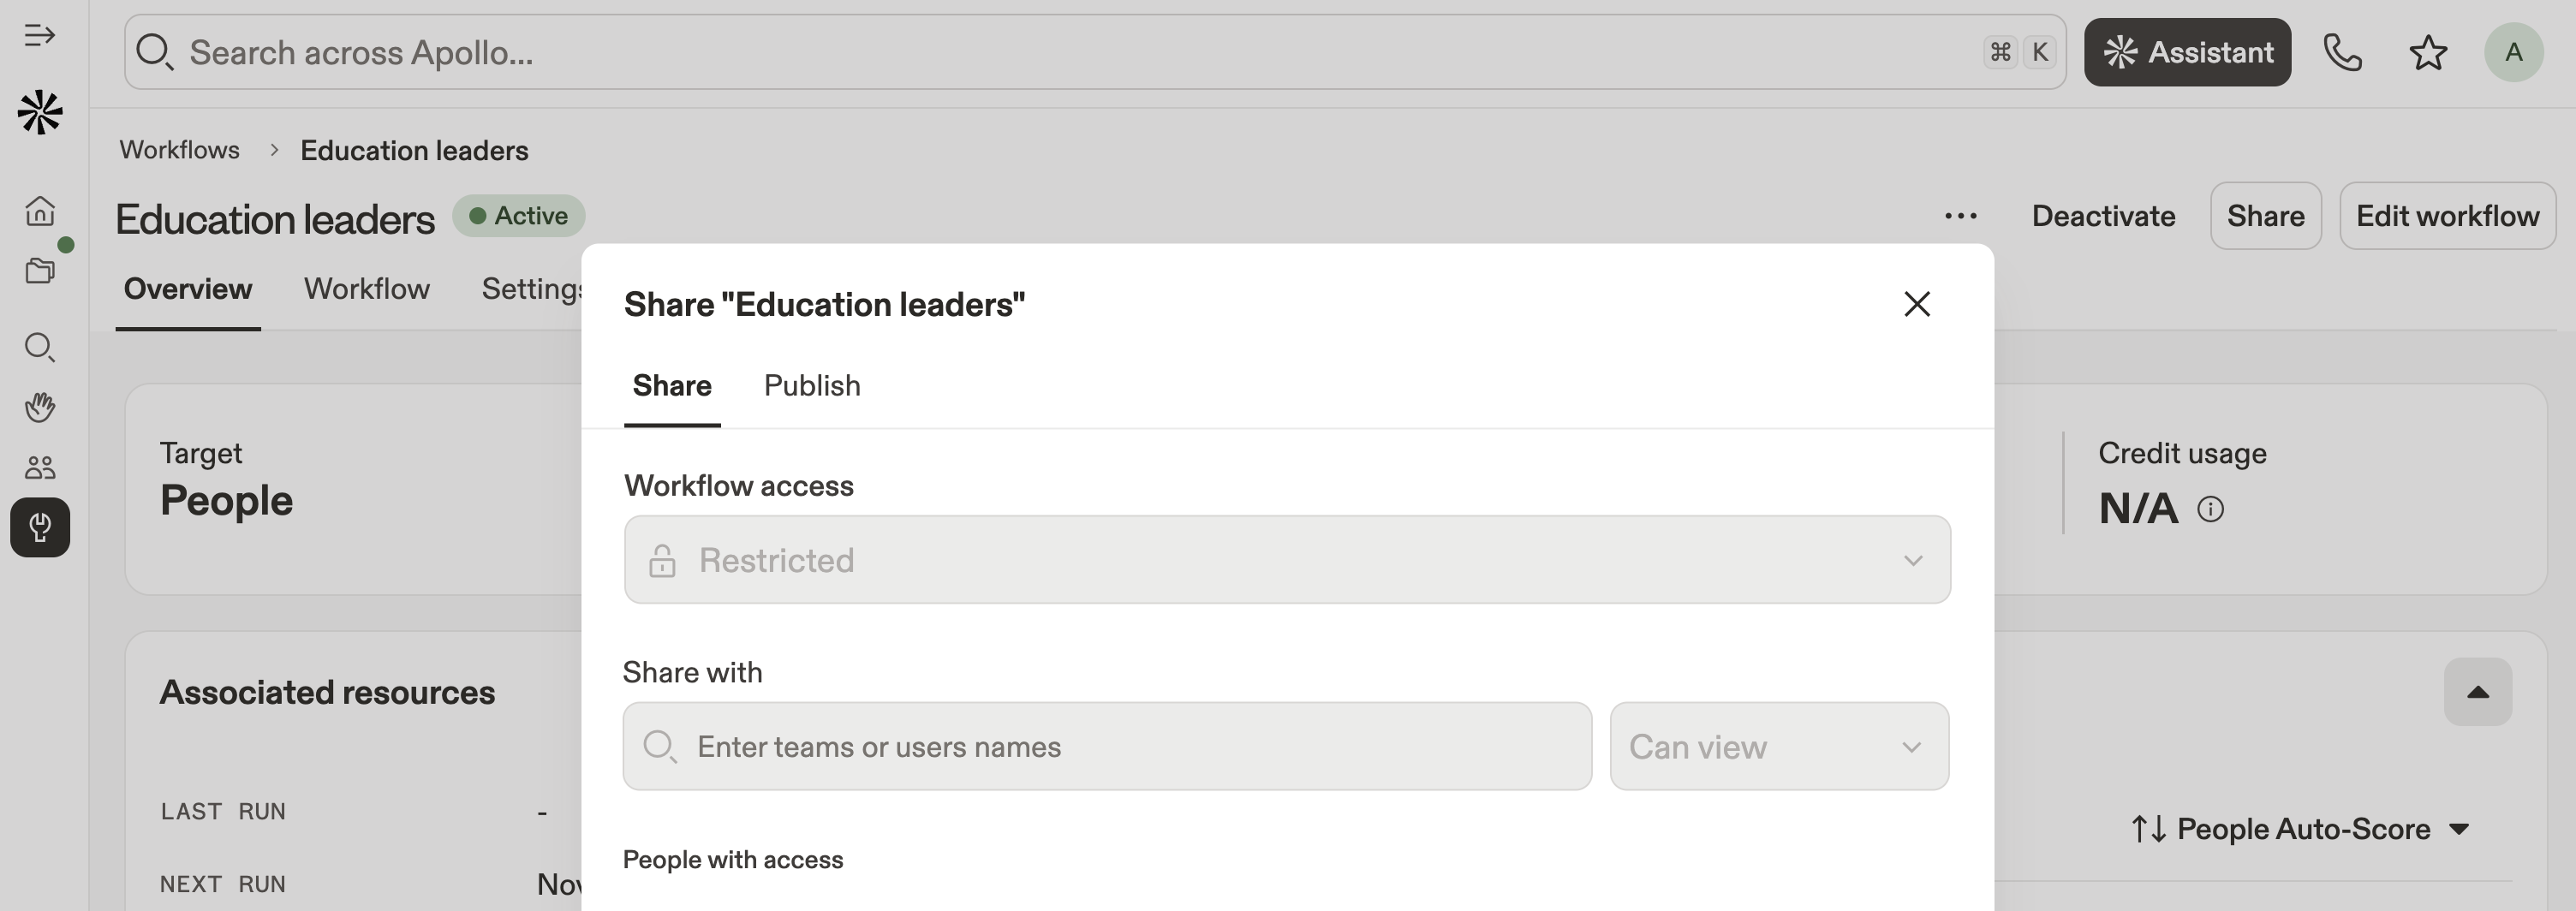
- Select a workflow access setting:
- Restricted: Apollo restricts access to your workflows by default. Use this setting to keep your workflow private to you or to share this workflow with select teammates only.
- Everyone at company: Make your workflow visible to everyone on your team.
- (Optional) Give specific users or teams access to your workflow. Click a user's email or team name.
- Next, set permissions:
- Can view: People can view your workflow but can't edit or share it with others.
- Can edit: People can view and edit your workflow but can't share it with others.
- Full access: People have full access to view, edit, and share your workflow.
- Remove: Remove a user's access to your workflow.
- Click Publish after sharing your workflow to publish it externally.
- Toggle Make workflow public as a template to make the workflow viewable to anyone.
- Click Post on LinkedIn or Post on X to share your workflow in a post.
- Click Copy link.
- When finished, click Done.
When you publish your workflow, anyone with the link can view or copy your template. Apollo shares your workflow's overall structure but keeps your individual sequence steps and lists private.
Next Steps
Want to go further with automations? Here's a few solid next steps to build smarter, faster workflows in Apollo.
| Workflows Overview | Get to know workflows and learn how to automate outreach and admin steps to cut manual clicks and scale repeatable motions. |
|---|---|
| Use the Outbound Copilot | Help your team move faster by using Outbound Copilot to draft targeted outreach, personalize messages, and propose next steps so you can launch high-quality sequences in minutes. |
| Use the Slack Integration | Keep everyone in the loop by connecting Slack and configuring workflow notifications to alert your team when a manual assist or milestone hits. |
| Automate Your Sales Process | Level up your team by taking the Apollo Academy course to design smarter workflows and ship automations with confidence. |