
Overview
Sequences are outreach campaigns that you can use to reach out to contacts over a planned period of time with sequential touchpoints like phone calls, emails, social media engagement, and other tasks.
Use sequence schedules to control the day and time that you send out sequence emails. You can set schedules based on a specific timezone, or use the timezone specific to your contacts. You can configure multiple sending schedules for different sequences, dependent on audience timezones or contact expectations. Sending schedules help optimize the possibility of positive interactions.
When you create or edit a sequence, you set the time between steps. This determines when Apollo moves a contact into the next step in the sequence. When the time between steps is set in days, Apollo counts only weekdays included in the sequence's sending schedule. For a Monday-Friday schedule, Saturday and Sunday don't count. For example, if a contact completes a step on Friday and the next step is set to six days, Apollo moves the contact to the next step on the Monday after next.
For automatic email steps, Apollo sends the email during the next available sending window after the contact moves to that step. Email sending limits can delay the email further.
If multiple automatic emails are ready to send at the same time, Apollo prioritizes prospects with higher scores first. Your team's email priority settings determine which queued sequence emails send first across all active sequences.
Check out the following sections to create and edit sequence schedules.
Create a Sequence Schedule
To create a sequence sending schedule, you need permission to add and edit email schedules.
To create a sequence schedule:
- Launch Apollo and navigate to Settings > Team email & sequences > Sequences > Schedules.
- Click + New Schedule.

- Enter a name, and choose a timezone on which to base your schedule. The selected time zone controls when automatic emails send.
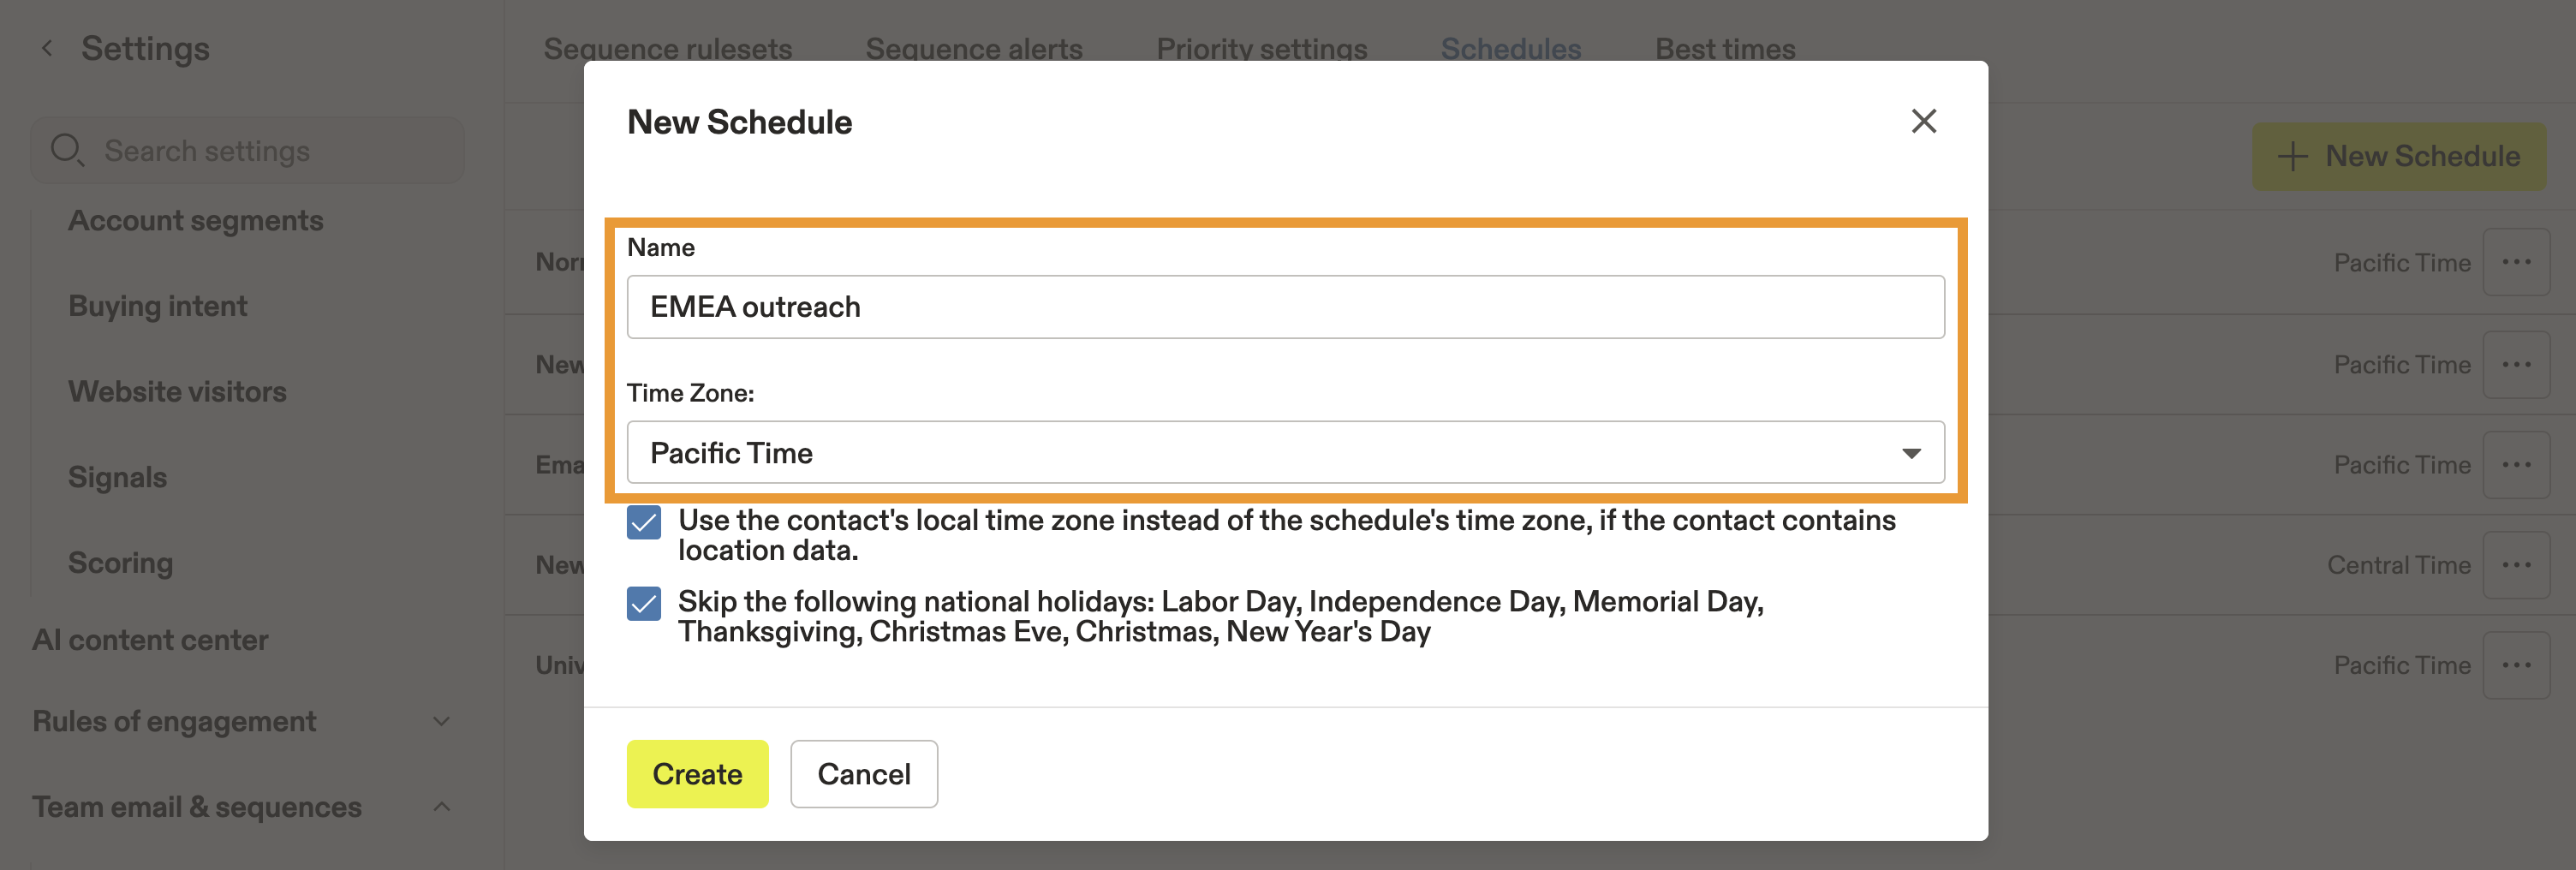
These are the available timezones:
- Pacific Time
- Mountain Time
- Central Time
- Eastern Time
- UTC
- London
- Paris
- Athens
- Australia Western Standard Time
- Australia Central Standard Time
- Australia Eastern Standard Time
- Middle East Time
- Near East Time
- Pakistan Lahore Time
- India Standard Time
- Bangladesh Standard Time
- Vietnam Standard Time
- Japan Standard Time
- Solomon Standard Time
- New Zealand Standard Time
- Midway Islands Time
- Hawaii Standard Time
- Alaska Standard Time
- Puerto Rico and US Virgin Islands Standard Time
- Canada Newfoundland Time
- Brazil Eastern Time
- (Recommended) Check Use the contact's local time zone instead of the schedule's time zone. Enabling this setting applies the schedule's time blocks in each contact's local time zone rather than the schedule's selected time zone.
When this setting is enabled, emails may appear to send outside the schedule's time blocks when viewed from a different time zone, but they still follow each contact's local sending window. If Apollo doesn't have enough location data to determine a contact's time zone, Apollo uses the schedule's selected time zone for that contact instead.
- By default, Apollo doesn't send messages on certain US holidays (Labor Day, Independence Day, Memorial Day, Thanksgiving, Christmas Eve, Christmas Day, and New Year's Day), but you can deactivate this setting if needed. To skip additional holidays or dates, pause the sequence manually.
- Click Create.
- Next, click Add Time Block for each day that you want to send sequence emails.

- Select a time range, then click Add Time Block.

- Repeat this process for each day that you want to send emails.
- When finished, click Save.
You have now configured a sequence sending schedule, and you can apply the schedule to a sequence.
You can edit a sending schedule at any time.
Apply a Schedule to a Sequence
Automatic emails and manual tasks follow different timing rules. After the time between steps has passed, Apollo sends automatic emails during the next available sending window. Apollo can create manual email, phone call, LinkedIn, and action item tasks after the time between steps has passed, even when no email sending window is active.
To apply a sending schedule to a sequence:
- Launch Apollo and click Sequences.
- Select your sequence.
- Click Settings.

- Select the schedule you want to use.

- Click Save Changes.
You have now applied a sending schedule to a sequence. You're ready to add contacts and engage with people in the sequence.
Adjust Email Priority Settings
To adjust email priority settings, you need permission to edit email priority settings.
Use email priority settings to control the order Apollo sends queued sequence emails across all active sequences. These settings apply when multiple emails are eligible to send at the same time.
To adjust your team's email priority settings:
- Launch Apollo and go to Settings > Team email & sequences > Sequences.
- Click Priority settings.
- Choose how Apollo prioritizes queued sequence emails:
- Scheduled date (default): Apollo sends emails in the order they were scheduled. Emails scheduled first send first.
- Sequence with the highest interested rate: Apollo prioritizes emails from the sequence with the highest interested rate across all prospects in that sequence. Use this option to prioritize the best-performing sequence overall.
- Step within a sequence with the highest interested rate: Apollo prioritizes emails from the sequence step with the highest interested rate. Use this option to prioritize the best-performing step.
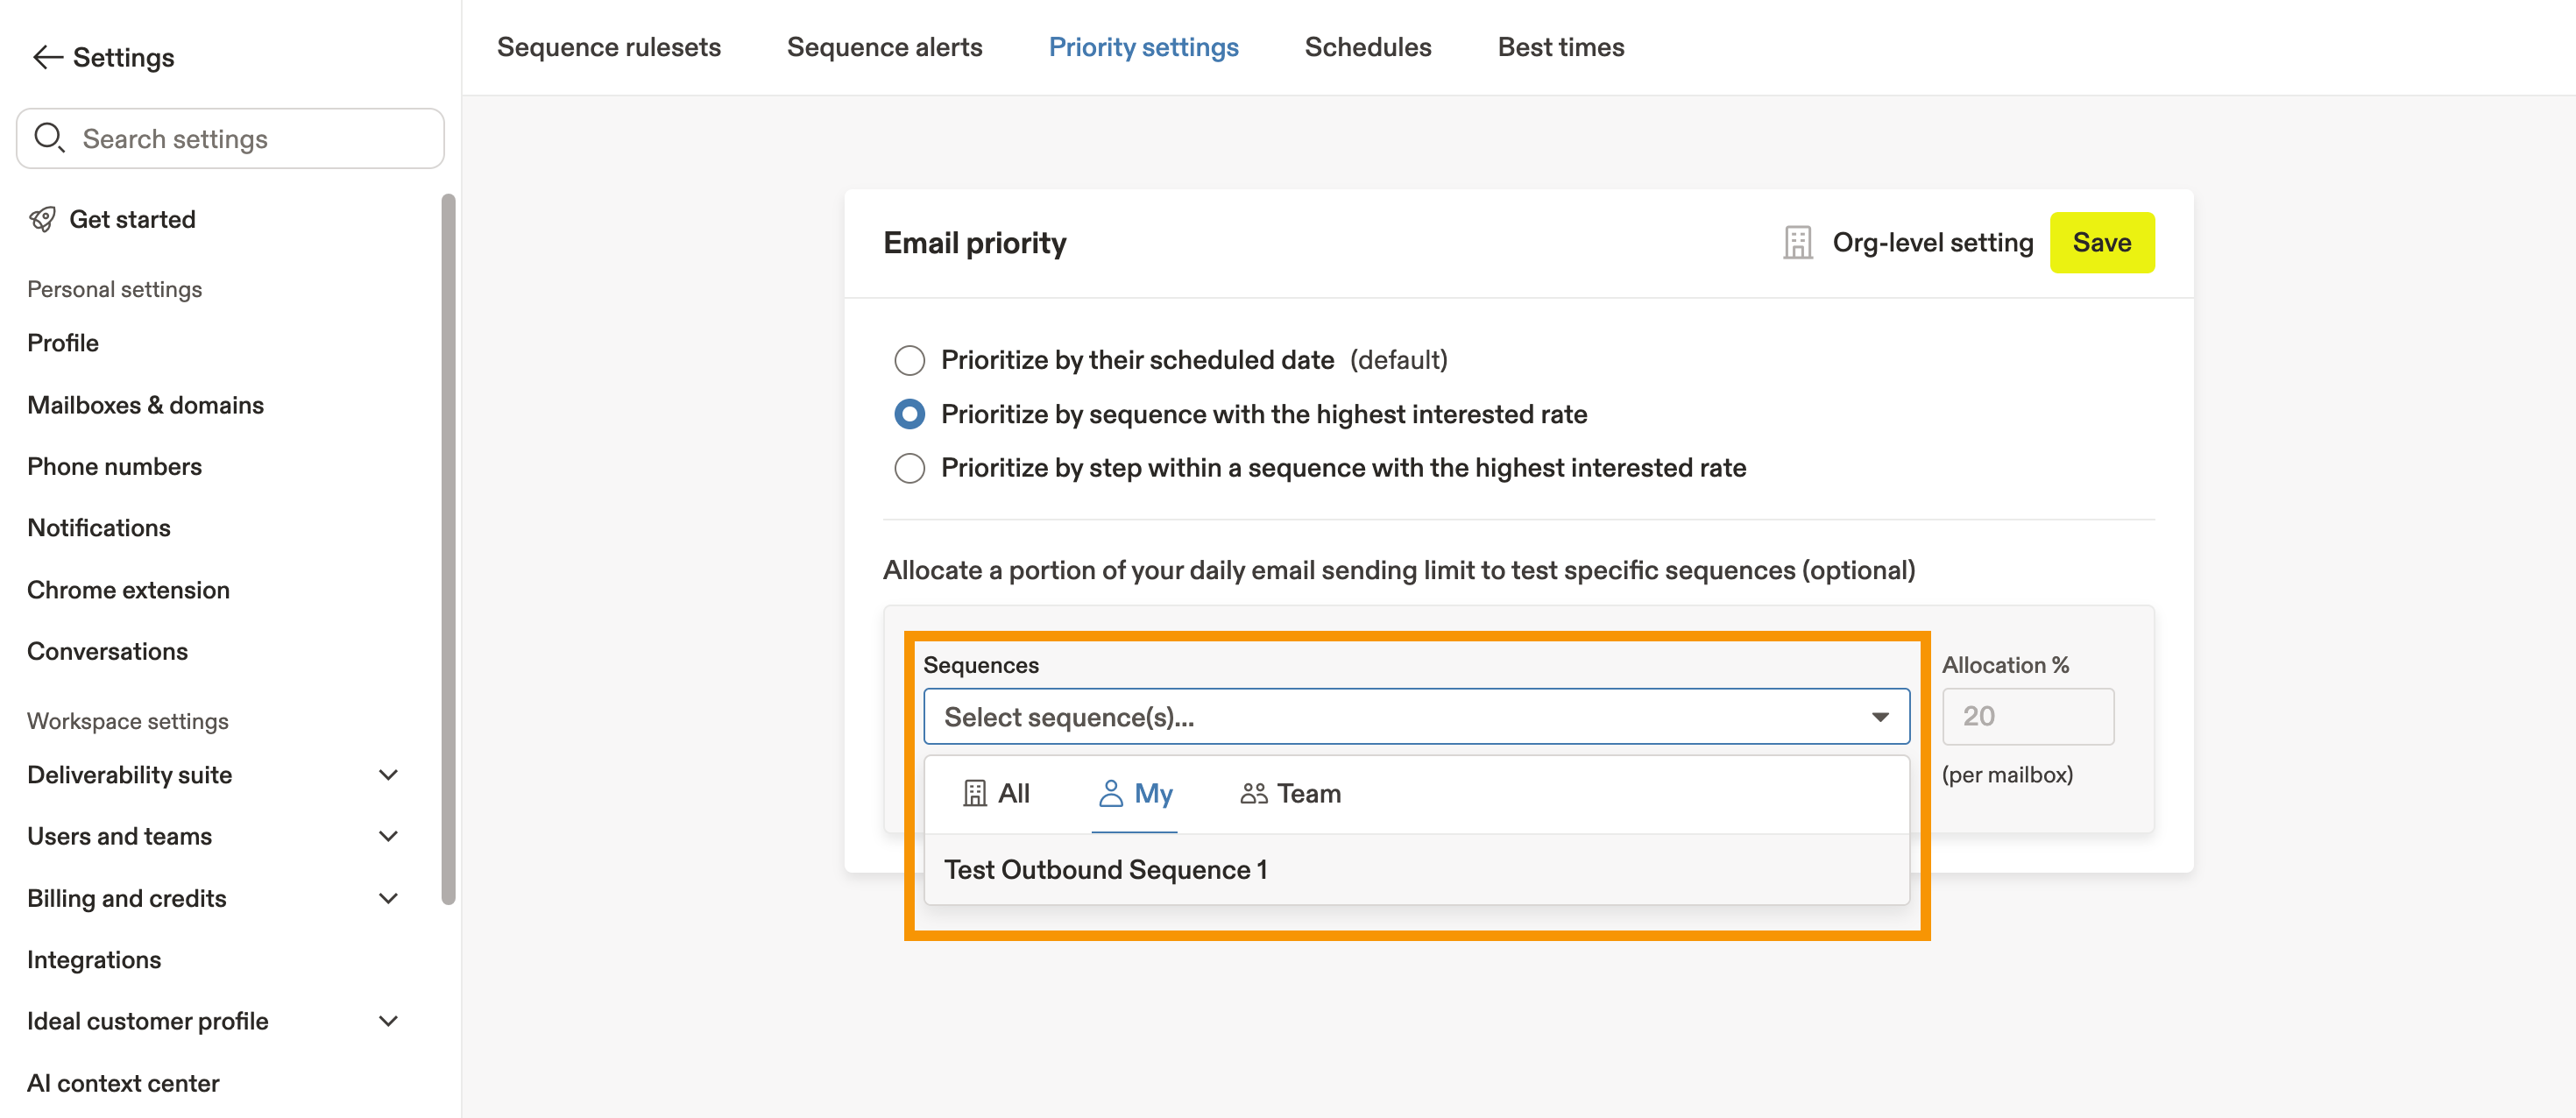
- (Optional) If you select Sequence with the highest interested rate or Step within a sequence with the highest interested rate, select a sequence.
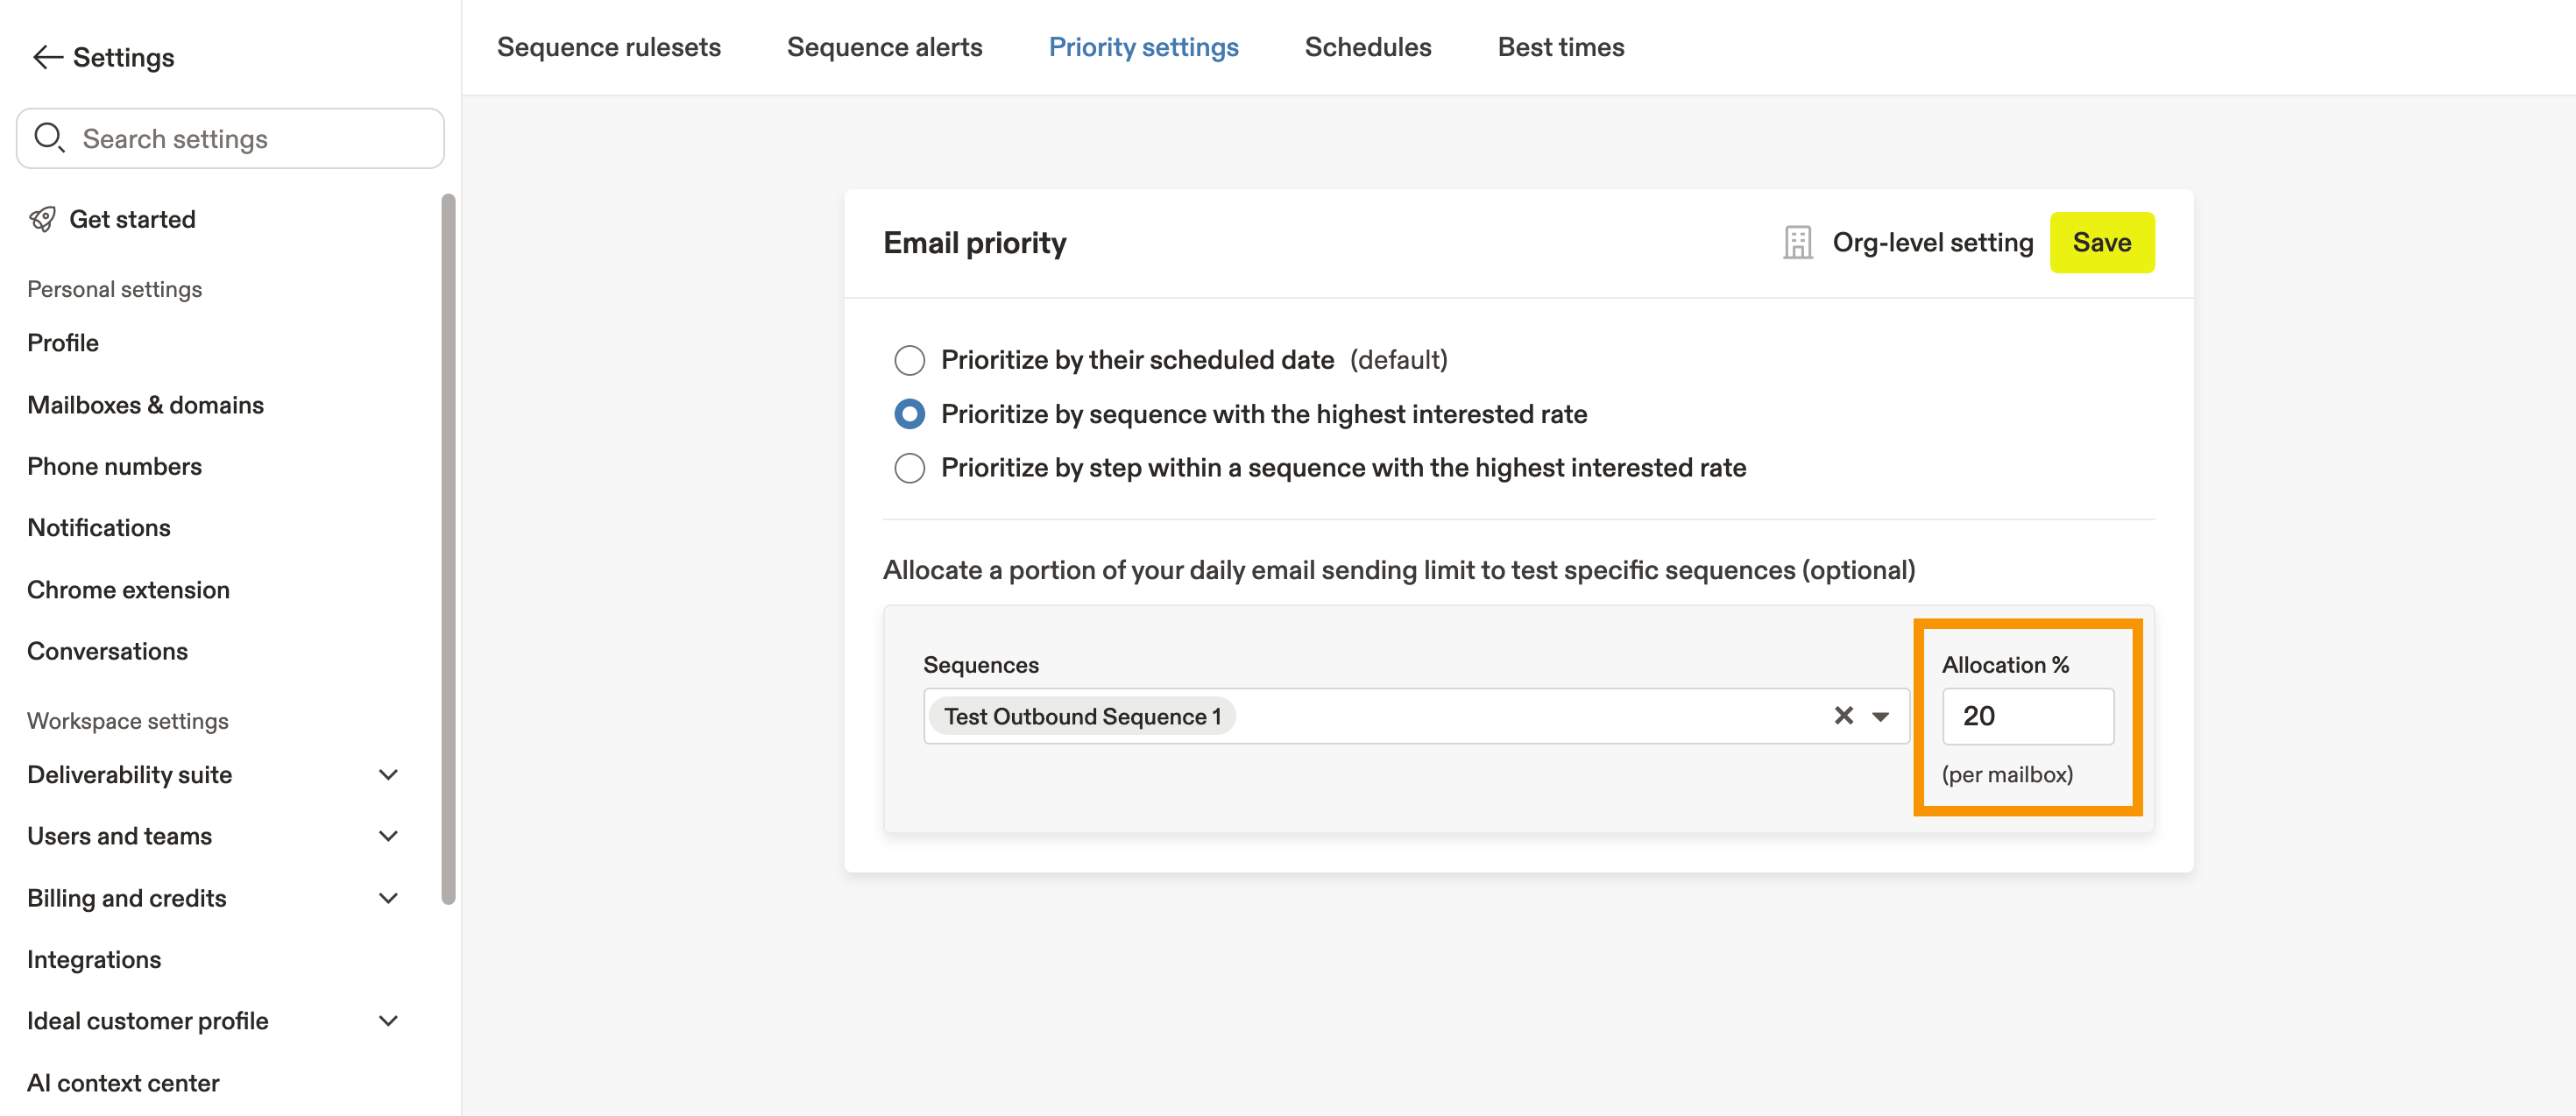
- Enter the allocation percentage per mailbox. This is the percentage of the daily email limit reserved for a specific sequence during testing. For example, if the daily email limit is
50and you allocate 20%, Apollo reserves ten emails for that sequence.
- Click Save.
You have now updated your team's email priority settings.
To see which contacts are up next and review their status in the sequence, check out Manage Contacts in a Sequence.
Next Steps
Once you've set a sequence sending schedule, follow these next steps to maintain your sequence volume, protect deliverability, and keep timing predictable.
| Configure Email Sending Limits | Go ahead and set rolling 24-hour sending limits to keep your team's sequences from spiking volume and triggering provider throttles. |
|---|---|
| Use Email Warmup to Improve Email Deliverability | Before you ramp outreach, run email warmup on your sending mailbox to build trust with inbox providers and protect replies from landing in spam. |
| Set Up Domain Authentication | Lock in deliverability basics by setting up SPF, DKIM, and DMARC to help your scheduled sequence emails consistently hit the inbox. |
| Edit the Sending Mailbox on Contacts in a Sequence | If timing looks right but volume needs balancing, switch the sending mailbox for specific contacts to spread sends across inboxes without changing your sequence plan. |
| Troubleshoot Sending Emails | When a step doesn't fire when you expect, pinpoint why emails stayed scheduled to quickly fix schedule windows, missed send times, or other blockers. |