
Overview
Workflow triggers determine when Apollo evaluates and enrolls records in a workflow. Rules and actions determine how qualifying records move through the workflow and what Apollo does with them.
You can configure triggers, enrollment criteria, rules, and actions when you create a workflow or edit an existing workflow.
Access to workflows and specific workflow features depends on your Apollo plan, permissions, workflow target, and enabled features.
Check out the following sections to configure workflow triggers and actions.
Configure a Workflow Trigger
Need to build a workflow first? Check out Create and Launch a Workflow to create a workflow with AI, from a template, or from scratch.
A workflow trigger determines when Apollo evaluates records for enrollment. You can run a workflow on a schedule or when a specific event occurs.
To configure a workflow trigger:
- Launch Apollo, then click Workflows.
- Open the workflow builder:
- For a new workflow, click Create workflow > Start from scratch.
- For an existing workflow, select the workflow, then click Edit workflow.
- For an existing workflow, click the trigger block on the workflow canvas.
- In the Trigger panel, select what the workflow targets:
- People
- Companies
- Deals
You can only change the workflow target before the workflow completes its first run. Changing the target resets the workflow and removes its existing triggers, filters, rules, and actions. Deal-based workflows are only available for teams with access to deals in workflows.
- Choose when the workflow should run:
- Based on a date or schedule: Apollo evaluates matching records at the frequency you configure.
- Based on a trigger event: Apollo evaluates a record after the selected event occurs while the workflow is active.
- Configure the trigger using the option that matches your workflow.
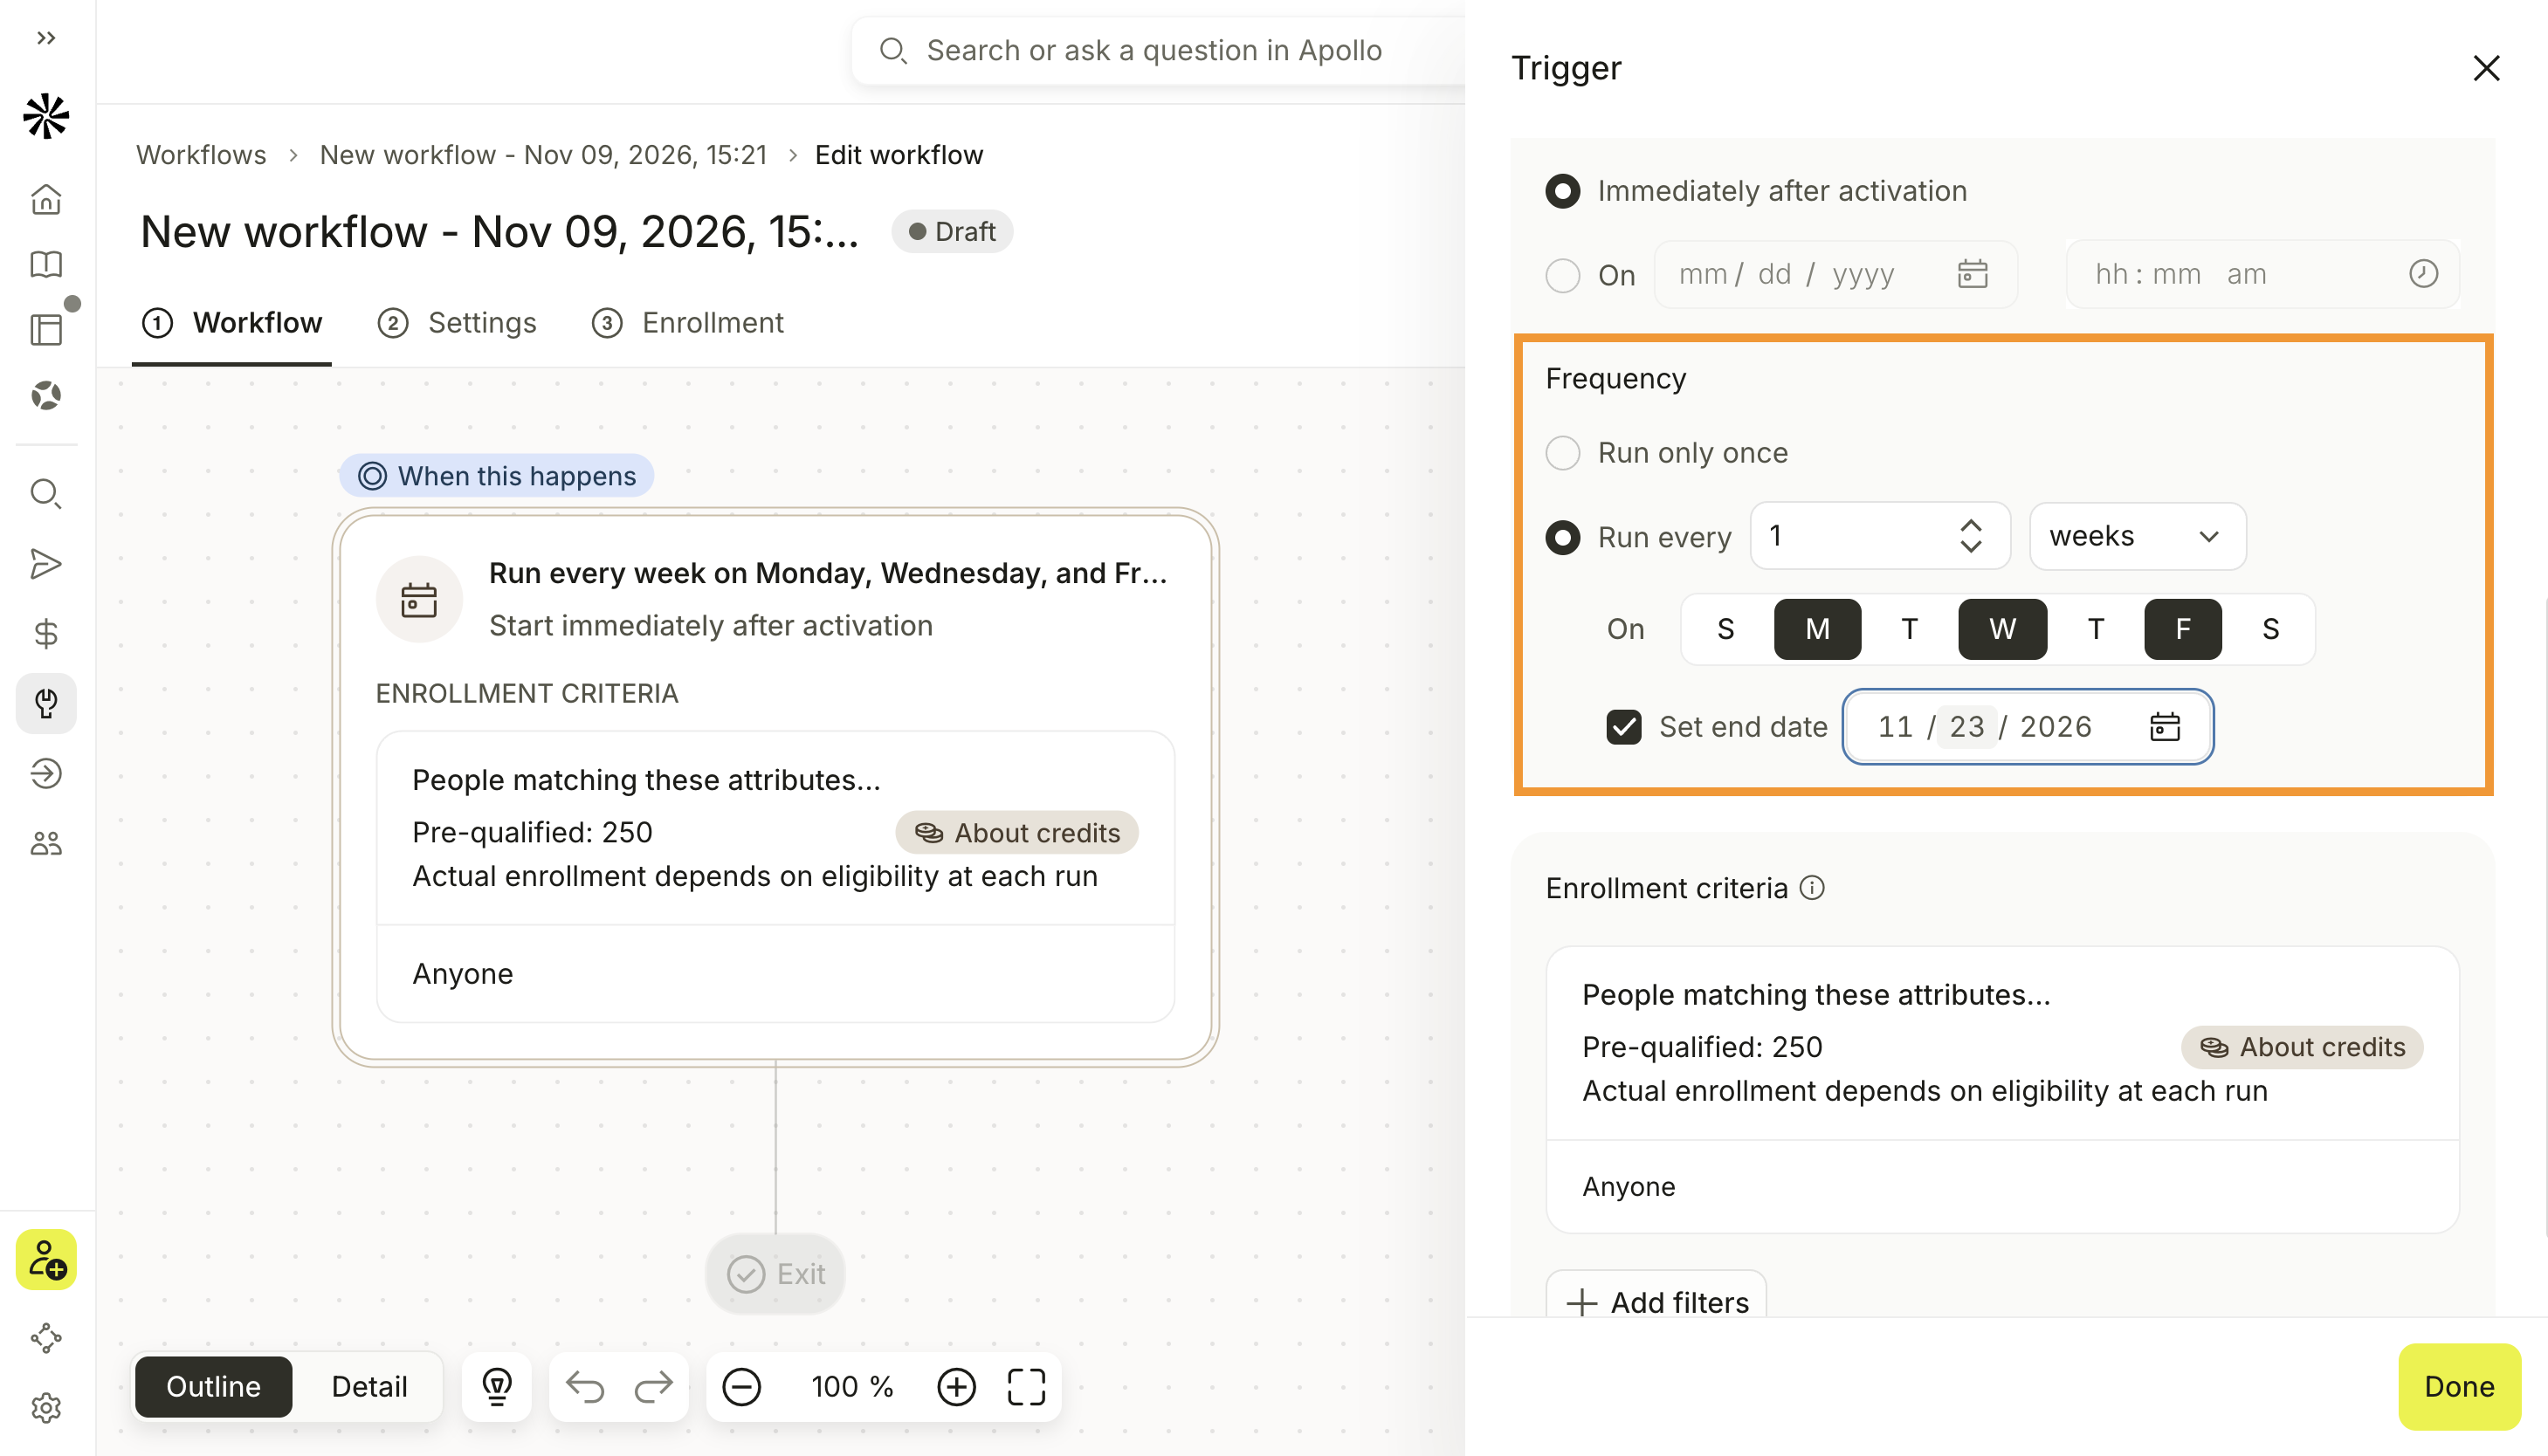
Use a scheduled trigger when you want Apollo to evaluate matching records at a specific time or frequency.
To configure a scheduled trigger:
- Under Start, choose when Apollo should begin running the workflow:
- Immediately after activation
- On, then select a date
- Under Frequency, choose how often the workflow should run:
- Run only once
- Run every, then enter an interval and select days, weeks, or months
-
Configure any additional scheduling options:
- For a weekly schedule, select the days when the workflow should run.
- For a monthly schedule, configure the Day of Month.
- To stop the workflow on a specific date, select Set end date.
- Click Done.
Use an event trigger when you want Apollo to evaluate records after a specific event occurs.
To configure an event trigger:
- Under Trigger when, click the Event dropdown.
- Select the event that should trigger the workflow.
- Configure any required event conditions.
- To add another event, click + Add event. Apollo joins multiple trigger events with OR.
- If Data source is available, select Apollo or Webhook.
- Click Done.
Available events depend on the workflow target and the features enabled for your team.
You have now configured the workflow trigger.
A scheduled workflow uses your device's timezone for its start time. It doesn't use the timezone of the people or companies enrolled in the workflow.
Configure Enrollment Criteria
Enrollment criteria determine which records Apollo processes when the workflow runs. Add filters to narrow enrollment to records that meet the conditions relevant to your workflow.
To configure enrollment criteria:
- Launch Apollo, then click Workflows.
- Select the workflow, then click Edit workflow.
- Click the trigger block on the workflow canvas.
- Under Enrollment criteria, click Add filters. If the workflow already has filters, click Edit filters.
- In the Filter configuration window, add the filters and values that records must meet to enter the workflow. Review the selected filters and the Results count to confirm that the criteria target the intended records.
- Click Save filters.
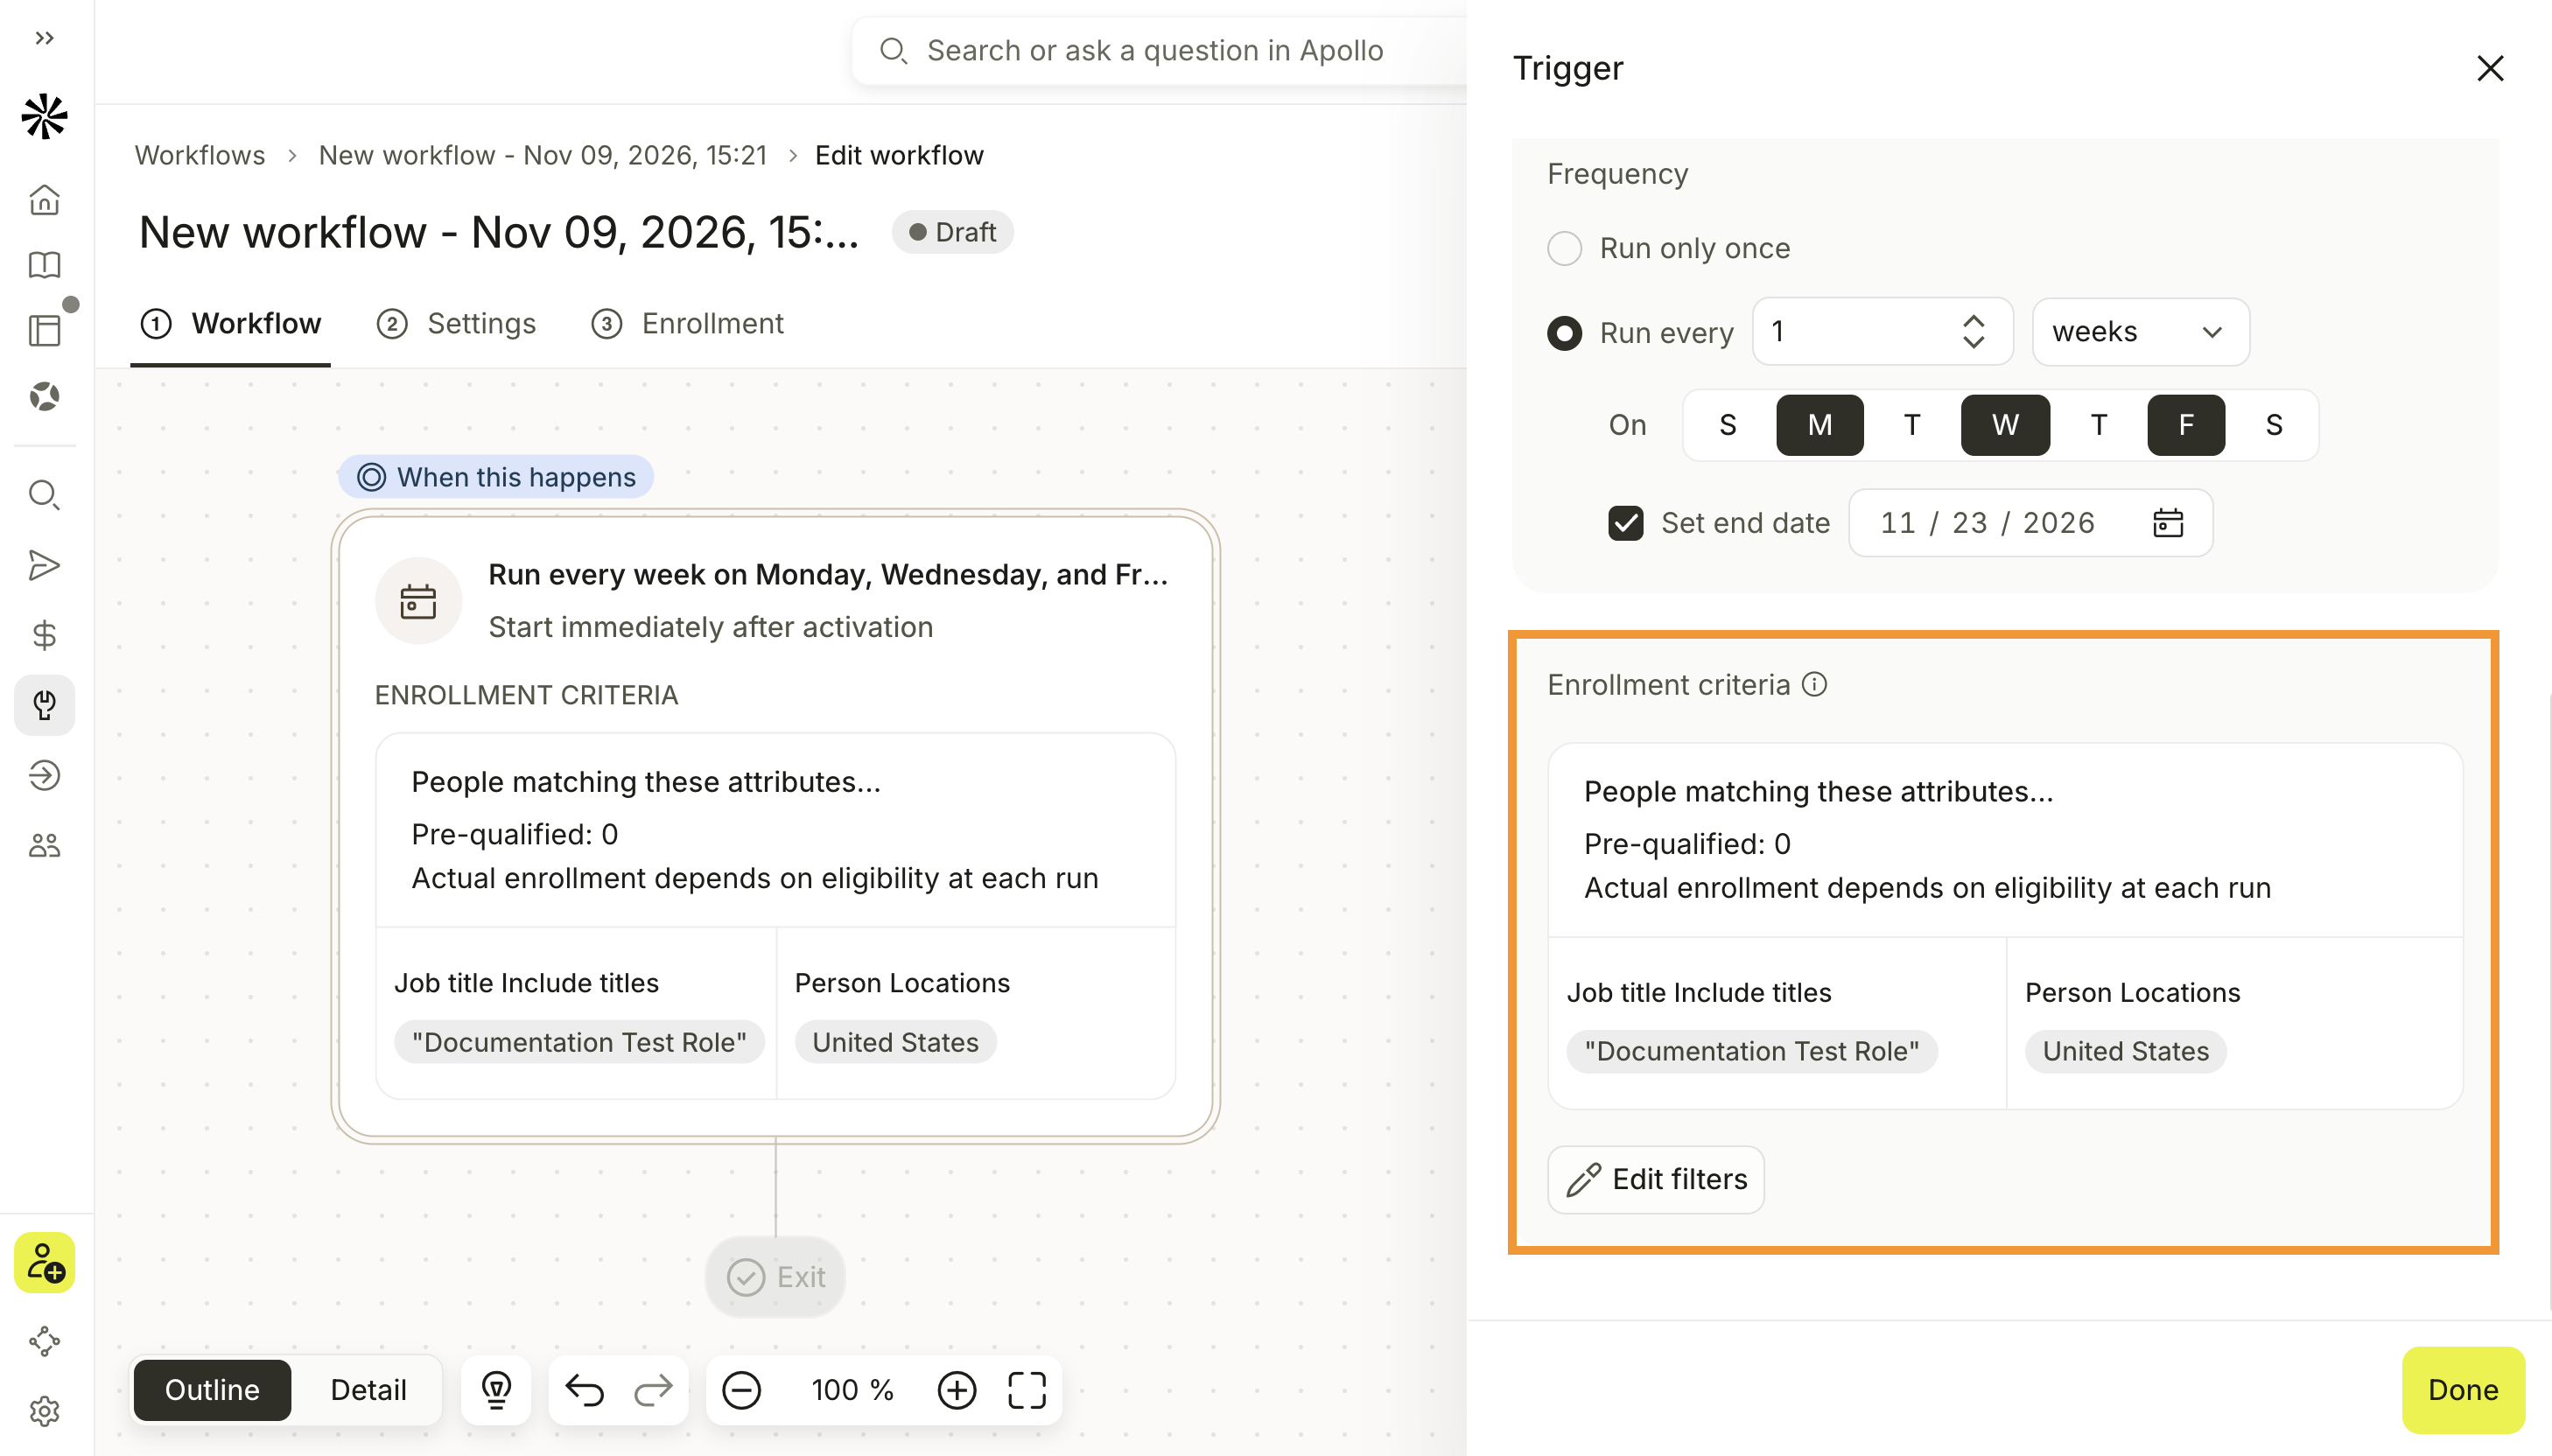
- In the Trigger panel, click Done.
You have now configured the workflow enrollment criteria.
The Enrollment tab displays workflow runs, enrolled records, processing statuses, and credit usage. It doesn't contain the controls for editing enrollment criteria.
Add Workflow Logic
Use rules to control how records move through the workflow. You can evaluate records against conditions, divide them between different paths, pause them before the next step, or end a workflow path.
Choose a rule based on how you want Apollo to route or process records.
| Rule | When to use it |
|---|---|
| True / false branch | Separate records into two paths based on whether they meet the filters you configure. |
| Multi-split branch | Create multiple paths for records that meet different sets of filters. |
| Traffic branch | Distribute records between multiple paths according to the percentages you configure. |
| Delay | Pause records for a specific amount of time before Apollo continues to the next block. |
| Exit | End a workflow path. You can only add Exit at the end of a branch. |
You can also use Research with AI and Qualify records to research or evaluate records before routing them to later workflow steps. Access to these AI agents depends on your permissions and enabled features.
To add workflow logic:
- Launch Apollo, then click Workflows.
- Select the workflow, then click Edit workflow.
-
Add a block using one of the following methods:
- Open Build, then click a block or drag it onto a line in the workflow.
- Hover over a line between blocks, then click the + icon labeled Add block.
- Click an Add condition placeholder on the workflow canvas.
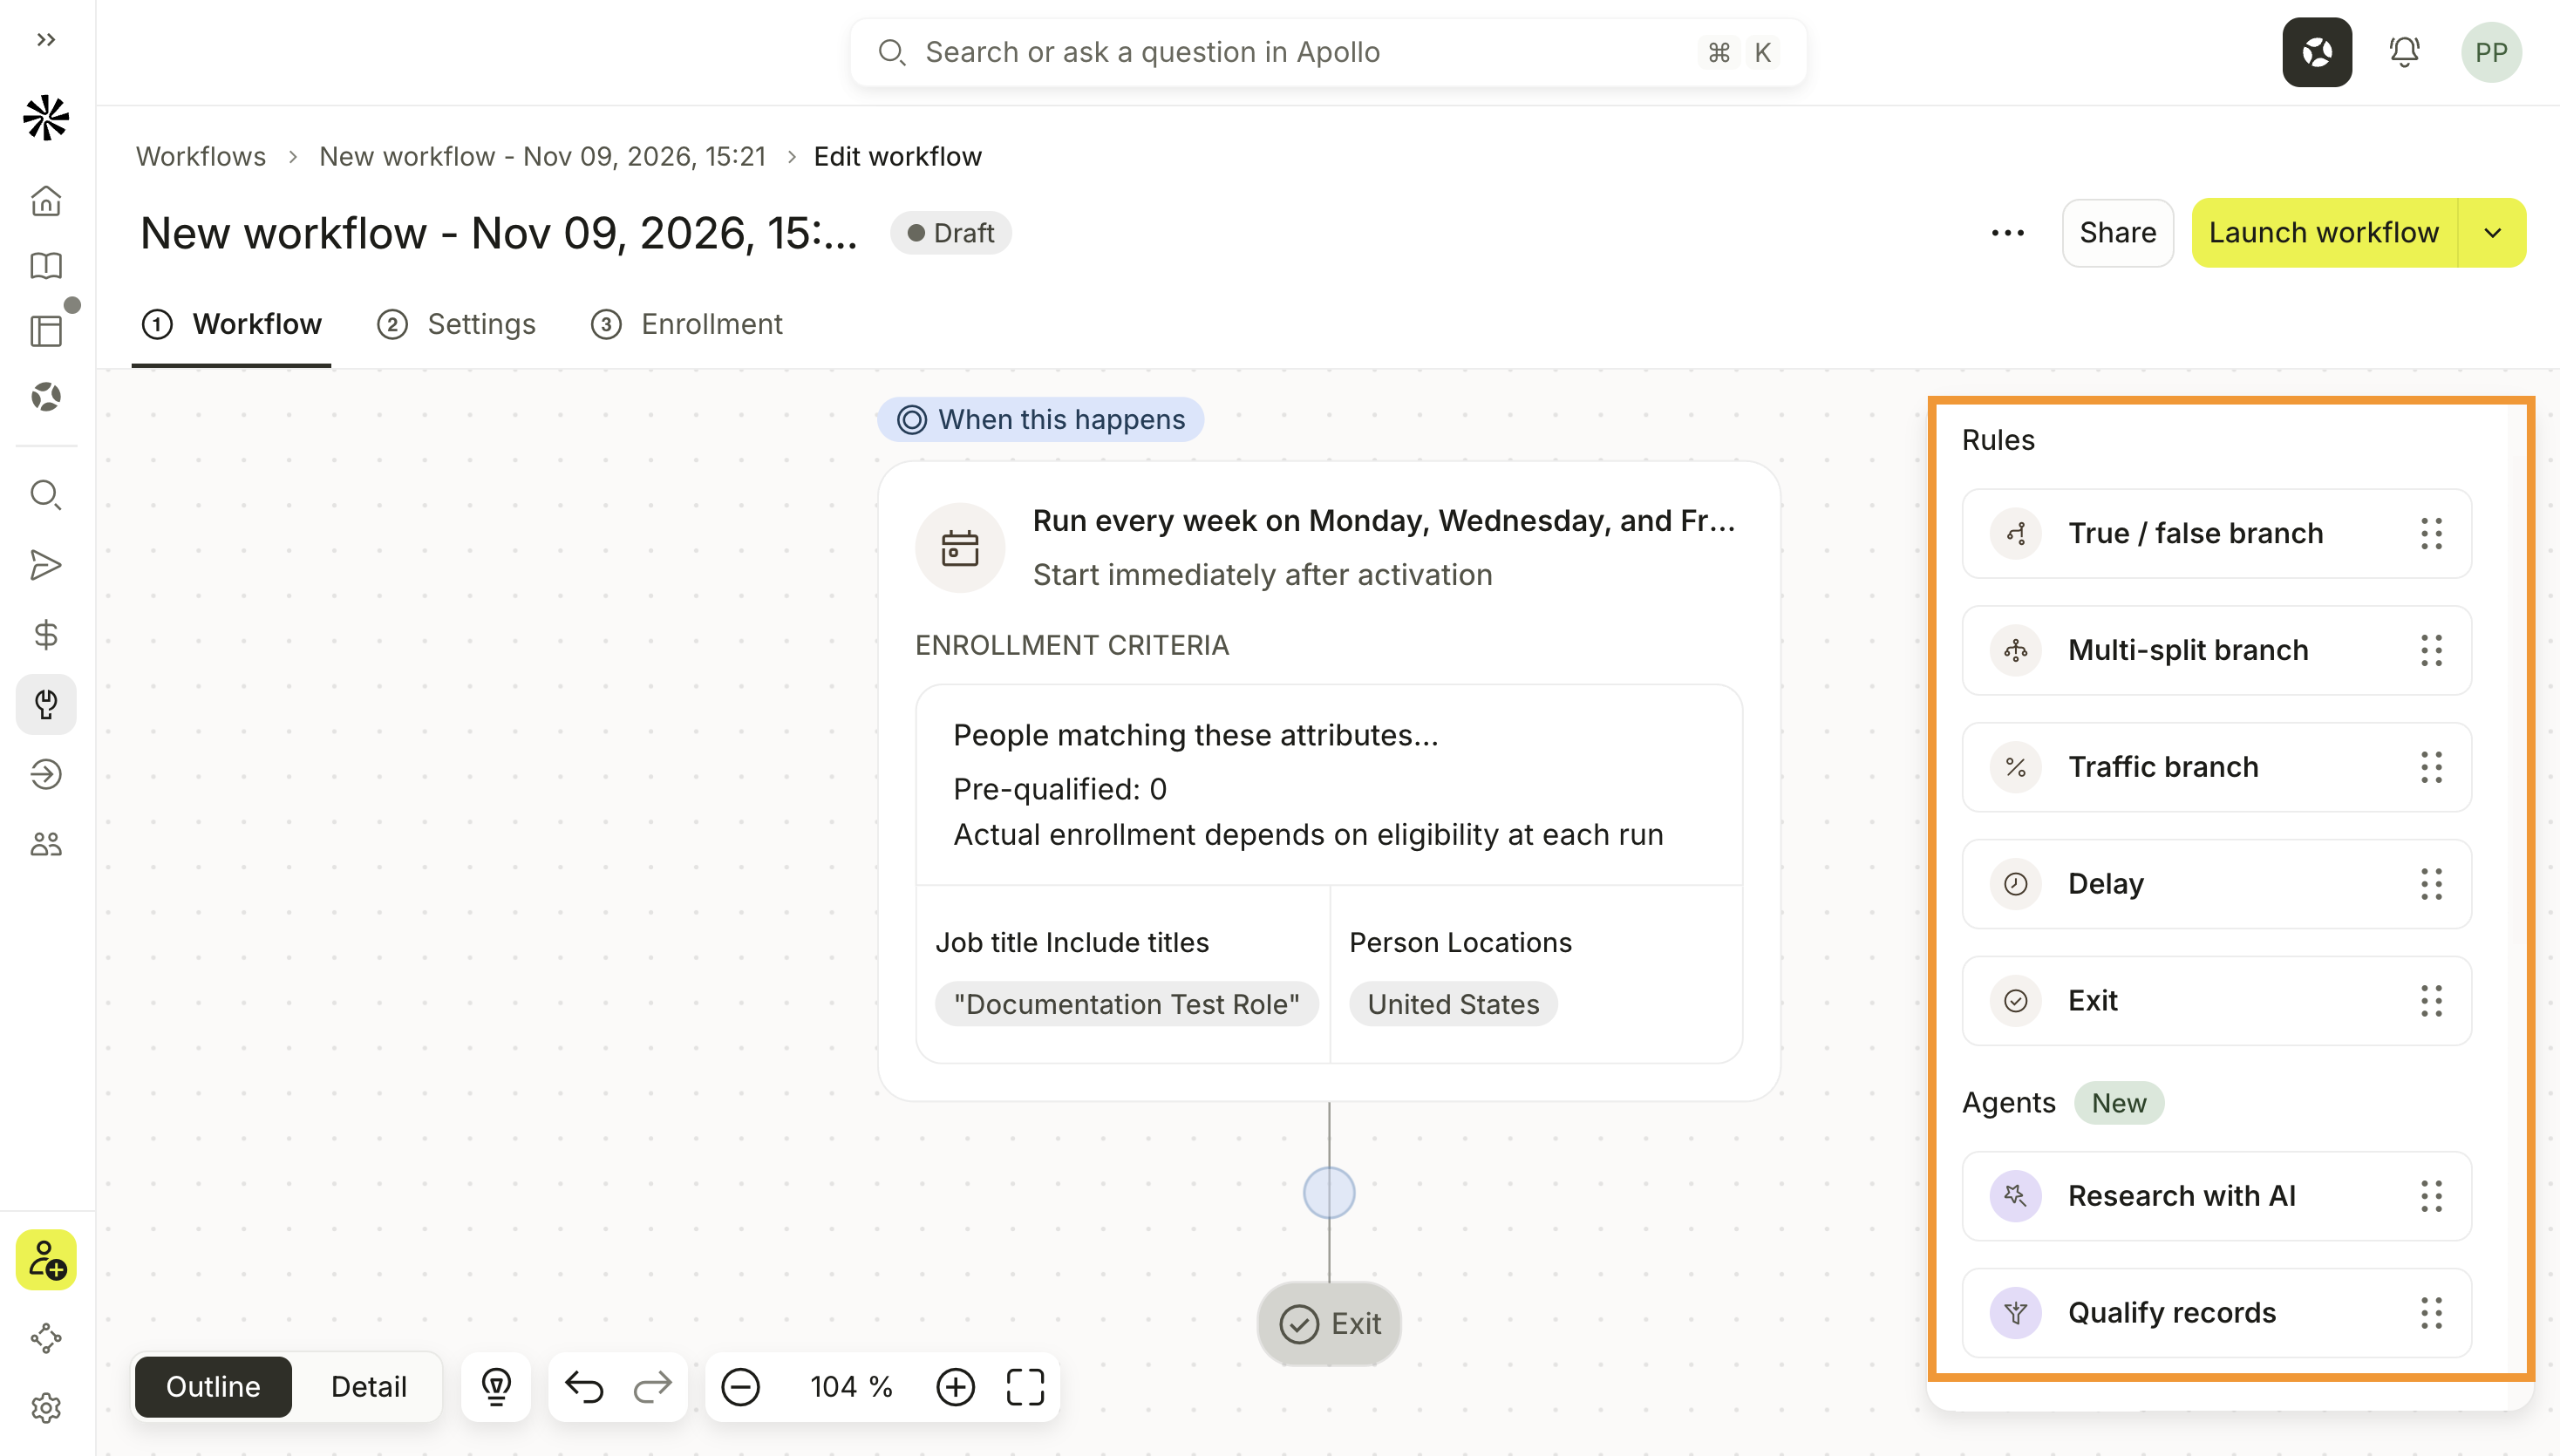
- Select the rule you want to add.
- Click the new rule block on the workflow canvas.
- Configure the rule in the side panel.
- Click Done.
You have now added workflow logic.
Add Workflow Actions
Actions put the workflow into motion after records meet the trigger and pass through any configured rules. Use actions to organize records, engage prospects, enrich data, assign follow-up tasks, update fields, notify your team, or pass information to another tool.
The actions available to you depend on the workflow target, your permissions, and the features enabled for your team. Use the following categories to choose what the workflow should do next.
| Action category | What you can automate |
|---|---|
| Integrations (Beta) | Complete actions in a connected third-party tool. Check out Available Workflow Integrations and Actions for supported integrations. |
| Manage Sequences | Add people to or remove people from a sequence. |
| Manage lists | Add records to or remove records from a list. |
| Manage deals | Create or update deals. |
| Enrich data | Enrich people or company data. |
| Assign manual tasks | Assign an outreach email, phone call, LinkedIn interaction, or action item. |
| Update contact/account | Update contact or account information. |
| Send Email | Send an email from the workflow. |
| Send Notifications | Notify your team about a workflow event. |
| Send webhook | Send workflow data to an external endpoint. |
Some actions use credits. Apollo displays credit information on applicable workflow blocks before you launch the workflow. To monitor usage across your team, check out Review Credit Usage in Apollo.
To add a workflow action:
- Launch Apollo, then click Workflows.
- Select the workflow, then click Edit workflow.
-
Add a block using one of the following methods:
- Open Build, then click an action or drag it onto a line in the workflow.
- Hover over a line between blocks, then click the + icon labeled Add block.
- Click an Add action placeholder on the workflow canvas.
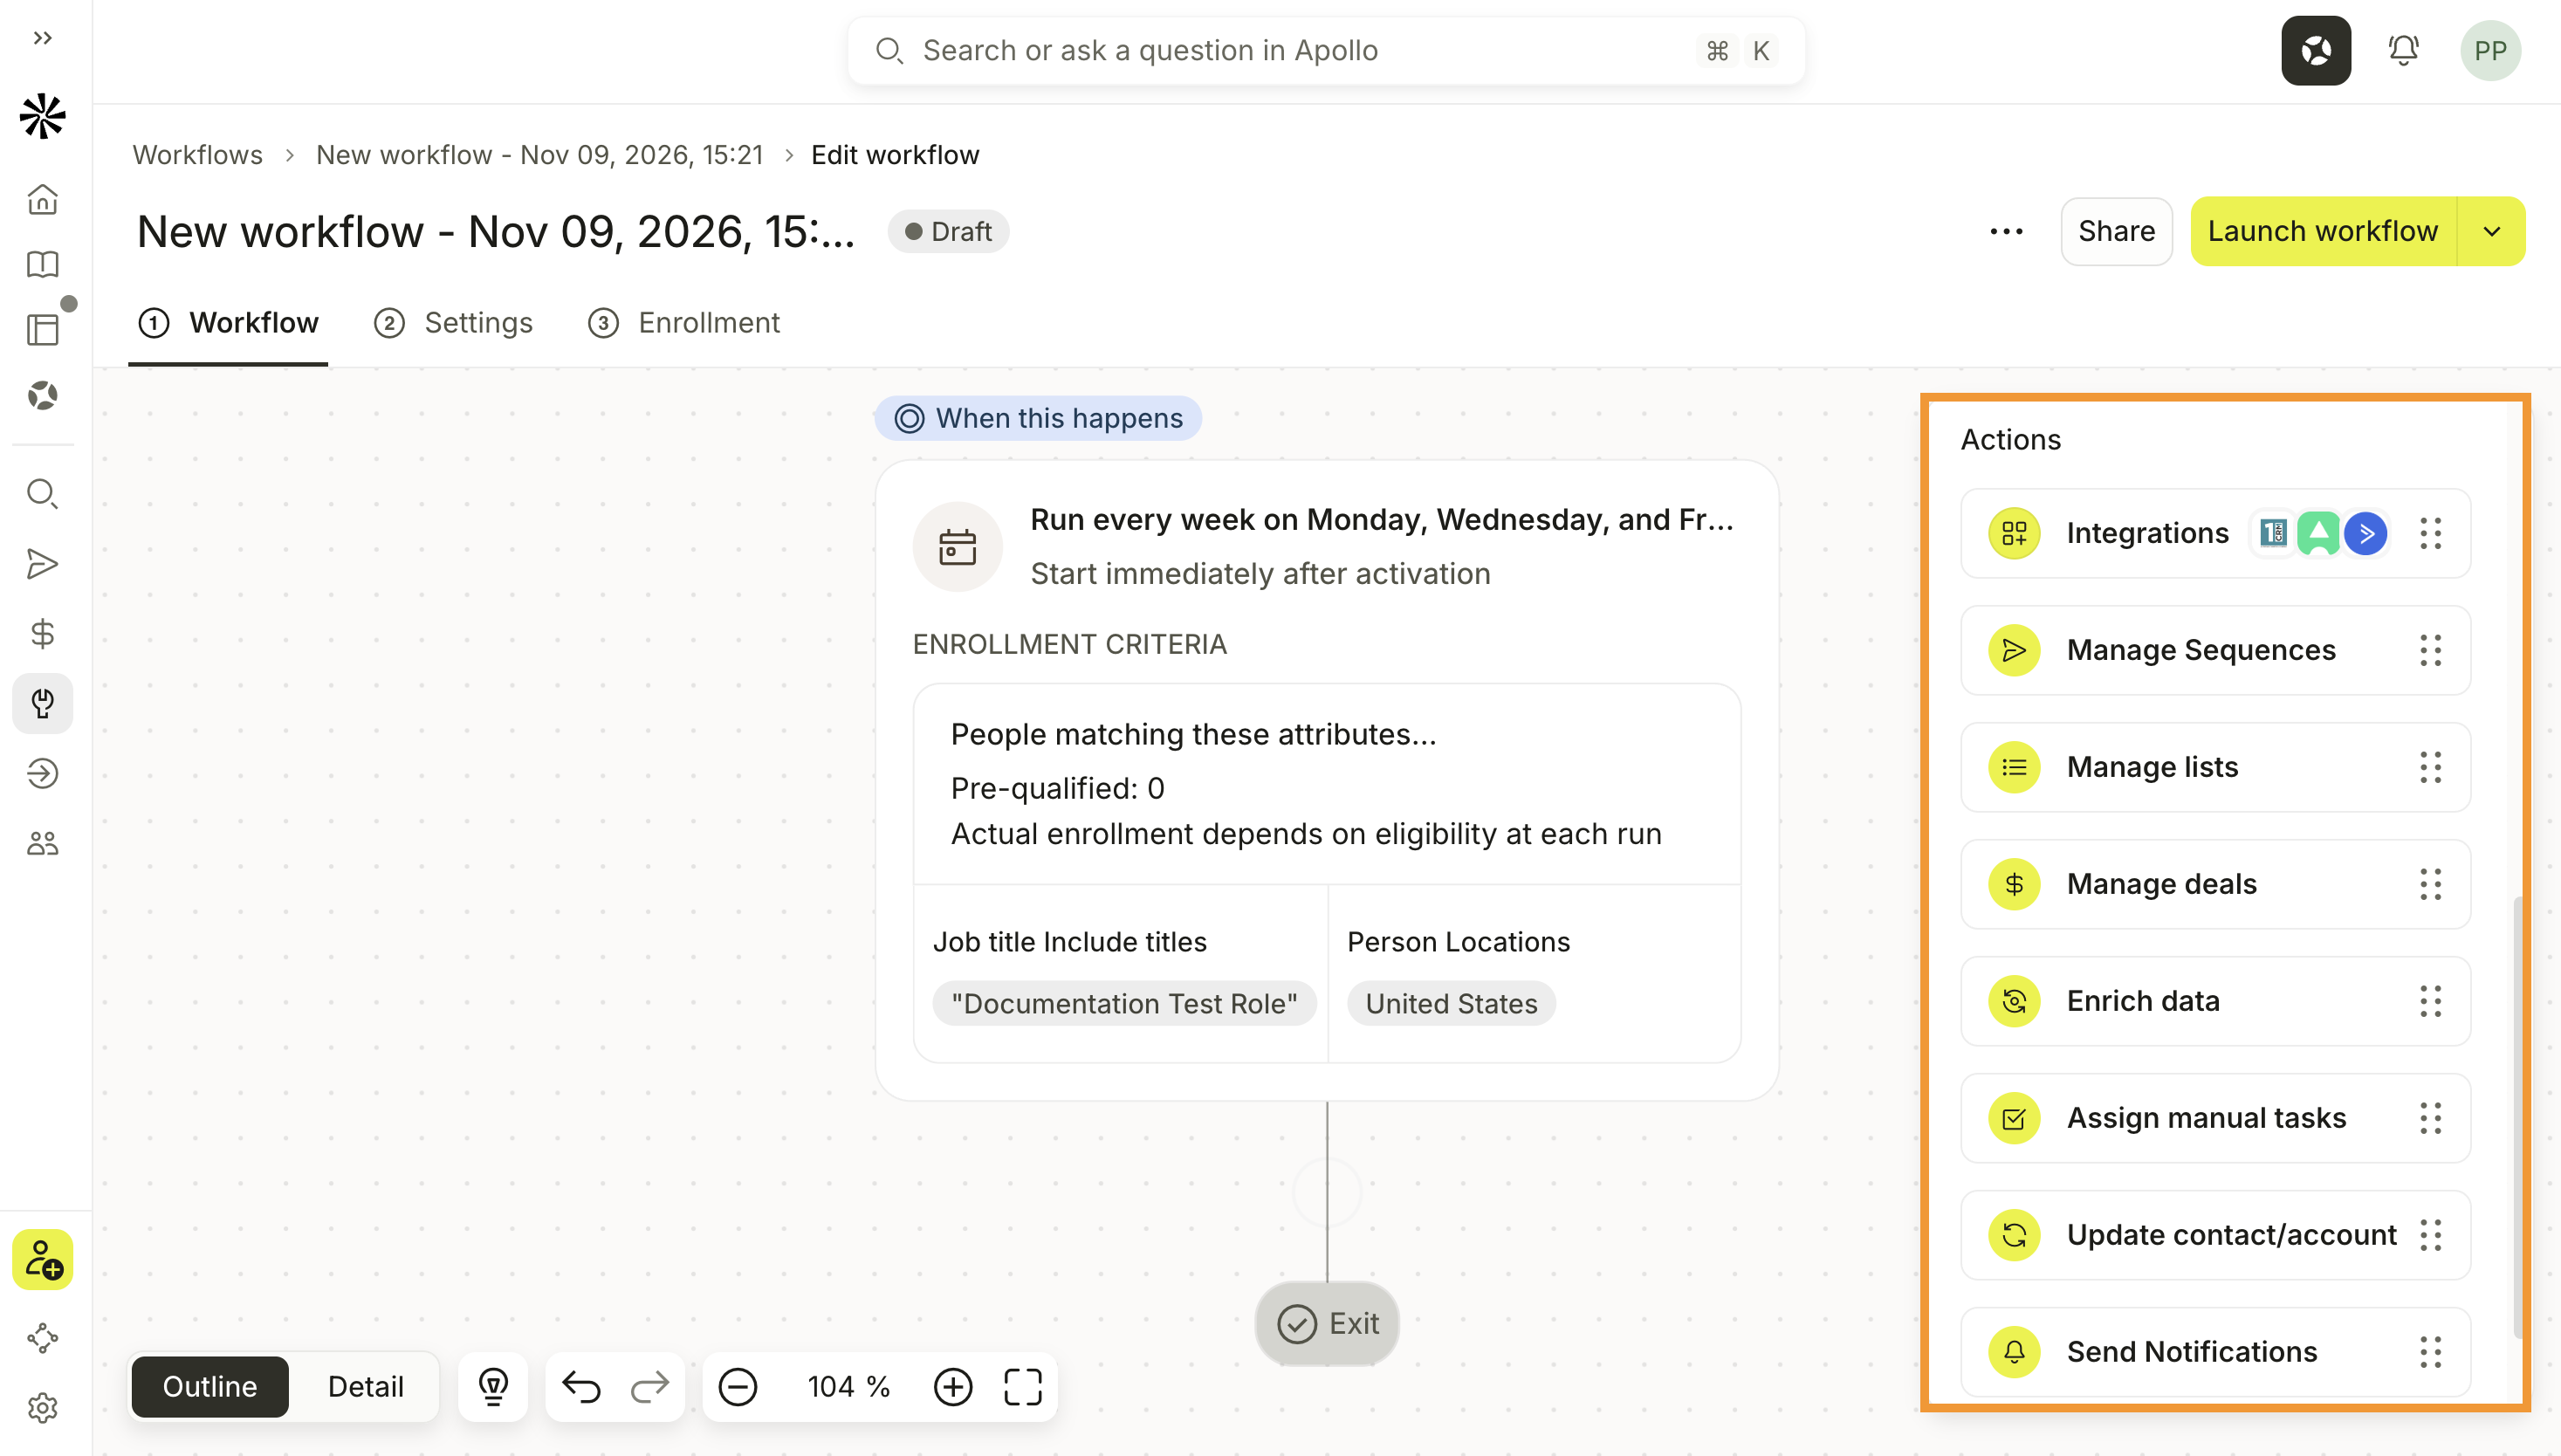
- Select the action you want to add.
- Click the new action block on the workflow canvas.
- In the Action panel, select the operation Apollo should complete and configure any required records, lists, sequences, assignees, messages, or connected tools.
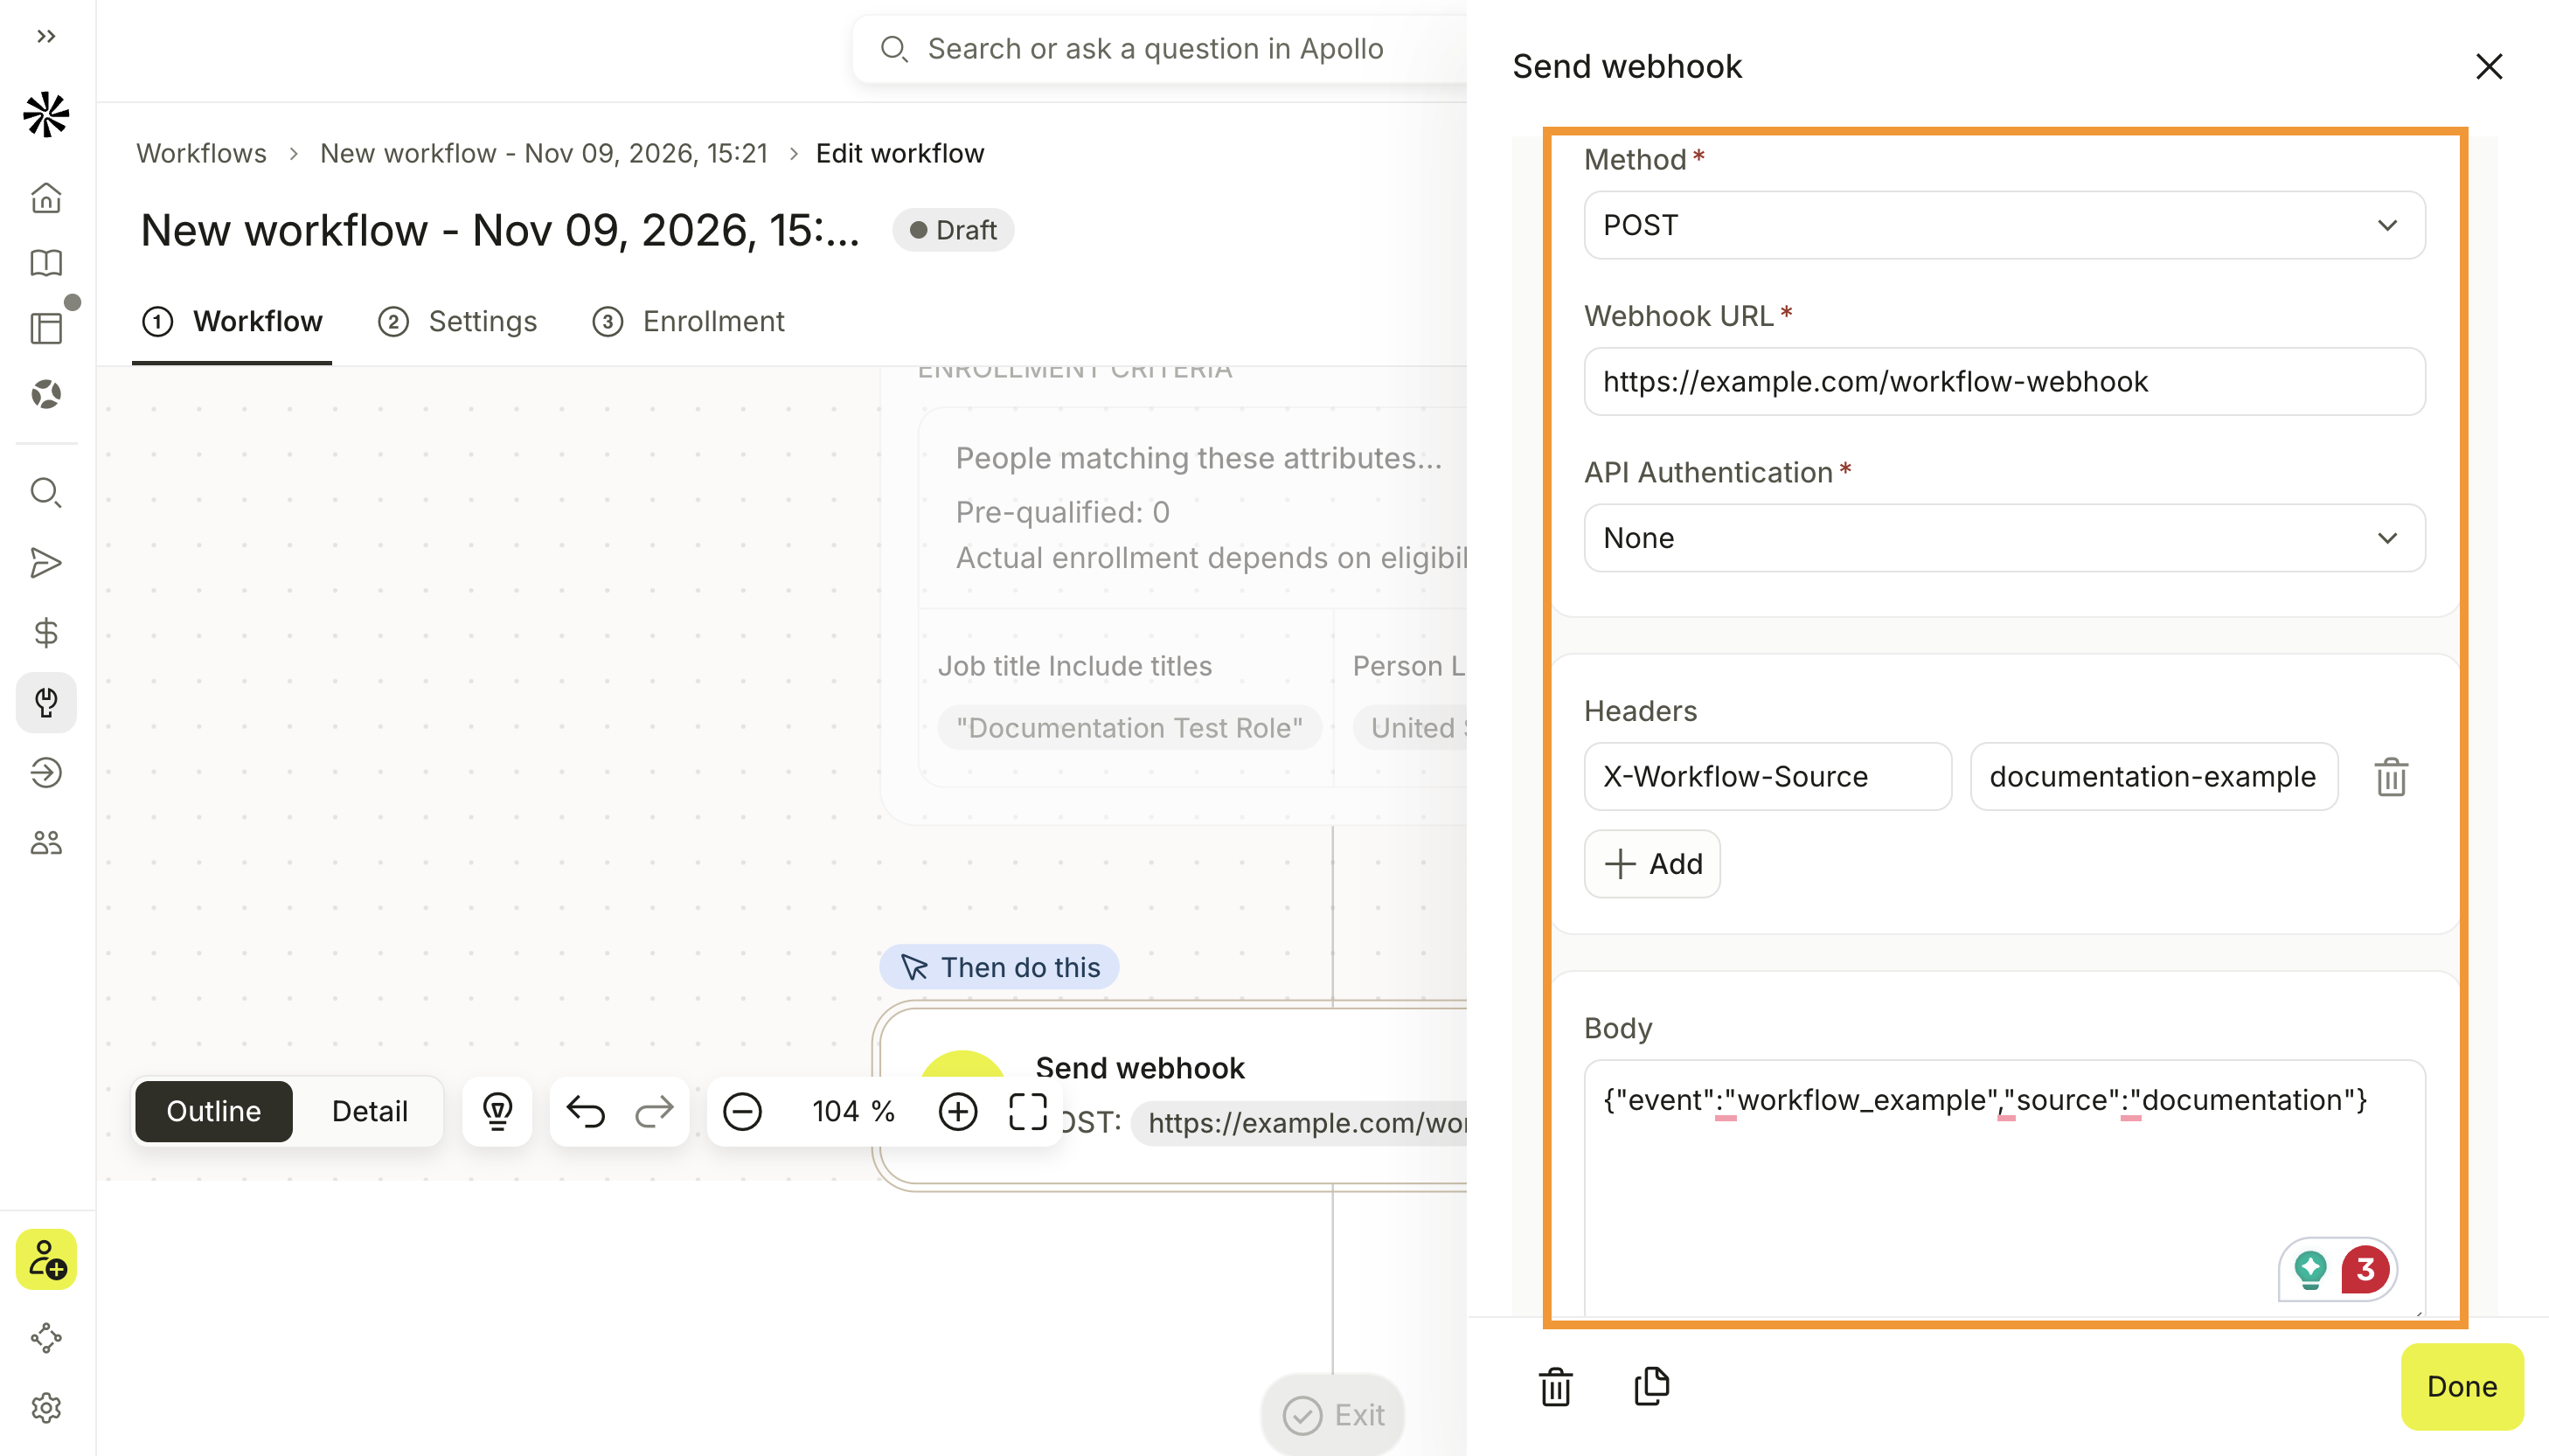
- Click Done.
You have now added and configured a workflow action.
Add configuration is a warning on an incomplete or invalid block, not a button. Click the block, complete the required fields in the side panel, then click Done.
To move, copy, or remove an existing block, select the block and click Move, Clone, or Delete.
FAQs
Frequently asked questions | ||
| Can I change the workflow run type? | Why can't I find a specific rule or action? | What happens if I close a block without saving? |
Can I change the workflow run type?
Yes. You can switch between a scheduled trigger and an event trigger. If the workflow includes a Send Notifications action, changing the run type resets the notification message.
Why can't I find a specific rule or action?
Available blocks depend on the workflow target, your permissions, and the features enabled for your team. Company and deal workflows don't support every action available for people workflows.
What happens if I close a block without saving?
Apollo displays You have unsaved changes. Click Stay to return to the block and save your changes, or click Leave to discard them.
Next Steps
Keep building and managing your workflows with these resources: