Overview
The website visitors feature lets you track the contacts and accounts that have visited your websites. This means you can uncover the names of prospects that have generated activity on the domains you choose to track and filter them based on when they visited and how engaged they are in the buying process.
Using Apollo to track your website visitors reduces the need for your sales team to coordinate with your IT and marketing teams to understand whether prospects are actively engaged with your websites. You can also use more search filters to further reduce the noise in your visitors data and target only your ideal prospects based on company information.
Check out the following sections to set up visitor tracking on your website.
Set Up Tracking
Add Website Domains
All Apollo plans support up to three domains for website visitor tracking. Need more? Get the Inbound add-on to track up to 100 domains.
If you downgrade to a Free plan, Apollo retains the first three active domains you added for website visitor tracking.
To add the websites you want to track and find the Apollo code snippet:
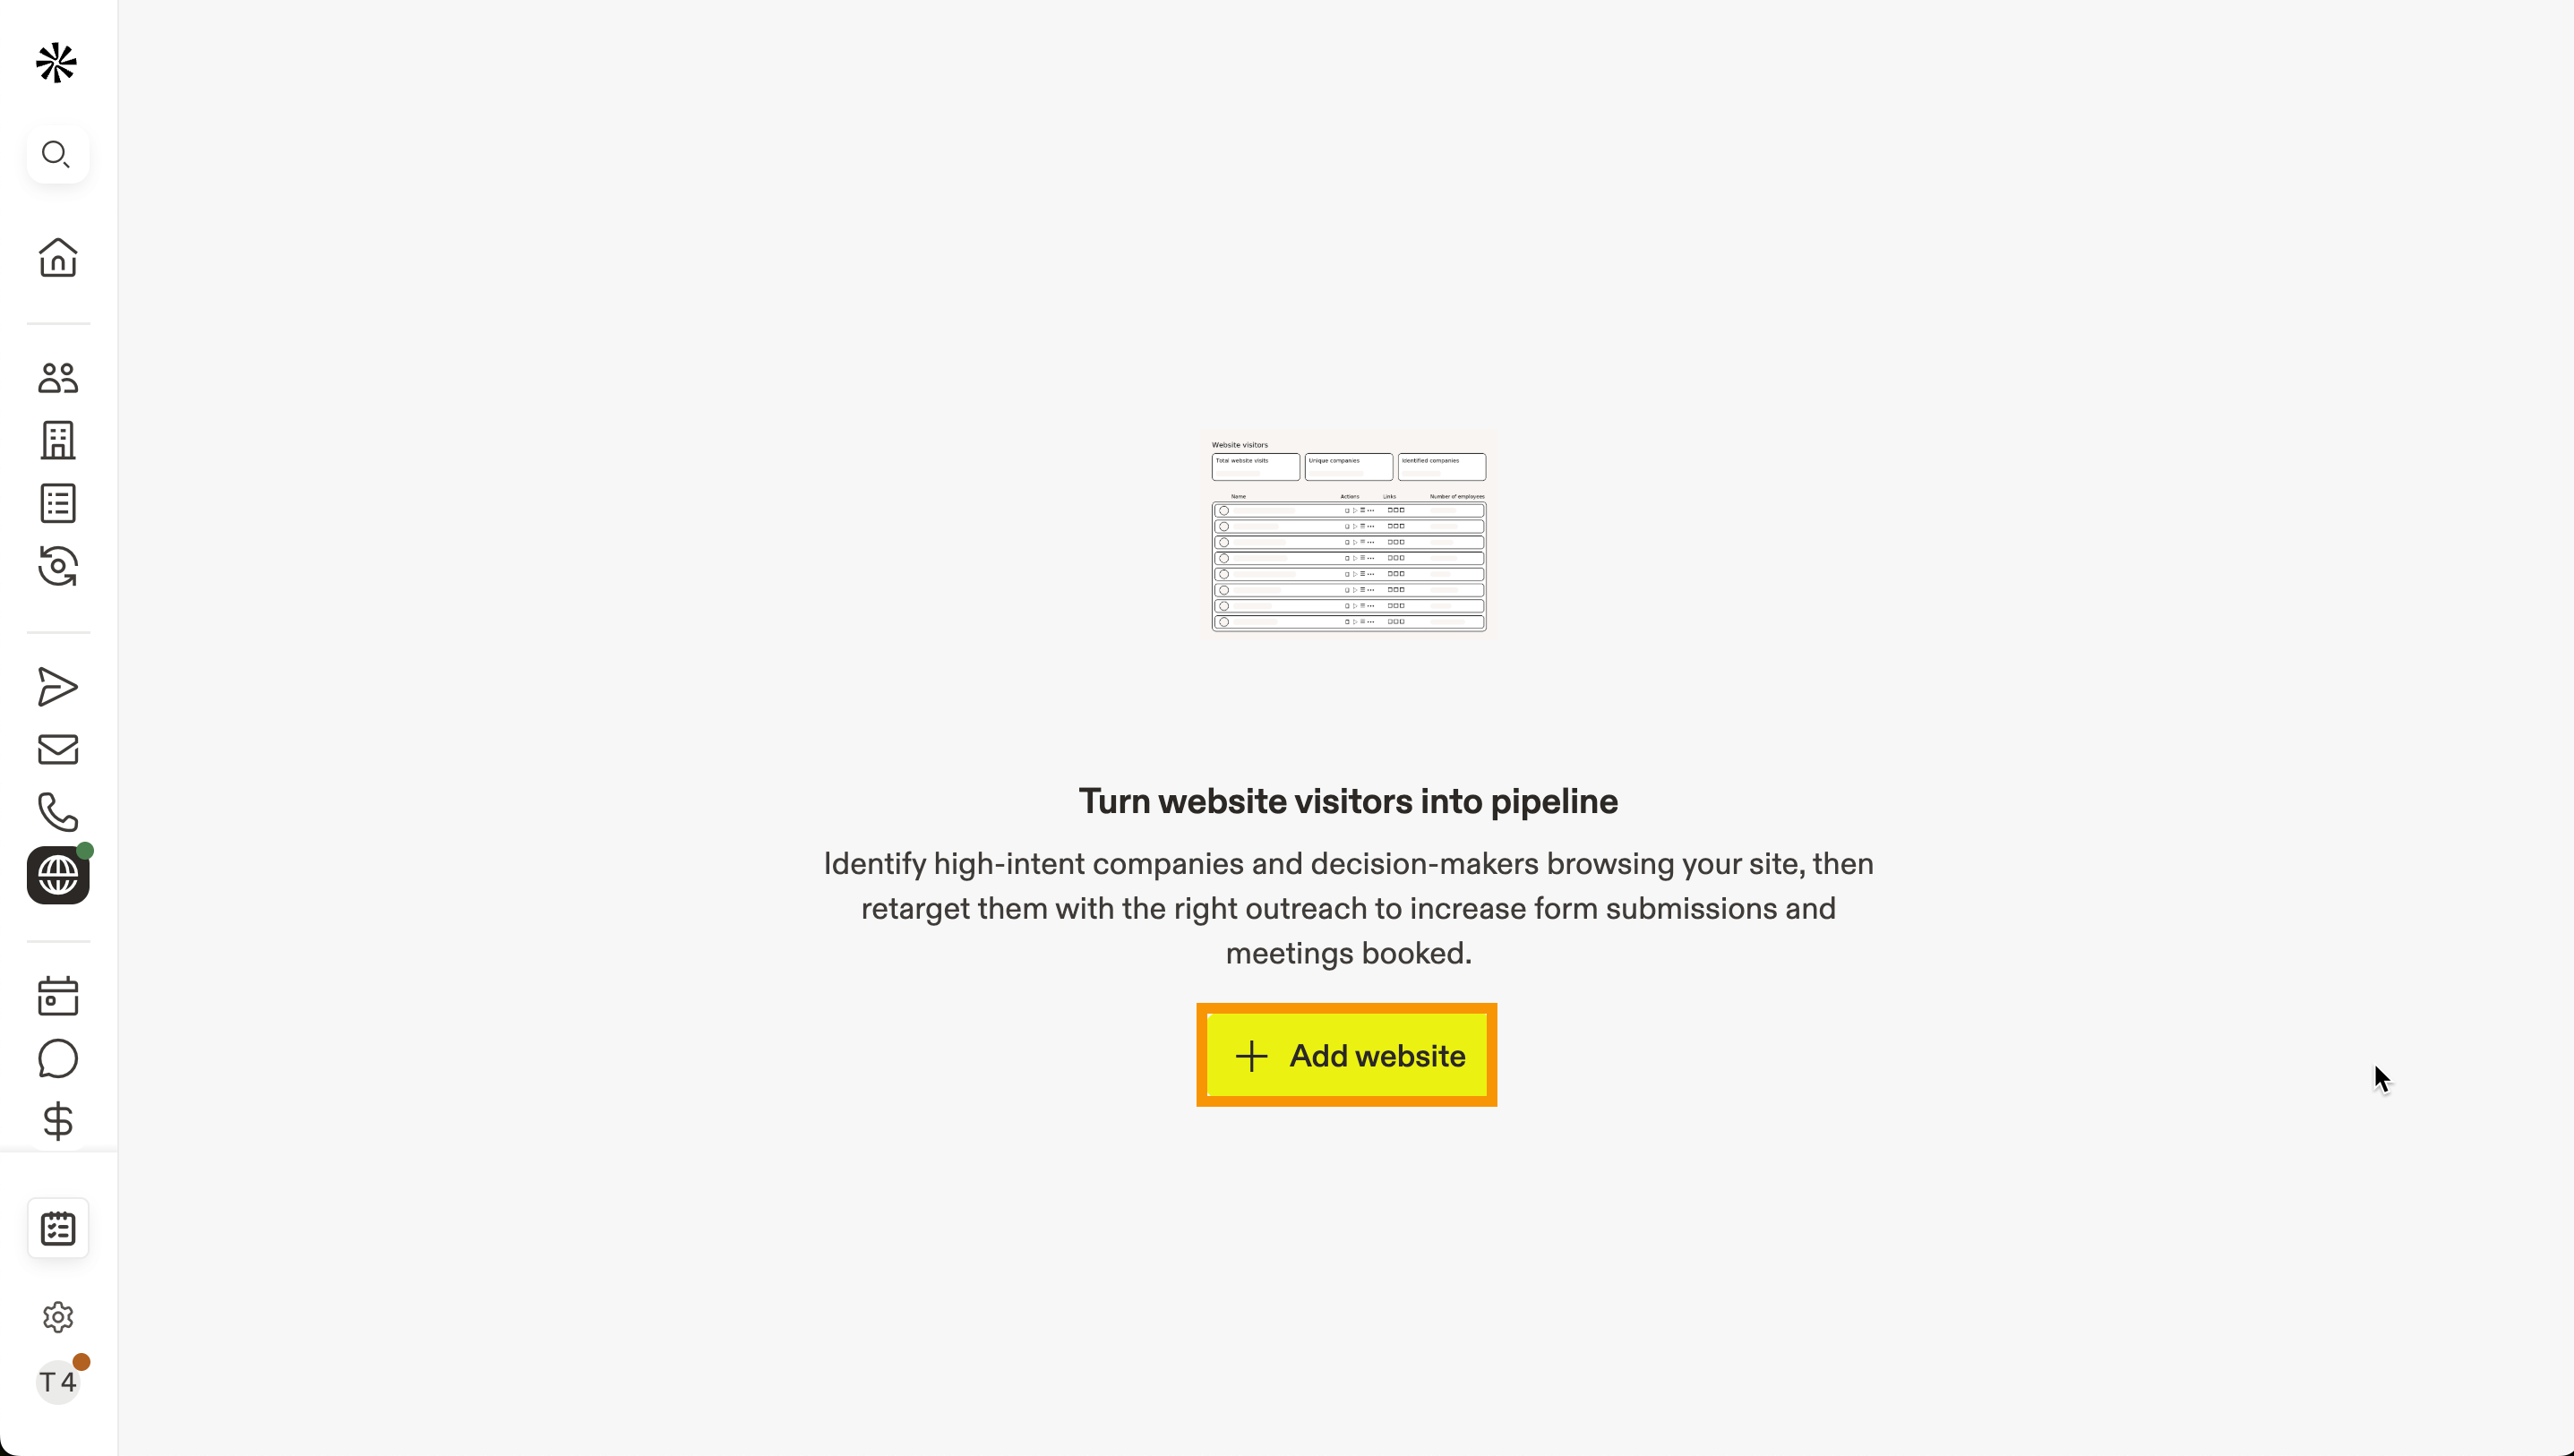
- In Apollo, click Website visitors.
Alternatively, click Settings > Ideal customer profile > Website visitors. - Click Add website.
- Enter the URL for the website where you want to track traffic. You can also add subdomains to track.
- Click Company to identify companies or Company & person to identify companies and U.S.-based contacts who visit your website, then acknowledge the cookie and data collection policy.
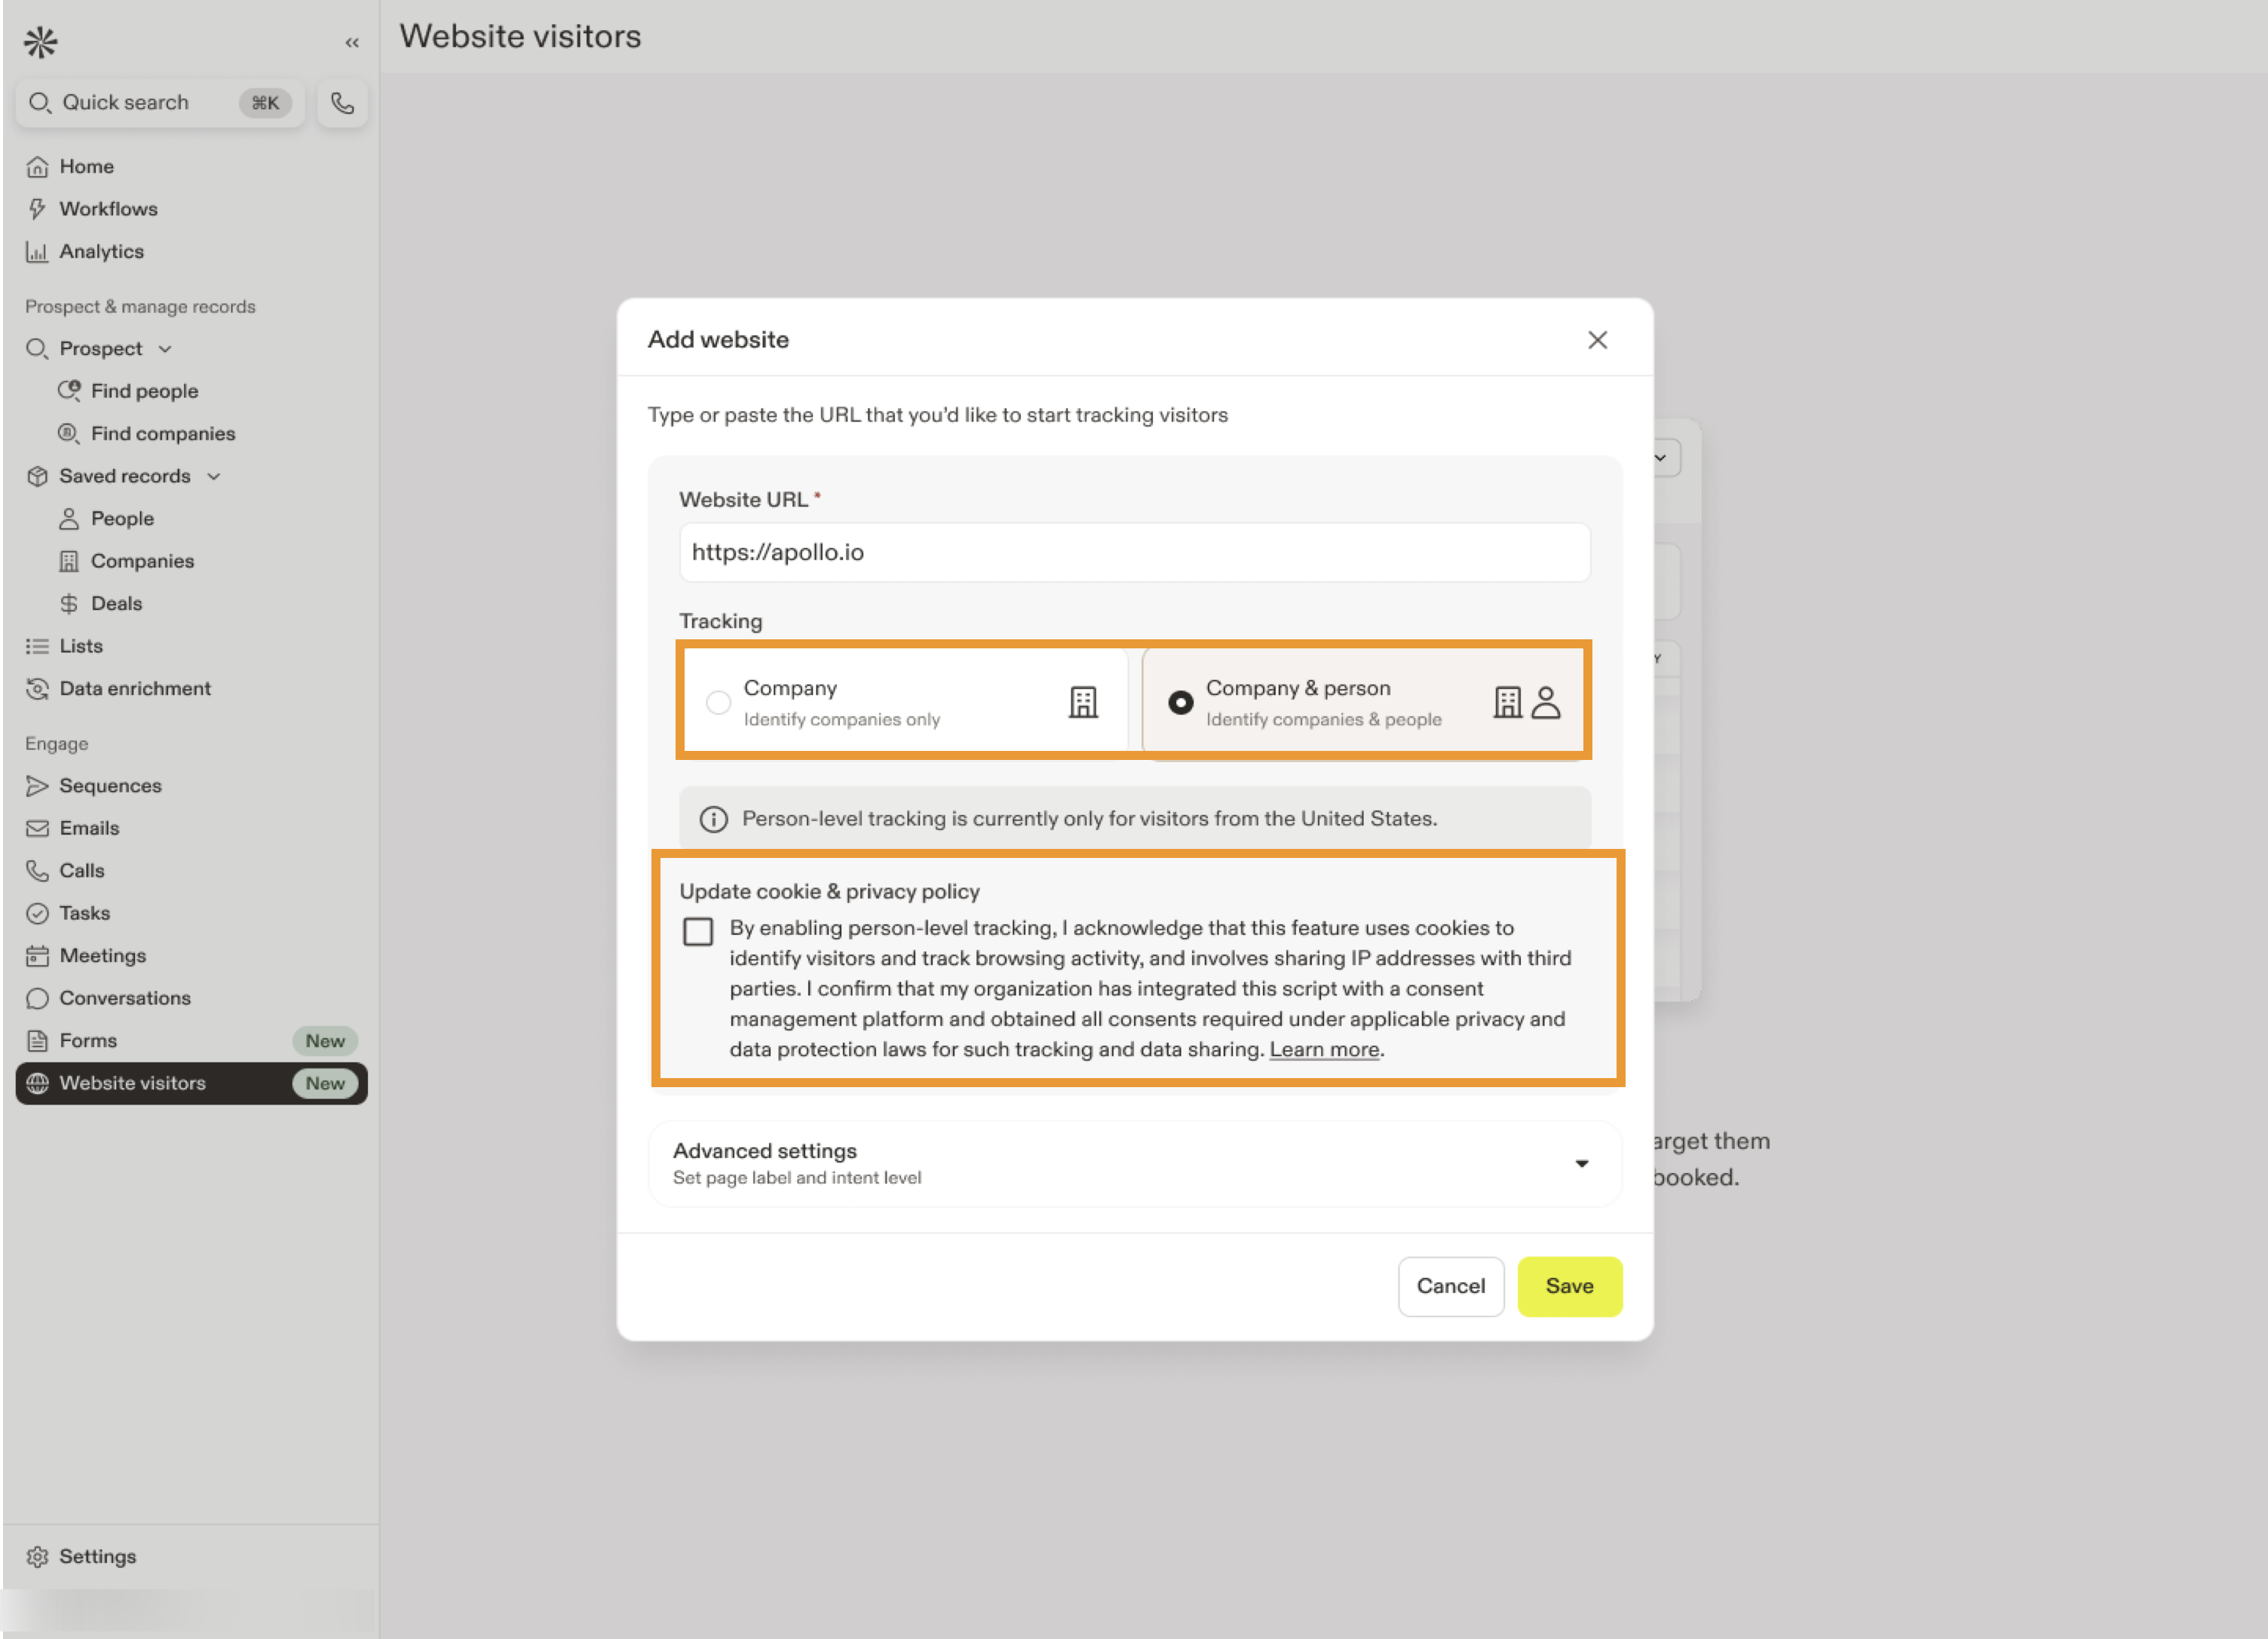
Before enabling contact-level tracking, confirm that your organization has implemented appropriate cookie and data collection notices and obtained any legally required consent to share visitor data with third parties. This may be included in your website's cookie policy, cookie banner, or other privacy documentation.
- (Optional) To set a scoring criteria for website visitors, click Advanced Intent Settings, then click Add new. These define the importance of visits to specific pages and help you identify prospects showing strong interest.
For example, if visits to your pricing page indicate strong interest in your product, set the Page URL to your pricing page and assign the Intent level to High. This helps you prioritize prospects that show clear buying intent.

- Click Save.
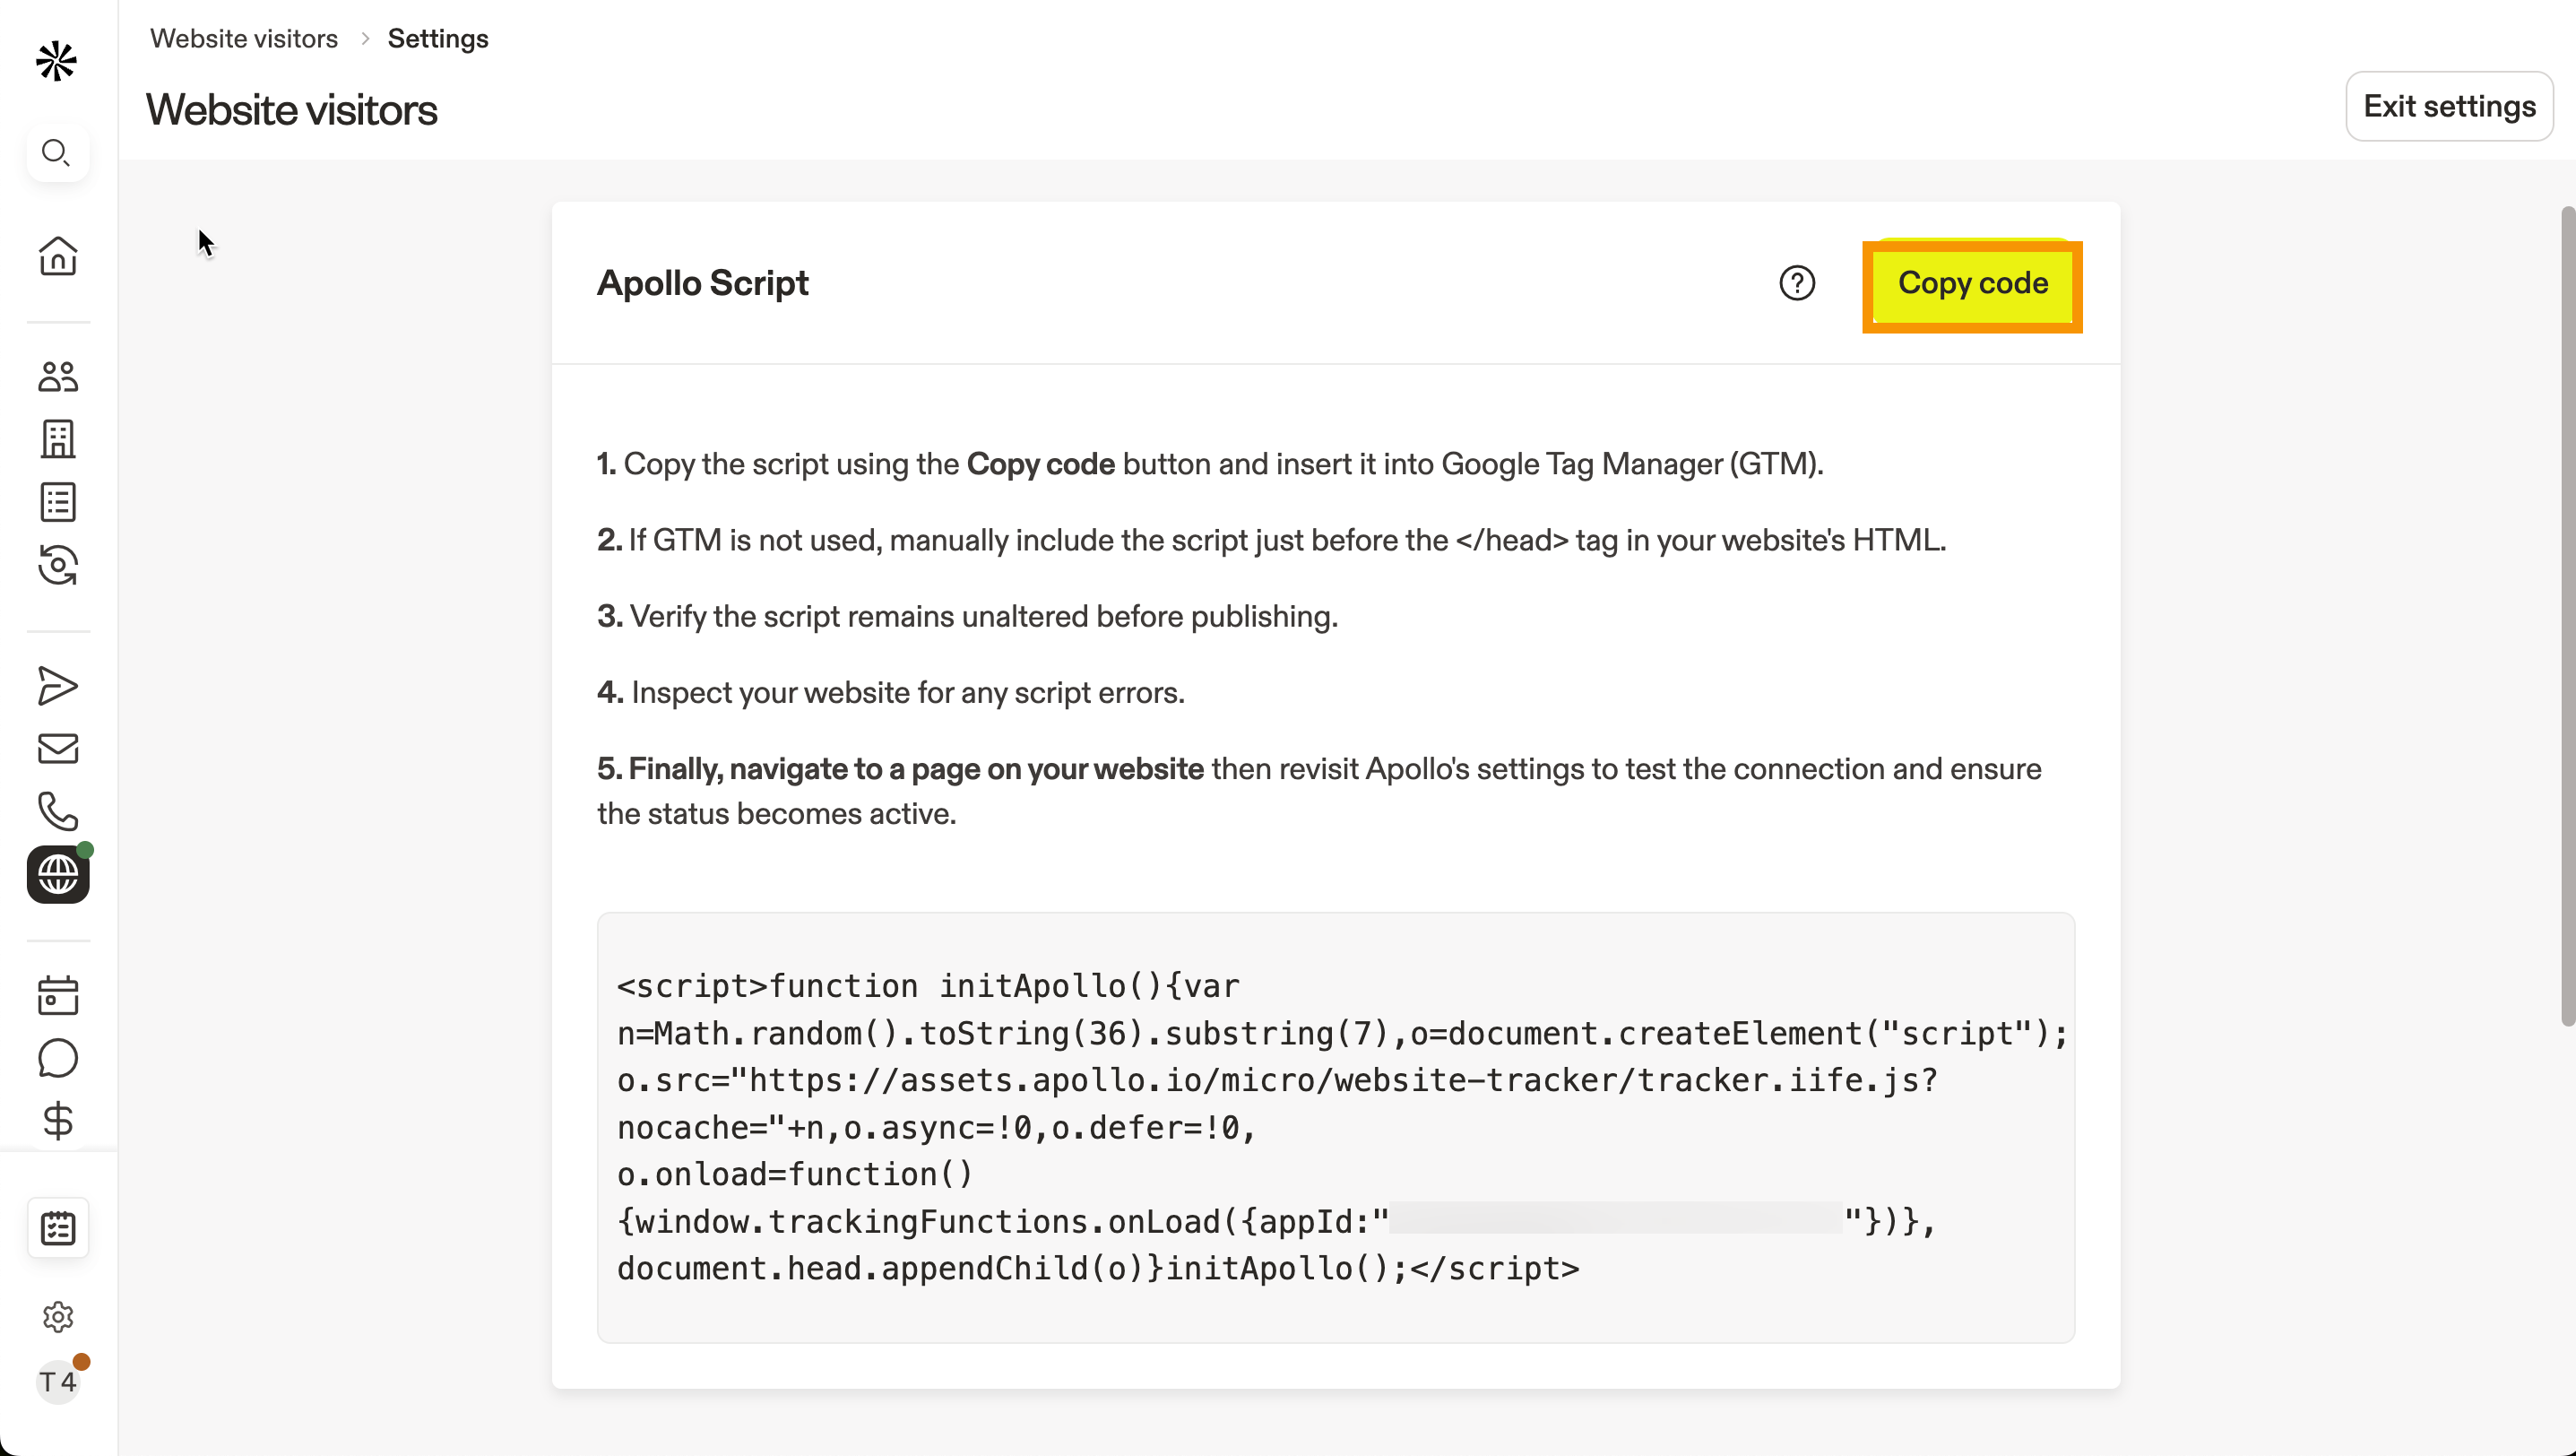
- Apollo shows you the script to track your website visitors. Click Copy Code. You'll add this code to your website.
Apollo uses the same website visitor script for both contact and company-level tracking. To track only companies without contact-level tracking, you can enable or disable it in Apollo without adjusting the script on your website.
- (Optional) To edit or disable tracking for your domains, click Website Visitors > Settings, then click Edit to edit or Delete to disable tracking for the domain.
- (Optional) To add more domains, click Add domain and repeat the process.
Do not attempt to copy or type the code manually. If you're not the one adding the code to your website, send the copied code to the personnel responsible.
You've now added the websites to track and copied the tracking script. Proceed to the next section to add the code to your website.
Add the JavaScript Snippet to Your Website
There are two options for adding the JavaScript snippet to your website: adding it directly to your website's code, or using Google Tag Manager. If your website is a single-page app, you may need to complete additional setup to track route changes.
Add the JavaScript snippet generated in Apollo to your website's code.
The snippet can either be inserted between the head tags of a website's HTML, or in the code for a specific page you want to track. Include the snippet for every page you want to track.
If you're new to Google Tag Manager, check out Google's Tag Manager documentation to get started.
To use Google Tag Manager to add the JavaScript snippet generated in Apollo:
- Go to Google Tag Manager and log in to your account. Select the workspace you want to use to manage this tag.
- Click Tags > New to add a new tag.

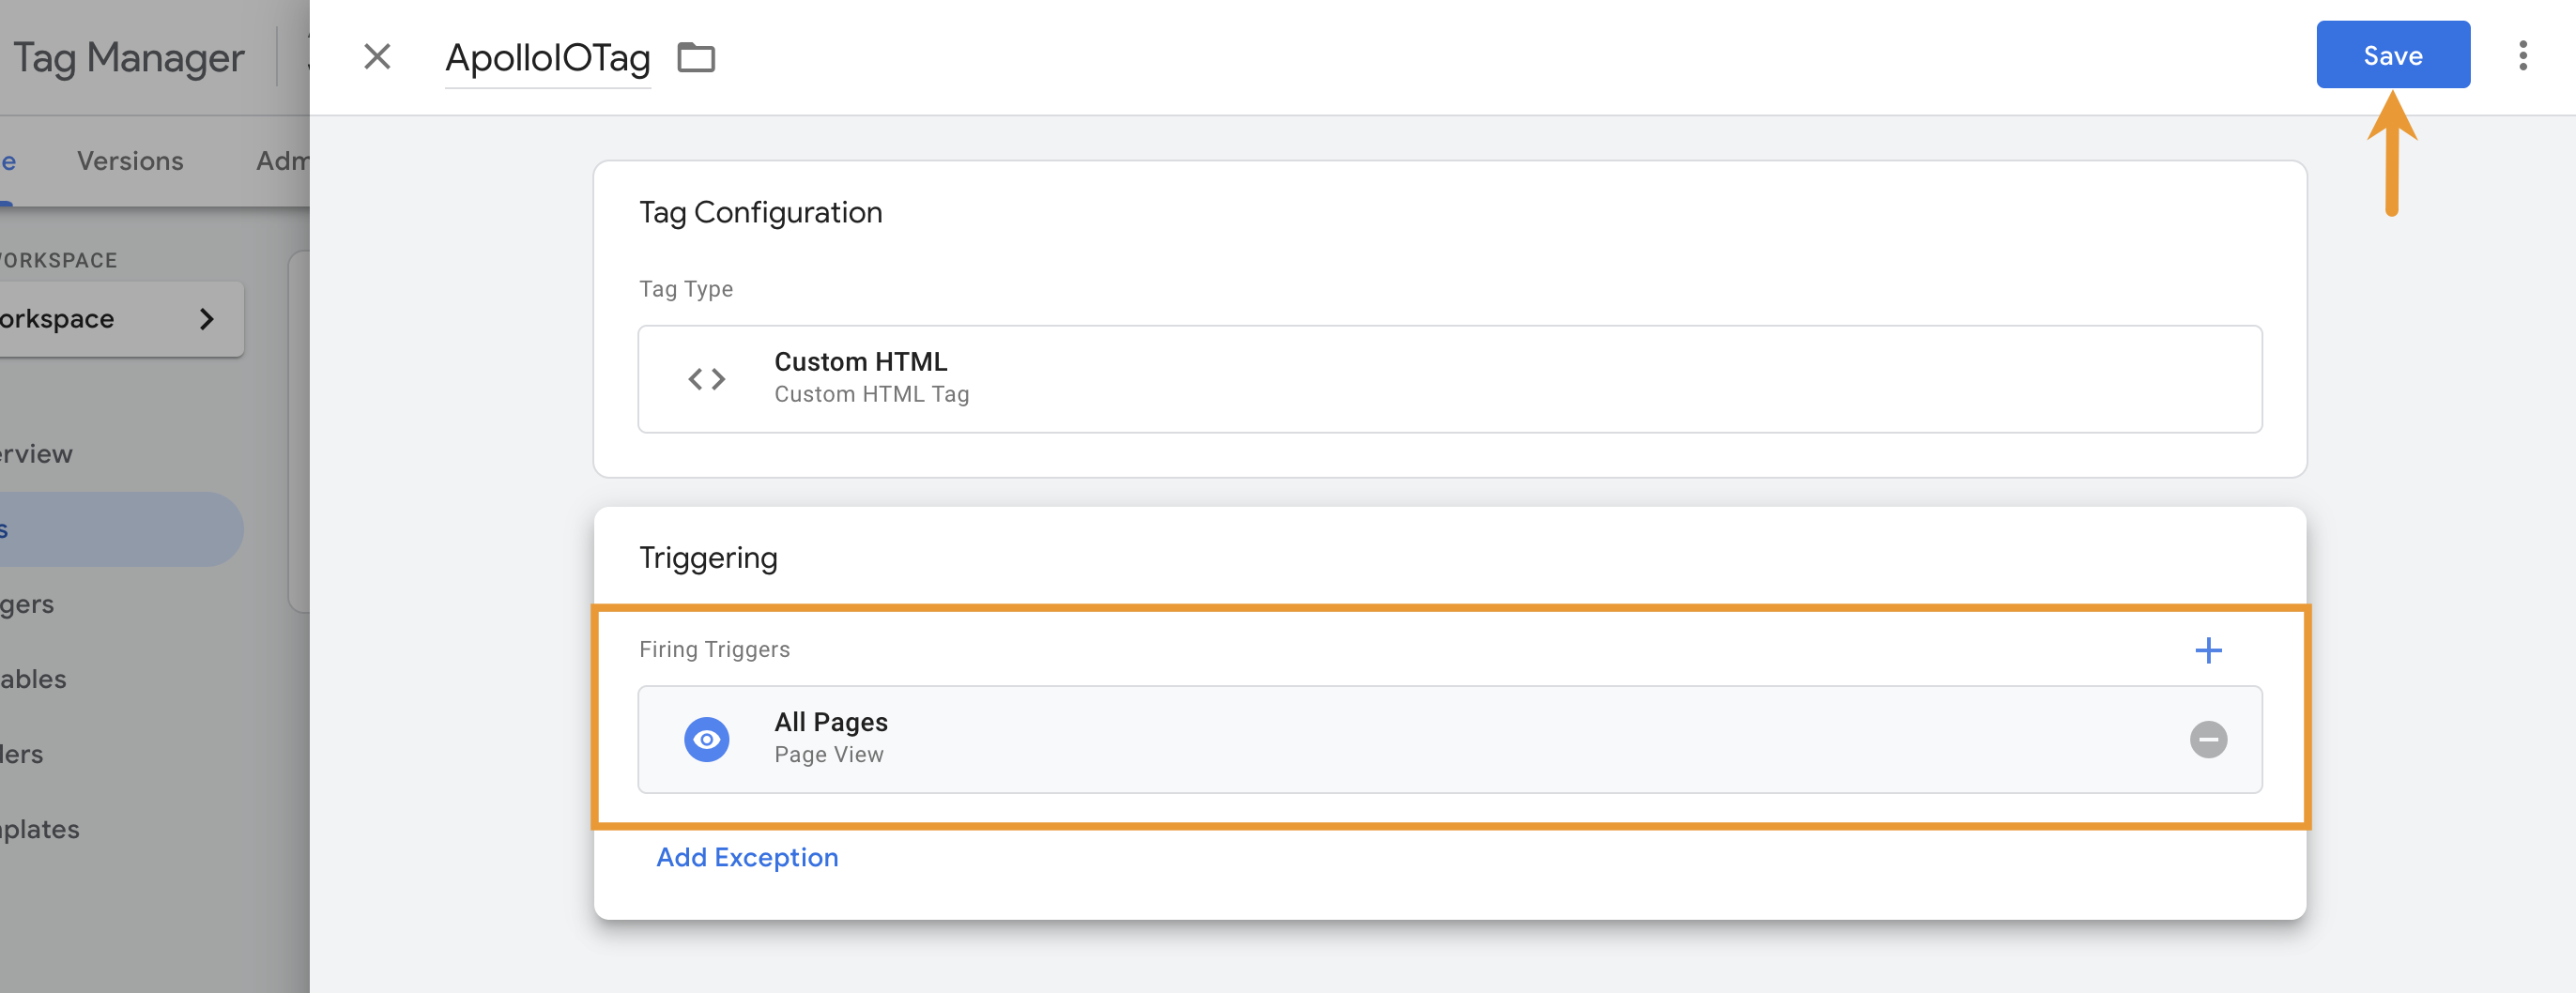
- Click the pencil icon to edit the tag configuration, then select Custom HTML for the tag type.

- Paste the Apollo JavaScript snippet into the HTML section.

- Click the pencil icon to edit the tag trigger, then choose which pages on your website should trigger the tag. Select All Pages to trigger the tag across your website. Click Save.
- To publish, click Submit, then click Publish.
Your tag is now added to your website. With the snippet added to your website, proceed with testing the connection.
Install the Tracking Script on Single-Page Apps
If your website is a single-page app built with a framework like React, Next.js, Vue, or Angular, visitors can move between pages without a full page reload. When this happens, the Apollo tracking script may only run on the first page a visitor loads.
To track visits across a single-page app, make sure the Apollo script runs when visitors navigate to new routes on your website.
If you add the Apollo script directly to your website, place it in your app's global layout, shared app shell, or main HTML template. This ensures the script loads on the first page load and remains available as visitors navigate between routes.
For example, add the script to the global layout or entry file your framework uses across every route. In Next.js, this might be your shared app layout. In React, Vue, or Angular, this might be the main HTML template or root app shell.
If you added the Apollo script with Google Tag Manager, configure your tag to fire when the route changes in your single-page app.
To track route changes with Google Tag Manager:
- Add the Apollo script as a Custom HTML tag in Google Tag Manager. Refer to the Google Tag Manager section.
- Add a single-page app trigger, such as a History Change trigger, to fire the tag when visitors navigate to a new route.
- If your website uses custom route-change events, configure your app to push those events to the data layer, then use the event as the trigger for the Apollo tag.
- Publish your Google Tag Manager changes.
Apollo manages the website visitor tracking script. Avoid editing the script contents directly. Instead, configure when the script or tag runs, such as on the first page load and after route changes.
After you configure tracking for your single-page app, proceed with testing the connection.
Test the Connection
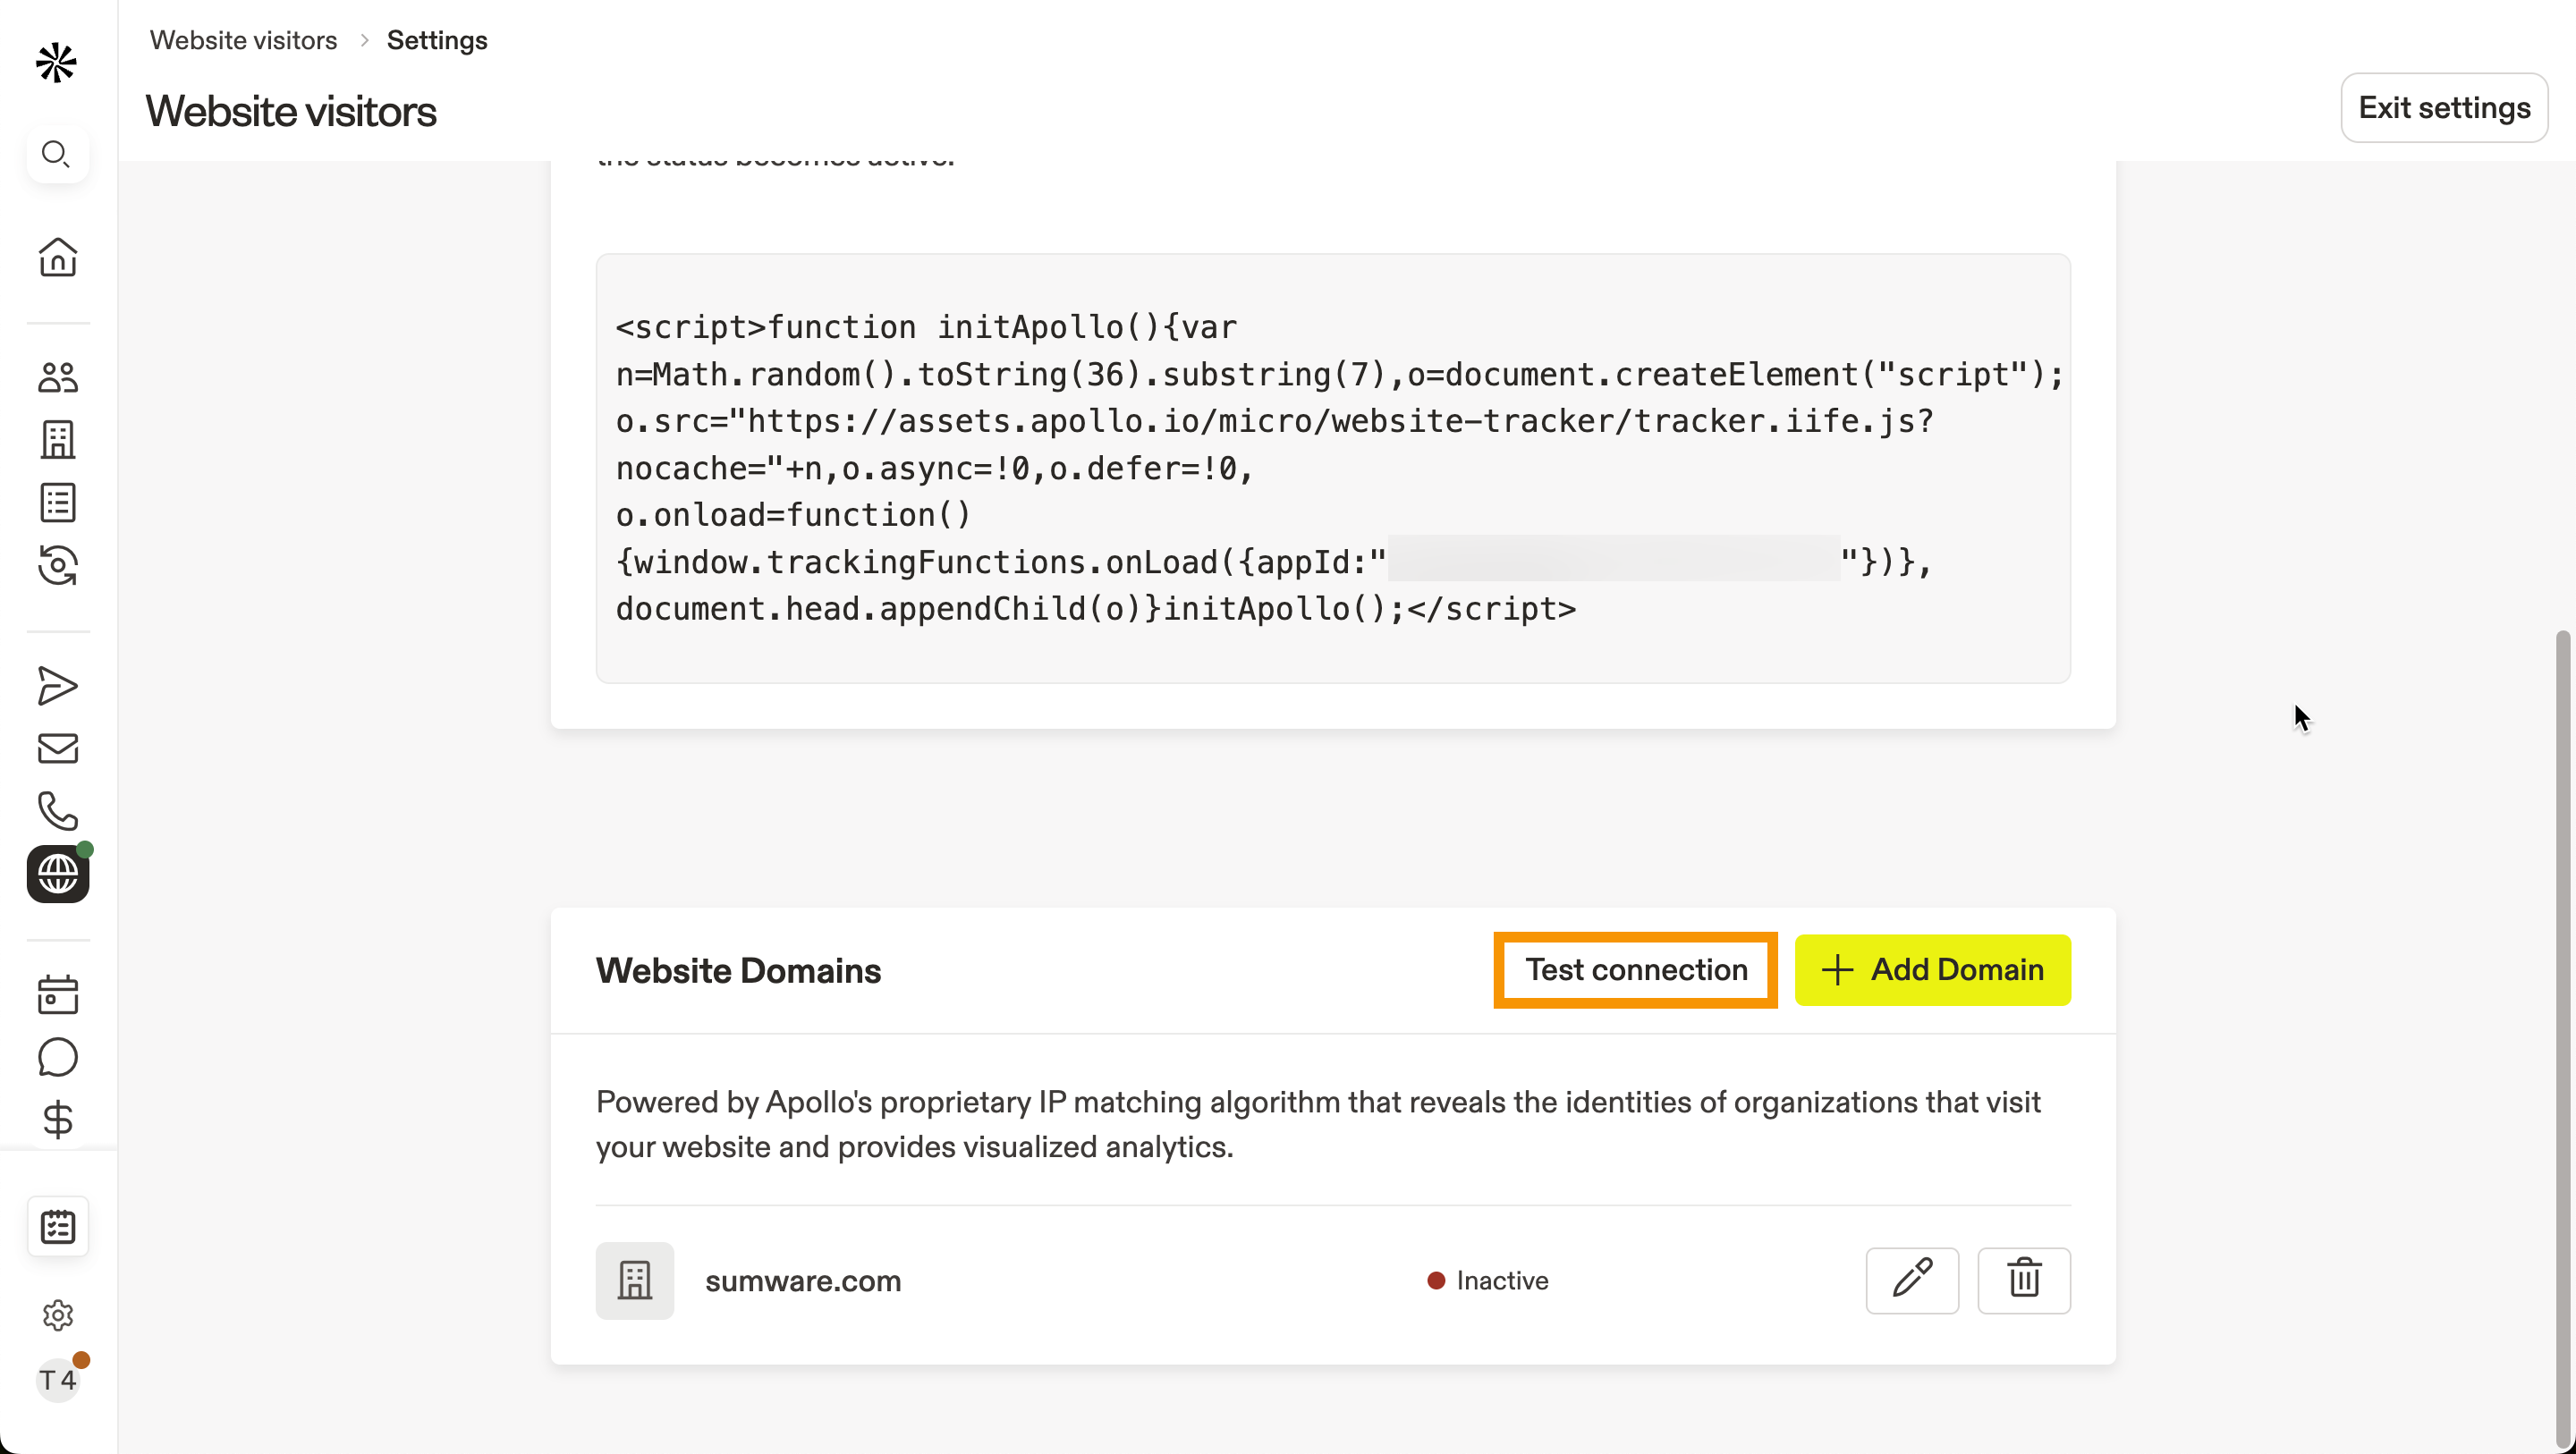
After adding the code to your website, test the connection to confirm that Apollo can capture and analyze traffic from the domains you added.
To test the connection:
- In Apollo, click Website visitors > Settings.
Alternatively, click Settings > Ideal customer profile > Website visitors. - Click Test connection to test all of your websites. If a domain's connection is good, the status will be
Active.
If the connection is successful, it can take up to 24 hours for data to appear in Apollo. Once available, you can begin using visitor data as prospects visit your website.
You've now tested the connection to track website visitors.
Troubleshoot the Connection
To manually confirm that the code is installed:
- Navigate to the website where the snippet was added.
- Open the inspect tools in your browser. For Google Chrome, right-click the web page, then click Inspect.
- Go to the Sources tab. Confirm that
assets.apollo.ioappears. If not, the snippet hasn't been installed correctly.
- Go to the Network tab and reload the web page. Search for
track_request. If the snippet was installed successfully, the status code will be204.
If the status code is 400, confirm that the script is installed correctly. If the issue persists, you've reached your website tracking limit. Get the Inbound add-on to track more website.
If the request doesn't appear in the Sources tab after reloading the page, check that the snippet has been installed in the correct place. For example, if you added the snippet directly to your website, place the snippet inside the head tags, not the body tags.
If your website is a single-page app, confirm that Apollo tracking requests fire after route changes, not only after the first page load.
To verify single-page app tracking:
- Open your website in Chrome.
- Right-click the page, then click Inspect.
- Go to the Network tab.
- Filter for
track_request,apollo-event, orintent_pixel. - Navigate between routes in your app.
If tracking works, you should see a successful request with the status code 204 on the first page load and additional requests after route changes. If requests only appear on the first page load, update your Google Tag Manager trigger or framework route-change handling.
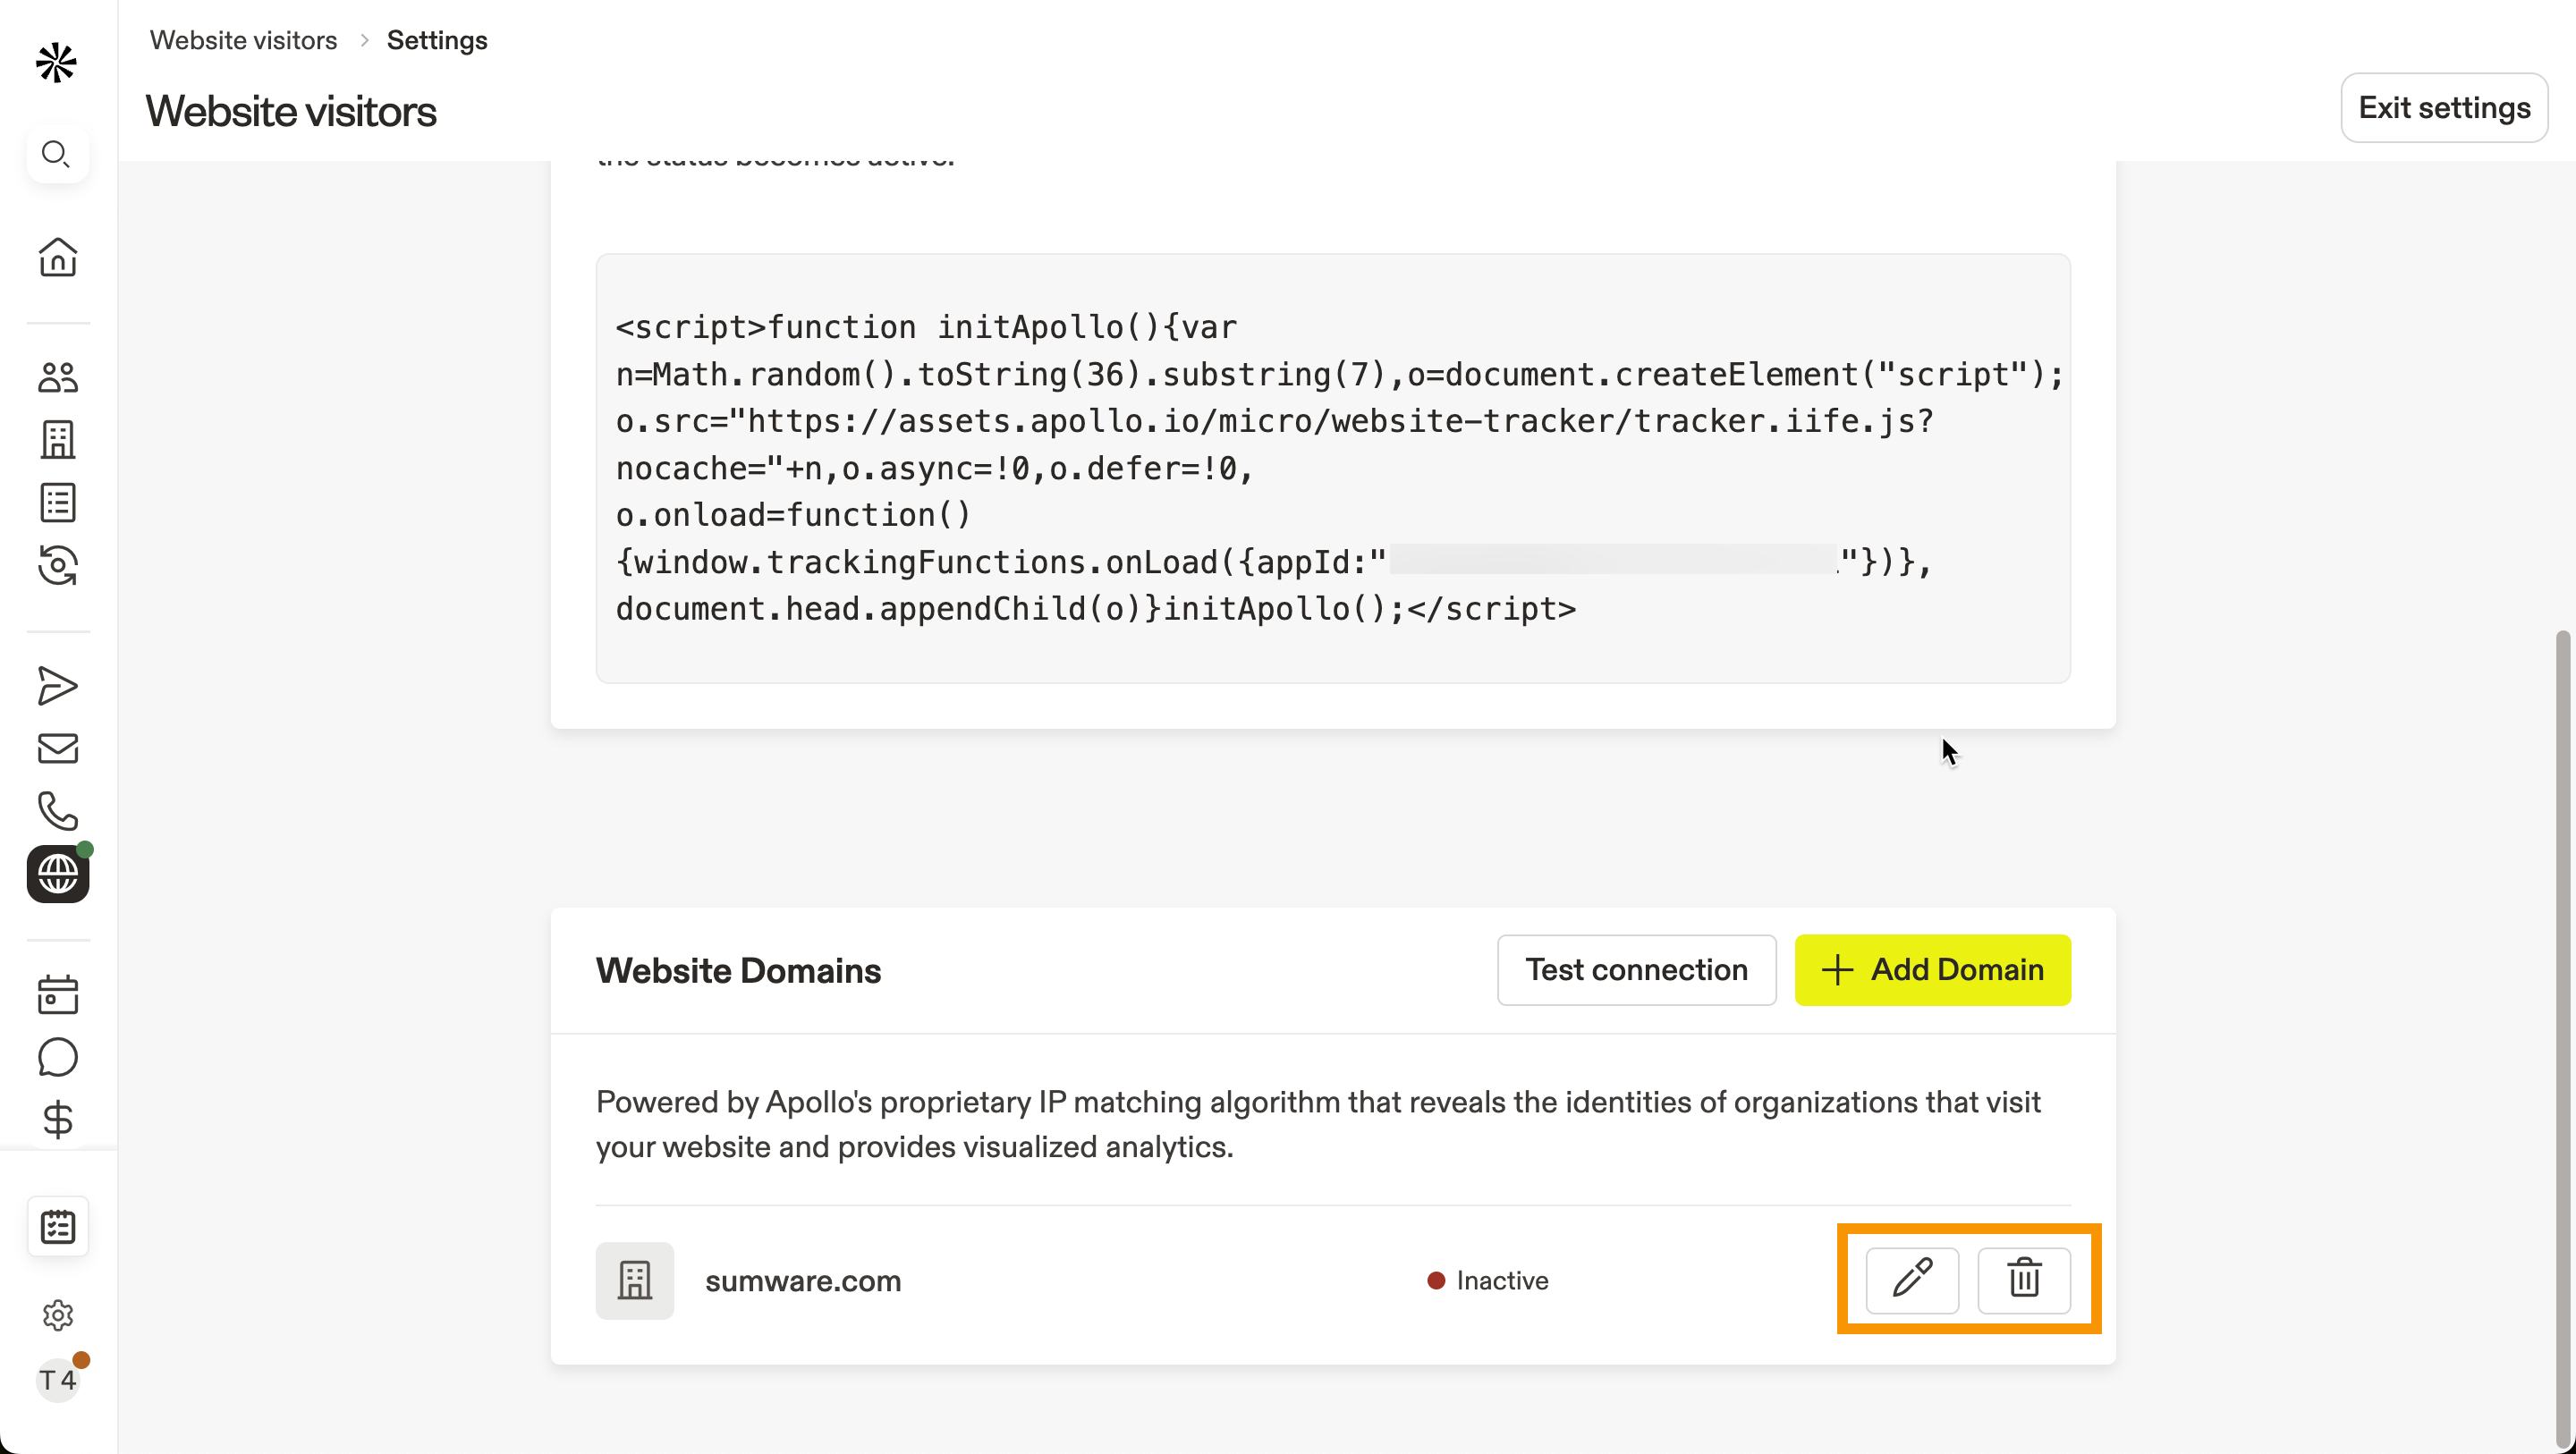
Edit Domain Information or Deactivate Tracking
To edit the information for a website you're tracking or disable tracking entirely, in Apollo click Website visitors > Settings.
Click Edit to edit website information, or click Delete to remove tracking for the domain.
Configure Cookie Consent Banner
When you install the Apollo tracking script on your website, it sets a first-party cookie in the visitor's browser. Many privacy laws require websites to obtain user consent before collecting data through cookies. To meet these requirements, websites typically display a cookie consent banner that allows users to accept or decline cookies.
Cookie banners are managed through consent management platforms. If your website uses a consent management platform, configure it so that the Apollo tracking script runs only after consent is granted. As part of this setup, classify Apollo's tracking script under a category such as Analytics or Marketing. Refer to your consent management platform's documentation for setup instructions.
Once configured, Apollo's tracking script respects your consent settings. Tracking begins only after a valid consent cookie is present, ensuring that user identification and data processing occur only after consent is given. If a visitor declines cookies, Apollo's script won't run for that visitor, which may impact your website visitor metrics.
Next Steps
Here are a few solid next moves to turn website visitor signals into faster, cleaner pipeline.
| Use Website Visitors Data | Apply website visitor filters to zero in on companies hitting your highest-value pages and prioritize outreach with confidence. |
|---|---|
| Inbound Overview | Roll out Apollo inbound to connect visitor identification, form enrichment, and routing so your team follows up on hot demand without delays. |
| Use Buying Intent | Search by buying intent topics and scores to target companies already researching what you sell and focus on the best-fit accounts first. |
| Create a Custom Score | Build a custom score with signals to rank prospects the way your team actually sells and keep prioritization consistent across reps. |