Overview
The dialer allows you to make and receive calls to prospects without leaving Apollo, directly from contact profiles. To get started, you need an Apollo phone number.
On Apollo plans that include the dialer, each user gets one active free phone number at a time. You can get additional phone numbers using monthly credits. International phone number registration and dialing is only available through the advanced dialer add-on. If you need to get an international phone number, upgrade your plan to get the advanced dialer add-on.
Check out the following sections to get a US or international phone number on Apollo.
Get an Apollo Phone Number
You can use Apollo to dial around the world.
Choose which type of phone number you want to set up:Get a US or Canadian phone number
To get a US or Canadian phone number:
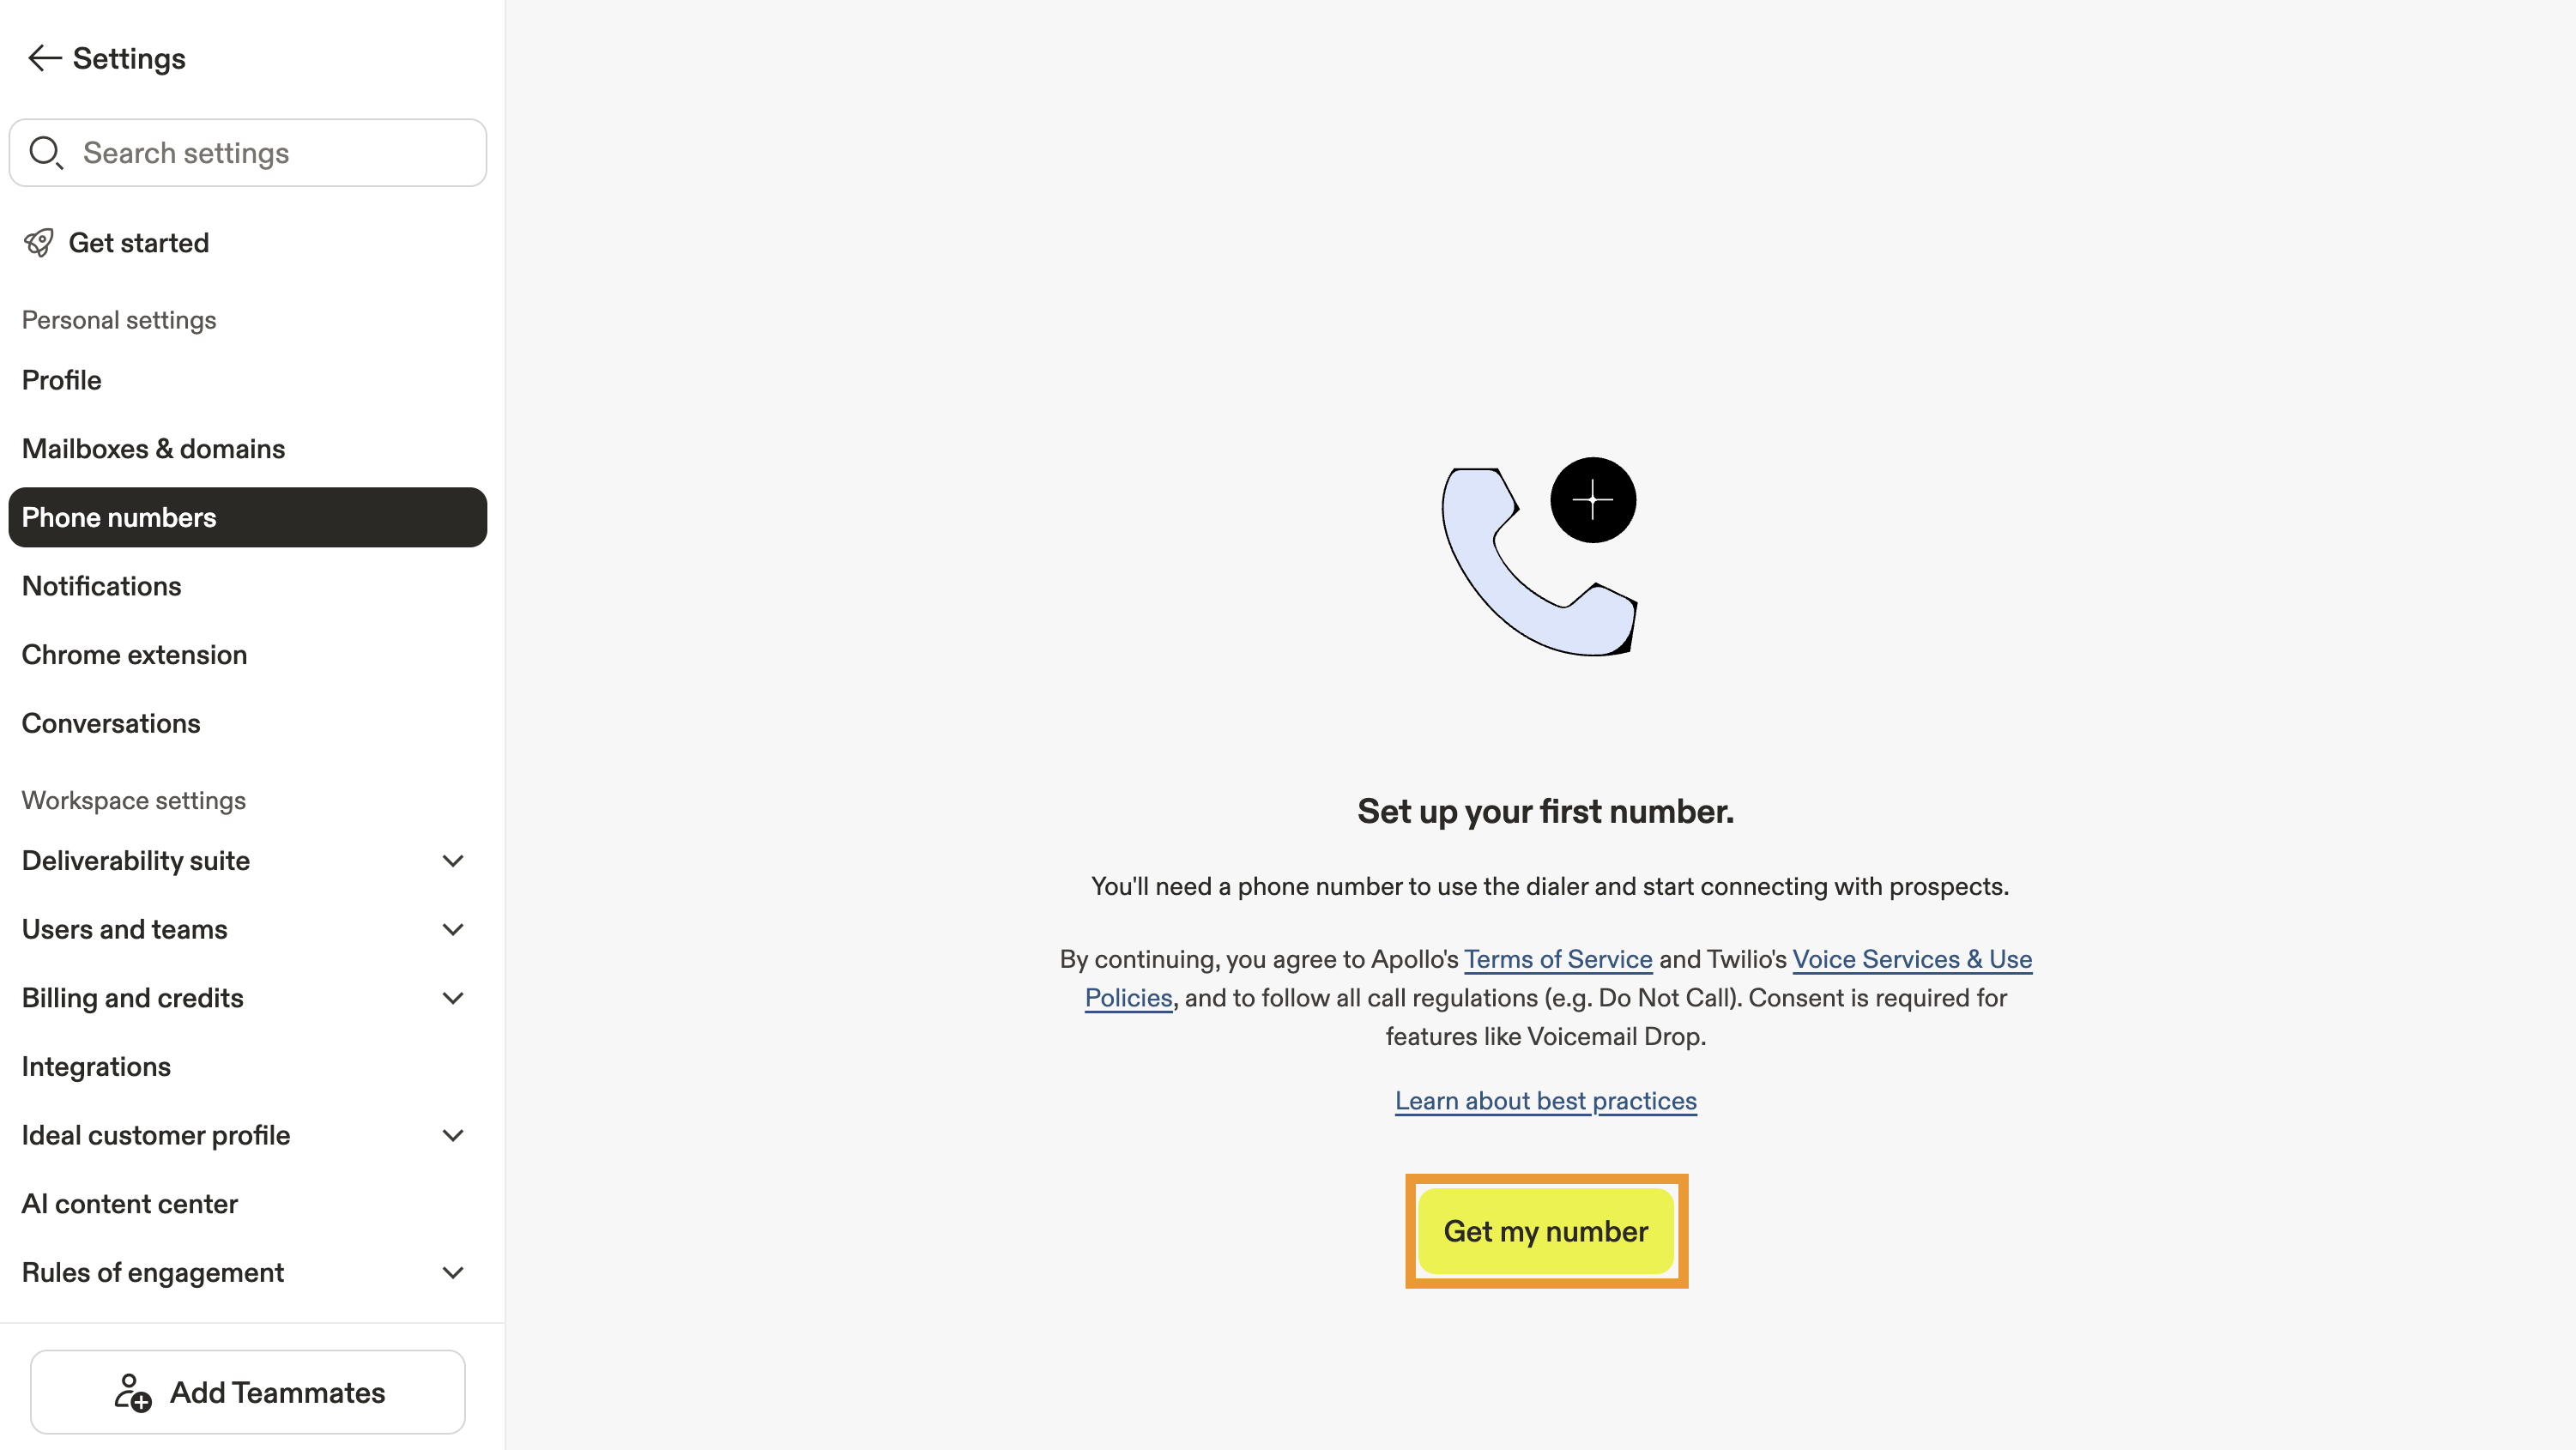
- Launch Apollo and click Settings > Phone numbers.
- Click Set up phone number if you're starting from scratch, or click Purchase new number to buy additional phone numbers.
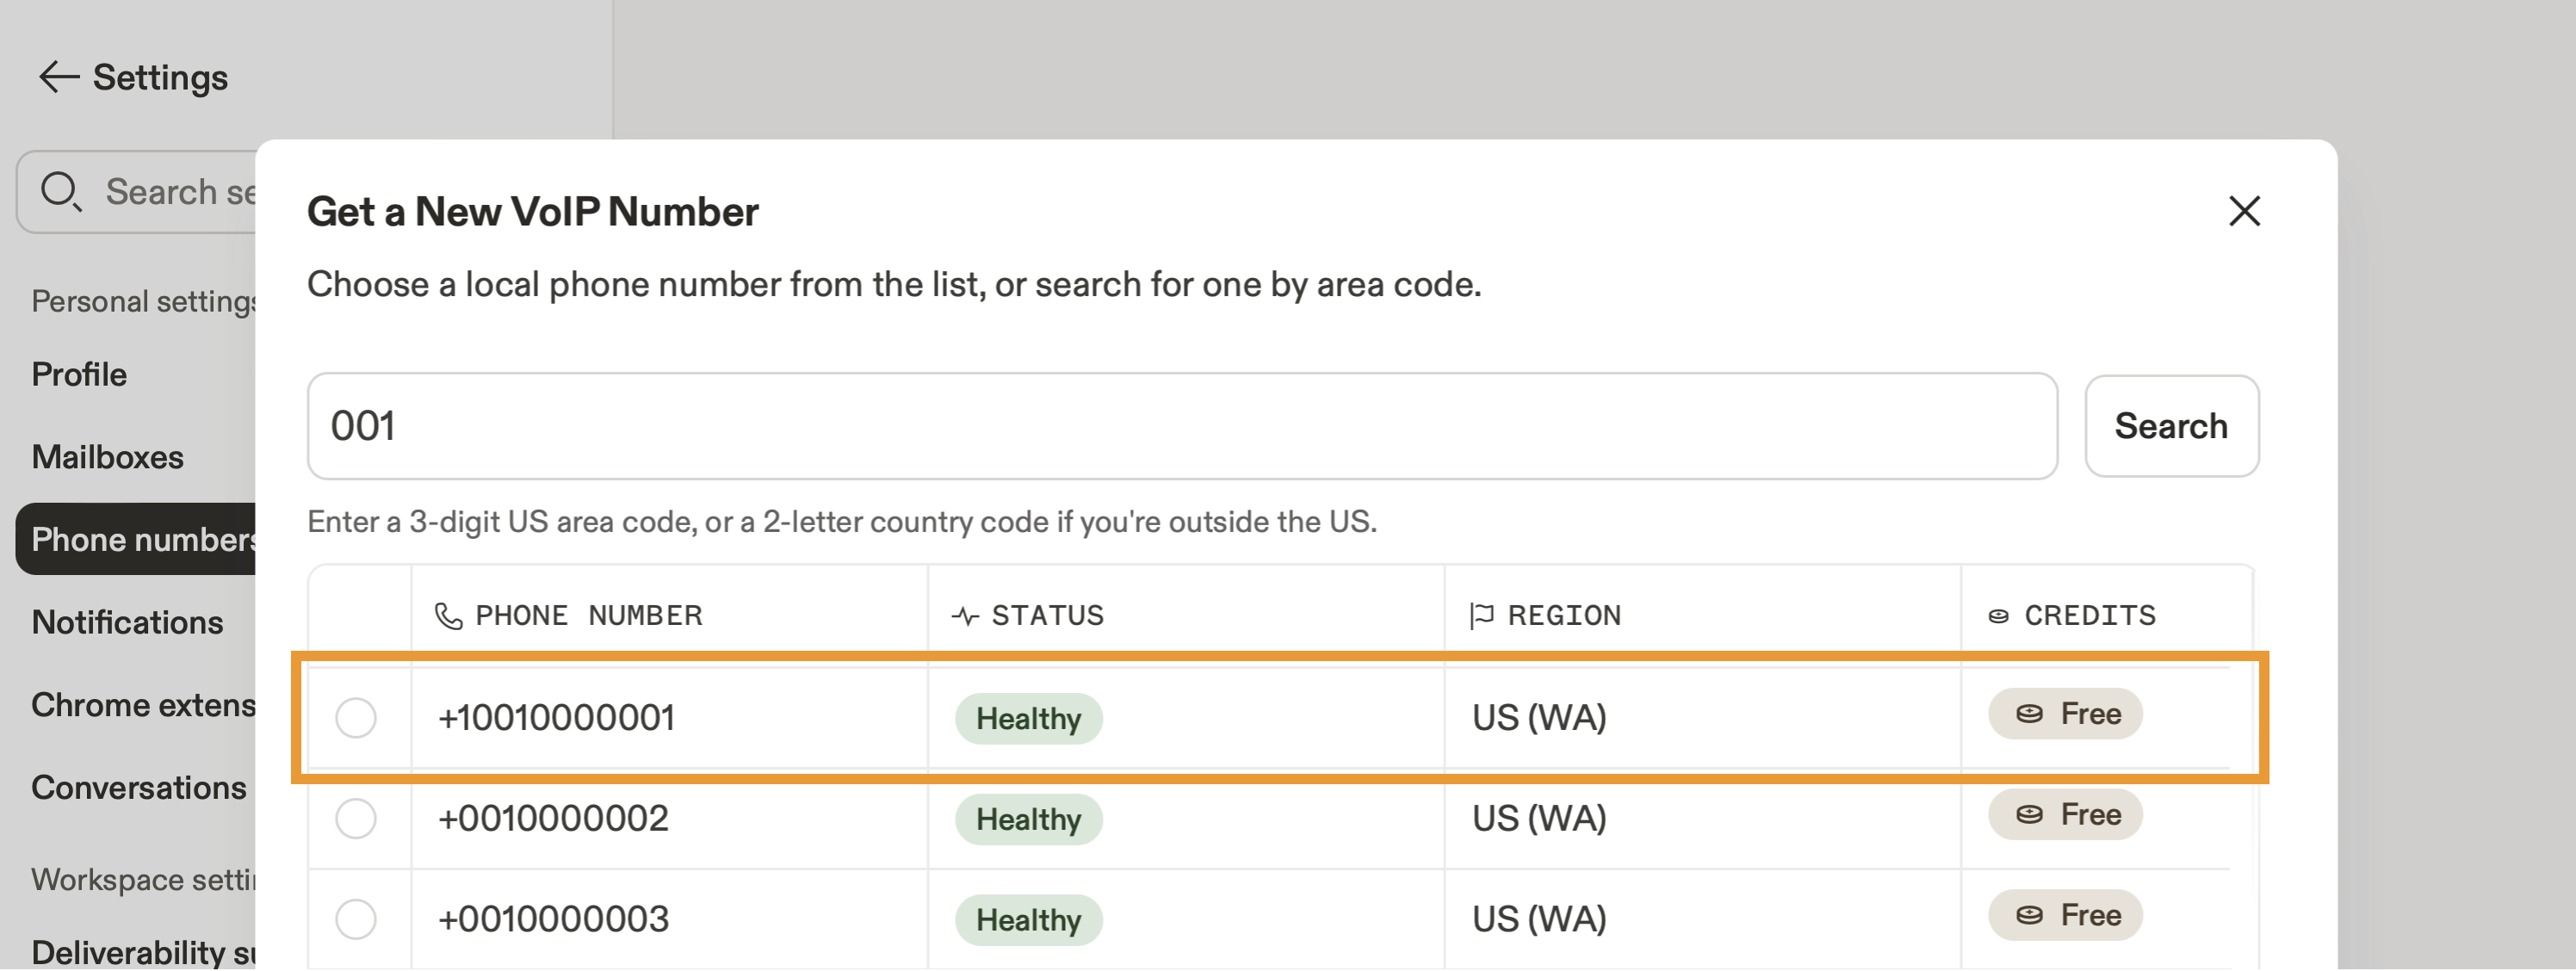
- Enter a US or Canadian area code, and click Search.
- Choose a number from the list and click Select.
Not drawn to any of the available phone numbers? Click Search to refresh the list.
- (Optional) Toggle Use a local phone number by default to automatically call contacts from a number with a local area code.
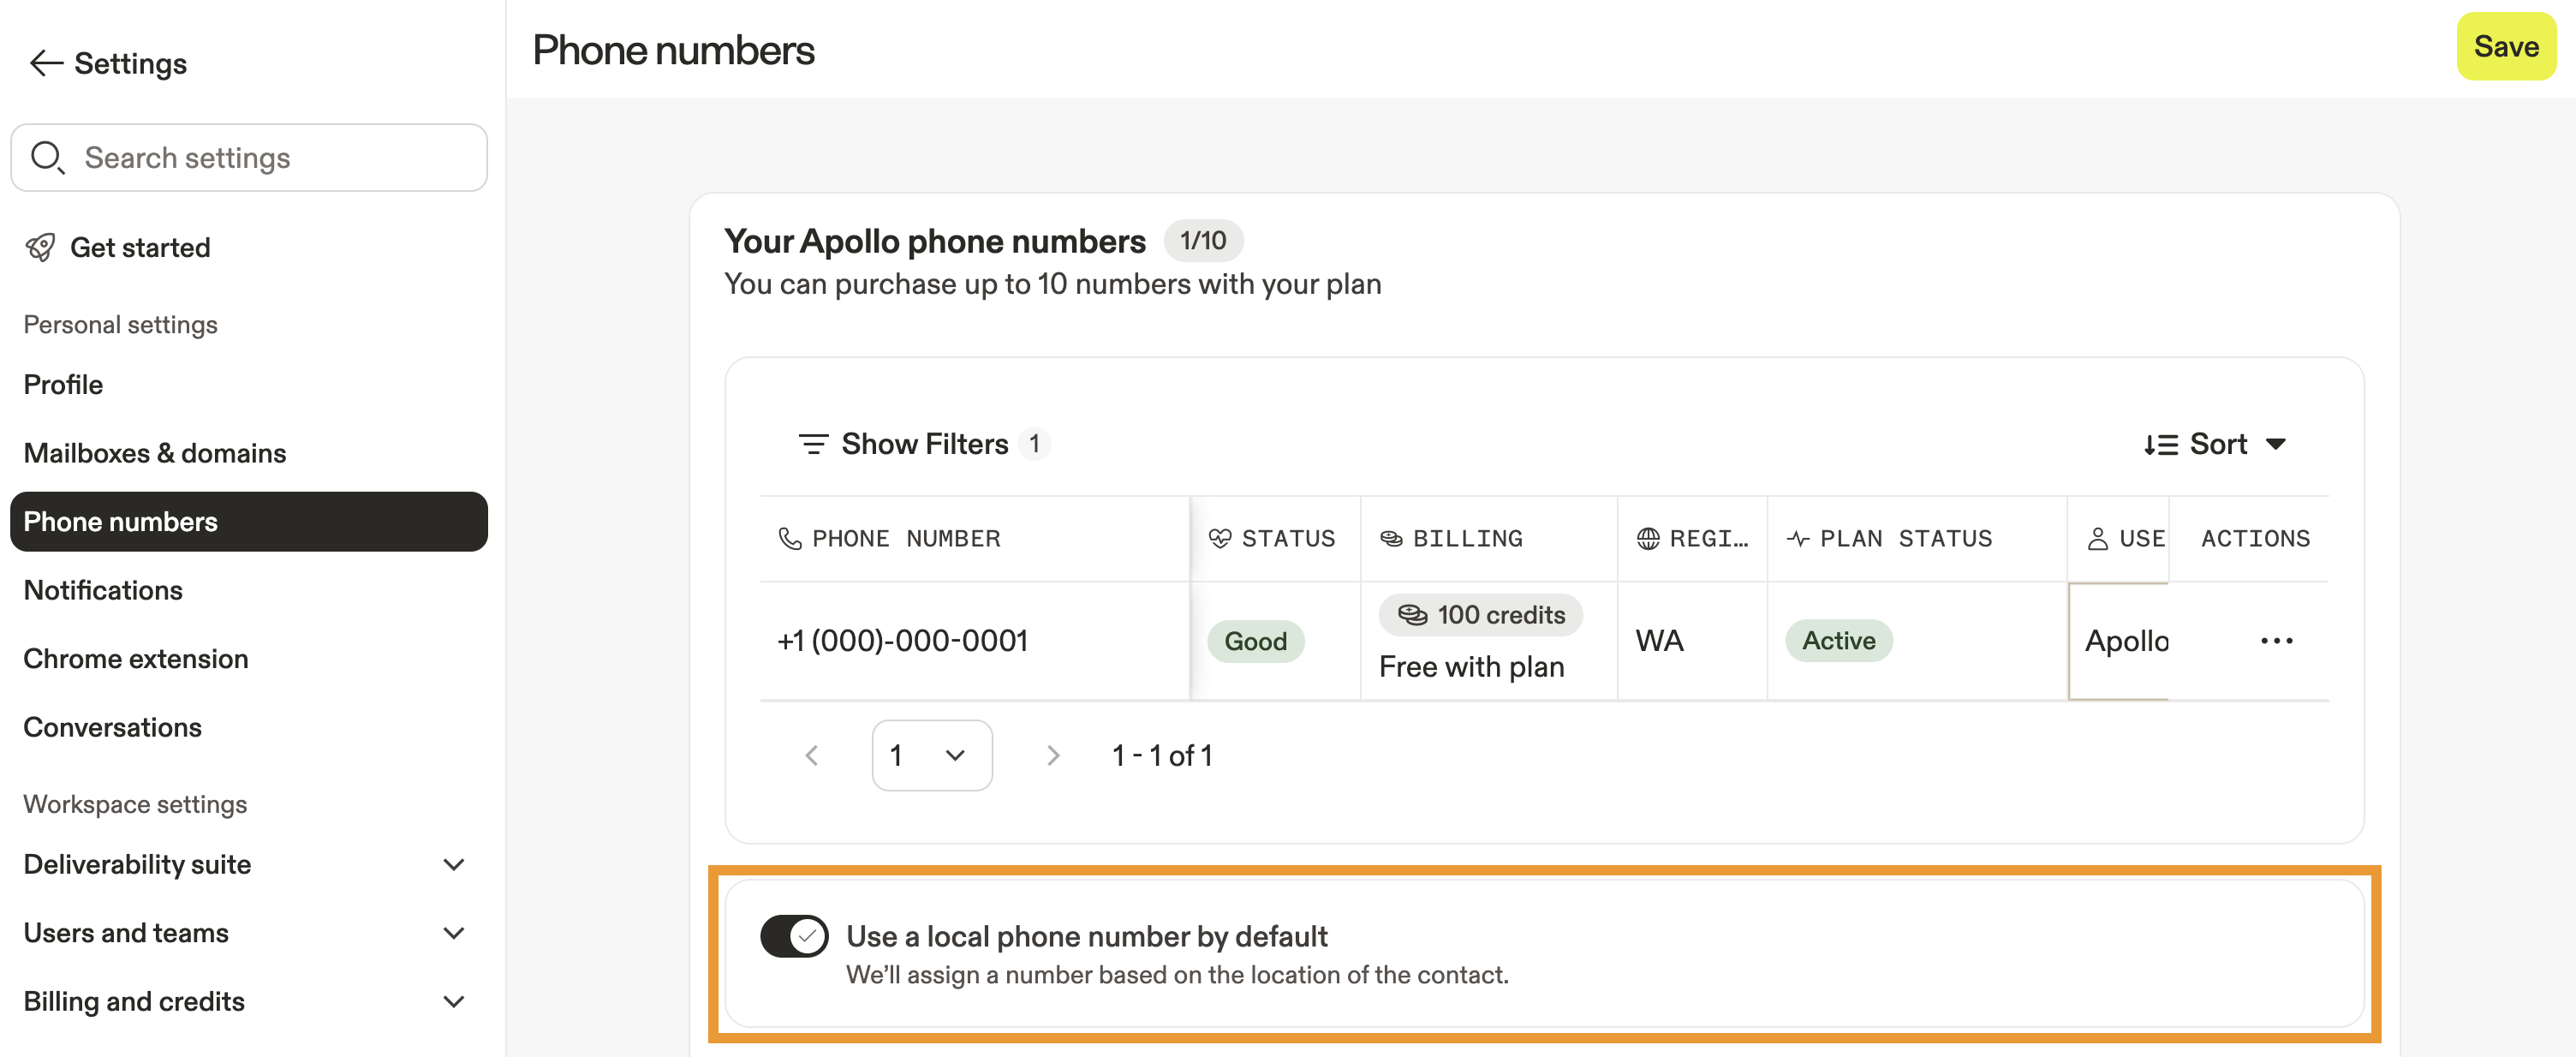
With local presence, when you call contacts, Apollo uses a team number or generates a number local to the contact's area code. Apollo then saves the number in Settings > Team Dialer > Team Numbers.
Local presence requires the advanced dialer add-on on your Apollo plan. If you need to use local presence, upgrade your plan. If you have questions about upgrading, reach out to the Apollo sales team.
- After selecting your phone number, click Add business profile to enter business registration information. Apollo recommends you add a business profile as it helps elevate your credibility and visibility, leading to increased engagement and higher conversion rates.

A business profile only needs to be submitted once per country. After it's approved, it applies to all users dialing from that country — no need for each rep to set it up individually.
- Enter your business details:
| Field | Description |
|---|---|
| Business name | The official, legal name of the business entity. |
| Business address | The primary physical address where the business is registered or operates. |
| Business type | The legal structure of the company. This field must be one of the following: Sole proprietorship, partnership, limited liability corporation, co-operative, non-profit corporation, or corporation. |
| Business industry | The sector in which the business operates. This field must be one of the following: Automotive, agriculture, banking, consumer, education, engineering, energy, oil and gas, fast-moving consumer goods, financial, fintech, food and beverage, government, healthcare, hospitality, insurance, legal, manufacturing, media, online, raw materials, real estate, religion, retail, jewelry, technology, telecommunications, transportation, travel, electronics, or not for profit. |
| Business registration ID type | The category of registration identifier. This field must be one of the following: US Employer Identification Number, US Dun & Bradstreet Number, Canadian Business Number, Great Britain Company Number, Australian Company Number from ASIC, Indian Corporate Identity Number, Estonian VAT Number, Romanian VAT Registration Number, Israeli Registration Number, or other. |
| Business registration ID number | The actual number or code assigned to the business by the relevant government or registration authority, corresponding to the ID type above. |
| Business use case | The intended application or purpose of the business's services. This field must be one of the following: Identity & verification, asset management, lead generation, intelligent routing, appointment scheduling, customer support, self-service, automated support, appointment reminders, employee notifications, delivery notifications, emergency notifications, contactless delivery, order notifications, service alerts, purchase confirmation, mass alerts, fraud alerts, contact tracing, lead management, lead nurturing, telemarketing, marketing events, rewards program, lead alerts, lead distribution, abandoned cart, call tracking, outbound dialer, survey/research, click to call, phone system, meetings/collaboration, telehealth, distance learning, shift management, field notifications, dating/social, remote appointments, group messaging, exam proctoring, tutoring, therapy (individual + group), pharmacy, or first responder. |
| Employee count | The approximate number of employees working for the business. |
| Average call volume per day | The typical total number of calls the business handles on a daily basis. |
| Average calls per day | The average number of outbound or inbound calls made per day, often specific to certain teams or use cases. |
| Business regions of operation | The geographical areas or countries where the business actively provides products or services. |
| Business website | The official website URL associated with the business. |
- When finished, click Submit.
If you purchase multiple phone numbers, your oldest phone number is set as the default and is used when you dial contacts. To edit your default, click ... beside a phone number, then click Set as default.
You have now configured your Apollo phone number. Next, set your call preferences and make calls to contacts!
Get an international phone number
International phone number registration and dialing requires the advanced dialer add-on on your Apollo plan. If you need access to international phone number registration, upgrade your plan to enable the advanced dialer add-on. If you have questions about upgrading, reach out to the Apollo sales team.
International dialing is available on Apollo with VoIP (Voice over Internet Protocol) phone calls. VoIP enables phone calls to be made using the internet.
To get an international phone number:
- Launch Apollo and click Settings > Phone numbers.
- Click Set up phone number.
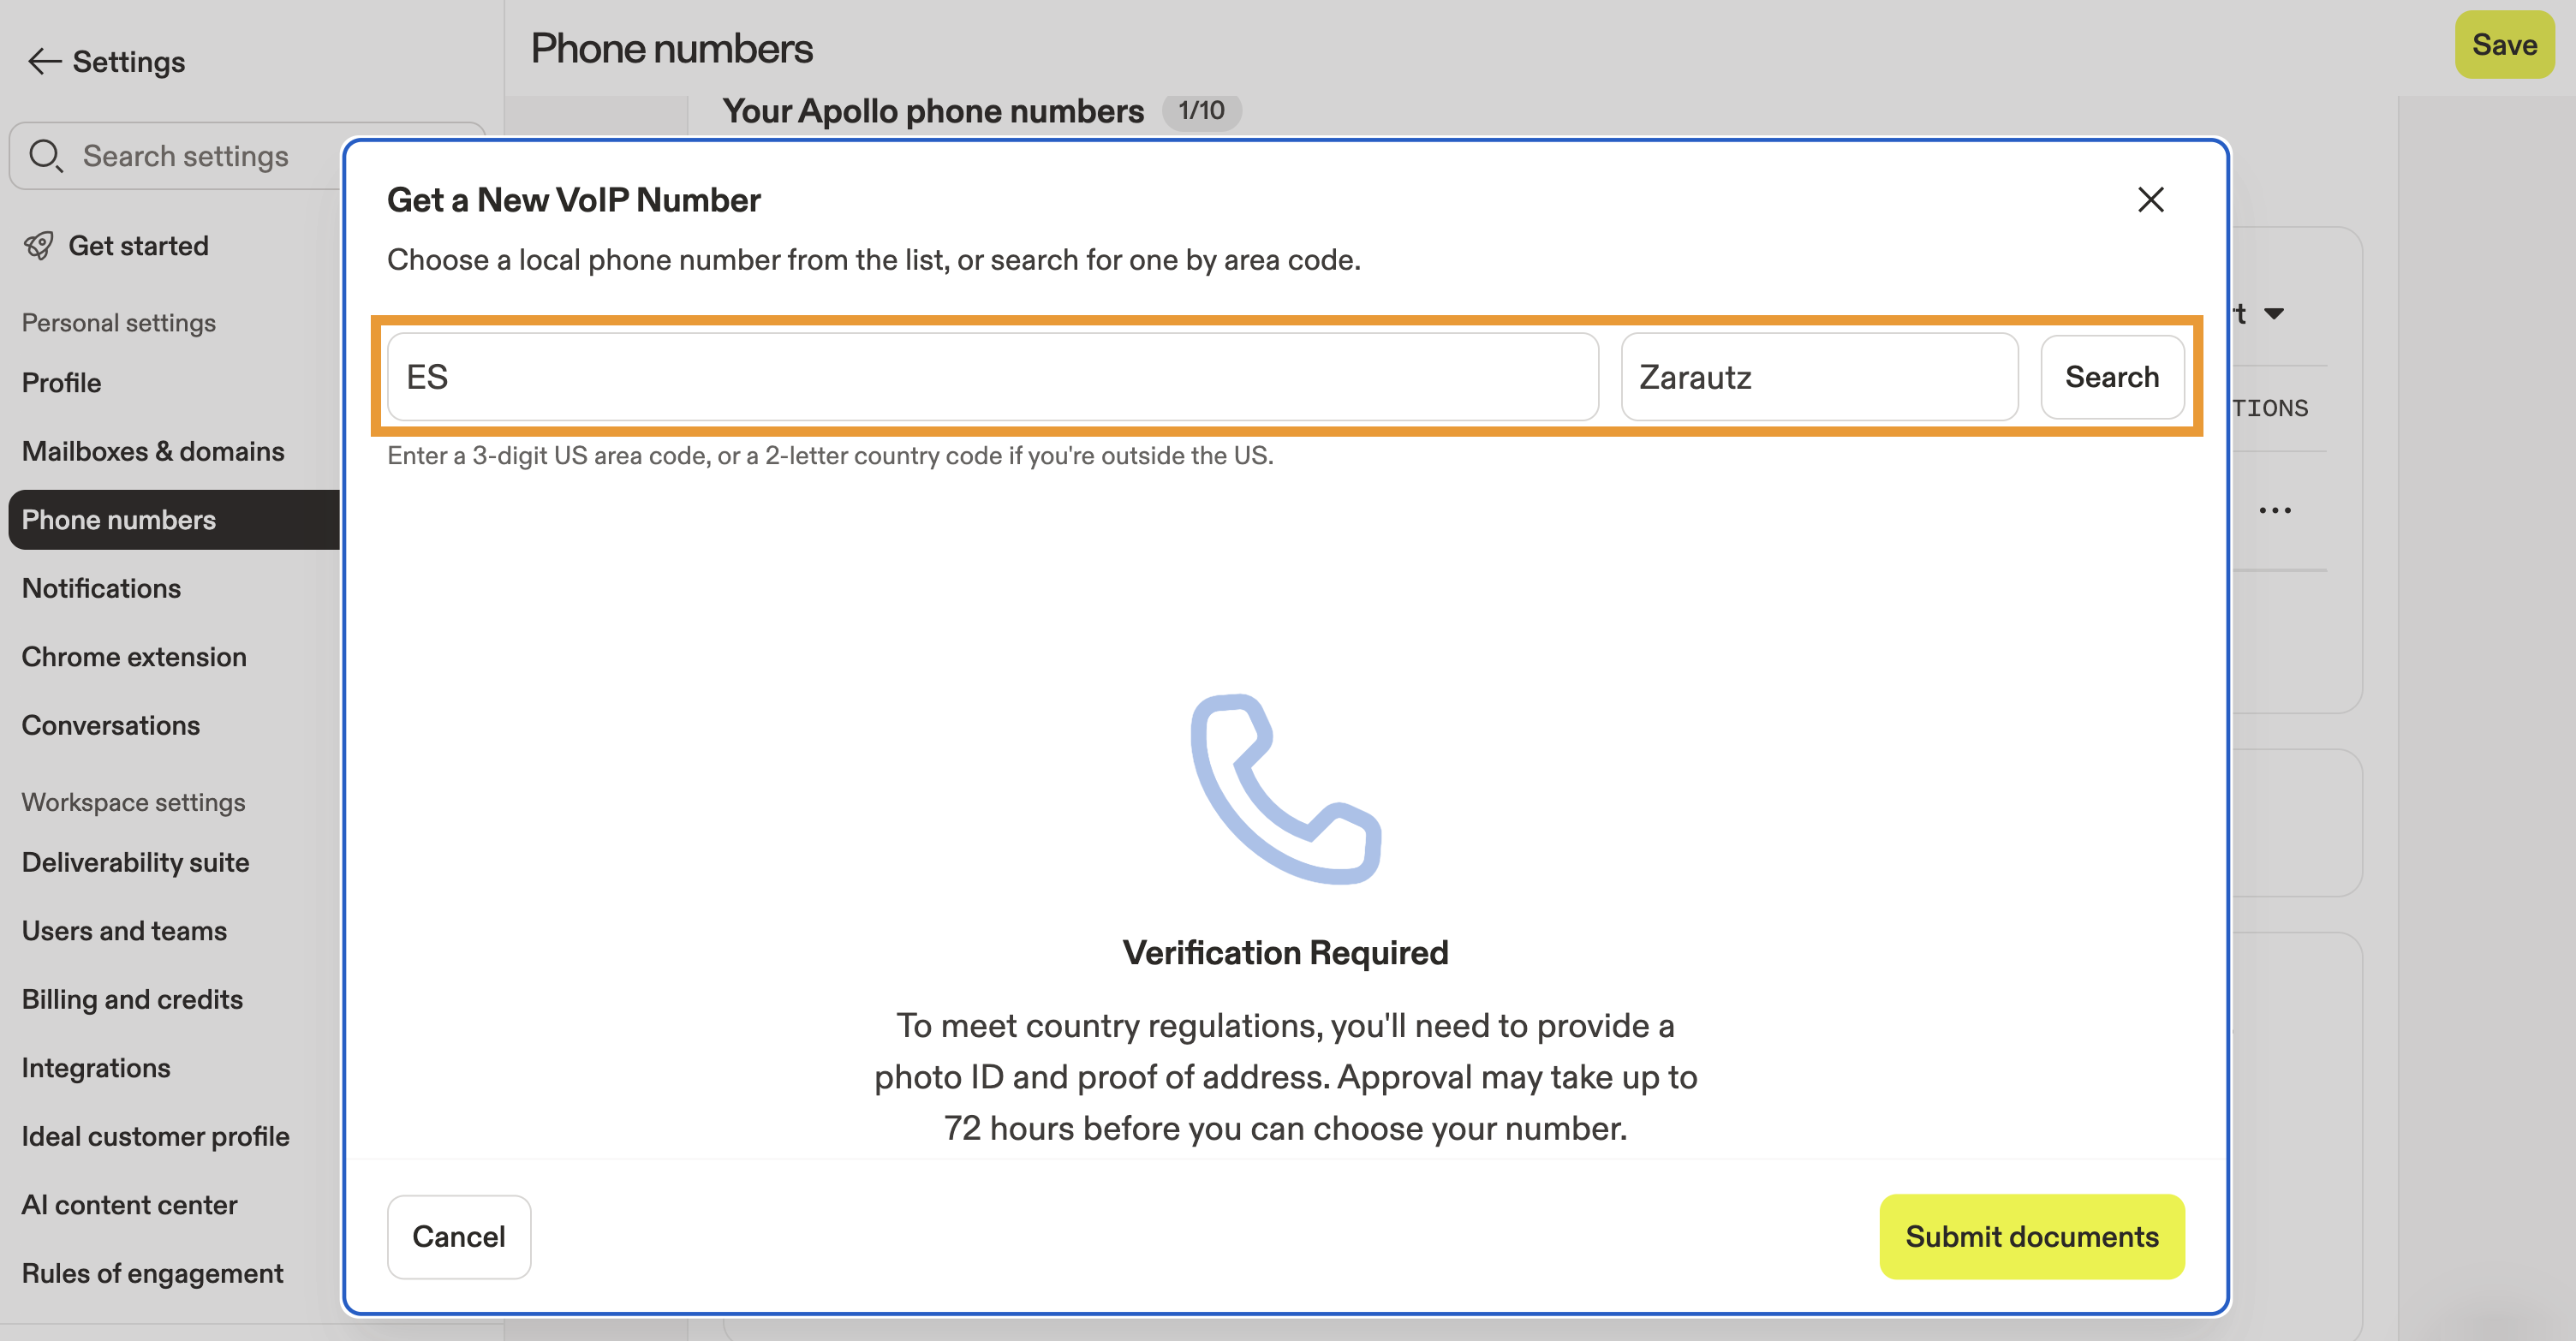
- Enter the ISO Alpha-2 country code that you would like to call from. For some countries, you can enter a city name in English. Then click Search.
You can only register phone numbers in the countries in which you live or have a business registration. Apollo supports an extensive list of international phone numbers. Check out all of the available countries in which you can register a phone number. Good to know:
- Locality: For some countries, a locality is required when registering a phone number. If required, enter the city name in English, like "Zarautz."
- Registration: For some countries, you must submit identification and additional documents to meet regulatory requirements. These documents may include a government-issued ID, a visa, or a passport, in addition to a utility bill, tax notice, rent receipt, or a title deed to establish proof of address.
- If necessary, click Submit documents to provide registration information. Choose whether to proceed as an individual or as a business.
Wondering which to choose? If you're dialing on behalf of a business and have access to the company documents required for registration, proceed as a business. You may need to reach out to internal departments at your company for help registering. Once business registration is complete, other users on your Apollo account can get international phone numbers in the country in which you register without additional documentation.

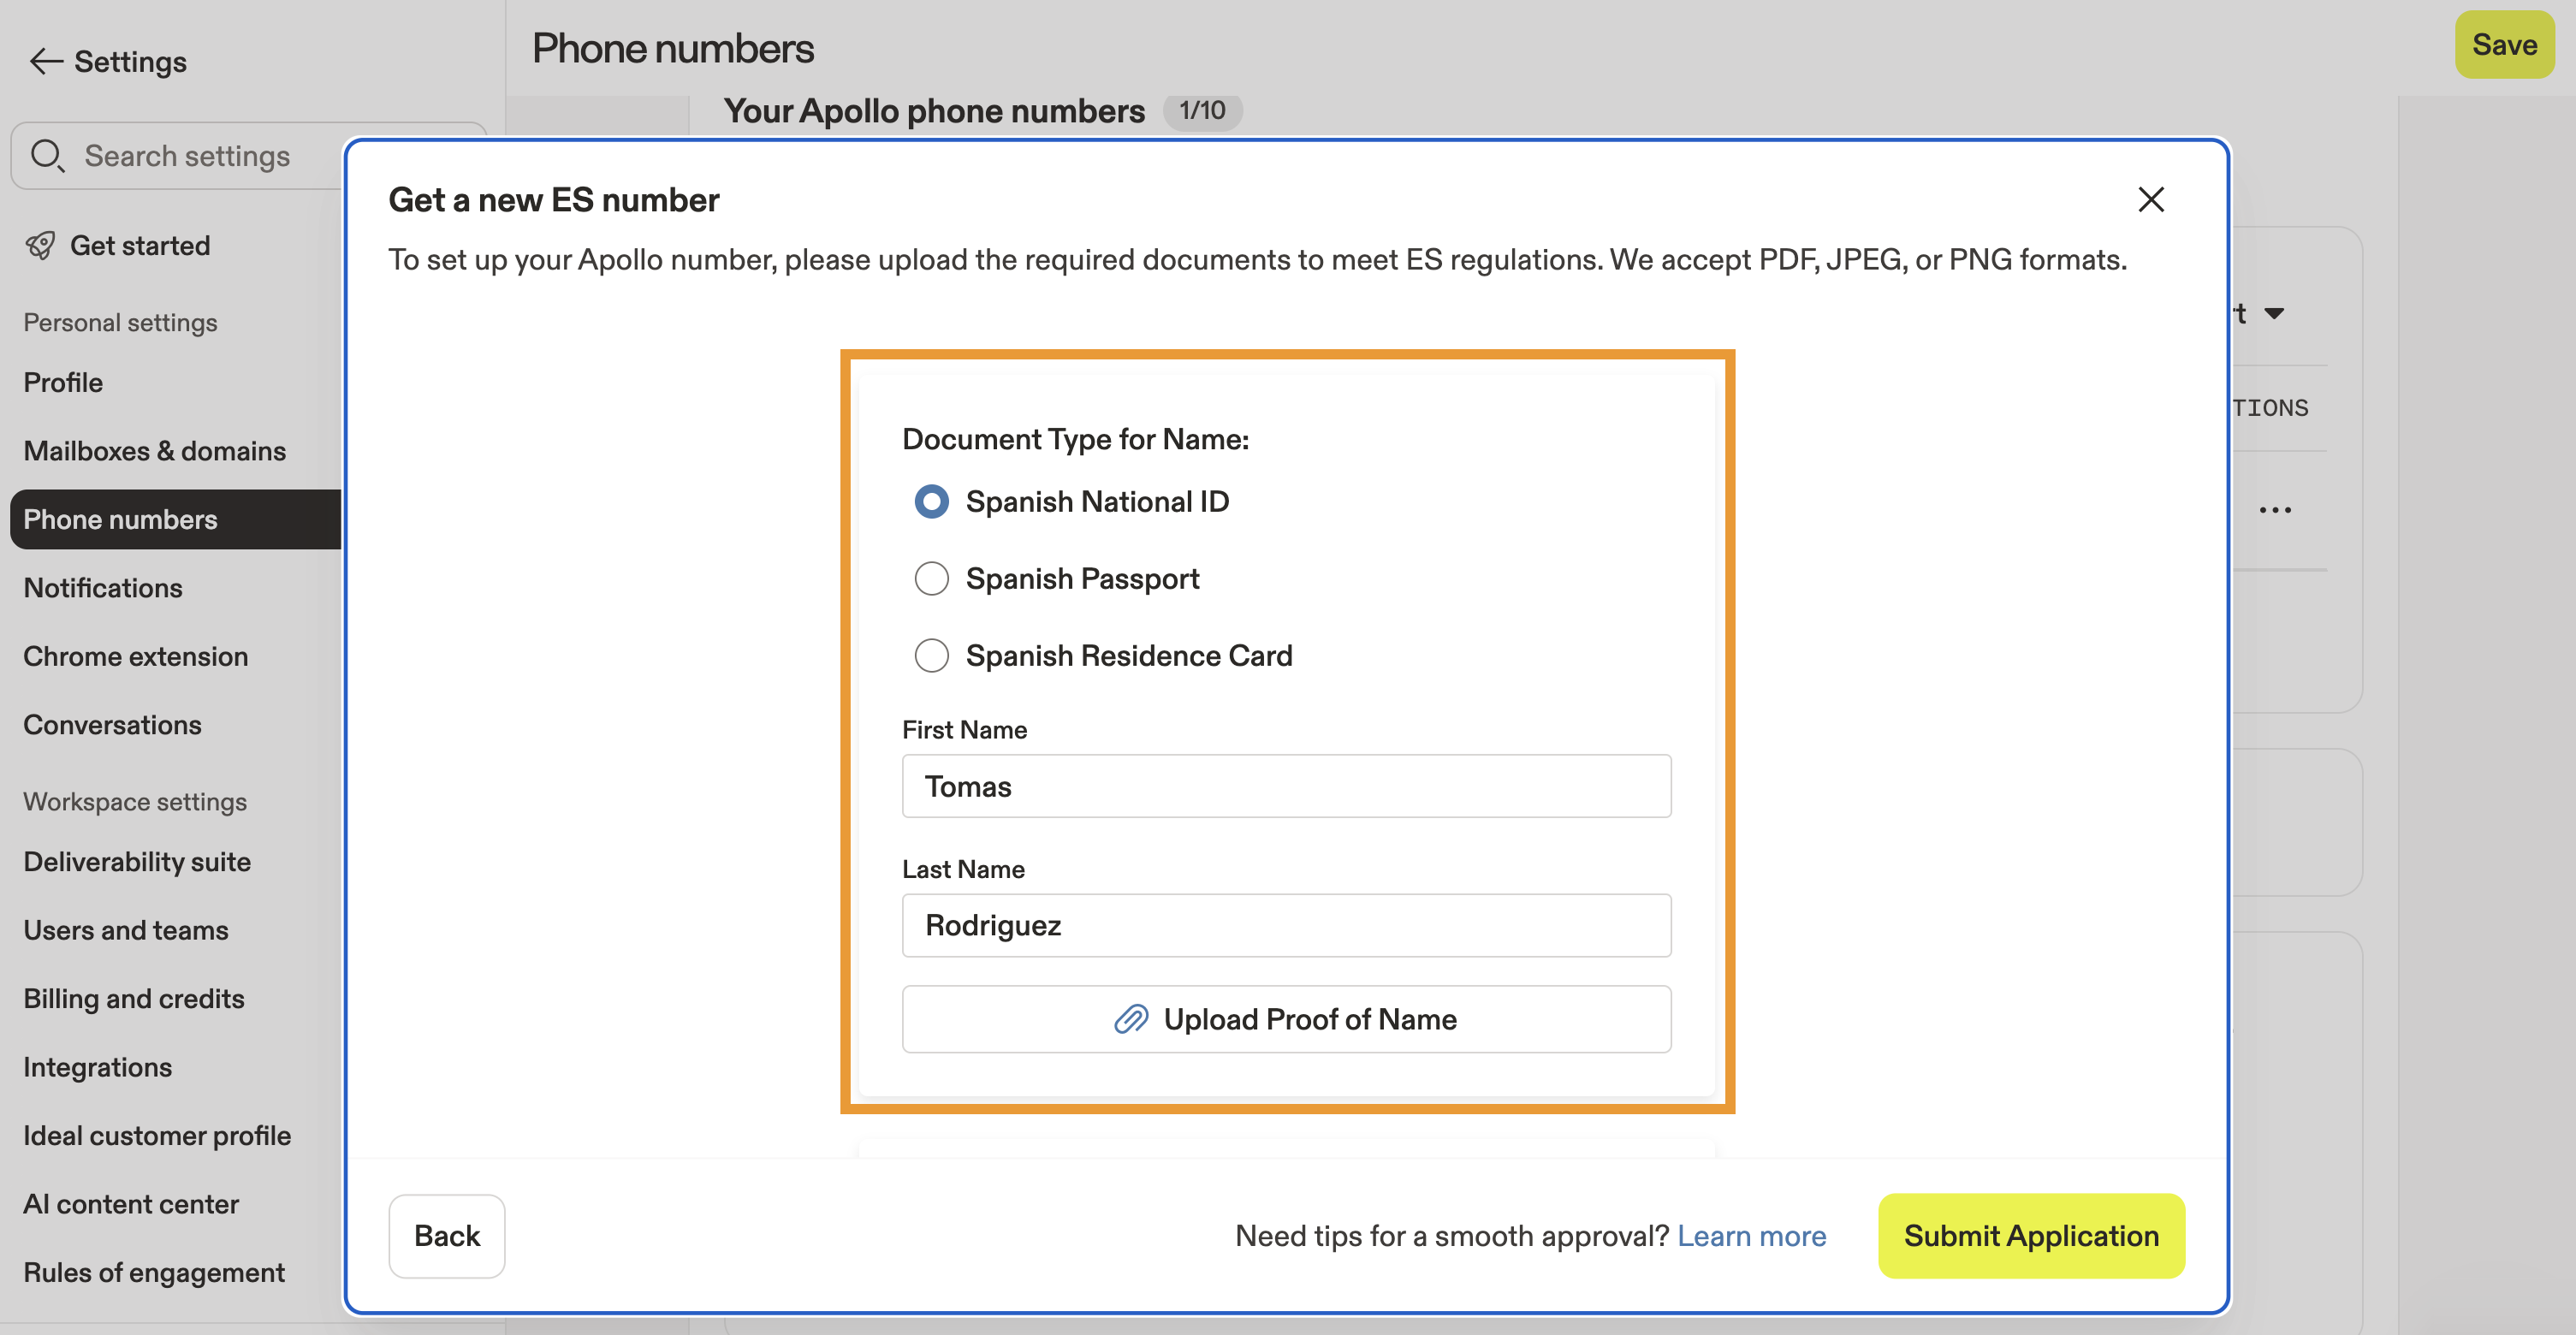
- Choose the type of documentation that you want to use to verify your identity, then enter your name, and click Upload Proof of Name to select the document from your computer.
Apollo's partner, Twilio, manages international dialing registration. Twilio may reject your documentation if it isn't valid or legible. Some common reasons for documentation rejection include:
- Document expiration date
- Unacceptable proof of identification
- Incorrect address
- Incorrect name
- Wrong government office selected
- Missing information
- Missing ID to match the name on the business registration
- Missing one side of your ID
- Age: you must be 18 or older
- Next, enter your address. Click Upload Proof of Address and select the document from your computer.
The proof of address documentation you provide must be from within the country in which you're registering for a phone number. Documentation from outside of the country will result in rejection.
- When finished, click Submit Application. Once submitted, it may take up to 48 hours to verify your documentation.
You receive an email once Twilio has processed your application. If Twilio rejects your application, verify and update your documentation, then resubmit it.
When your application is accepted, select a phone number:
- Launch Apollo and navigate to Settings > Phone numbers.
- Click Set up phone number > Choose a Number.

- Enter the ISO Alpha-2 country code for your approved country and click Search.
- Choose a phone number from the list and click Select.
In some cases, it may take an additional 24 hours for Apollo to confirm and allot your new phone number.
- After selecting your phone number, click Add business profile to enter your business information.Apollo recommends you add a business profile as it helps elevate your credibility and visibility, leading to increased engagement and higher conversion rates.

Not all countries require a business profile. Apollo only suggests that you add a business profile based on the regulatory requirements of the country in which you register a phone number. Only an Apollo admin needs to fill out the business profile when setting up a phone number. Once submitted, it covers everyone on the team using the dialer in the country you selected — no need for each person to do it separately!
You have now configured your Apollo phone number. Next, set your call preferences and make calls to contacts!
If you purchase multiple phone numbers, your oldest phone number is set as the default and is used when you dial contacts. To edit your default, click ... beside a phone number, then click Set as default.
FAQs
|
Frequently asked questions |
||
| Is there a cost to get an Apollo phone number? | How many phone numbers can I get on Apollo? | Can I port or transfer an external phone number into Apollo? |
| Can I customize the caller ID display for my Apollo phone number? | Can I change my Apollo phone number? | Can Apollo automatically rotate between my phone numbers to improve connection rates? |
| Can phone numbers be recovered after they're deleted? | ||
Is there a cost to get an Apollo phone number?
On Apollo plans that include the dialer, each person can have one active free phone number at a time. You can purchase additional phone numbers using monthly credits.
How many phone numbers can I get on Apollo?
You can get one free number and purchase additional phone numbers with monthly credits.
The amount of phone numbers you can purchase depends on your Apollo plan:
| Plan | Free numbers per user | Total numbers allowed |
|---|---|---|
| Free | 0 | 0 |
| Basic | 1 free | 1 |
| Professional | 1 free | 5 |
| Custom | 1 free | 10 |
| Trial | 1 free | 1 |
Can I port or transfer an external phone number into Apollo?
It isn't possible to port existing phone numbers into Apollo. However, you can enable local presence for a more familiar face to prospects.
Can I customize the caller ID display for my Apollo phone number?
Outbound calls display your Apollo phone number. Caller ID name (CNAM) customization isn't available on Apollo. To improve connection rates, consider using local presence to show a local area code.
Can I change my Apollo phone number?
Yes, you can either purchase additional phone numbers on eligible plans or remove and get a new free phone number. If you delete a phone number, it can't be recovered.
Can Apollo automatically rotate between my phone numbers to improve connection rates?
When you make calls to multiple people at once using the power dialer or parallel dialer, Apollo can distribute calls across the phone numbers you've purchased. This helps improve connection rates by avoiding repeated use of the same number in a short period of time.
For individual prospect calls, Apollo always uses the phone number you've set as your default in Settings > Phone Numbers.
Can phone numbers be recovered after they're deleted?
No, deleted phone numbers can't be recovered. Once a number is removed, it's permanently released and can't be reassigned to your account.
You can get a new Apollo phone number or use local presence to continue calling from a number that matches your prospects' region.
Next Steps
Now that your number is set up, here are a few ways to start calling smarter and getting more out of the dialer.
| Dialer Overview | Get a full picture of how calling works by setting up and navigating the dialer to confidently manage inbound and outbound calls from one place. |
|---|---|
| Make Calls | Start reaching prospects faster by making calls directly from contact records to keep your workflow tight and conversion-focused. |
| Set Your Call Preferences | Fine-tune how your team connects by customizing call settings and behavior to match your outreach style and improve efficiency. |
| Use Power And Parallel Dialing On Apollo | Increase connect rates at scale by running power or parallel dialing sessions to reach more prospects in less time. |
| Countries With Available International Phone Numbers | Plan your global outreach by checking supported countries and availability to expand your calling strategy with confidence. |