
Overview
After you launch a workflow, you can update its configuration, manage enrolled records, review its performance, and retry records that encounter errors.
Use this article to manage an existing workflow, add people manually, review workflow runs and activity, resolve failed records, and control who can access or copy the workflow.
Your permission profile determines which workflow actions you can complete. You need Can view workflows permission to access workflows and Can activate workflows permission to activate or deactivate them. If you can edit a workflow but can't activate it, submit the workflow to an admin for review.
Check out the following sections to manage and troubleshoot workflows.
Manage a Workflow
Keep your workflows up to date as your processes evolve. Use the following tabs to update workflow logic, control when a workflow runs, organize it for your team, and manage who can access or reuse it.
Edit a workflow when you need to change its trigger, filters, rules, actions, or settings.
To edit a workflow:
- Launch Apollo, then click Workflows.
- Select the workflow, then click Edit workflow.
- Click a workflow block to open its configuration panel.
- Update the trigger, filters, rules, or actions, then click Done.
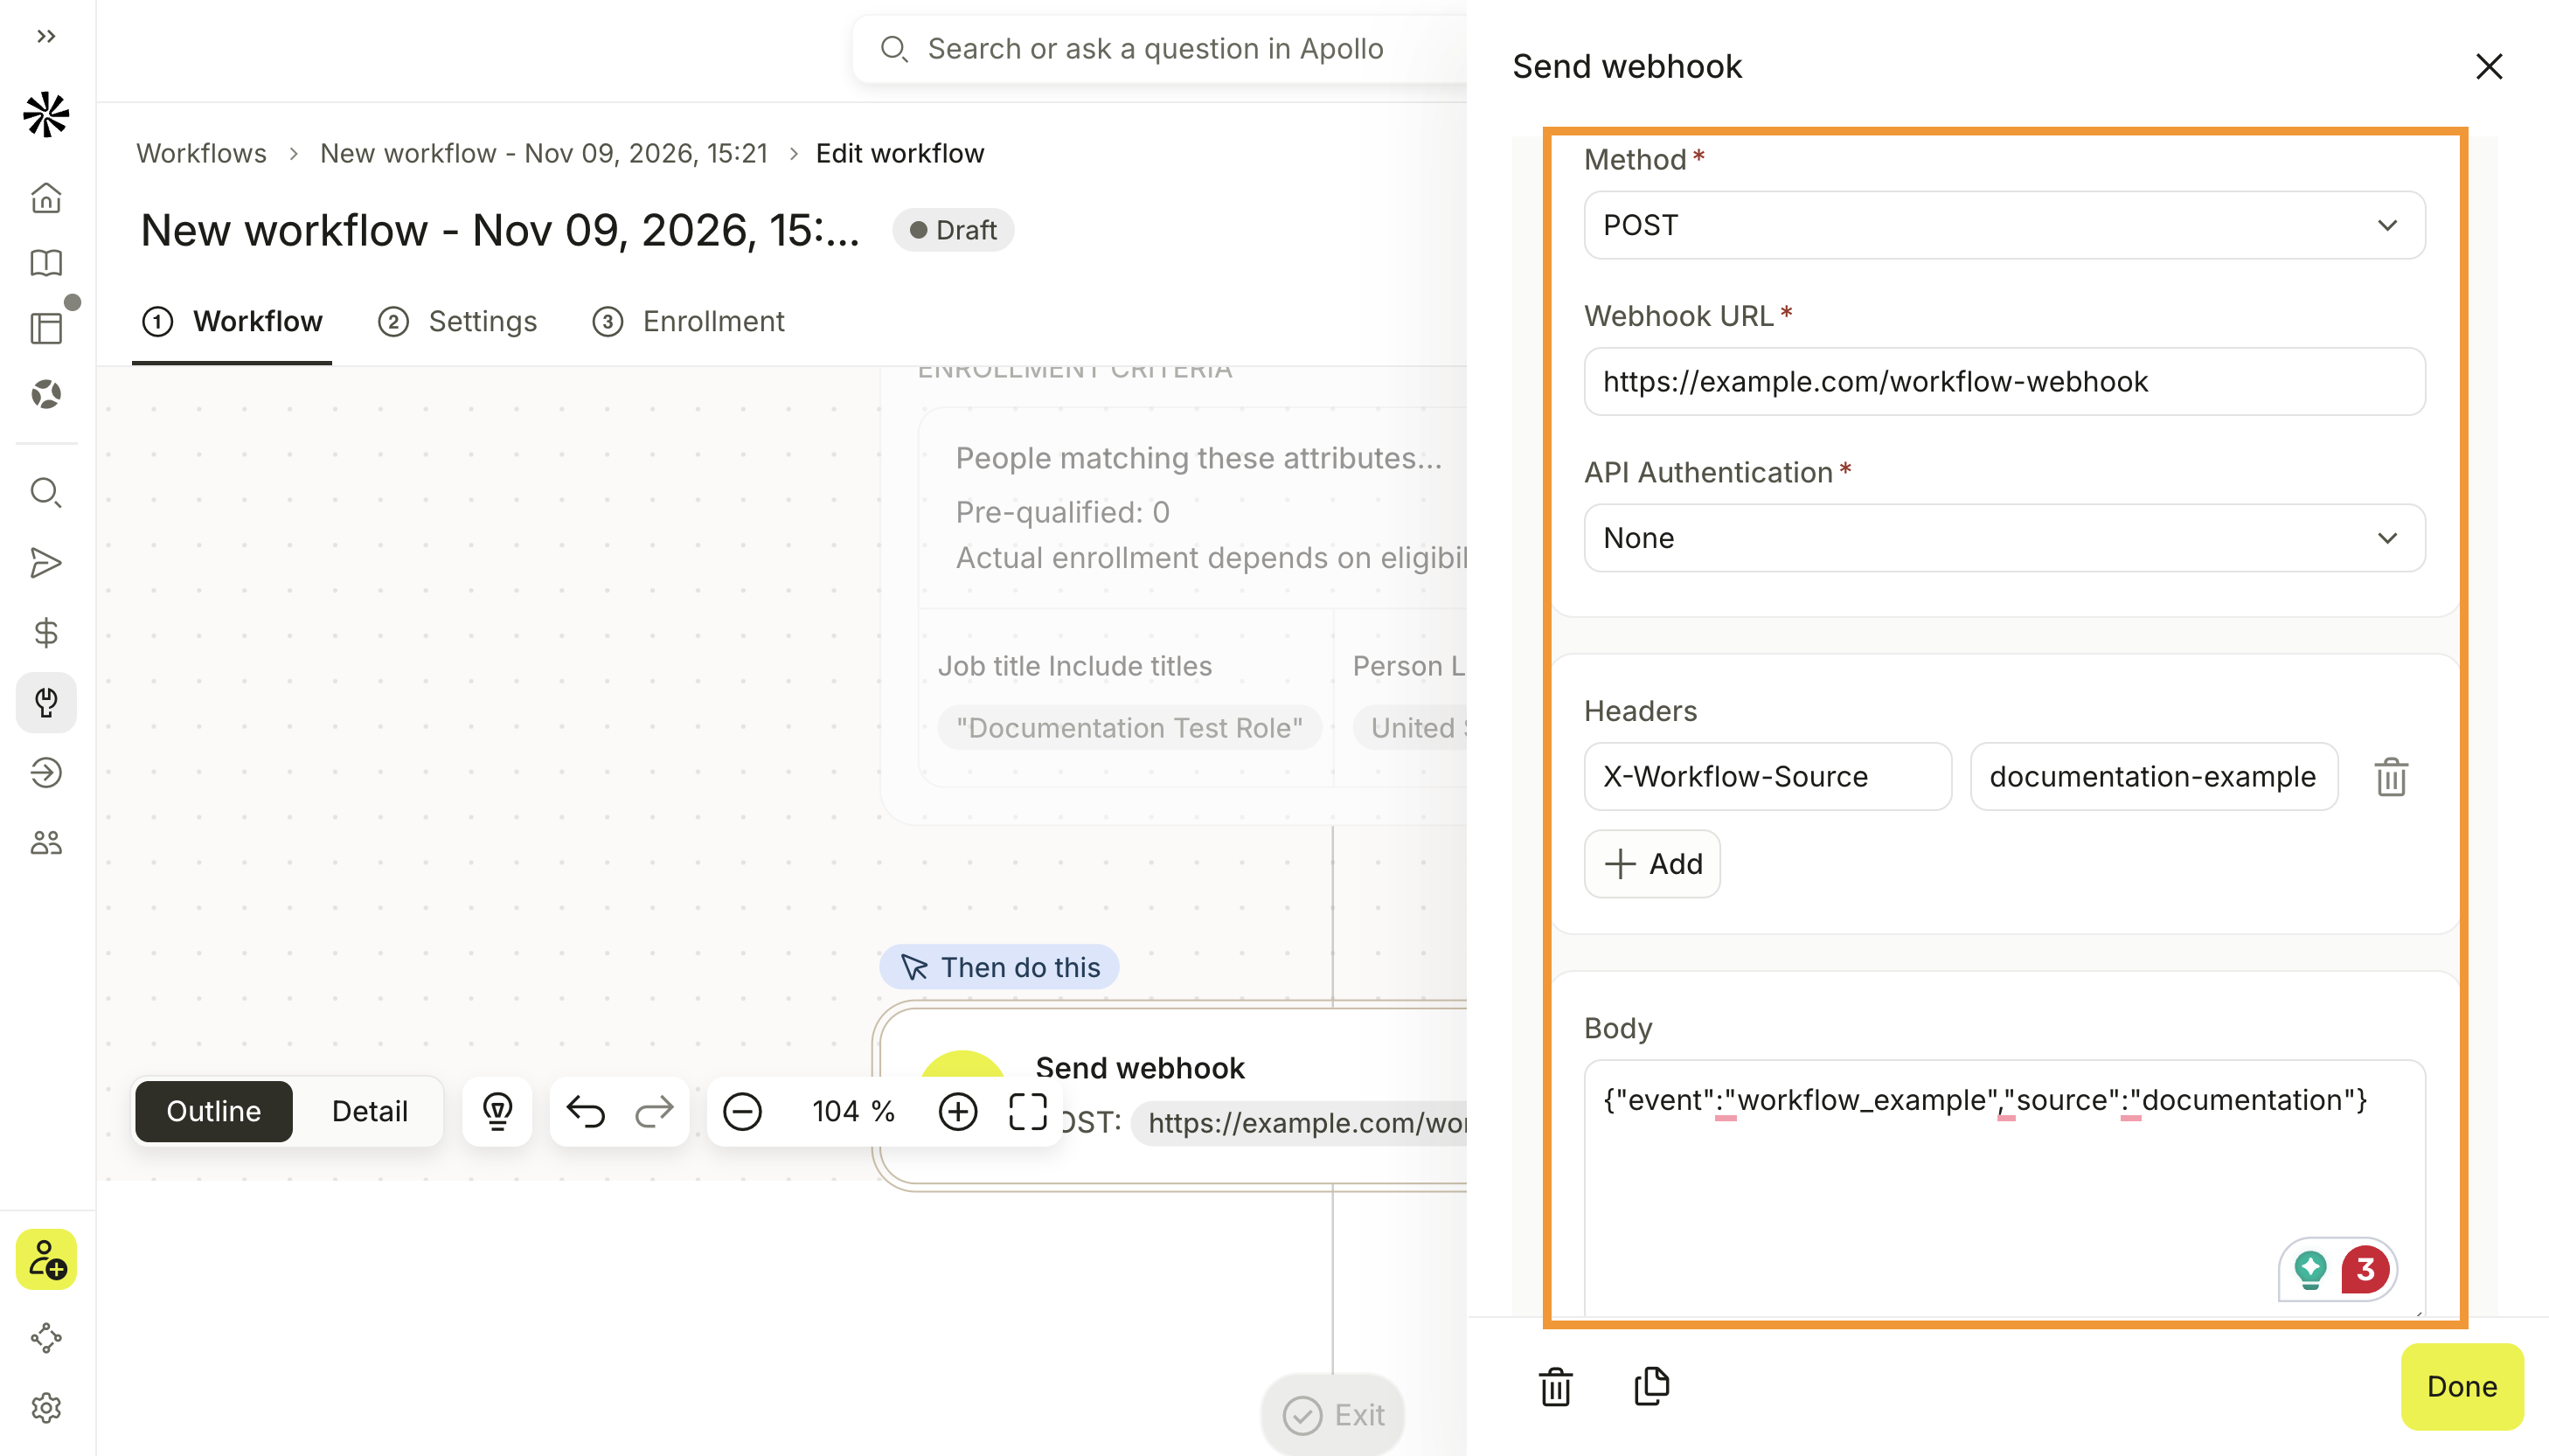
- Repeat these steps for each block you want to update.
- Save or publish your changes:
- For an inactive workflow, click Save and Launch workflow when you're ready to configure its launch options.
- For an active workflow, click Publish changes.
You have now updated the workflow.
You can change the workflow target before the workflow completes its first run. Changing the target resets the workflow and removes its triggers, filters, rules, and actions. After the first run, the target is locked. You can still change the run type, but doing so clears the message in a Send Notifications action.
Activate a workflow when you're ready for Apollo to begin processing records. Deactivate it when you need to stop new records from entering while you review or update the workflow.
To activate or deactivate a workflow:
- Launch Apollo, then click Workflows.
- Select the workflow.
- Complete one of the following actions:
- To start an inactive workflow:
- Click Launch workflow.
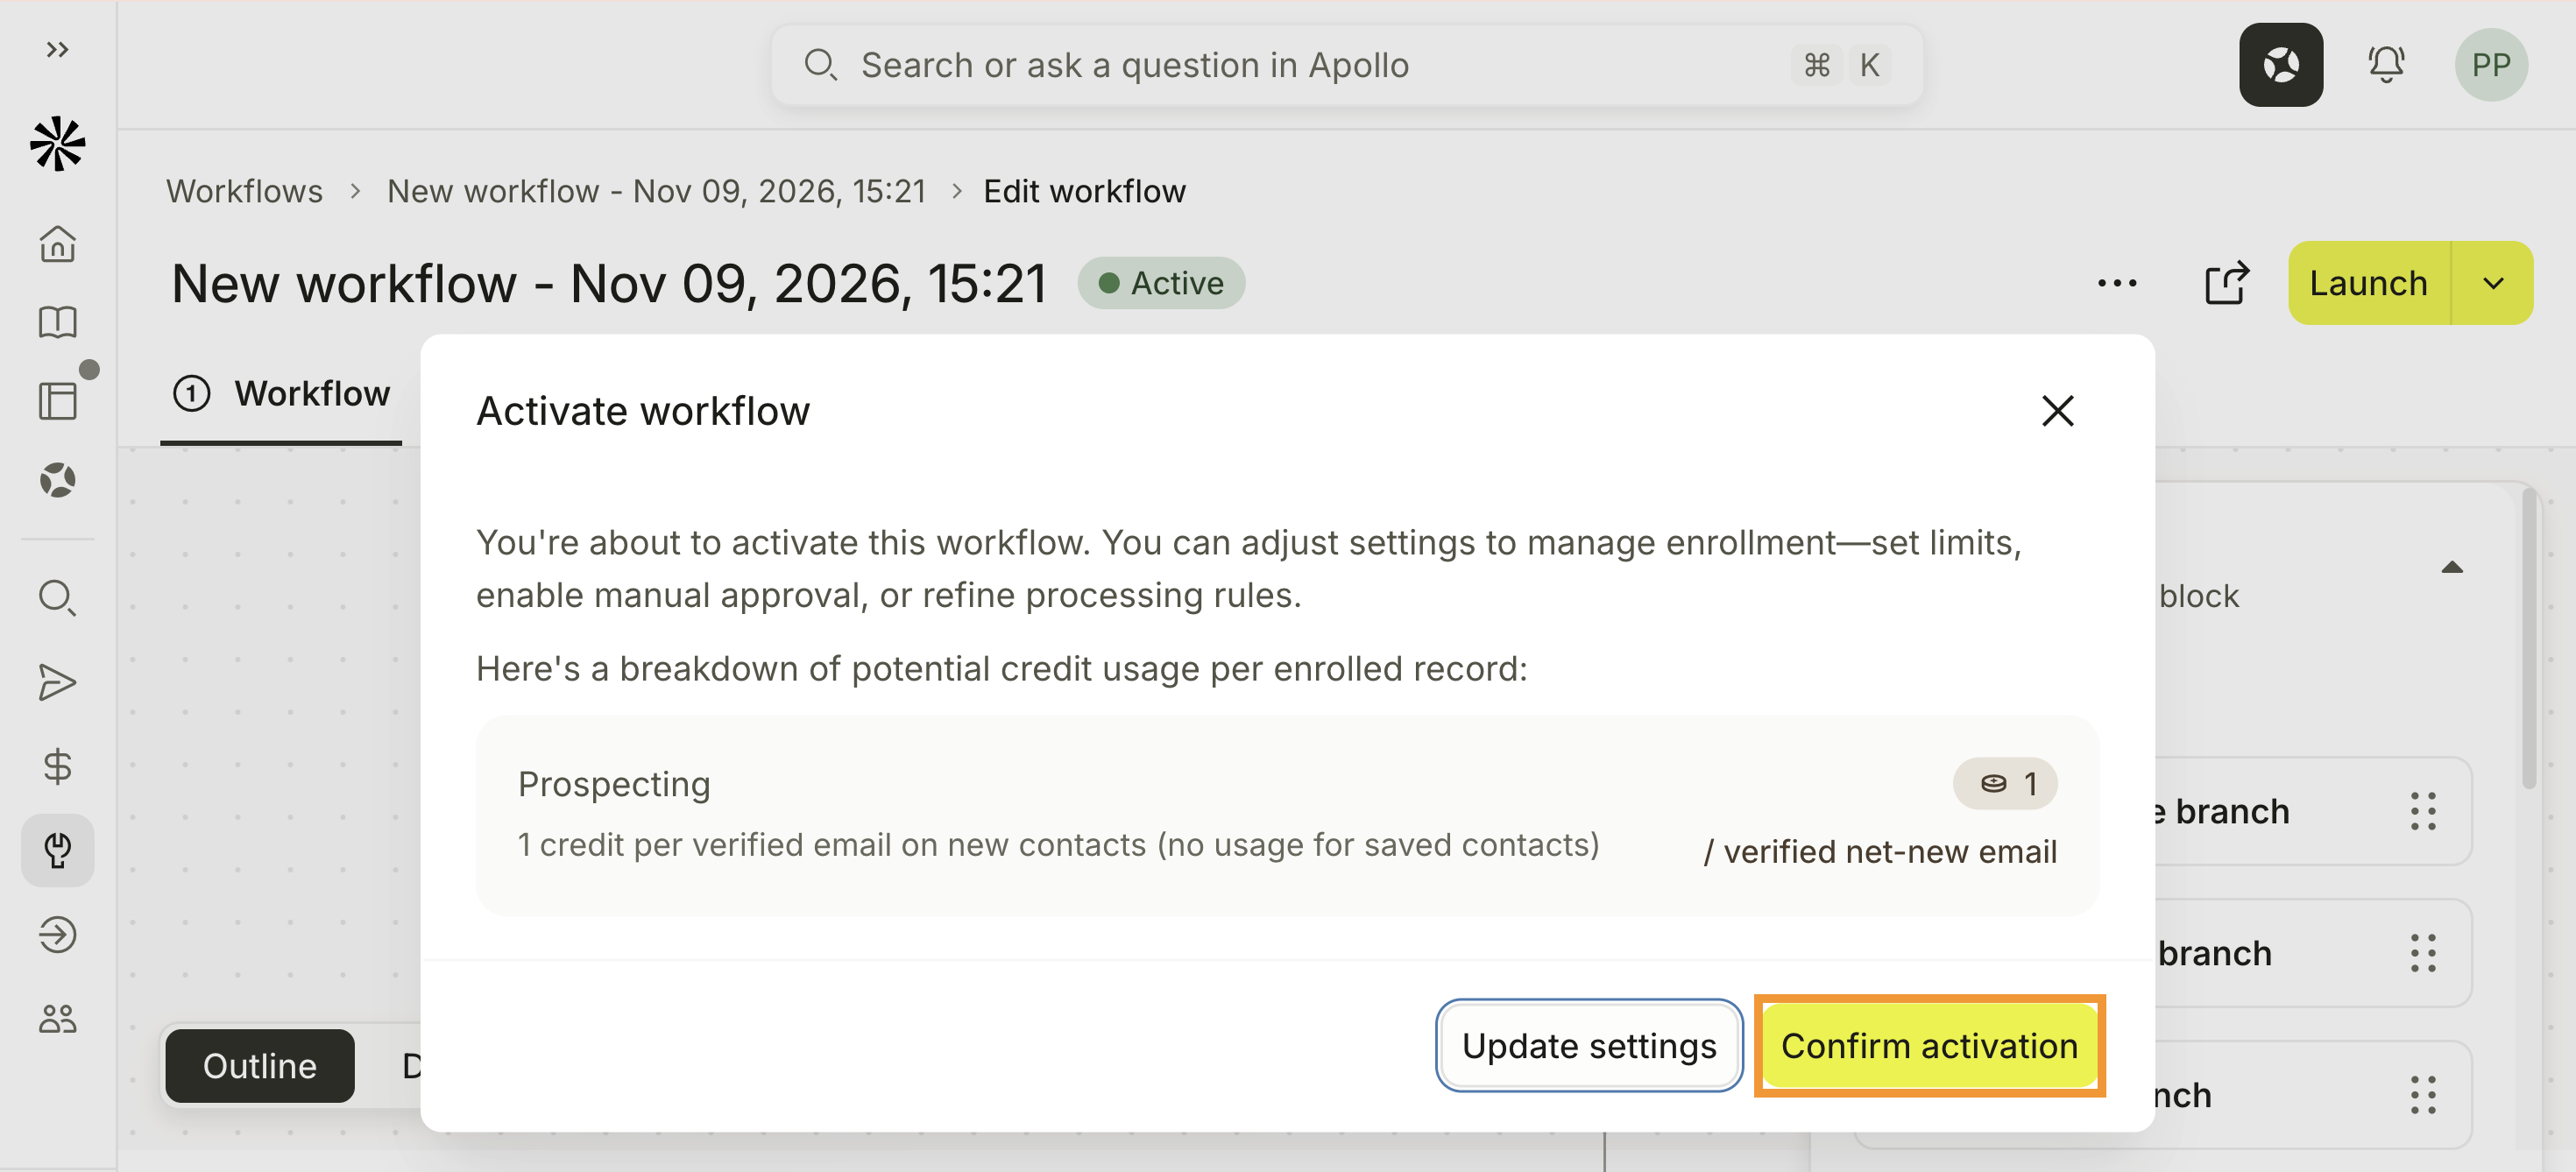
- Review the workflow settings and potential credit usage. To change the enrollment settings, click Update settings.
- Click Confirm activation.
- Click Launch workflow.
- To stop an active workflow, switch the workflow off.
- If you don't have permission to activate workflows, click Submit for approval.
- To start an inactive workflow:
You have now activated, deactivated, or submitted the workflow for approval.
Deactivating a workflow stops it from processing new records. It doesn't delete its configuration or previous runs.
Use the Actions menu to clone, move, archive, or restore a workflow.
To clone, move, or archive a saved workflow:
- Launch Apollo, then click Workflows.
- Locate the workflow you want to manage.
- Click Actions from the workflow row, overview page, or workflow builder.
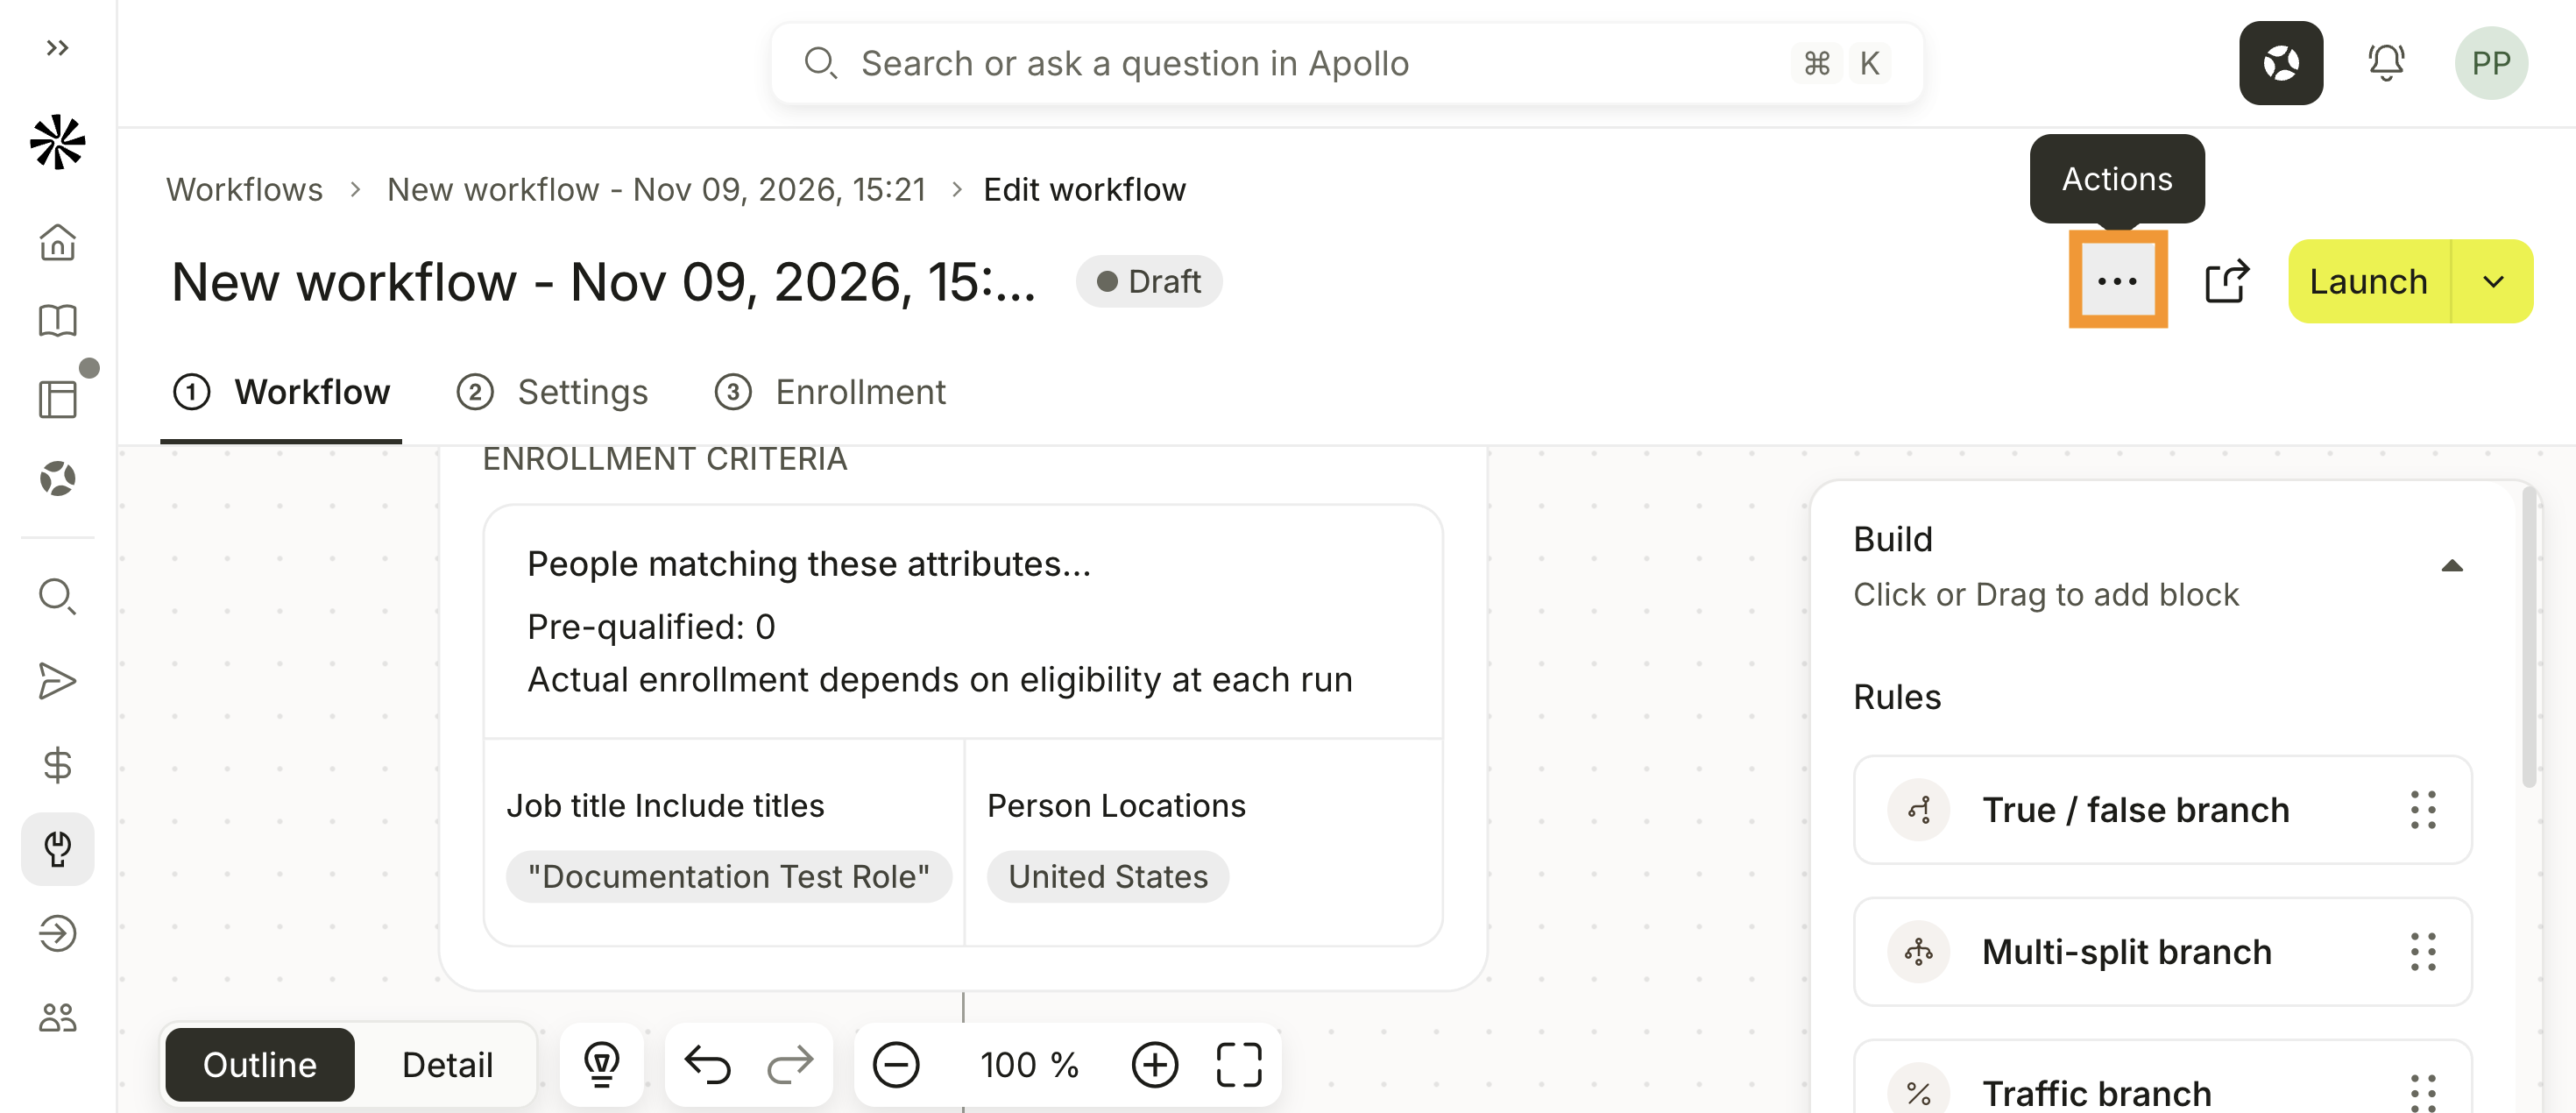
- Select the action you want to complete:
- Clone: Create a copy and open it in the workflow builder. You can't clone a pre-built workflow.
- Move to folder: Select a folder, then click Move Here.
- Archive: Click Archive in the confirmation window. Archiving an active workflow automatically switches it off.
You have now cloned, moved, or archived the workflow.
You can also select multiple workflows from the workflow list, then move or archive them in bulk.
To restore an archived workflow:
- Launch Apollo, then click Workflows.
- Click Filters > Workflow status > Archived.
- Select the archived workflow.
- Click Unarchive. You can also click Actions > Unarchive.
You have now restored the workflow. The workflow returns switched off, so review it before you launch it again.
Share a saved workflow when other members of your team need to view or manage it. You can also publish an eligible workflow as a public template that anyone with the link can view and clone.
Share a Workflow
To share a workflow:
- Launch Apollo, then click Workflows.
- Select the saved workflow.
- Click Actions > Share.
- Choose the workflow access:
- Restricted: Only people with access can view the workflow.
- Everyone at [team]: Everyone in your team can access the workflow.
- For restricted access, add the users who need access and choose their access level:
- Full access: The user can edit the workflow and share it with others.
- Can edit: The user can edit the workflow but can't share it.
- Can view: The user can view the workflow but can't edit or share it.
- Click Done.
You have now shared the workflow.
Only users with Full access can change sharing. Admins and workflow owners have full access. A user's workflow permissions still apply after you share the workflow, and users may need to grant access to their contacts, accounts, and deals before they can edit it. Non-admin users can't access workflows created by admins, and person-level sharing only applies to workflows created by non-admin users.
If workflow sharing isn't included in your plan, Apollo displays Upgrade to share.
Publish a Workflow as a Public Template
The workflow must have completed at least one run before you can publish it as a public template. Draft workflows display Only published workflows can be shared.
To publish a workflow as a public template:
- Launch Apollo, then click Workflows.
- Select the workflow, then click Actions > Share.
- Click Publish.
- Toggle on Make workflow public as template.
- Enter a name in Template Name.
- Click Copy link to share the public template.
You have now published the workflow as a public template. The Published as template column on the workflow list displays Live.
Anyone with the link can view and clone the public template. Apollo hides private filters and fields, and edits to the original workflow update the shared version.
To stop sharing the public template, return to Share > Publish, then toggle off Make workflow public as template. Apollo displays Workflow template un-published, and the workflow list displays Unpublished.
Publishing a public template doesn't add it to Apollo's in-app template library. Customers can't add workflows to that library.
Add People to a Workflow Manually
You can manually add people to an active workflow without waiting for them to meet the workflow trigger.
Manual enrollment bypasses the workflow trigger and starts the selected people at the configured workflow steps. Review the workflow before you manually add people to confirm that its actions are appropriate for them.
To manually add people:
- Launch Apollo, then click Prospect and enrich > People. You can also open Saved records > People.
- Select the people you want to add.
- Click Workflow. If Workflow isn't visible, click More > Workflow.
- Select an active workflow. Click All, My, or Team, or search for a workflow by name.
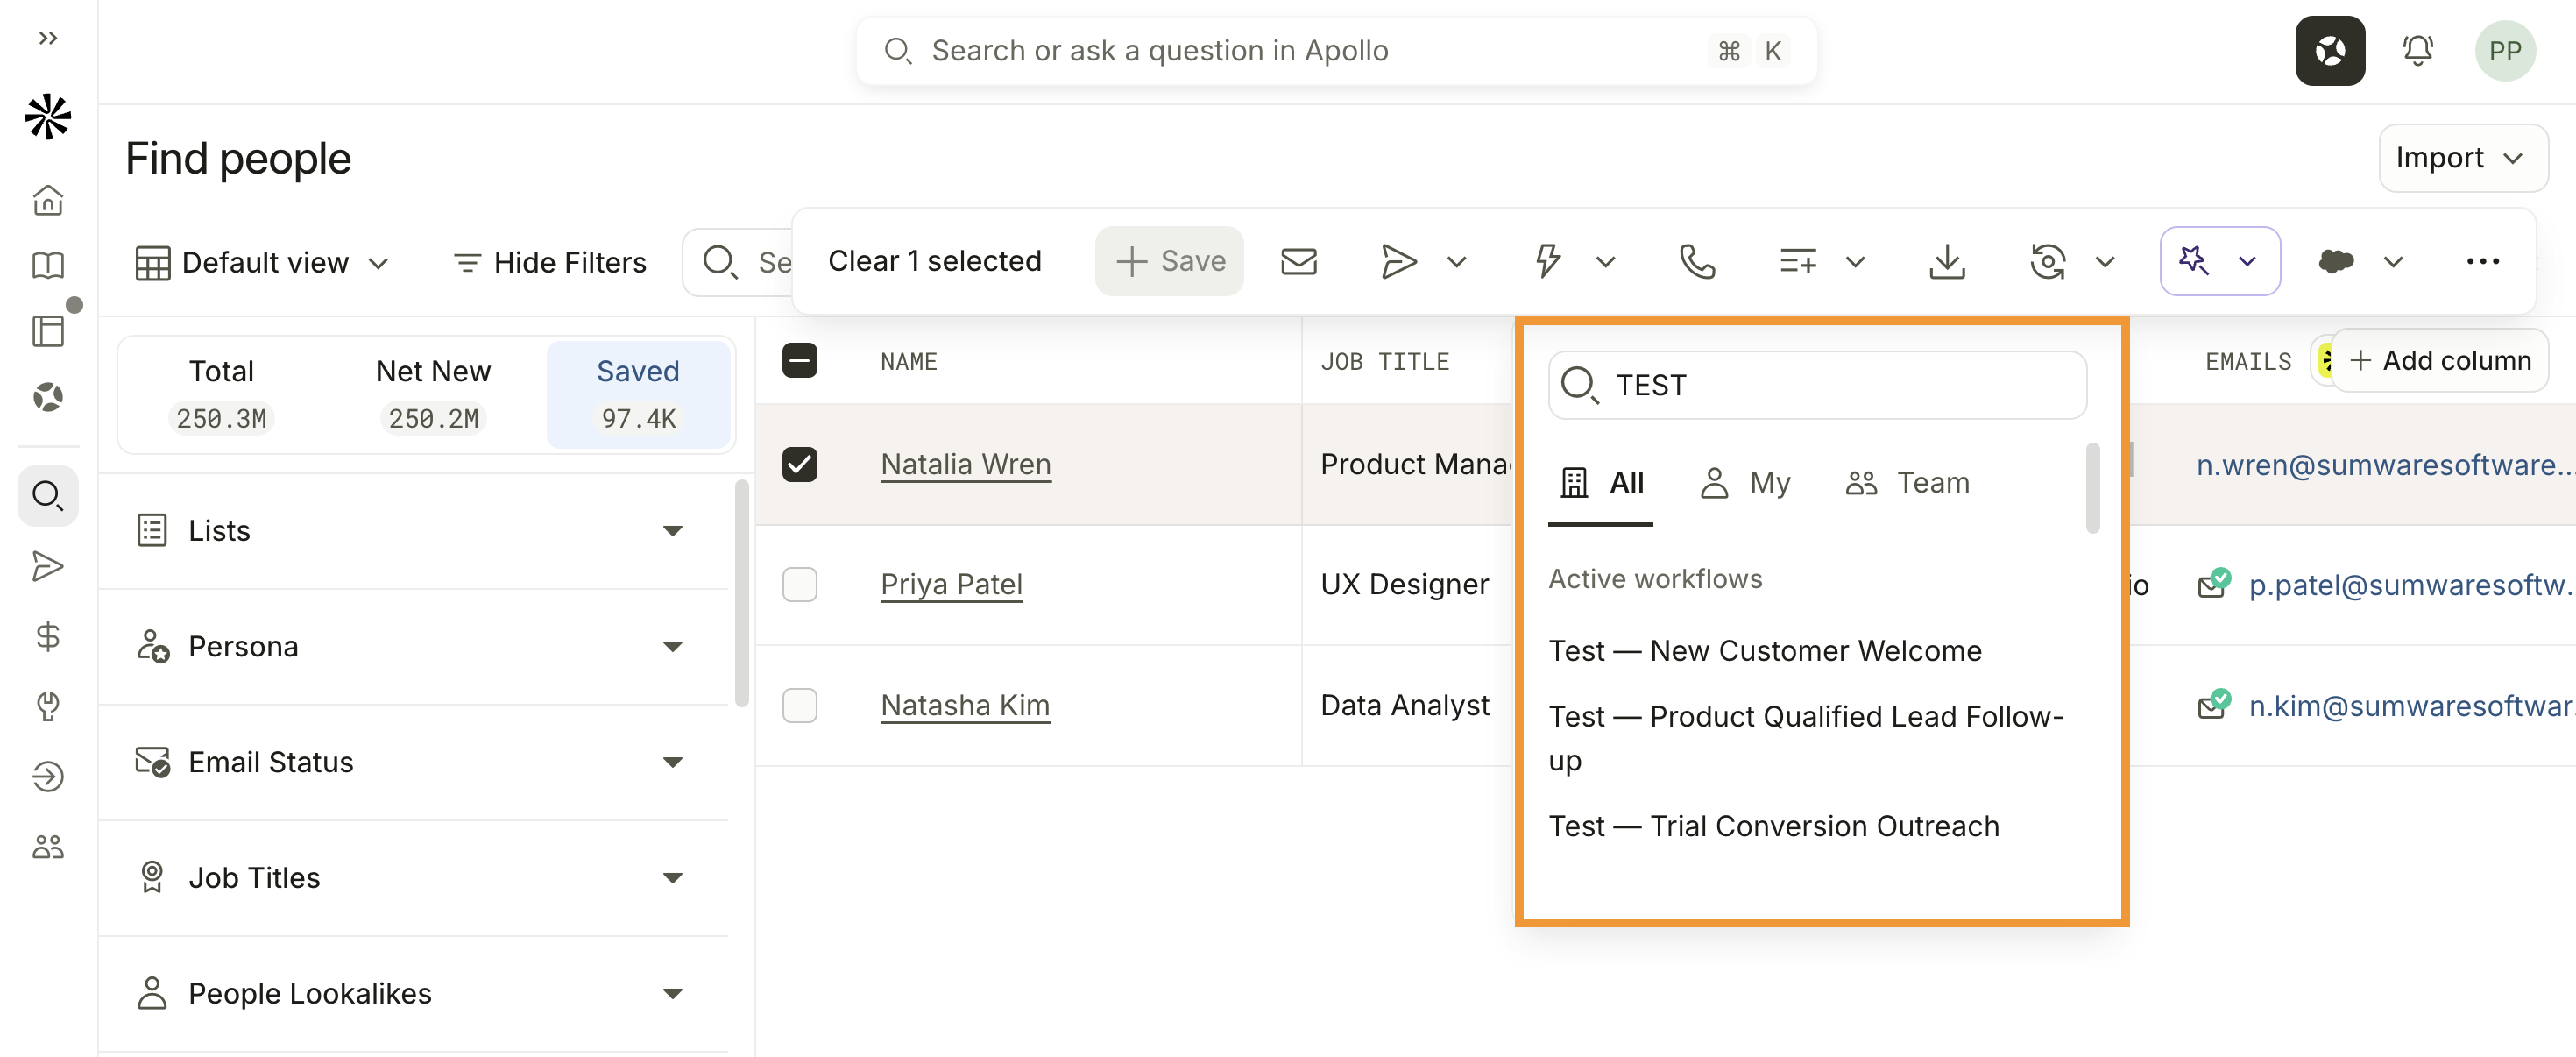
- Review the selected people. If any have already entered the workflow, select the people you want to add again, then click Add records. To exclude them, click Skip these records.
- Review the enrollment details, then click Confirm enrollment. If the workflow reached its enrollment limit and you want to continue, click Override and enroll.
You have now manually added the selected people to the workflow. Manual workflow runs appear in the workflow history as Run #N (Manual run).
Apollo doesn't currently support manually adding companies or deals to an existing workflow from their respective search pages. To control whether a record can enter an automatic workflow more than once, configure the workflow's re-enrollment settings.
Troubleshoot a Workflow
Use the following questions to identify why a workflow or record didn't behave as expected. Each answer includes checks you can complete in Apollo and steps to correct the issue.
Common workflow concerns | ||
| Why didn't the workflow run? | Why wasn't a record enrolled? | Where can I review workflow enrollment and activity? |
| Why did a record fail? | Why can't I retry a failed record? | Why did a sequence use an unexpected sender? |
Why didn't the workflow run?
A workflow only evaluates records when it is active and its configured schedule or trigger event occurs. Check the workflow status and trigger before changing its enrollment criteria.
To troubleshoot a workflow that didn't run:
- Launch Apollo, then click Workflows.
- Locate the workflow and confirm that it is active. If it is inactive, open it, review its configuration, then click Launch workflow.
- Open the workflow and click Workflow. Review the trigger block:
- For a scheduled workflow, confirm the start date, frequency, selected days, timezone, optional end date, and next run date.
- For an event-triggered workflow, confirm that the selected event occurred while the workflow was active.
- Confirm that the workflow isn't archived. Archived workflows can't run.
- Open Settings and confirm that the workflow hasn't reached a configured run, record, or credit limit.
- Correct the trigger or settings, then publish the changes. Check out Configure Workflow Triggers and Actions for complete trigger instructions.
Event-triggered workflows only process events that occur while the workflow is active. Activating a workflow doesn't enroll records for earlier events. Event processing isn't immediate, and some triggers can take longer depending on when Apollo receives and evaluates the event.
Why wasn't a record enrolled?
A workflow can run without enrolling a particular record. The record must match the workflow target, trigger, enrollment criteria, and re-enrollment settings when Apollo evaluates it.
To troubleshoot a record that wasn't enrolled:
- Open the workflow and confirm that the record matches its target: people, companies, or deals.
- Click Edit workflow, then open the trigger block.
- Review every enrollment filter and its AND/OR logic. Confirm that the record contains the required data and matches each filter value.
- For an event-triggered workflow, confirm that the event occurred while the workflow was active. Apollo doesn't backfill events that happened before activation.
- Open Settings and review the re-enrollment setting:
- Every run allows the record to enter whenever it meets the criteria.
- Only once prevents a record from entering again after its first enrollment.
- Once every allows the record to enter again after the configured period.
- Click Enrollment and check whether the record appears as Skipped or Failed. Review the reason displayed under the status.
- Correct the filters, re-enrollment setting, or processing limit, then publish the changes. Check out Configure Workflow Triggers and Actions to update enrollment criteria.
Where can I review workflow enrollment and activity?
Use Enrollment to follow records through each workflow run. Use Activity when you need to investigate the individual actions Apollo completed, skipped, or failed.
To check a workflow run:
- Launch Apollo, then click Workflows.
- Select the workflow, then click Enrollment.
- Select a run from Record runs. Runs appear as Run #N and include Trial run or Manual run when applicable.
- Review the target, run count, credit usage, enrolled records, and record status:
- In Progress: Apollo is still processing the record.
- Completed: Apollo completed the configured actions.
- Failed: Apollo couldn't complete an action. Review the failure reason before retrying.
- Skipped: Apollo didn't process the record because it didn't meet a requirement or the workflow reached a limit.
- To investigate a particular action, click Activity.
- Use Status, Failure reason, Action, or Completed in date range to narrow the activity.
Pending approval isn't a record status. Under Enrollment, review records that require approval in the separate Pending approvals section.
Why did a record fail?
Under Enrollment, the failure reason appears below the record's Failed status. Correct the underlying issue before retrying the record. Otherwise, the same action can fail again.
| Failure reason | How to fix it |
|---|---|
| Missing required owner |
|
| Missing or inactive mailbox |
|
| Credit error |
|
| Missing assignee |
|
| Slack notification failure |
|
| Record selection limit breached |
|
Why can't I retry a failed record?
The workflow must be active before Apollo can retry failed records. Apollo displays Workflow is not active if you try to retry records while the workflow is inactive.
To retry failed records:
- Correct the ownership, mailbox, credit, assignee, or integration issue shown in the failure reason.
- Activate the workflow if it is inactive.
- Open the workflow and click Enrollment.
- Select the run that contains the failed records, then toggle on Show failed only.
- Retry all eligible failures or retry an individual record:
- Click Retry failed records to retry all eligible failures.
- Click Retry failed record on an individual row to retry only that record.
Apollo processes up to 10,000 records in a retry.
Why did a sequence use an unexpected sender?
The Send email from setting on the sequence action determines which mailbox Apollo uses. The selected sender source can resolve to a different user for each enrolled record.
To troubleshoot the sequence sender:
- Open the workflow and click Edit workflow.
- Open the action that adds people to the sequence.
- Review Send email from. Confirm that the workflow uses the intended source, such as the contact owner, account owner, opportunity owner, a custom field, a specific user, or round robin.
- Open the affected record and confirm that the selected owner or custom field resolves to the expected active user.
- Confirm that the expected user has an active mailbox. If necessary, follow Link Your Mailbox to Apollo to connect it.
- Update the sender source or record ownership, publish the changes, and retry any failed records.
For deal workflows, Apollo uses Opportunity owner, not Deal owner, in the sender options. Deal workflows don't automatically fall back to another mailbox when the selected owner doesn't have an active one.
If the same person is associated with multiple deals that trigger the workflow, Apollo uses the most recently created triggering deal to determine the sequence sender.
Next Steps
Keep building and managing your workflows with these resources: