Overview
Meetings on Apollo empower your prospects to self-schedule meetings with you without a lot of back-and-forth administrative work. After you set up meetings, you can create meeting types and share a scheduling link with contacts, allowing them to self-schedule meetings based on your real-time availability.
Check out the following sections to create and manage meetings. Back to Top
Create a Scheduling Page
Scheduling pages are templated meetings with hosts, meeting flows, lengths, and locations. You can create a scheduling page to quickly book single host, multi-host, or round-robin meetings with prospects.
You can create as many scheduling pages as you need, but the number of scheduling pages you can activate depends on your Apollo plan. If you need to activate additional scheduling page types, manage your plan. If you have questions about upgrading, reach out to the Apollo sales team.
To create a scheduling page:
- Launch Apollo and click Meetings.
- Click Create, then select the type of scheduling page you want to create.
- Single host: 1 host, useful for 1-on-1 discussions.
- Multi host: Multiple hosts, useful for group discussions. Requires all hosts to be available at the same date and time.
- Round robin host: Rotates between different hosts to facilitate a series of 1-on-1 discussions.

- Enter a meeting name. Prospects can use meeting names to decide which type of meeting to book with you.
- (Optional) To set a public display name for your meeting, click Use an external display name, then enter a public meeting name.
- Select a meeting duration from the dropdown.
- (Optional) Enter a custom URL next to the meeting link to customize the URL.
- Add a meeting description to give participants more context.

- When you're done, click Next: Host details.
Follow the steps below to complete setup for your selected scheduling page type:
To complete the setup for a single host meeting.
- Select hosts from the dropdown. Admins can select any user as a single host, while non-admins can create single-host scheduling pages only for themselves.
- Click Manage schedule next to each host to set their working hours and availability.
 When you’re done, click Next: Buffers & limits.
 - Set a minimum notice to ensure you have enough time to accept requested meetings. Enter the minutes, hours, or days in advance that a prospect needs to book a meeting with you.
- Set a meeting availability interval to limit how frequently prospects can book meetings. You can configure intervals of up to two hours per booking.
- Add time buffers before and after your scheduled meetings to ensure that prospects can't book back-to-back meetings with you. You can buffer up to 1 hour before and after each meeting.
- Use bookings limits to set the number of prospect bookings you want to allow per day, week, or month. When your bookings reach this limit, Apollo prevents prospects from booking this meeting until the next available day, week, or month.
- Set a booking date range to limit how far in advance prospects can book a meeting with your host. Prospects only see the host's availability within the maximum date range.
 When you're done, click Next: Email reminder.
 - Set an automated email reminder to remind your prospect when they have an upcoming meeting. Toggle on the reminder, then use the editor to fill out your reminder's subject line and message. You can apply text styling or add the following elements in the editor:
- Links
- Images
- Vidyard videos
- Dynamic variables
- Snippets
- Set your reminder's timing to minutes, hours, or days before a prospect's scheduled meeting. Click Add another reminder to create additional reminders, or click Delete to delete a reminder. When you’re done, click Next: Invitee questions.
- (Optional) Click Add question to add more questions to your intake form.
- (Optional) Click Edit to edit existing questions, or click Delete to remove them.

- When you're done, click Publish.
You've now created a single host meeting in Apollo.
To complete the setup for a multi-host meeting.
- Select hosts from the dropdown.
- Click Manage schedule next to each host to set their working hours and availability.

- Click Assign owner to make 1 person the meeting type's owner. This person's meeting location link will be used as the default location for all bookings via the meeting type, and they will have full access to manage the meeting.
 When you’re done, click Next: Buffers & limits.
 - Set a minimum notice to ensure you have enough time to accept requested meetings. Enter the minutes, hours, or days in advance that a prospect needs to book a meeting with you.
- Set a meeting availability interval to limit how frequently prospects can book meetings. You can configure intervals of up to two hours per booking.
- Add time buffers before and after your scheduled meetings to ensure that prospects can't book back-to-back meetings with you. You can buffer up to 1 hour before and after each meeting.
- Use bookings limits to set the number of prospect bookings you want to allow per day, week, or month. When your bookings reach this limit, Apollo prevents prospects from booking this meeting until the next available day, week, or month.
- Set a booking date range to limit how far in advance prospects can book a meeting with your host. Prospects only see the host's availability within the maximum date range.
 When you're done, click Next: Email reminder.
 - Set an automated email reminder to remind your prospect when they have an upcoming meeting. Toggle on the reminder, then use the editor to fill out your reminder's subject line and message. You can apply text styling or add the following elements in the editor:
- Links
- Images
- Vidyard videos
- Dynamic variables
- Snippets
- Set your reminder's timing to minutes, hours, or days before a prospect's scheduled meeting. Click Add another reminder to create additional reminders, or click Delete to delete a reminder. When you’re done, click Next: Invitee questions.
- (Optional) Click Add question to add more questions to your intake form.
- (Optional) Click Edit to edit your existing questions, or Delete to delete them.

- When you're done, click Publish.
You've now created a multi-host meeting in Apollo.
To complete the setup for round-robin meetings.
- Select hosts from the dropdown.
- Click Manage schedule next to each host to set their working hours and availability.
- Select one of the following options to optimize round-robin distribution:
- Optimize for availability: Apollo sets the round-robin host based on each teammate's availability during the prospect's selected meeting time.
- Optimize for equal distribution: Apollo displays availability based on the next host in line to run the meeting.
- Click Adjust allocation next to each host to set how often Apollo schedules each host for round-robin meetings. When you're done, click Next: Buffers & limits.

- Set a minimum notice to ensure you have enough time to accept requested meetings. Enter the minutes, hours, or days in advance that a prospect needs to book a meeting with you.
- Set a meeting availability interval to limit how frequently prospects can book meetings. You can configure intervals of up to two hours per booking.
- Add time buffers before and after your scheduled meetings to ensure that prospects can't book back-to-back meetings with you. You can buffer up to 1 hour before and after each meeting.
- Use bookings limits to set the number of prospect bookings you want to allow per day, week, or month. When your bookings reach this limit, Apollo prevents prospects from booking this meeting until the next available day, week, or month. When you're done, click Next: Email reminder.

- Set an automated email reminder to remind your prospect when they have an upcoming meeting. Toggle on the reminder, then use the editor to fill out your reminder's subject line and message. You can apply text styling or add the following elements in the editor:
- Links
- Images
- Vidyard videos
- Dynamic variables
- Snippets
- Set your reminder's timing to minutes, hours, or days before a prospect's scheduled meeting. Click Add another reminder to create additional reminders, or click Delete to delete a reminder. When you’re done, click Next: Invitee questions.
- (Optional) Click Add question to add more questions to your intake form.
- (Optional) Click Edit to edit your existing questions, or Delete to delete them.

- When you’re done, click Publish.
You've now created a round-robin meeting in Apollo.
Book a Meeting
When you're ready to book a meeting, share a meeting link with the contact or account for the meeting type you prefer.
To book a meeting:
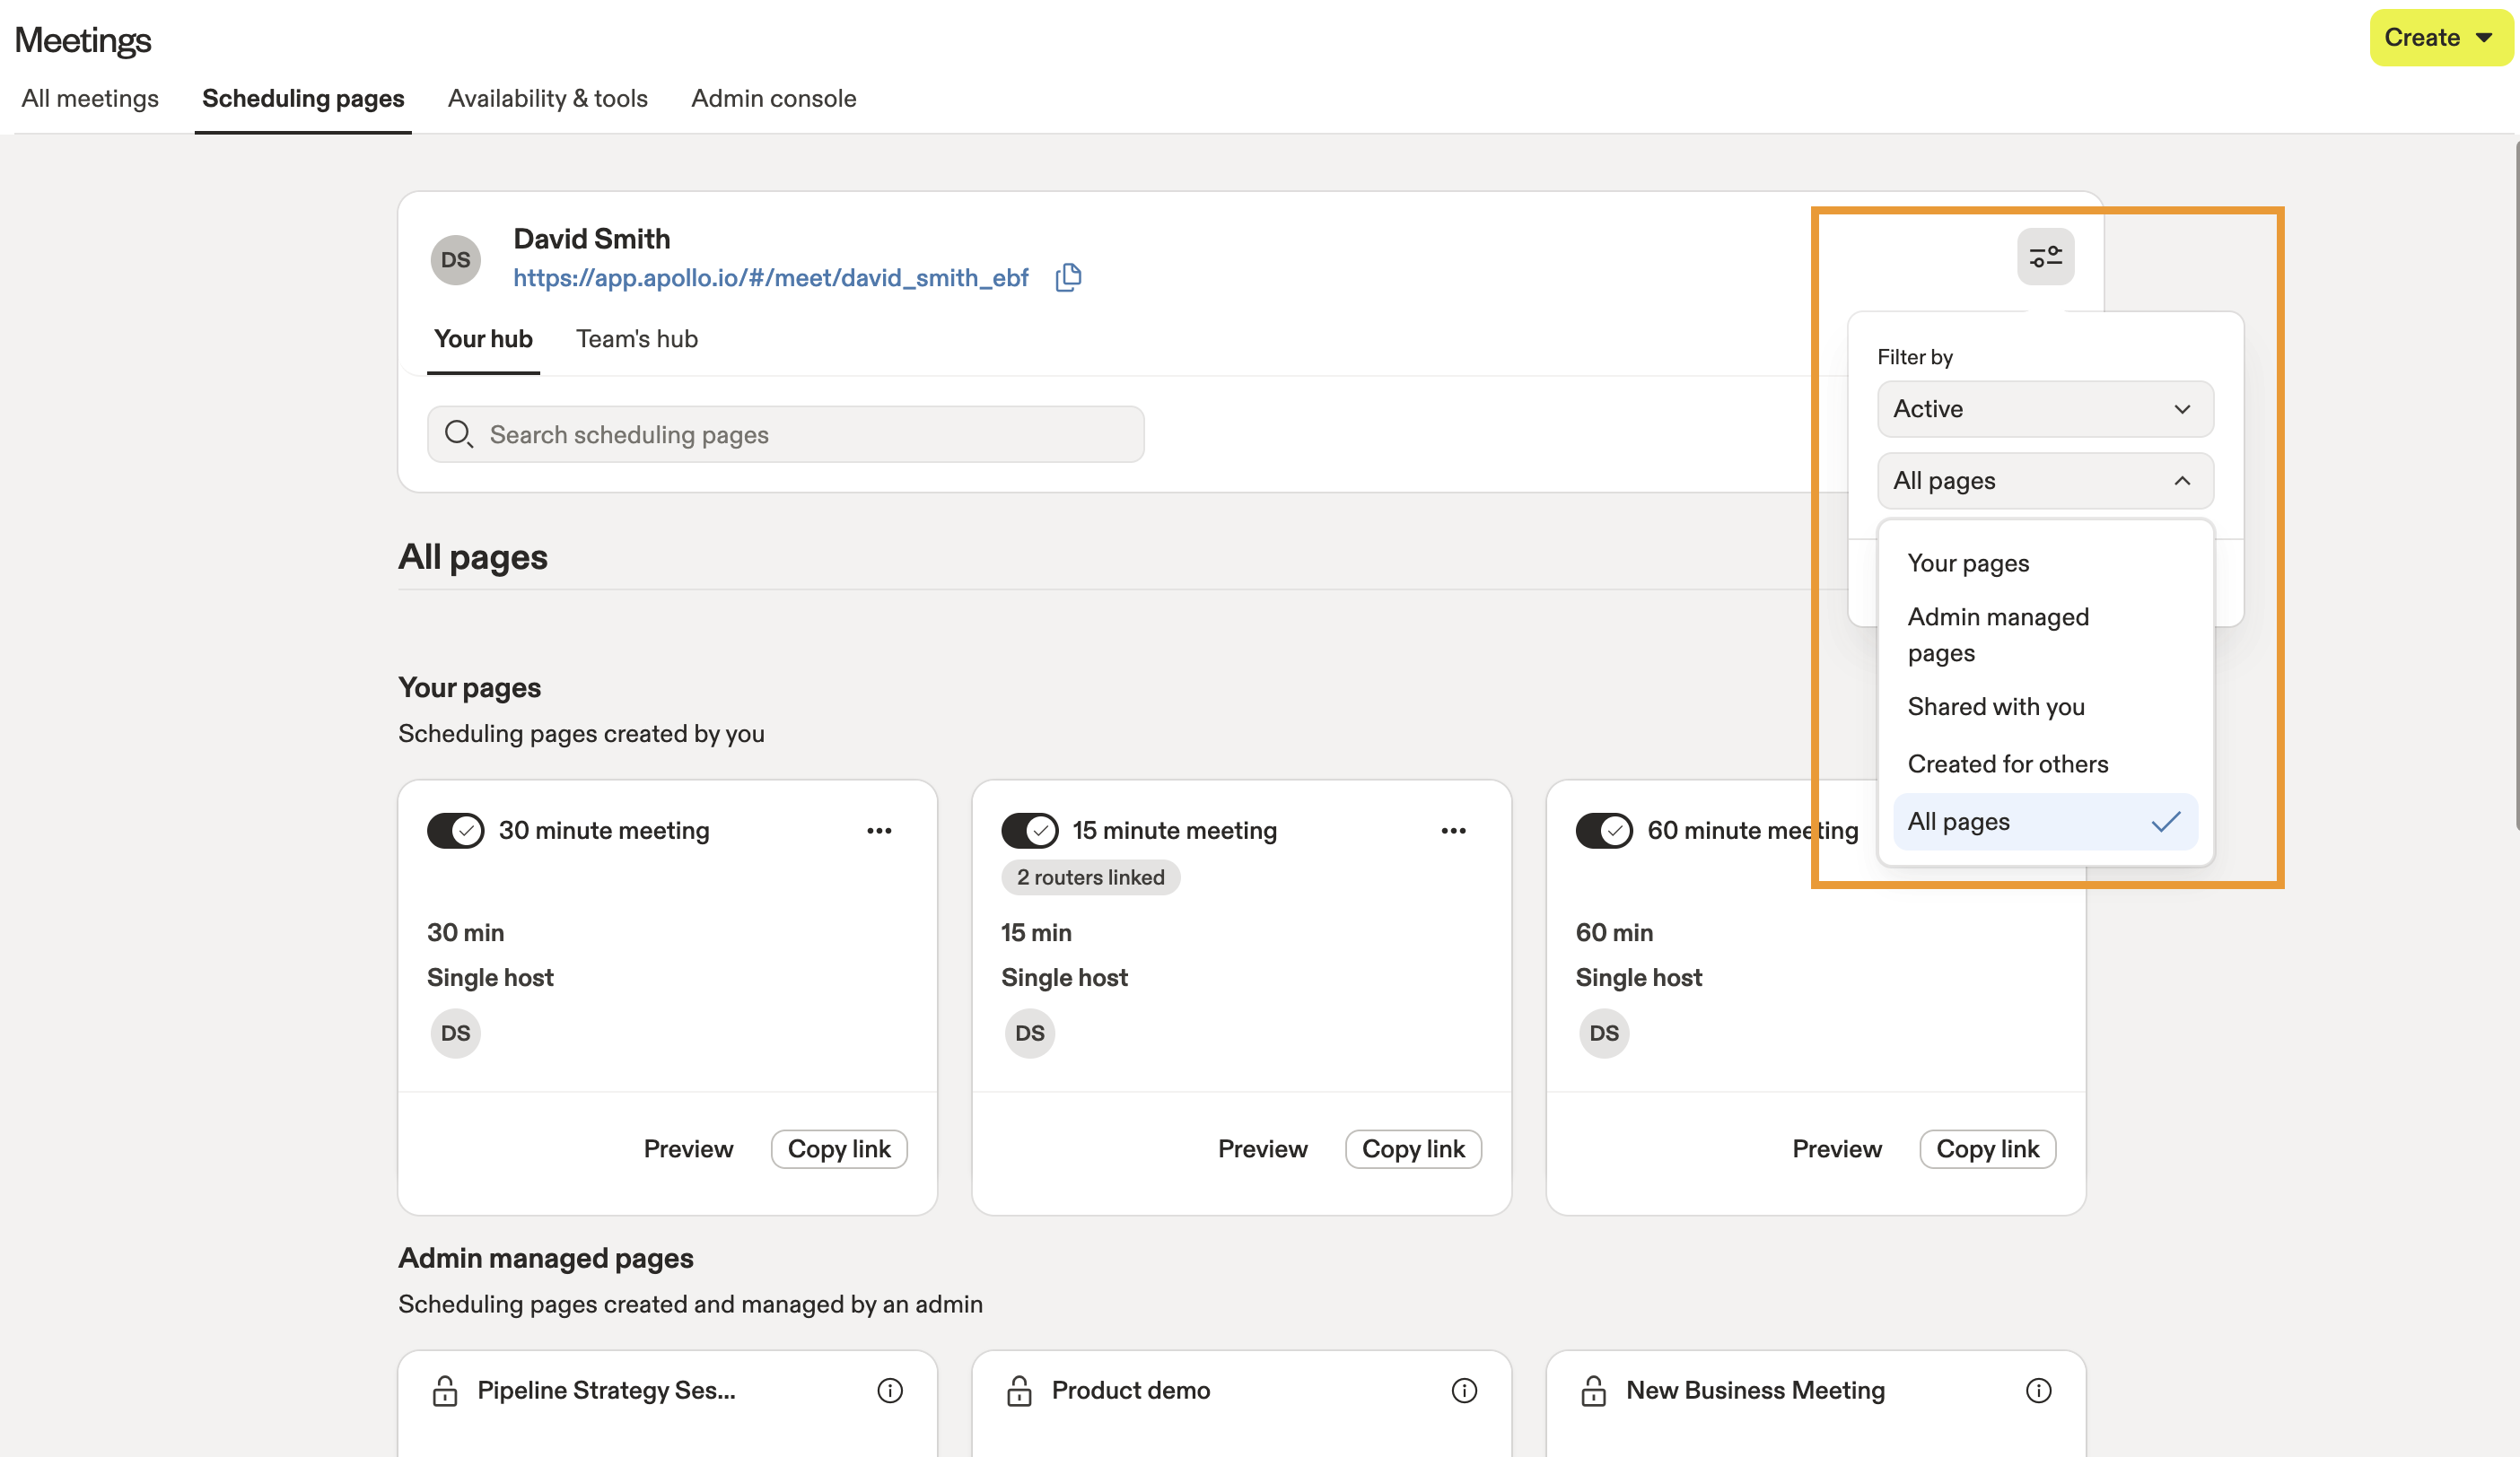
- Launch Apollo and click Meetings > Scheduling pages.
- Apollo displays your personal scheduling pages by default. Click Filter to view scheduling pages managed by your team's admin or pages shared with you by other teammates. You can also filter for active or inactive scheduling pages.
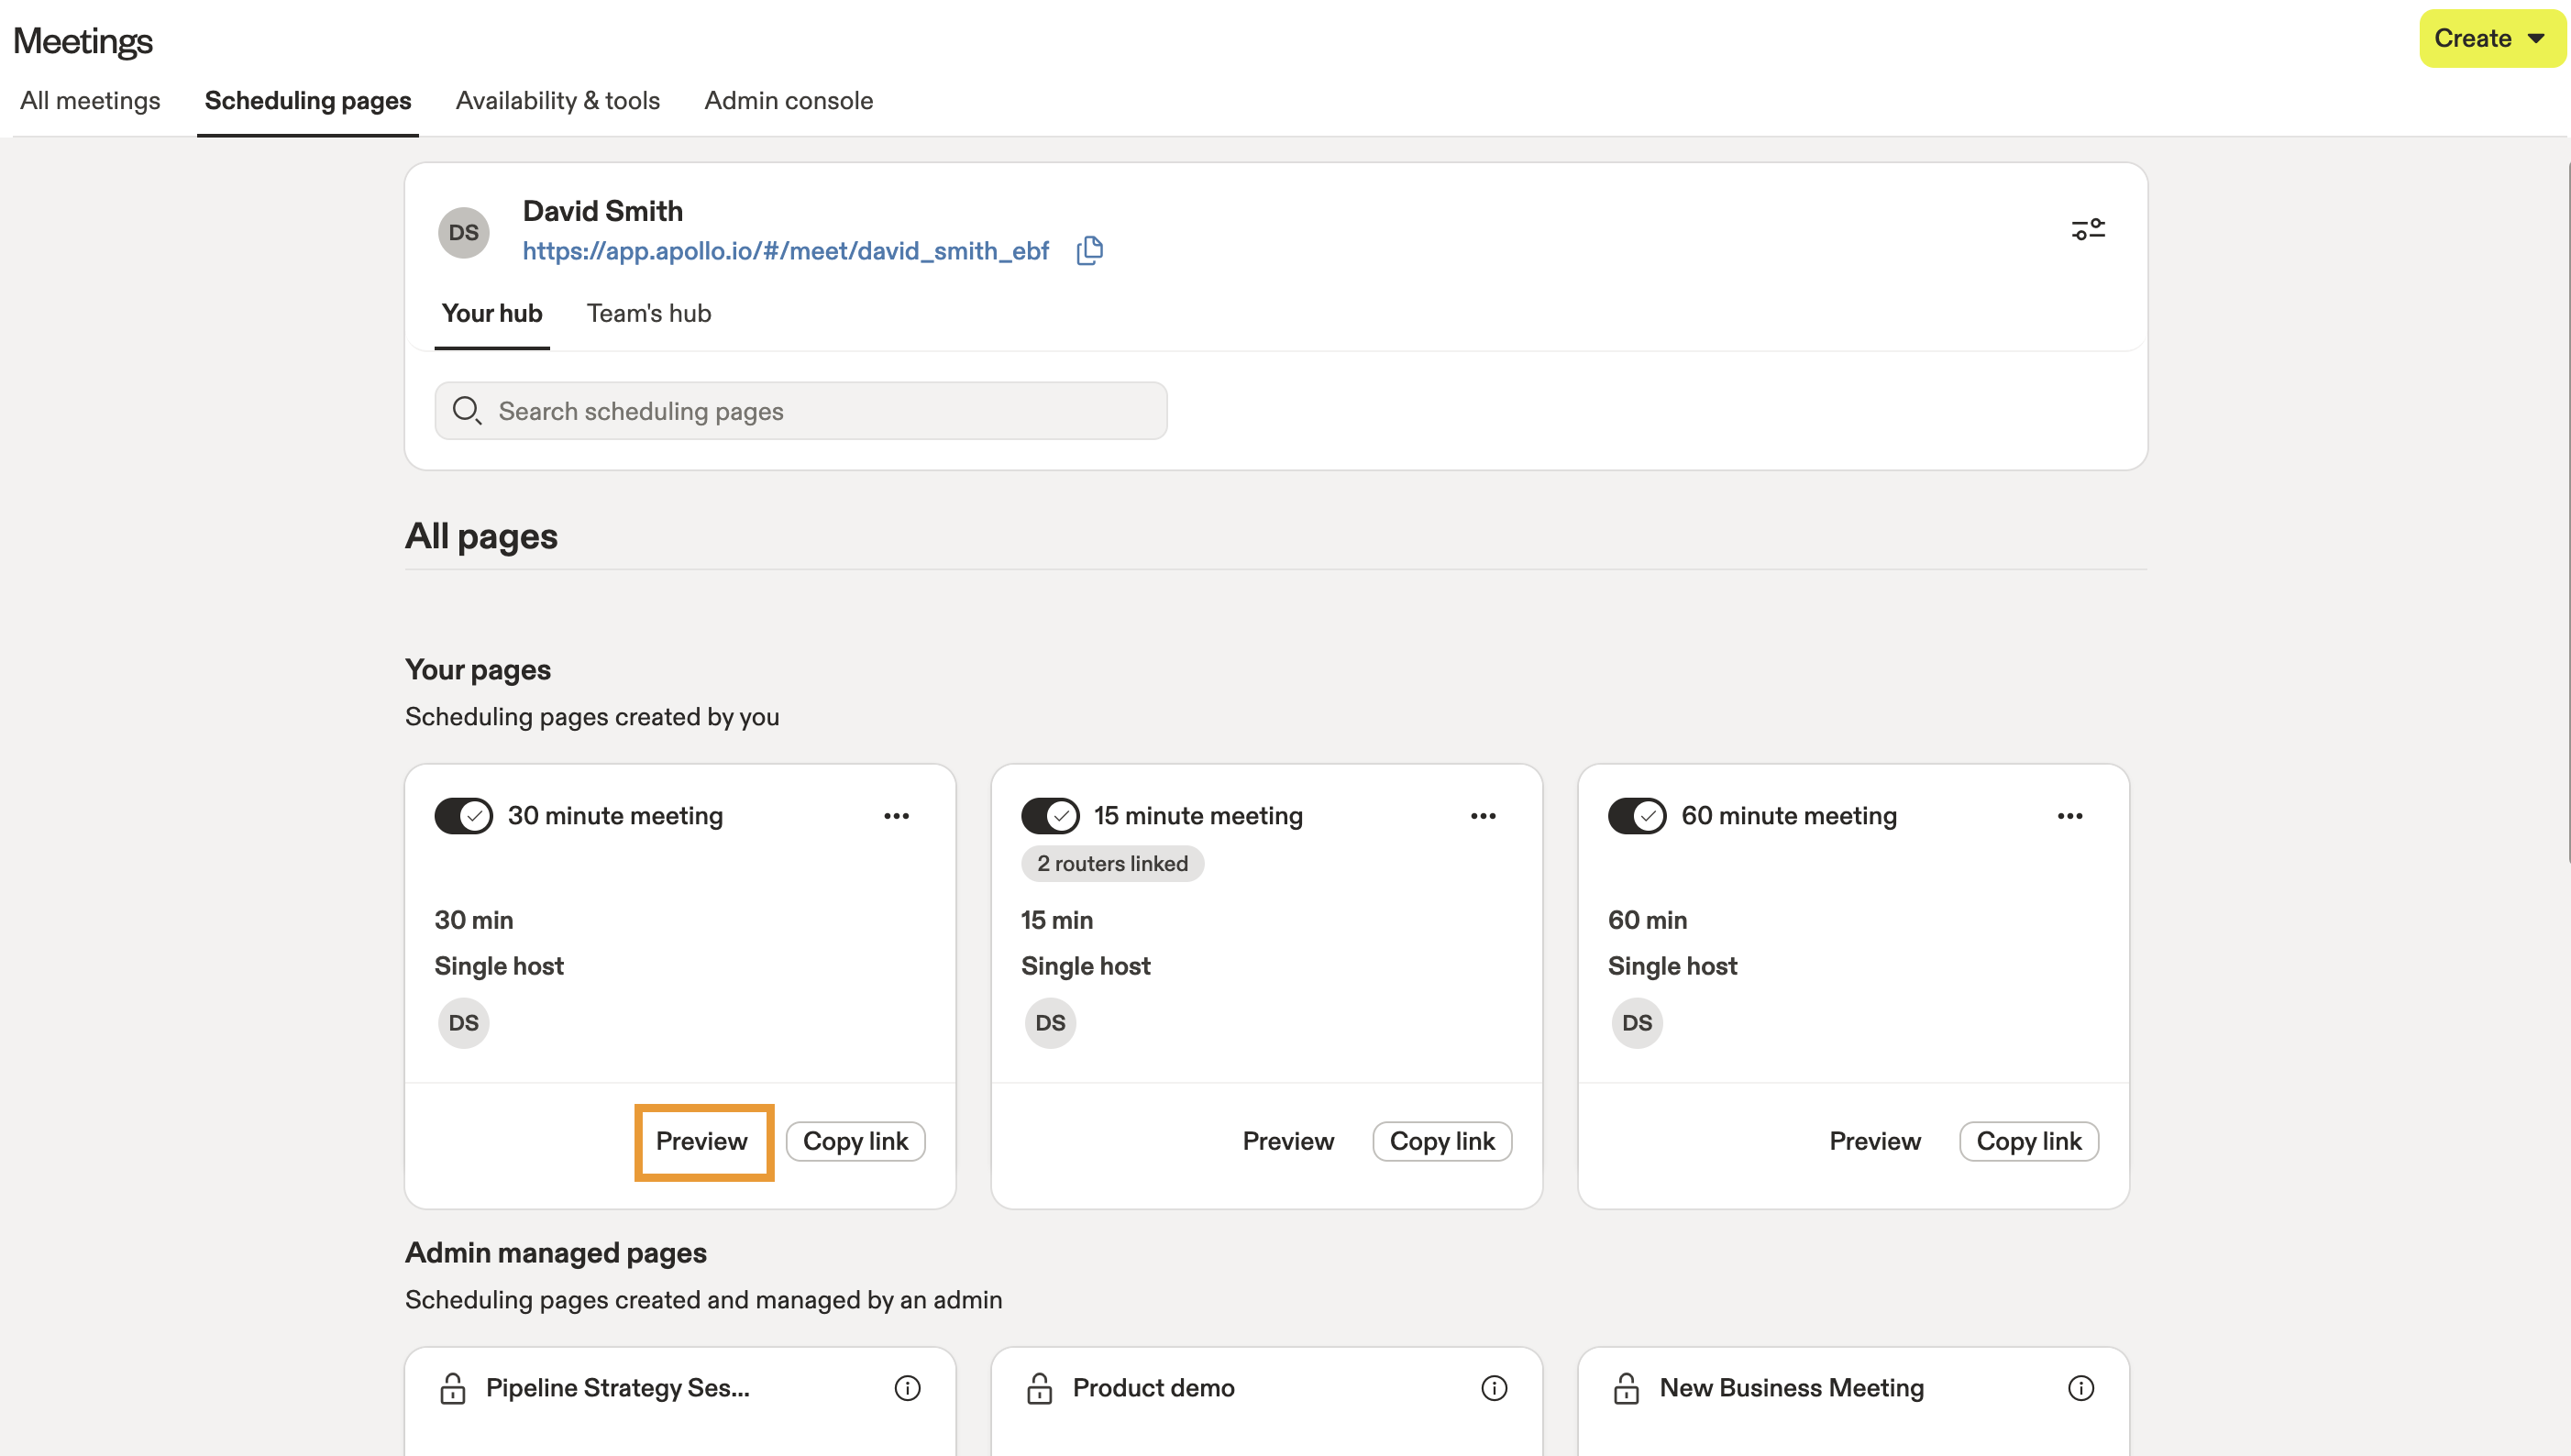
- Click Copy link beside the meeting type you want to book. Share the link with your prospect so they can self-schedule a meeting with you.

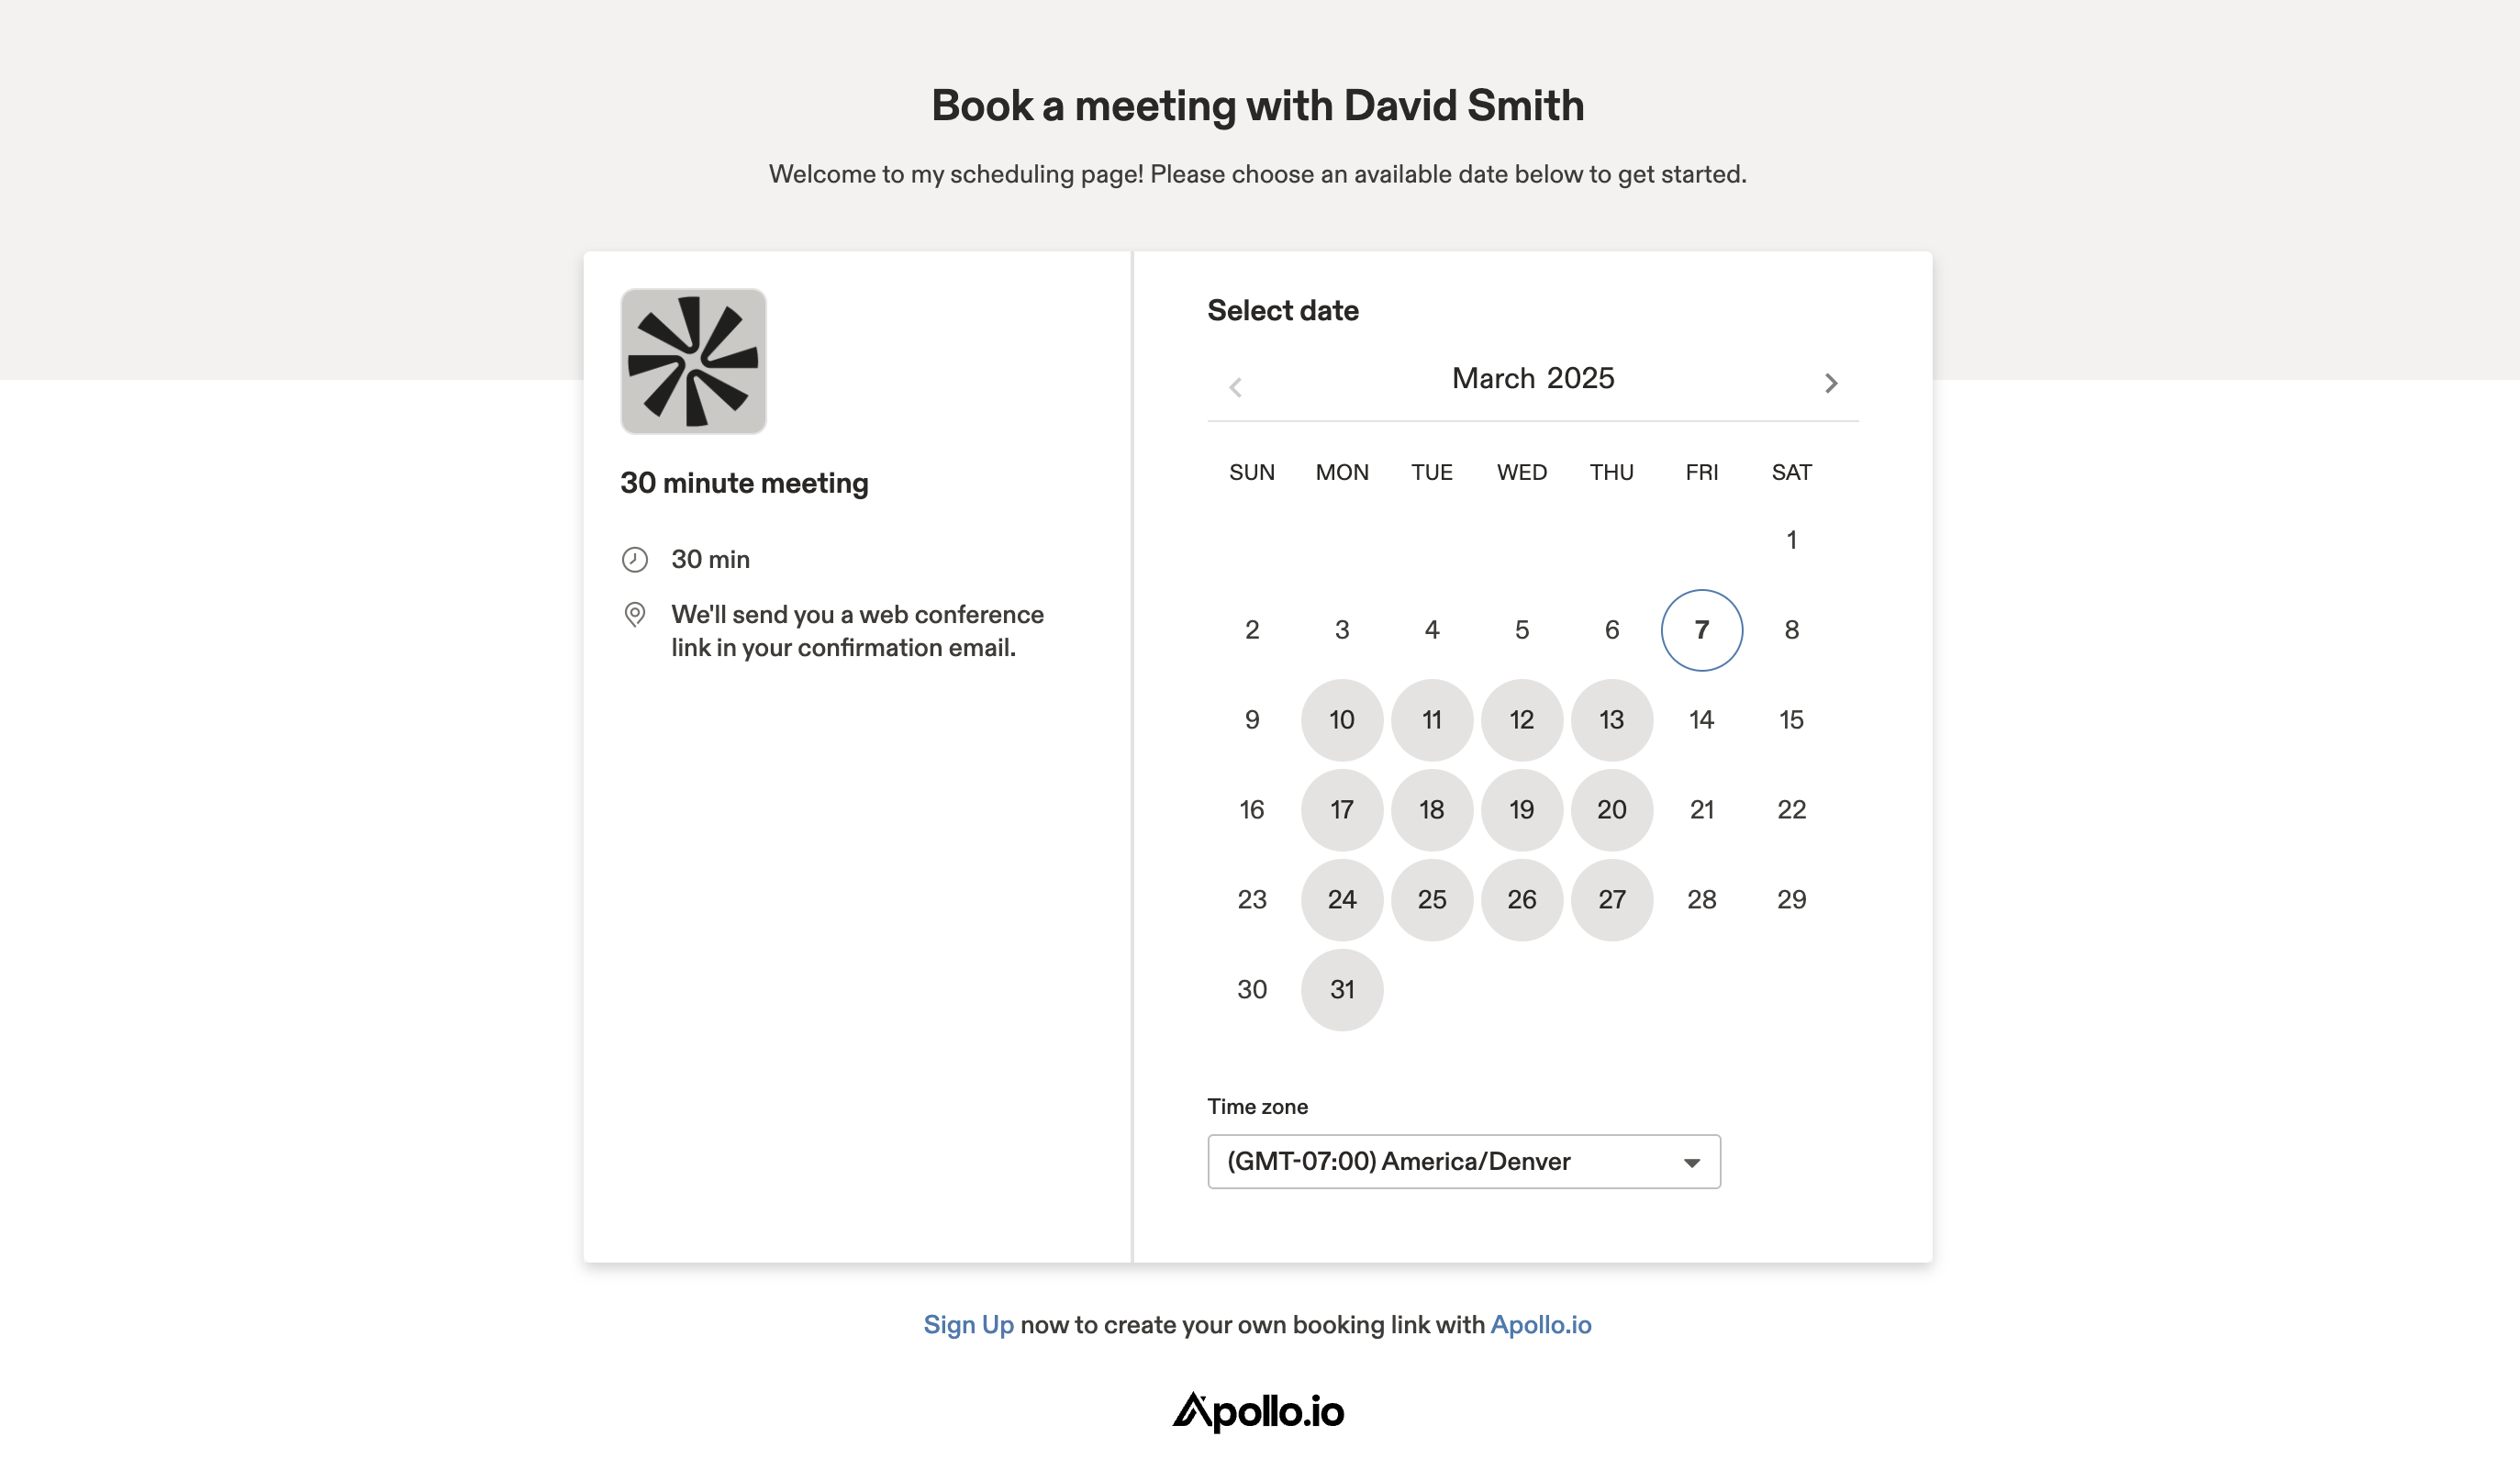
- To preview the self-schedule process, click Preview.
- Apollo shares a preview of how prospects self-schedule using your configured availability.
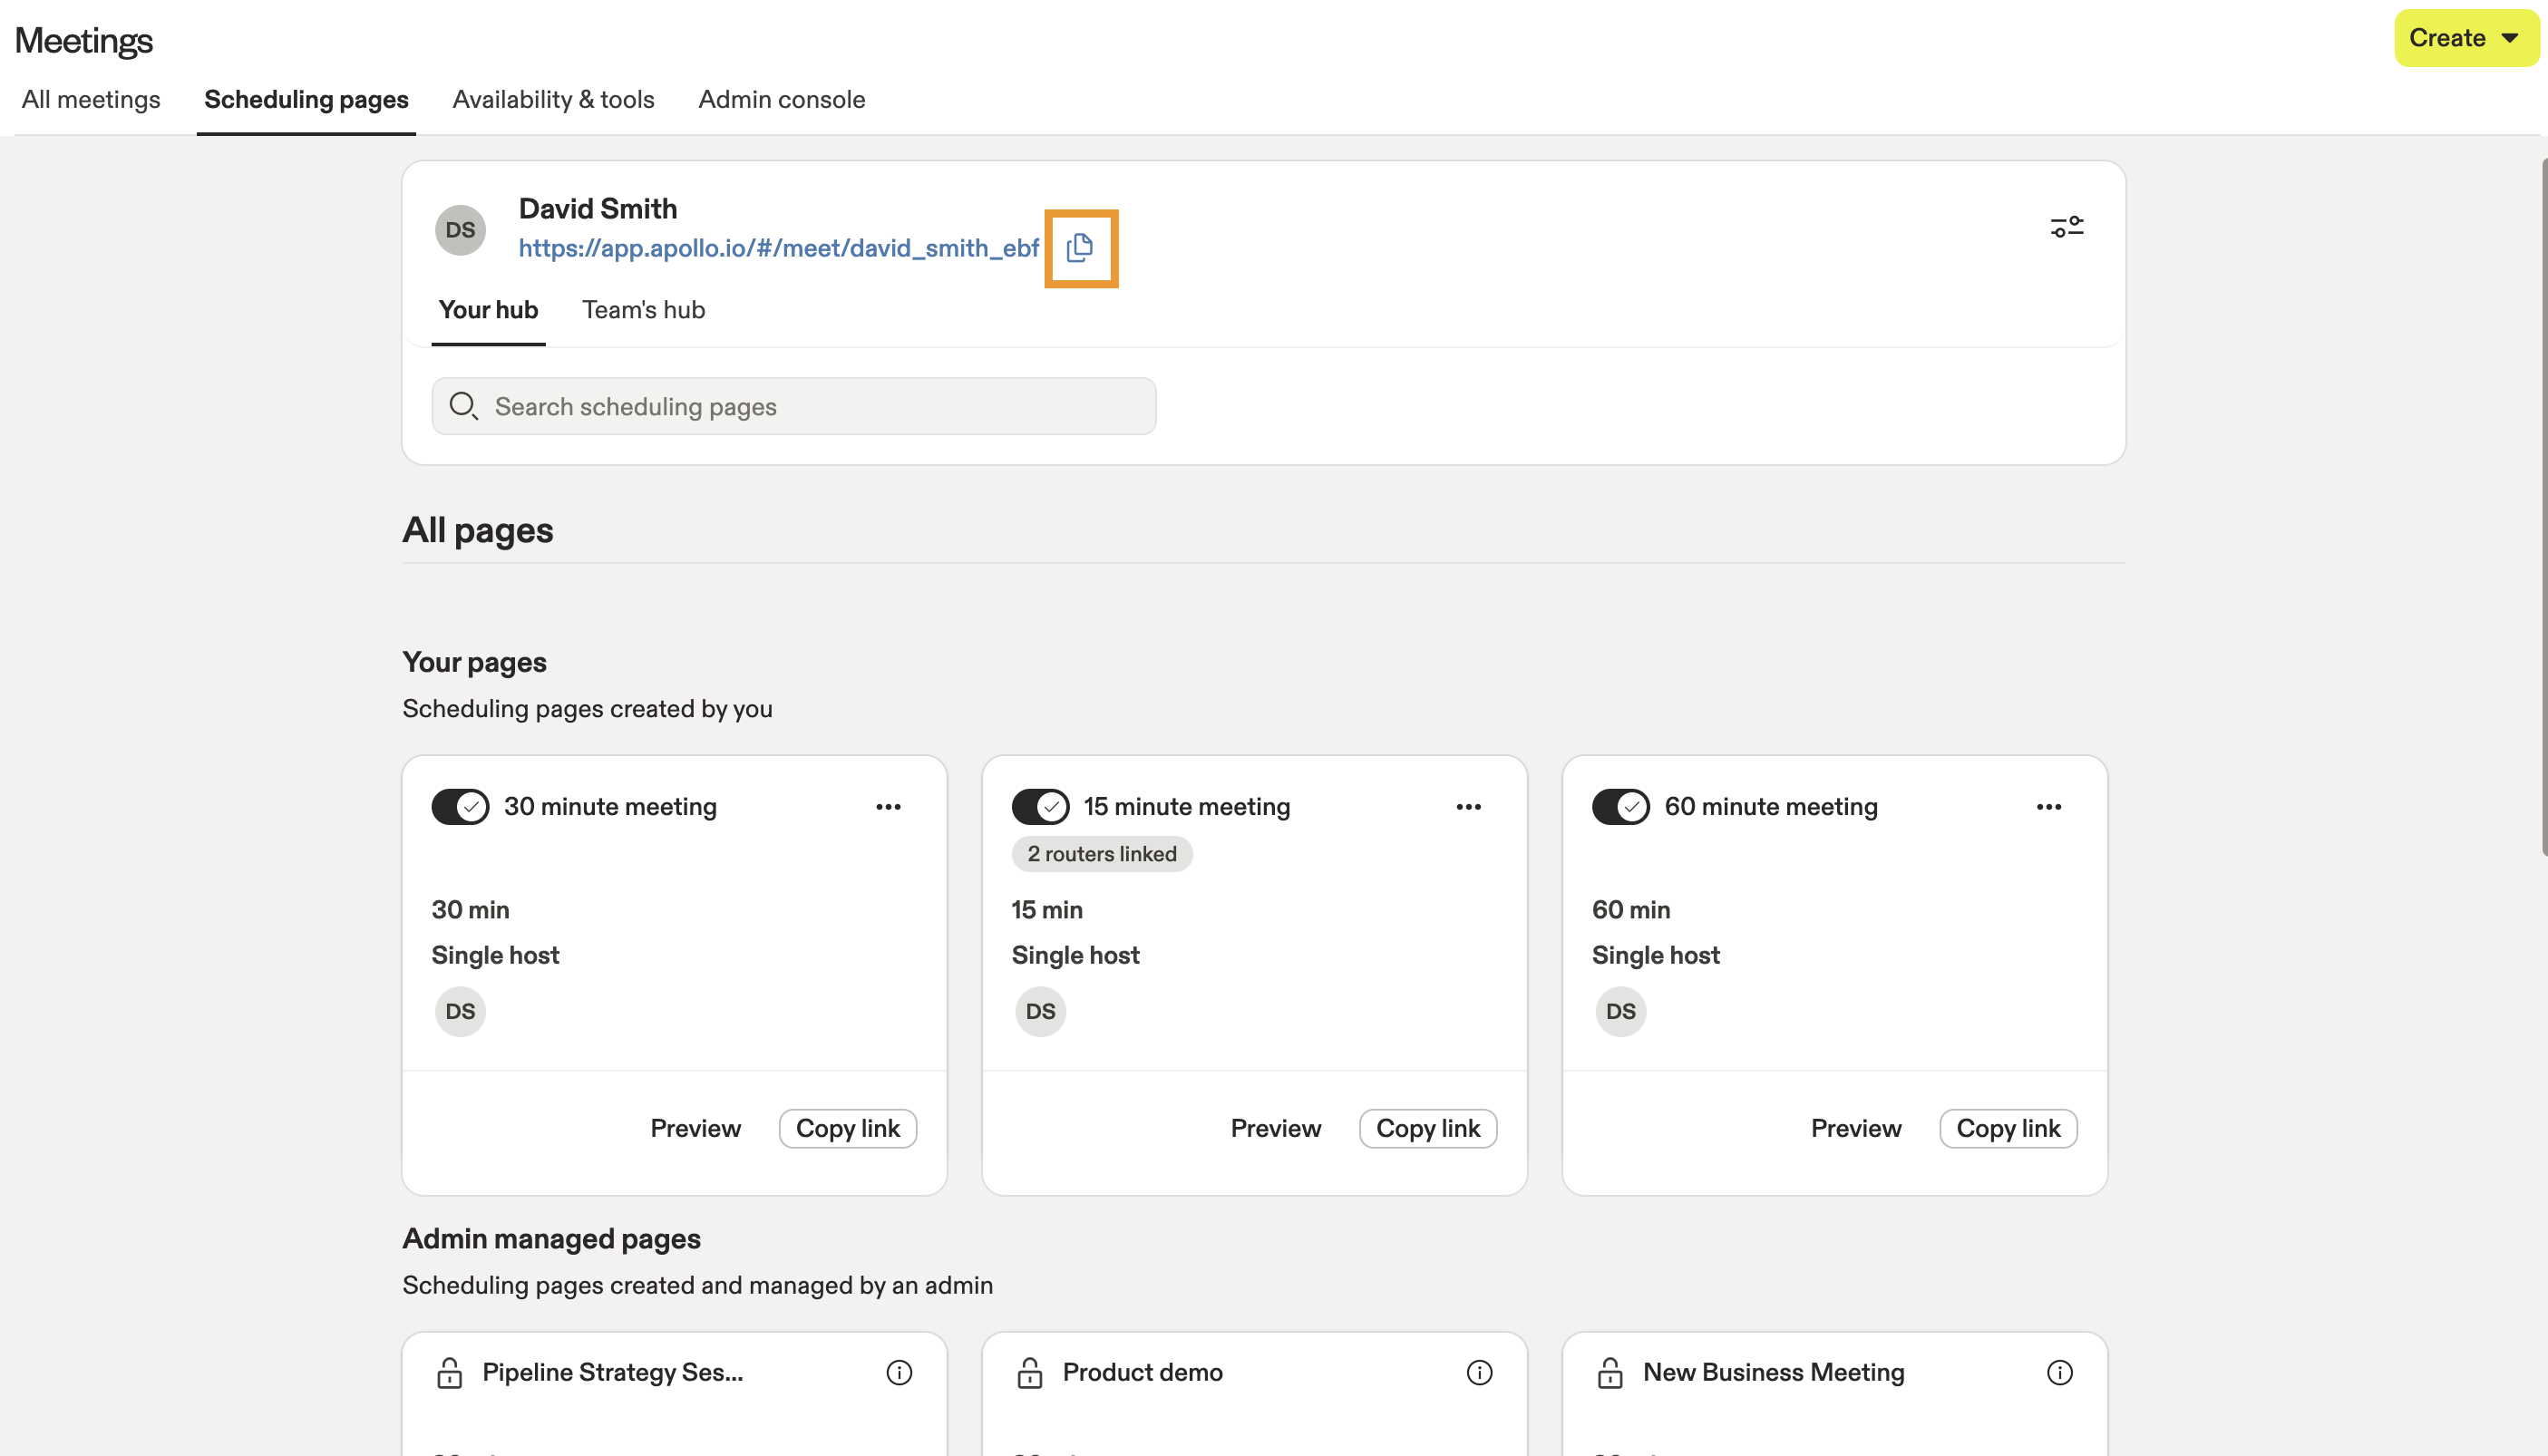
- To allow prospects to pick from any of your configured meeting types, click Copy beside your personal meeting link. Share the link with your prospect so they can self-schedule by choosing from the available meeting types.
You've now booked a meeting.
View Upcoming Meetings
Apollo shares your calendar meetings, including meetings not scheduled in Apollo, so you can quickly review upcoming events.
To view your meetings:
- Launch Apollo and click Meetings > All meetings.
- By default, Apollo shares your upcoming meetings.

- Click Upcoming to filter for past, reserved, and upcoming meetings. Reserved meetings haven't been RSVP'd by all participants.

- Click Show filters to search for a specific meeting.
Check out Search Filters Overview for more info on the available filters.
- Click Record meeting to enable video recording on an upcoming meeting.

To record meetings, set up conversations on Apollo.
- Click a meeting to view details and participant information.


You've now viewed your upcoming meetings.
Join a Meeting
You can join a meeting directly from Apollo.
To join a meeting:
- Launch Apollo and click Meetings > All meetings.
- Apollo shares your upcoming meetings. Click Link to join a meeting.

- Apollo takes you to the meeting location.
You've now joined a meeting.
Need to cancel an upcoming meeting? Open the meeting you want to cancel, then click ... > Cancel meeting.

Report on Meetings
You can report on meetings to track team trends in scheduling, rescheduling, and cancellations to identify potential areas for improvement.
All Apollo plans include access to analytics features like email tracking. Some plans include Apollo-built reports and dashboards. If your team needs access to analytics dashboards, upgrade your plan. If you have questions about upgrading, reach out to the Apollo sales team.
To access meetings analytics:
- Launch Apollo and click Analytics. Then, open the Created by Apollo filter and click the Prebuilt dashboards checkbox.
- Click Meeting Insights.

- Adjust the date range to see insights on meetings within a specific time period.
- Apollo analyzes your team's meetings for the time you selected. Review the widgets for at-a-glance insights:
- # Meetings scheduled: Total number of meetings scheduled in Apollo.
- # Meetings scheduled by meeting type: Total number of meetings scheduled in Apollo by type of meeting.
- # Meetings rescheduled: Total number of meetings rescheduled in Apollo.
- # Meetings cancelled: Total number of meetings cancelled in Apollo.
Looking to amp up your analytics? Gain deeper insights into your team and organization performance across Apollo with custom reports and dashboards.
Next Steps
Here are a few solid next moves to make your meeting links easier to book, easier to route, and easier to prep for.
| Set Up Meetings | Start clean—connect your calendar and lock in meeting preferences to keep availability accurate and every booking consistent (work hours, locations, branding). |
|---|---|
| Meetings Overview | If your team runs different motions, choose the right meeting type for each scenario to support single-host, multi-host, and round-robin scheduling without breaking your workflow. |
| Research and Prepare for Upcoming Meetings | Before the call hits, run pre-meeting insights and tweak templates to walk in with priorities, decision makers, and past objections already surfaced. |
| Create Inbound Routers for Your Meetings | Need tighter routing at scale—route booking requests with intake-form rules to automatically send prospects to the right team, rep, or meeting type every time. |
| Integrate Your Web Forms with Meetings | If you’re capturing demand on your site, connect your web forms to Apollo meeting routing to collect the right details up front and immediately offer the best scheduling path. |