Overview
While there are many strategies to use Apollo effectively, we've identified a few key steps to help you connect with new customers. When you optimize Apollo for your business and strategize your search, you can use our highly accurate database of people and companies to find and connect with your ideal customers at scale. Book meetings, secure deals, and learn from reporting to constantly improve your performance.
Check out the following sections to find and connect with the contacts most relevant to your business.
Step 1: Identify Your Ideal Customers
A successful sales strategy requires identifying the types of companies you want to do business with:
Do you sell best to enterprise or startups? Are your target companies in a specific vertical? Are they located in key geographies?
Answering questions like these will help create your ideal customer profile (ICP), a fictitious company that combines key characteristics that best portray your ideal customer. Firmographics such as company size, industry, location, annual revenue, and budget can help define the types of companies that you serve best.
The following table shows an example of one of Apollo's ideal companies:
| ICP | Key Firmographics | CSAT Score | ROI | CLV Ratio | Customer Health | # of Referrals |
|---|---|---|---|---|---|---|
| Company Type #1 |
|
95% | 30% | 3:1 | Healthy | >5 |
Use data points from your own ICP and apply them as search filters to find real prospects. Search filters allow you to include or exclude specific subsets of data when you search for people or companies in Apollo.
- Launch Apollo and click Companies.
- Use search filters that match the data points from your ICP.

Refine your search with more advanced filters like buying intent or signals to find the most promising companies.
Use Search Filters Overview to learn more about all of the search filters in Apollo.
- Create a list of your ideal companies and save the search to quickly access these accounts when you need.

If you already have existing customers, or know specific businesses that match your ICP, you can find similar companies on Apollo. Just navigate to an account profile to view lookalike companies. Use lookalikes to broaden or build on your prospect list.
You can easily return to saved searches or share saved searches with your teammates.
Step 2. Create Personas and Prospect Lists
Next, use your company list to search for people to engage with at your target businesses:
- Create a persona that identifies the key characteristics of your buying customers. This could be a set of job titles, functions, departments, or locations.
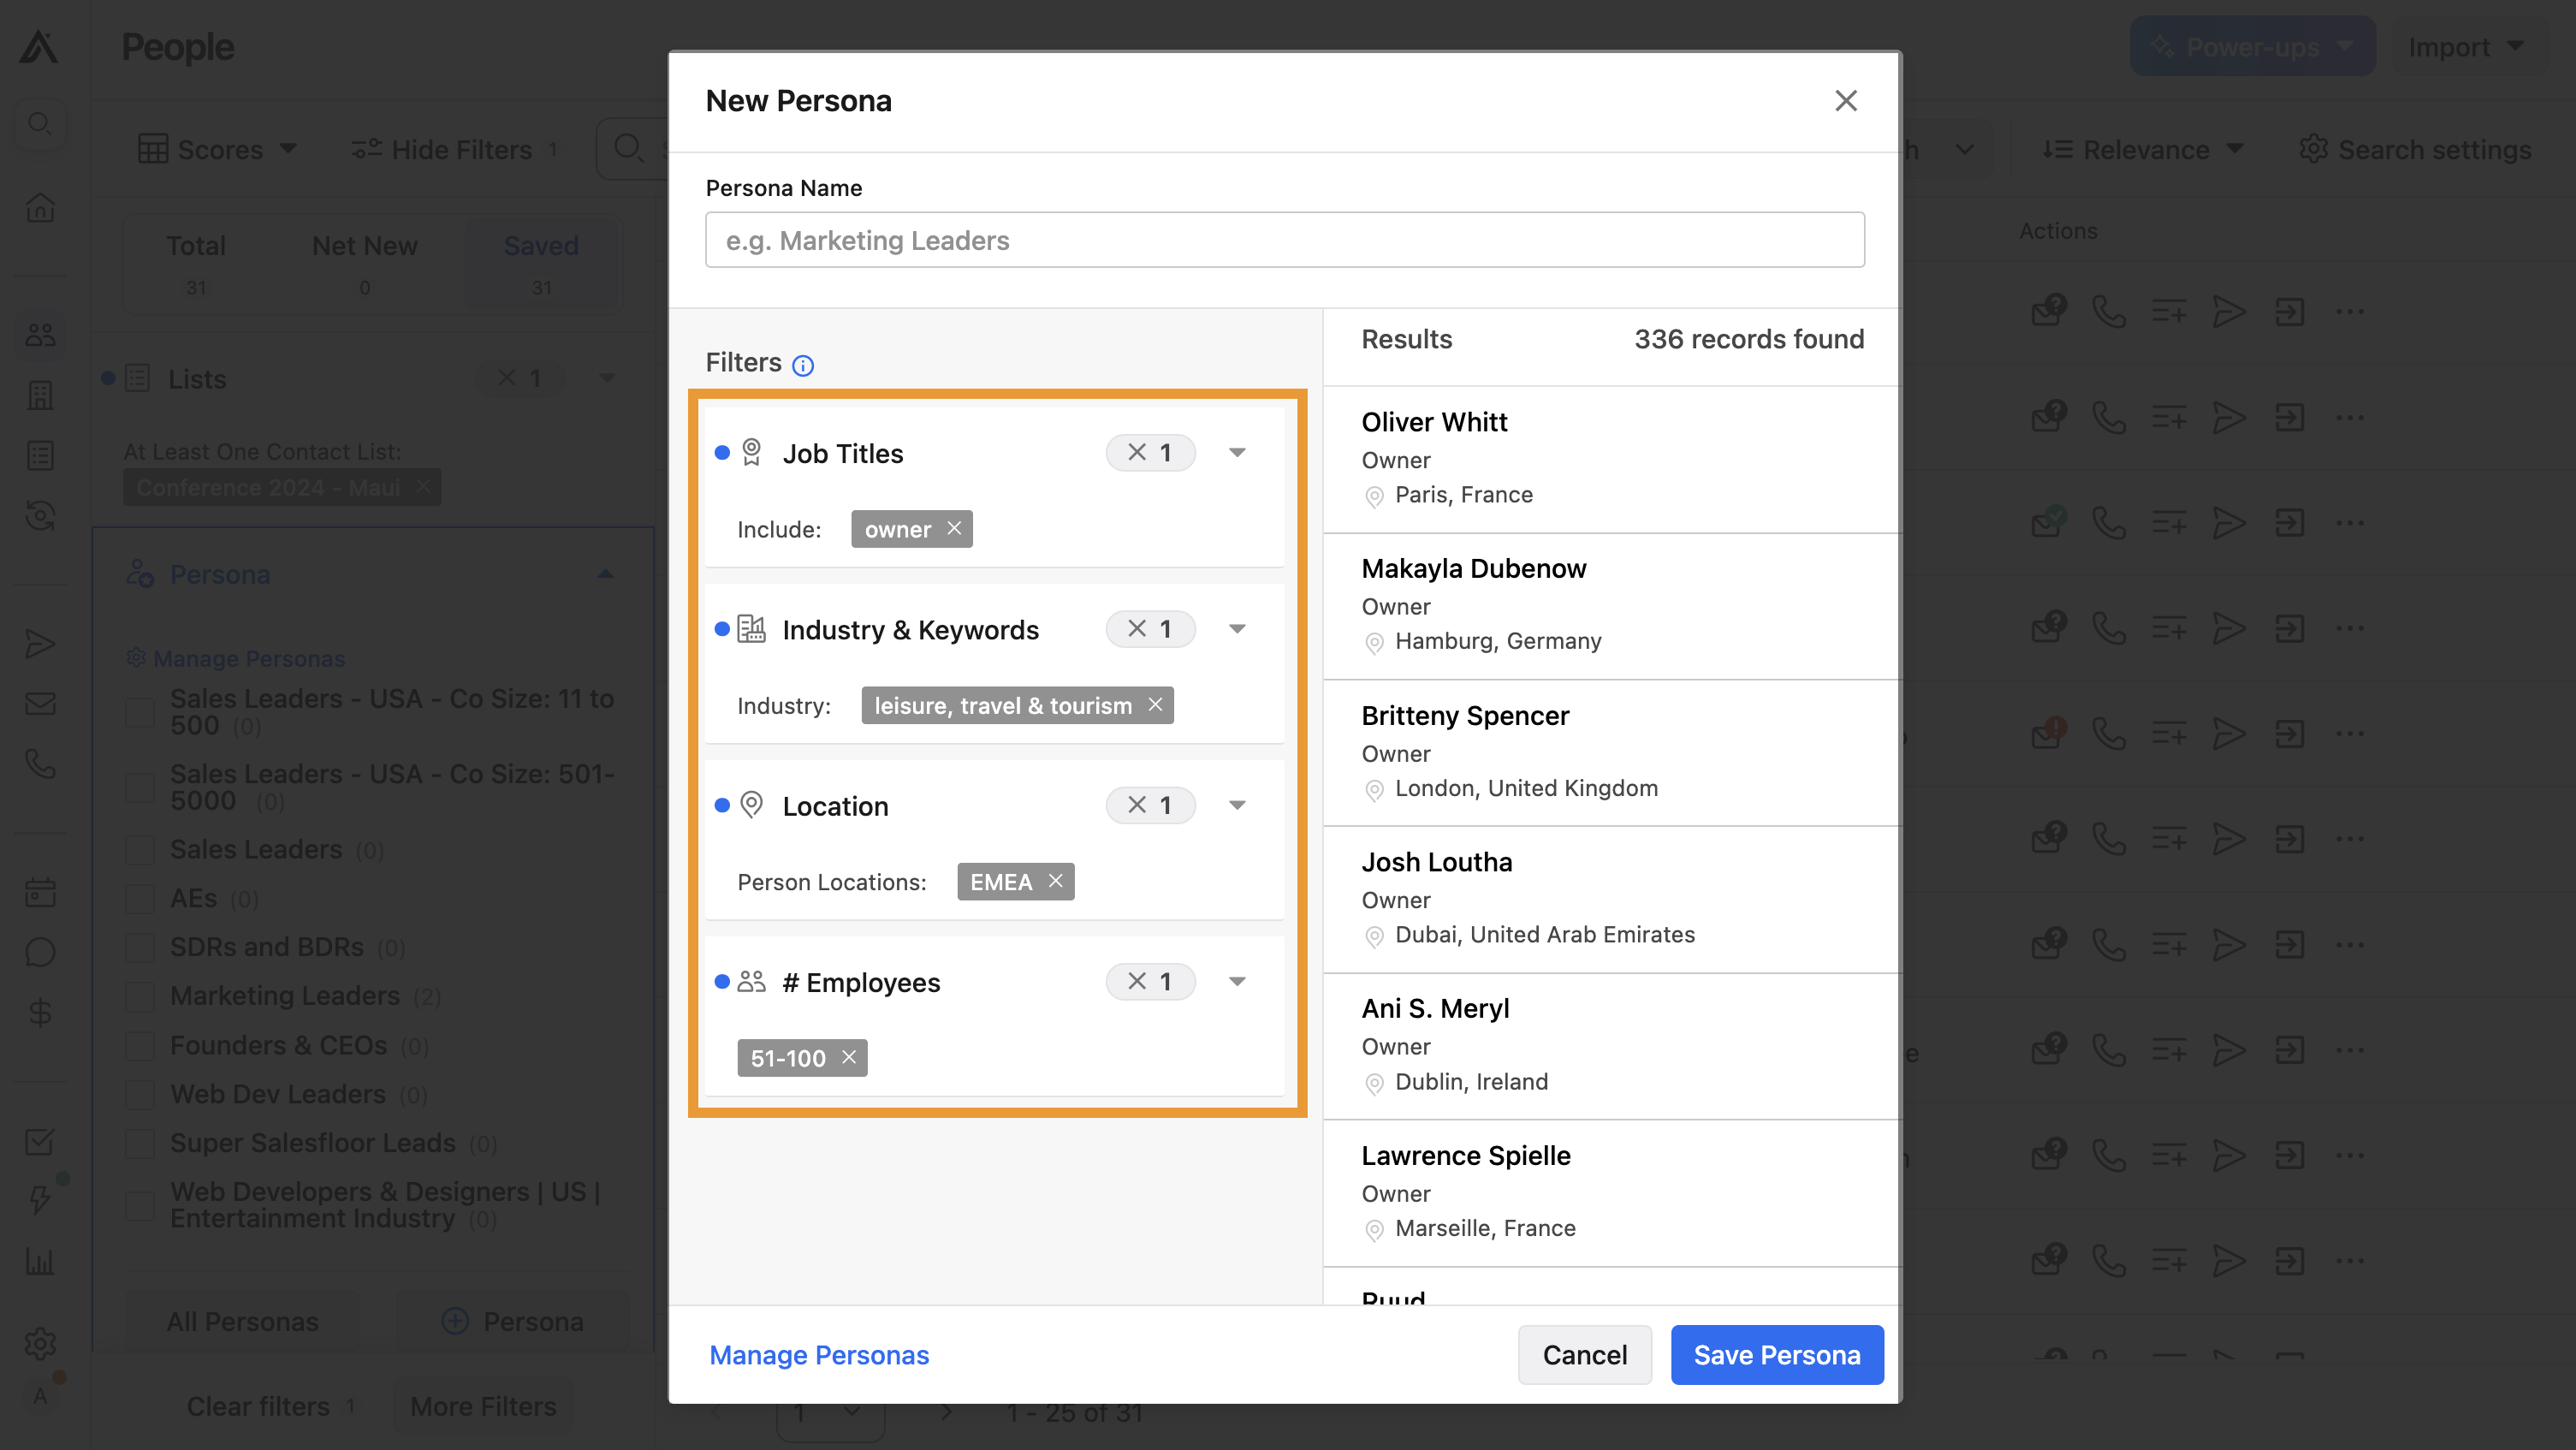
- Click People, then combine filters like the persona filter and the list filter for the accounts you identified to narrow your search to the companies and the personas most likely to buy your product or service.

Did you know? You can use AI research to discover more about the people you prospect. Learn about how AI research works.
You can easily return to saved searches, or share your saved searches with your teammates.
Once you have a list of refined contacts, you're ready to reach out and engage with them.
Got the need for speed? You can use the outbound copilot on Apollo to automatically generate prospects and add them to a list.
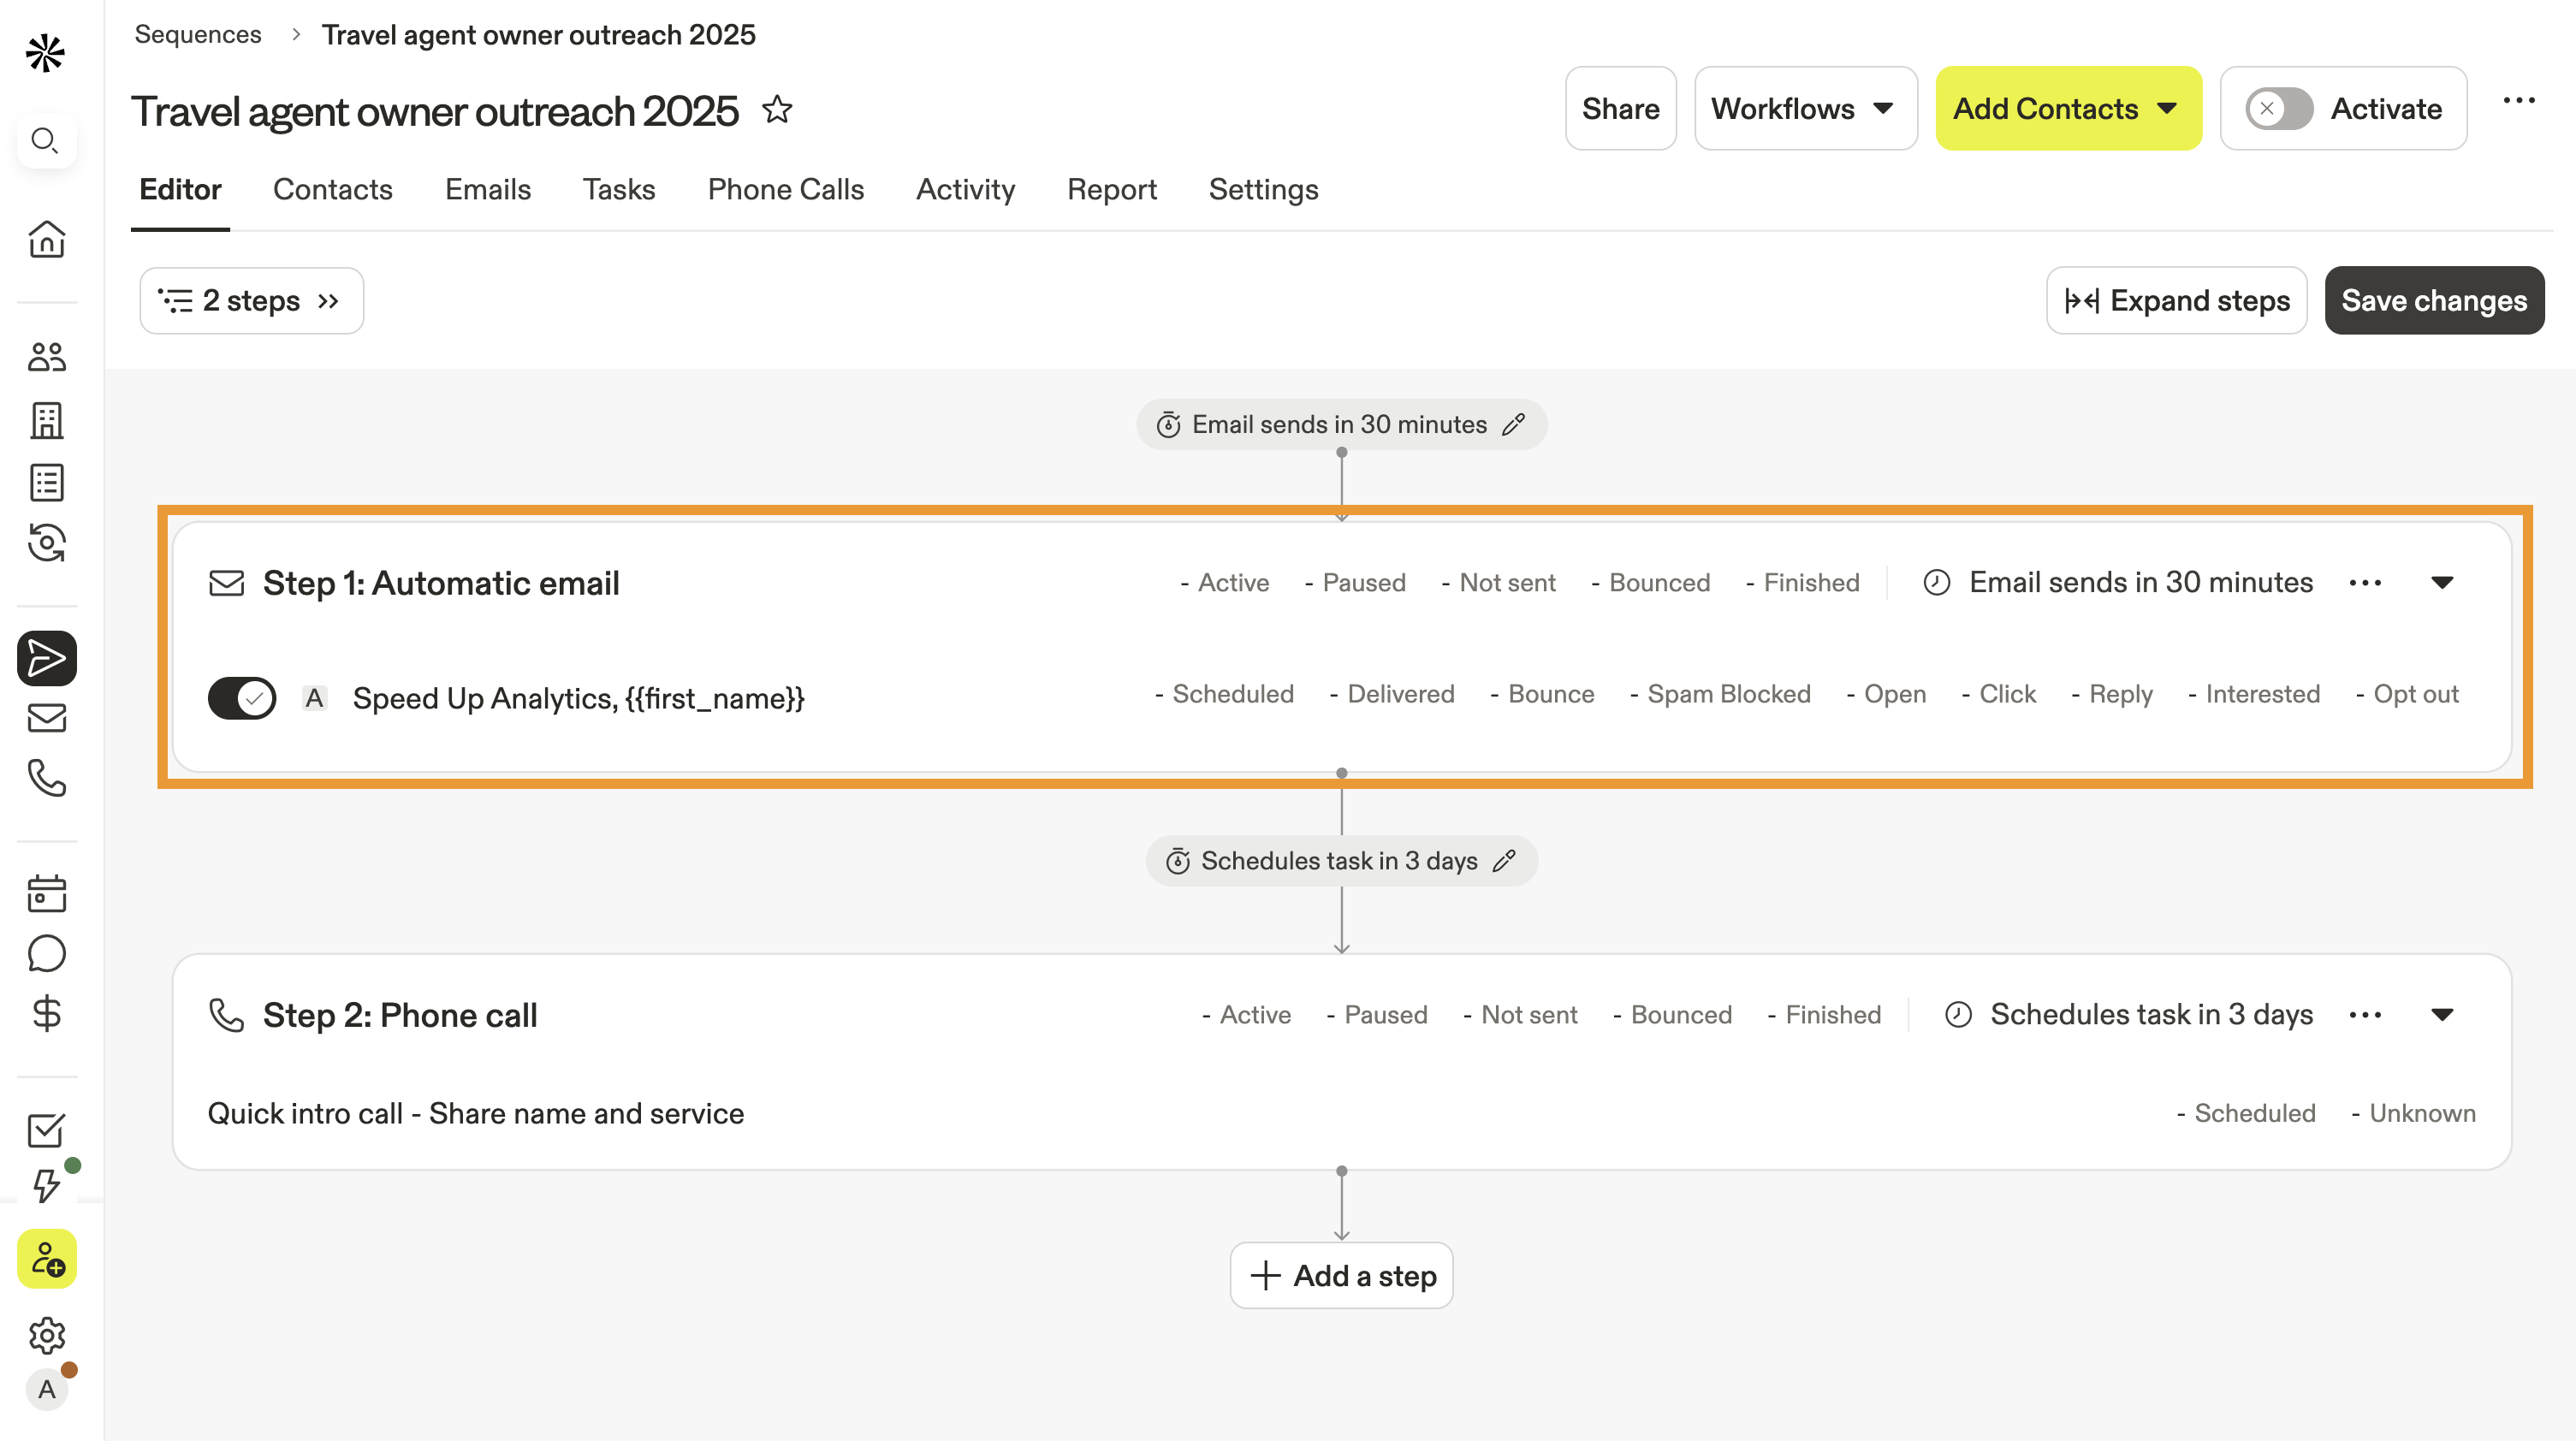
Step 3: Engage and Win
Sequences allow you to manage outbound engagement campaigns. You can automate outreach and customize messaging to your target audiences with the help of Apollo's AI writing assistant. Use sequences to A/B test your emails, personalize your approach, and automatically follow up when people show interest. Keep people engaged with a multi-channel strategy by calling contacts and reaching out on LinkedIn.
Use insights about your email performance, sequences, and team outreach to refine your engagement over time through email analytics and reports. You can use reports built by Apollo to get you started.
Once you have warm prospects, it's time to book meetings and secure deals — all within Apollo.

Looking for more best practices? Check out Apollo Academy to learn more about industry-leading strategies:
Next Steps
Here are some next steps to help you supercharge your prospecting with Apollo:
| Identify Your Ideal Customer Profile | Identify your ideal customer profile to zero in on the companies most likely to buy from you. |
|---|---|
| Search Filters Overview | Apply search filters to sift through Apollo’s database and find prospects that match your ICP. |
| AI Research Overview | Run AI research to generate personalized insights that help you craft messages that resonate. |
| The New Rules of Cold Calling | Check out the new cold calling rules to land more callbacks with smarter scripts. |